![- Large shrimp: Use 1 pound of large shrimp. They need to be peeled and deveined. This size cooks well and has great flavor. The shrimp should be fresh or properly thawed if frozen. - Fresh garlic: You will need 3 cloves, minced. Garlic adds a strong, savory taste. It brings depth to the dish when sautéed. - Lemon juice and zest: Use the juice and zest of one lemon. The juice gives a bright tang, while the zest adds aromatic oils. Together, they enhance the shrimp's flavor. - Red pepper flakes: Add 1 teaspoon for heat. This gives a nice kick without overpowering the dish. - Fresh herbs: You can use parsley or basil for a fresh taste. They can add color and enhance the flavor. Feel free to mix and match based on your preference. - Alternative serving options: You can serve the shrimp over cooked pasta or rice. These sides soak up the delicious garlic butter sauce perfectly. For the complete recipe, check out the Full Recipe. Start by prepping the shrimp. It’s key to keep them dry. Pat them with a paper towel. This step helps the shrimp sear well. Next, season lightly with salt and black pepper. This simple seasoning brings out their natural flavor. Now, let’s cook the garlic and butter. Use a large skillet for even cooking. Melt 2 tablespoons of unsalted butter over medium heat. Keep an eye on the temperature. Too hot can burn the garlic. Once the butter bubbles, add minced garlic and optional red pepper flakes. Sauté for 1-2 minutes. You want the garlic fragrant but not browned. Next, it’s time to cook the shrimp. Add them to the skillet in a single layer. Avoid overcrowding, as this can steam them. Cook for 2-3 minutes on one side. Watch for that vibrant pink color! Flip them over and cook for another 1-2 minutes. They should be opaque and fully cooked. Finally, let’s create the garlic butter sauce. Squeeze fresh lemon juice over the shrimp and sprinkle in lemon zest. Add the remaining 2 tablespoons of butter and stir gently. This helps the butter melt and mix with the garlic and lemon. Taste the dish, then adjust with more salt or pepper if needed. Garnish with chopped fresh parsley for a pop of color. Serve the shrimp over pasta or rice, drizzling that luscious garlic butter sauce on top. For the full recipe, check out the complete guide! To know when shrimp are done, look for a vibrant pink color. They should curl into a C shape. Overcooking makes shrimp tough and rubbery. Cook them until they are opaque. This usually takes about 3 to 5 minutes. Shrimp cook fast, so watch them closely. Pairing your lemon garlic butter shrimp with side dishes makes the meal shine. I suggest serving it over cooked pasta or rice. Both soak up the tasty sauce well. You can also add a simple salad or steamed veggies. These sides balance the rich flavors and add freshness. Store leftovers in an airtight container. Refrigerate them for up to 2 days. If you want to keep them longer, freeze shrimp for up to 3 months. When reheating, do it gently. Use low heat on the stove to warm them up. This keeps the shrimp tender and tasty. For the best flavor, add a splash of fresh lemon juice while reheating. {{image_4}} You can add more flavor to your Lemon Garlic Butter Shrimp using spices and herbs. Try adding paprika for a smoky taste. Cumin offers a warm flavor that works well too. For a fresh twist, mix in some chopped basil or cilantro. These herbs give the dish a bright note. You can also play with the level of heat. If you like spice, add more red pepper flakes. Just a pinch can change the whole dish! There are two great ways to cook your shrimp: grilling and stovetop. Grilling gives the shrimp a nice char. It adds a smoky flavor that is hard to beat. Just make sure to skewer the shrimp to keep them from falling through the grill. Stovetop cooking is quicker and easier. It lets you control the heat better. Both methods work well, so choose what suits you best! When it comes to serving, be creative! You can serve the shrimp on a bed of pasta or rice for a full meal. Or, try serving it in a taco shell with fresh toppings. For a party, use small skewers. This way, guests can easily grab them. You can also serve it with crusty bread. The garlic butter sauce is perfect for dipping! You can store leftover shrimp in the fridge or freezer. If you plan to eat them soon, refrigeration works well. Place the shrimp in an airtight container. They stay fresh this way for up to three days. If you want to keep them longer, freezing is the best option. Use a freezer-safe bag or container. This way, they can last for up to three months. For the best freshness, use airtight containers. Glass containers are great because they do not absorb odors. If you prefer plastic, make sure it is BPA-free. Vacuum-sealed bags are also excellent for freezing. They help prevent freezer burn and keep the shrimp tasting fresh. Leftover shrimp can last in the fridge for three days. After that, they start to lose quality. If you freeze them, they can last for about three months. Always check for any off smells or changes in color before eating. If you notice anything unusual, it’s best to throw them away. Shrimp are fully cooked when they turn pink and opaque. You can also check if they curl into a C shape. Overcooked shrimp will curl tightly into an O shape. Cooking shrimp usually takes about 3 to 5 minutes. Keep an eye on them to avoid chewy shrimp. Yes, you can use frozen shrimp. Just ensure to thaw them first. The best way to thaw shrimp is to place them in the fridge overnight. If you need to thaw them quickly, place them in a bowl of cold water for about 15-20 minutes. Pat them dry before cooking to avoid excess moisture. If you want a dairy-free option, you can use olive oil or coconut oil. Both oils will provide a nice flavor. For a vegan choice, try a plant-based butter. These options will keep the dish flavorful while meeting your dietary needs. To make this dish low-carb, skip the pasta or rice. Serve the shrimp over zucchini noodles or cauliflower rice instead. These options keep the meal light while still being satisfying. You can also reduce the amount of butter if you want fewer calories. For the full recipe, check out the [Full Recipe]. In this article, we covered the essential ingredients for lemon garlic butter shrimp, including large shrimp, fresh garlic, and lemon juice. You learned step-by-step instructions for preparing and cooking the dish. We also explored tips for perfect shrimp texture, flavor enhancements, and storage practices. Remember, cooking is all about experimenting. Don’t be afraid to add your own twist. Whether you spice it up or try new methods, enjoy the process. Your kitchen can become a place of fun and flavor!](https://tastyhatch.com/wp-content/uploads/2025/05/ee0e837a-21eb-494b-969d-eddae48486ba-768x768.webp)
If you crave a quick and tasty dish, Lemon Garlic Butter Shrimp is a winner. This simple recipe packs a punch of flavor with just a few ingredients. You’ll love the tender, juicy shrimp paired with a rich garlic butter sauce and a pop of fresh lemon. Whether for a weeknight dinner or special occasion, this dish impresses without fuss. Let’s dive into the delicious details and make cooking a breeze!
Ingredients
Essential Ingredients for Lemon Garlic Butter Shrimp
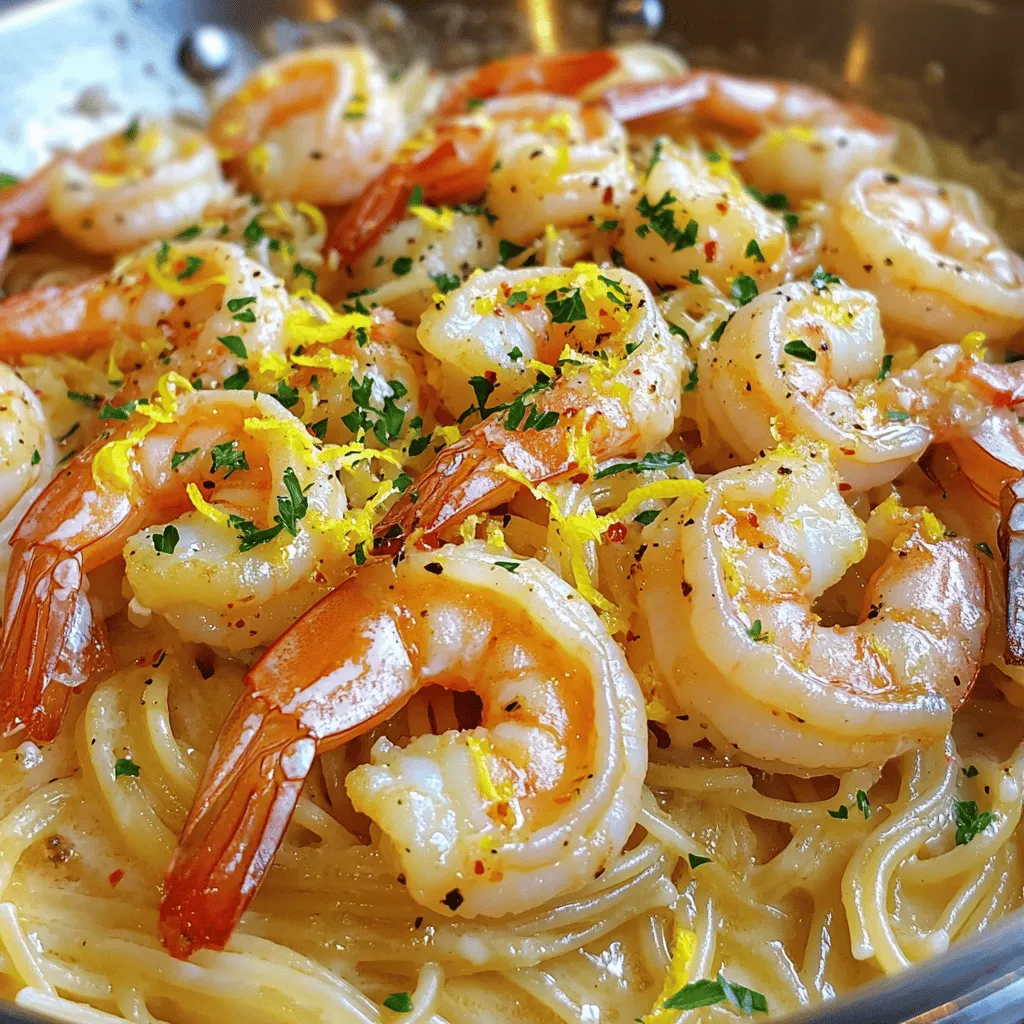
– Large shrimp: Use 1 pound of large shrimp. They need to be peeled and deveined. This size cooks well and has great flavor. The shrimp should be fresh or properly thawed if frozen.
– Fresh garlic: You will need 3 cloves, minced. Garlic adds a strong, savory taste. It brings depth to the dish when sautéed.
– Lemon juice and zest: Use the juice and zest of one lemon. The juice gives a bright tang, while the zest adds aromatic oils. Together, they enhance the shrimp’s flavor.
Optional Ingredients
– Red pepper flakes: Add 1 teaspoon for heat. This gives a nice kick without overpowering the dish.
– Fresh herbs: You can use parsley or basil for a fresh taste. They can add color and enhance the flavor. Feel free to mix and match based on your preference.
– Alternative serving options: You can serve the shrimp over cooked pasta or rice. These sides soak up the delicious garlic butter sauce perfectly.
Step-by-Step Instructions
Preparation of Shrimp
Start by prepping the shrimp. It’s key to keep them dry. Pat them with a paper towel. This step helps the shrimp sear well. Next, season lightly with salt and black pepper. This simple seasoning brings out their natural flavor.
Cooking the Garlic and Butter
Now, let’s cook the garlic and butter. Use a large skillet for even cooking. Melt 2 tablespoons of unsalted butter over medium heat. Keep an eye on the temperature. Too hot can burn the garlic. Once the butter bubbles, add minced garlic and optional red pepper flakes. Sauté for 1-2 minutes. You want the garlic fragrant but not browned.
Cooking the Shrimp
Next, it’s time to cook the shrimp. Add them to the skillet in a single layer. Avoid overcrowding, as this can steam them. Cook for 2-3 minutes on one side. Watch for that vibrant pink color! Flip them over and cook for another 1-2 minutes. They should be opaque and fully cooked.
Finishing Touches
Finally, let’s create the garlic butter sauce. Squeeze fresh lemon juice over the shrimp and sprinkle in lemon zest. Add the remaining 2 tablespoons of butter and stir gently. This helps the butter melt and mix with the garlic and lemon. Taste the dish, then adjust with more salt or pepper if needed. Garnish with chopped fresh parsley for a pop of color.
Serve the shrimp over pasta or rice, drizzling that luscious garlic butter sauce on top.
Tips & Tricks
Achieving the Perfect Shrimp Texture
To know when shrimp are done, look for a vibrant pink color. They should curl into a C shape. Overcooking makes shrimp tough and rubbery. Cook them until they are opaque. This usually takes about 3 to 5 minutes. Shrimp cook fast, so watch them closely.
Enhancing Flavor with Accompaniments
Pairing your lemon garlic butter shrimp with side dishes makes the meal shine. I suggest serving it over cooked pasta or rice. Both soak up the tasty sauce well. You can also add a simple salad or steamed veggies. These sides balance the rich flavors and add freshness.
Storage and Reheating Tips
Store leftovers in an airtight container. Refrigerate them for up to 2 days. If you want to keep them longer, freeze shrimp for up to 3 months. When reheating, do it gently. Use low heat on the stove to warm them up. This keeps the shrimp tender and tasty. For the best flavor, add a splash of fresh lemon juice while reheating.
Variations
Spice it Up
You can add more flavor to your Lemon Garlic Butter Shrimp using spices and herbs. Try adding paprika for a smoky taste. Cumin offers a warm flavor that works well too. For a fresh twist, mix in some chopped basil or cilantro. These herbs give the dish a bright note. You can also play with the level of heat. If you like spice, add more red pepper flakes. Just a pinch can change the whole dish!
Different Cooking Methods
There are two great ways to cook your shrimp: grilling and stovetop. Grilling gives the shrimp a nice char. It adds a smoky flavor that is hard to beat. Just make sure to skewer the shrimp to keep them from falling through the grill. Stovetop cooking is quicker and easier. It lets you control the heat better. Both methods work well, so choose what suits you best!
Serving Style
When it comes to serving, be creative! You can serve the shrimp on a bed of pasta or rice for a full meal. Or, try serving it in a taco shell with fresh toppings. For a party, use small skewers. This way, guests can easily grab them. You can also serve it with crusty bread. The garlic butter sauce is perfect for dipping!
Storage Info
How to Store Leftover Shrimp
You can store leftover shrimp in the fridge or freezer. If you plan to eat them soon, refrigeration works well. Place the shrimp in an airtight container. They stay fresh this way for up to three days. If you want to keep them longer, freezing is the best option. Use a freezer-safe bag or container. This way, they can last for up to three months.
Recommended Storage Containers
For the best freshness, use airtight containers. Glass containers are great because they do not absorb odors. If you prefer plastic, make sure it is BPA-free. Vacuum-sealed bags are also excellent for freezing. They help prevent freezer burn and keep the shrimp tasting fresh.
Duration of Freshness
Leftover shrimp can last in the fridge for three days. After that, they start to lose quality. If you freeze them, they can last for about three months. Always check for any off smells or changes in color before eating. If you notice anything unusual, it’s best to throw them away.
FAQs
How do I know when shrimp are fully cooked?
Shrimp are fully cooked when they turn pink and opaque. You can also check if they curl into a C shape. Overcooked shrimp will curl tightly into an O shape. Cooking shrimp usually takes about 3 to 5 minutes. Keep an eye on them to avoid chewy shrimp.
Can I use frozen shrimp for this recipe?
Yes, you can use frozen shrimp. Just ensure to thaw them first. The best way to thaw shrimp is to place them in the fridge overnight. If you need to thaw them quickly, place them in a bowl of cold water for about 15-20 minutes. Pat them dry before cooking to avoid excess moisture.
What can I substitute for butter in this recipe?
If you want a dairy-free option, you can use olive oil or coconut oil. Both oils will provide a nice flavor. For a vegan choice, try a plant-based butter. These options will keep the dish flavorful while meeting your dietary needs.
How can I make this recipe low-carb or keto-friendly?
To make this dish low-carb, skip the pasta or rice. Serve the shrimp over zucchini noodles or cauliflower rice instead. These options keep the meal light while still being satisfying. You can also reduce the amount of butter if you want fewer calories.
In this article, we covered the essential ingredients for lemon garlic butter shrimp, including large shrimp, fresh garlic, and lemon juice. You learned step-by-step instructions for preparing and cooking the dish. We also explored tips for perfect shrimp texture, flavor enhancements, and storage practices.
Remember, cooking is all about experimenting. Don’t be afraid to add your own twist. Whether you spice it up or try new methods, enjoy the process. Your kitchen can become a place of fun and flavor!
![- Large shrimp: Use 1 pound of large shrimp. They need to be peeled and deveined. This size cooks well and has great flavor. The shrimp should be fresh or properly thawed if frozen. - Fresh garlic: You will need 3 cloves, minced. Garlic adds a strong, savory taste. It brings depth to the dish when sautéed. - Lemon juice and zest: Use the juice and zest of one lemon. The juice gives a bright tang, while the zest adds aromatic oils. Together, they enhance the shrimp's flavor. - Red pepper flakes: Add 1 teaspoon for heat. This gives a nice kick without overpowering the dish. - Fresh herbs: You can use parsley or basil for a fresh taste. They can add color and enhance the flavor. Feel free to mix and match based on your preference. - Alternative serving options: You can serve the shrimp over cooked pasta or rice. These sides soak up the delicious garlic butter sauce perfectly. For the complete recipe, check out the Full Recipe. Start by prepping the shrimp. It’s key to keep them dry. Pat them with a paper towel. This step helps the shrimp sear well. Next, season lightly with salt and black pepper. This simple seasoning brings out their natural flavor. Now, let’s cook the garlic and butter. Use a large skillet for even cooking. Melt 2 tablespoons of unsalted butter over medium heat. Keep an eye on the temperature. Too hot can burn the garlic. Once the butter bubbles, add minced garlic and optional red pepper flakes. Sauté for 1-2 minutes. You want the garlic fragrant but not browned. Next, it’s time to cook the shrimp. Add them to the skillet in a single layer. Avoid overcrowding, as this can steam them. Cook for 2-3 minutes on one side. Watch for that vibrant pink color! Flip them over and cook for another 1-2 minutes. They should be opaque and fully cooked. Finally, let’s create the garlic butter sauce. Squeeze fresh lemon juice over the shrimp and sprinkle in lemon zest. Add the remaining 2 tablespoons of butter and stir gently. This helps the butter melt and mix with the garlic and lemon. Taste the dish, then adjust with more salt or pepper if needed. Garnish with chopped fresh parsley for a pop of color. Serve the shrimp over pasta or rice, drizzling that luscious garlic butter sauce on top. For the full recipe, check out the complete guide! To know when shrimp are done, look for a vibrant pink color. They should curl into a C shape. Overcooking makes shrimp tough and rubbery. Cook them until they are opaque. This usually takes about 3 to 5 minutes. Shrimp cook fast, so watch them closely. Pairing your lemon garlic butter shrimp with side dishes makes the meal shine. I suggest serving it over cooked pasta or rice. Both soak up the tasty sauce well. You can also add a simple salad or steamed veggies. These sides balance the rich flavors and add freshness. Store leftovers in an airtight container. Refrigerate them for up to 2 days. If you want to keep them longer, freeze shrimp for up to 3 months. When reheating, do it gently. Use low heat on the stove to warm them up. This keeps the shrimp tender and tasty. For the best flavor, add a splash of fresh lemon juice while reheating. {{image_4}} You can add more flavor to your Lemon Garlic Butter Shrimp using spices and herbs. Try adding paprika for a smoky taste. Cumin offers a warm flavor that works well too. For a fresh twist, mix in some chopped basil or cilantro. These herbs give the dish a bright note. You can also play with the level of heat. If you like spice, add more red pepper flakes. Just a pinch can change the whole dish! There are two great ways to cook your shrimp: grilling and stovetop. Grilling gives the shrimp a nice char. It adds a smoky flavor that is hard to beat. Just make sure to skewer the shrimp to keep them from falling through the grill. Stovetop cooking is quicker and easier. It lets you control the heat better. Both methods work well, so choose what suits you best! When it comes to serving, be creative! You can serve the shrimp on a bed of pasta or rice for a full meal. Or, try serving it in a taco shell with fresh toppings. For a party, use small skewers. This way, guests can easily grab them. You can also serve it with crusty bread. The garlic butter sauce is perfect for dipping! You can store leftover shrimp in the fridge or freezer. If you plan to eat them soon, refrigeration works well. Place the shrimp in an airtight container. They stay fresh this way for up to three days. If you want to keep them longer, freezing is the best option. Use a freezer-safe bag or container. This way, they can last for up to three months. For the best freshness, use airtight containers. Glass containers are great because they do not absorb odors. If you prefer plastic, make sure it is BPA-free. Vacuum-sealed bags are also excellent for freezing. They help prevent freezer burn and keep the shrimp tasting fresh. Leftover shrimp can last in the fridge for three days. After that, they start to lose quality. If you freeze them, they can last for about three months. Always check for any off smells or changes in color before eating. If you notice anything unusual, it’s best to throw them away. Shrimp are fully cooked when they turn pink and opaque. You can also check if they curl into a C shape. Overcooked shrimp will curl tightly into an O shape. Cooking shrimp usually takes about 3 to 5 minutes. Keep an eye on them to avoid chewy shrimp. Yes, you can use frozen shrimp. Just ensure to thaw them first. The best way to thaw shrimp is to place them in the fridge overnight. If you need to thaw them quickly, place them in a bowl of cold water for about 15-20 minutes. Pat them dry before cooking to avoid excess moisture. If you want a dairy-free option, you can use olive oil or coconut oil. Both oils will provide a nice flavor. For a vegan choice, try a plant-based butter. These options will keep the dish flavorful while meeting your dietary needs. To make this dish low-carb, skip the pasta or rice. Serve the shrimp over zucchini noodles or cauliflower rice instead. These options keep the meal light while still being satisfying. You can also reduce the amount of butter if you want fewer calories. For the full recipe, check out the [Full Recipe]. In this article, we covered the essential ingredients for lemon garlic butter shrimp, including large shrimp, fresh garlic, and lemon juice. You learned step-by-step instructions for preparing and cooking the dish. We also explored tips for perfect shrimp texture, flavor enhancements, and storage practices. Remember, cooking is all about experimenting. Don’t be afraid to add your own twist. Whether you spice it up or try new methods, enjoy the process. Your kitchen can become a place of fun and flavor!](https://tastyhatch.com/wp-content/uploads/2025/05/ee0e837a-21eb-494b-969d-eddae48486ba-250x250.webp)
