Skip to content
DisclaimerTerms Of UseGDPR PolicyCookie Policy

tastyhatch

  • Home
  • Drinks
  • Appetizers
  • Dinner
  • Dessert
  • About
  • Contact
  • Privacy Policy
DisclaimerTerms Of UseGDPR PolicyCookie Policy

Olivia

To make No-Bake Peanut Butter Bars, you need some basic ingredients. Here’s what you will need: - 1 cup creamy peanut butter - 1/2 cup honey or maple syrup - 2 cups rolled oats - 1/2 cup vanilla protein powder (optional for an added protein boost) - 1/4 cup dark chocolate chips (feel free to use dairy-free if preferred) - 1/4 cup chopped nuts (such as almonds or walnuts for crunch) - 1/2 teaspoon pure vanilla extract - A pinch of salt to balance the flavors These ingredients come together to create a tasty treat. The peanut butter gives a rich, creamy texture. The honey or maple syrup adds sweetness. Rolled oats provide a hearty base. If you add protein powder, it boosts the bars' nutrition. The dark chocolate chips add a touch of indulgence, while chopped nuts provide a delightful crunch. Using pure vanilla extract enhances the flavor. A pinch of salt balances the sweetness perfectly. This simple list makes it easy to whip up a batch. Check out the Full Recipe for more details on how to prepare these delicious bars. Start by adding 1 cup of creamy peanut butter and 1/2 cup of honey or maple syrup into a large mixing bowl. Use a spatula or wooden spoon to mix these until smooth. This blend forms the base of your bars. Next, stir in 1/2 teaspoon of pure vanilla extract and a pinch of salt. This step enhances the flavor and balances the sweetness. Now, gradually add in 2 cups of rolled oats and, if you choose, 1/2 cup of vanilla protein powder. Mix thoroughly until you achieve a thick, dough-like consistency. You want it to hold together nicely. This mixture should feel firm and not sticky. Gently fold in 1/4 cup of dark chocolate chips and 1/4 cup of chopped nuts. This addition provides a delightful crunch. Ensure these ingredients spread evenly throughout the mixture. Next, prepare an 8x8 inch baking dish by lining it with parchment paper. This will help you lift the bars out easily later. Carefully transfer your peanut butter mixture into the dish. Use your hands to press it down evenly. Make sure it's tightly packed. After that, place the dish in the fridge for about 1-2 hours. This step lets the bars firm up properly. Once set, lift the bars out using the parchment paper and cut them into squares or rectangles. For the full recipe, check the link above. Enjoy your tasty no-bake peanut butter bars! To get the right texture, it's key to mix well. The peanut butter and sweetener should blend until smooth. Then, add rolled oats gradually. This step ensures every oat gets coated. If the mixture feels too crumbly, stir in a bit more peanut butter. Chilling time is very important. You must let the bars set for at least one to two hours. This helps them firm up nicely. If you cut them too soon, they may fall apart. For a beautiful presentation, serve the bars on a rustic wooden board. You can dust them with powdered sugar or cocoa powder. This adds a nice touch. Pair the bars with fresh fruits like bananas or strawberries. They also go well with a glass of milk or a cup of coffee. This creates a balanced snack or dessert experience. You can switch sweeteners if you want. Agave nectar or coconut sugar work well. These options can change the flavor slightly, but they taste great. Feel free to vary the nuts too. Almonds, walnuts, or even pecans can add a nice crunch. You can also add spices like cinnamon for warmth. If you want to change the flavor, try adding dried fruits. Raisins or cranberries can enhance the taste. You can even add a splash of maple extract for a twist. For the full recipe, check out the irresistible no-bake peanut butter bars. {{image_4}} You can boost the flavor of your no-bake peanut butter bars easily. Consider adding spices like cinnamon or nutmeg. Just a sprinkle can elevate the taste. You might also add dried fruits or seeds. Raisins or cranberries add sweetness, while chia or flax seeds increase nutrition. For a twist, try different nut butters. Almond or cashew butter makes a tasty change. They bring unique flavors and healthy fats. If you need gluten-free options, use gluten-free oats. This makes the bars fit for more diets. Chocolate lovers can explore different chocolate types. Dark chocolate chips add a rich taste. If you prefer something sweeter, use milk chocolate chips instead. You can also drizzle melted chocolate on top. This makes the bars look fancy and adds extra chocolatey goodness. For the full recipe, check out the [Full Recipe]. To keep your no-bake peanut butter bars fresh, store them in an airtight container. This helps keep them moist and prevents them from drying out. I recommend placing a piece of parchment paper between layers if you stack them. This will stop them from sticking together. Refrigerating your bars is key for keeping them tasty. They stay good in the fridge for about a week. If you want to save some bars for later, freezing is a great option. Cut the bars into squares first, then place them in a single layer on a baking sheet. Once frozen, move them to an airtight container or a freezer bag. This way, you can grab one whenever you want. To thaw, just take them out and let them sit at room temperature for about 30 minutes. They will come back to life and taste just as good. In the fridge, expect your no-bake peanut butter bars to last about a week. If frozen, they can last up to three months. Always check for signs of spoilage. If you see any mold or if they smell funny, it’s best to toss them. Keeping an eye on these details will help ensure you enjoy every bite of your delicious treat. To make your no-bake peanut butter bars firmer, you can adjust the ingredients. Use less honey or maple syrup. You can also add more rolled oats. This will help absorb moisture. Chilling the bars longer will also improve their firmness. Aim for at least two hours in the fridge. If you want a firmer texture, try adding almond flour or a bit of protein powder. Both can help bind the mixture better. Yes, you can substitute peanut butter with other nut butters. Almond butter or cashew butter work well too. Each nut butter adds its own flavor. Almond butter gives a milder taste, while cashew butter is creamier. Remember, if you use a nut butter with added salt, reduce the salt in your recipe. This will balance the flavors. Choose a nut butter you enjoy for the best results. No-bake peanut butter bars last about one week in the fridge. Store them in an airtight container. This keeps them fresh and helps prevent drying out. If you notice any changes in color or smell, it's best to discard them. You can also freeze the bars for longer storage. When frozen, they can last for about two to three months. Just remember to thaw them in the fridge before eating. No-bake peanut butter bars can be a healthy treat. They contain protein from peanut butter and oats. The natural sweeteners like honey or maple syrup provide energy. If you add nuts, you boost the healthy fats. However, keep portion sizes in mind, as they can be calorie-dense. You can make them healthier by using less sweetener or adding seeds for more nutrients. Overall, they can fit into a balanced diet. Yes, you can use oat flour instead of rolled oats. Oat flour will change the texture a bit. It will make the bars smoother and less chewy. You might need to adjust the amount of sweetener since oat flour absorbs moisture differently. Start by using the same amount, then add more as needed. If you want that chewy texture, I recommend sticking with rolled oats. But feel free to experiment with oat flour for a unique twist. In this blog post, I covered how to make easy, no-bake peanut butter bars. You learned about the key ingredients, simple steps for mixing, and important tips for the best results. I shared variations, storage tips, and answers to common questions. These bars are not just a tasty treat; they can fit many diets and preferences. Enjoy experimenting with flavors and textures. Keep exploring healthy snacks that you'll love making again!

No-Bake Peanut Butter Bars Easy and Delicious Treat

Looking for a quick and satisfying treat? No-Bake Peanut Butter Bars are your answer! With just a few simple ingredients,

- 1 cup Nutella - 1/2 cup all-purpose flour - 2 large eggs - 1/4 cup unsweetened cocoa powder Nutella is the star of these brownies. It gives them a rich, creamy flavor. The all-purpose flour helps bind everything together. Eggs add moisture and help the brownies rise. Unsweetened cocoa powder adds that deep chocolate taste we all crave. - 1/2 teaspoon baking powder - 1/4 teaspoon salt - 1/2 cup chocolate chips - 1/4 cup hazelnuts, chopped (optional) - 1 teaspoon vanilla extract Baking powder helps the brownies puff up a bit. Salt brings out the sweetness of the Nutella. Chocolate chips add even more chocolate goodness. Chopped hazelnuts give a nice crunch, but this is optional. Finally, vanilla extract rounds out the flavors, making these brownies truly special. You can find the Full Recipe at the end of this article. Enjoy mixing these delicious ingredients! First, I preheat my oven to 350°F (175°C). This step is key for even baking. While it heats, I prepare my baking pan. I use an 8x8-inch pan, greasing it lightly. Sometimes, I line it with parchment paper. This makes it easy to lift out the brownies later. Next, I grab a large mixing bowl. I add 1 cup of Nutella and 2 large eggs. I whisk these together until they look smooth. This creates a rich, creamy base for my brownies. Then, I sift in the dry ingredients. I add 1/2 cup of all-purpose flour, 1/4 cup of cocoa powder, 1/2 teaspoon of baking powder, and 1/4 teaspoon of salt. I stir gently. I want to mix until just combined. Overmixing can make the brownies tough. After that, I fold in some extra fun! I add 1/2 cup of chocolate chips. If I want a crunch, I toss in 1/4 cup of chopped hazelnuts, too. These add a nice texture to the fudgy brownies. Now it’s time to transfer the batter. I pour it into my prepared pan. Using a spatula, I smooth the top. I want it even in the corners. Next, I place the pan in the oven. I bake for 20 to 25 minutes. To check if they’re done, I insert a toothpick in the center. If it comes out with a few moist crumbs, they are ready. This keeps them fudgy and delicious. Once baked, I take the pan out of the oven. I let the brownies cool in the pan for about 10 minutes. If I used parchment paper, I can lift them out easily. If not, I cut them right in the pan. I let them cool completely on a wire rack. This makes cutting them into squares much easier. For the full recipe, check out the section above! To make the best Nutella brownies, avoid overmixing. When you stir the batter, do it gently. This keeps your brownies fudgy and soft. Overmixing introduces air and can lead to a cake-like texture, which we don't want. For fudgy brownies, use room temperature eggs. They blend better with Nutella. Also, don’t bake them too long. A toothpick should have a few moist crumbs when you check for doneness. This ensures the rich, gooey texture we all love. When serving your brownies, think about a rustic wooden board. This adds charm to your serving style. Dust the top lightly with powdered sugar for a sweet touch. You can elevate the experience by pairing brownies with a scoop of vanilla ice cream. The cold ice cream contrasts beautifully with the warm, fudgy brownies. This makes each bite a delight. If you're curious, you can find the full recipe for these Nutella brownies to try at home! {{image_4}} You can change up the flavors in your Nutella brownies easily. First, try using different types of chocolate. You could use white chocolate, dark chocolate, or even milk chocolate chips. Each type adds its own unique taste and sweetness. Mixing these chocolates can create a fun flavor blend too. Another way to shake things up is to swap nuts for other mix-ins. If you do not like hazelnuts, consider using walnuts, pecans, or even crushed cookies. These options can give your brownies a new texture and taste. Dried fruits like cherries or blueberries can also add a fruity twist. If you need gluten-free options, you can use gluten-free flour instead of all-purpose flour. This makes your brownies safe for those with gluten allergies. Just make sure the flour you choose is a one-to-one substitute for best results. For those who want vegan brownies, you can replace eggs with flax eggs. To make these, mix one tablespoon of ground flaxseed meal with three tablespoons of water. Let it sit for five minutes until it thickens. You can also use a dairy-free chocolate for the chips. This way, everyone can enjoy these rich and fudgy delights! For the full recipe, check the Nutella Dream Brownies section above. To keep your brownies fresh, store them at room temperature. Place them in an airtight container. This keeps moisture in and prevents them from drying out. You can enjoy them for up to four days this way. Make sure to separate layers with parchment paper if you stack them. This avoids sticking and helps keep their texture intact. If you want to save brownies for later, freezing is a great option. Cut them into squares first. Wrap each square tightly in plastic wrap. Then, place the wrapped brownies in a freezer-safe bag. They can stay good for about three months. When you're ready to enjoy, just take them out and let them thaw. To thaw, leave the brownies at room temperature for about 30 minutes. You can also warm them in the microwave for about 10 seconds. This makes them soft and gooey again. Enjoy your Nutella brownies whenever you crave that rich, fudgy delight! To check if your Nutella brownies are done, look for a few signs. The edges will pull away from the pan. The top should look set and may have a shiny finish. Use a toothpick to test the center. If it comes out with a few moist crumbs, they are ready. If the toothpick is wet with batter, bake for a few more minutes. Remember, overbaking will dry them out. So, keep a close eye! You can make a few swaps in this recipe. If you need a gluten-free option, use almond flour instead of all-purpose flour. For eggs, a flax egg works well. Just mix 1 tablespoon of ground flaxseed with 2.5 tablespoons of water and let it sit until it thickens. You can also switch Nutella for other chocolate spreads. If you want less sugar, reduce the chocolate chips. Just remember, each swap changes the flavor and texture! To get a flaky brownie crust, there are some easy tips. First, mix the batter just until combined. Overmixing can ruin the crust. Second, bake at the right temperature. Too hot can burn the top. Lastly, try adding a bit of extra cocoa powder. This can help create that nice crust. Let them cool completely before cutting. This helps the crust set nicely! Nutella brownies are simple and fun to make. We covered key ingredients, like Nutella and cocoa powder. Then we explored step-by-step instructions to guide your baking. Tips helped improve texture and presentation. Variations let you customize flavors to your taste. Finally, proper storage keeps your brownies fresh. Whether you enjoy them warm or cold, Nutella brownies can be a treat for any occasion. Happy baking!

Ingredient Nutella Brownies Rich and Fudgy Delight

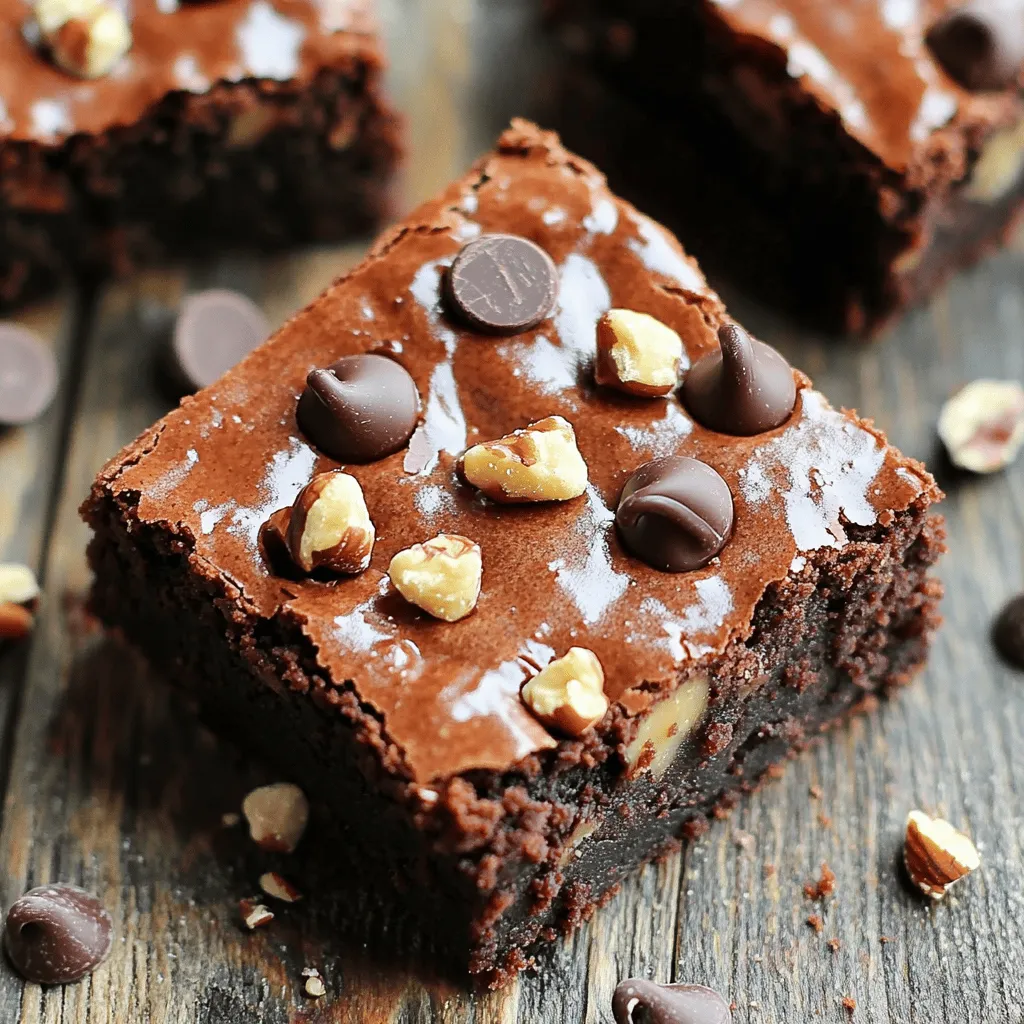
Craving a chocolaty treat? These Ingredient Nutella Brownies are your perfect solution! Made with simple ingredients like Nutella, eggs, and

- 1 loaf of freshly baked sourdough bread - 1 cup shredded mozzarella cheese - 1 cup shredded sharp cheddar cheese - 1/2 cup unsalted butter (1 stick), softened to room temperature - 4 cloves garlic, finely minced - 1/4 cup fresh parsley, finely chopped - 1 teaspoon garlic powder - 1/2 teaspoon fine sea salt - 1/4 teaspoon freshly ground black pepper This recipe uses fresh sourdough bread for a soft and chewy base. The combination of mozzarella and cheddar gives a perfect melt and flavor. Butter adds richness and helps the garlic infuse deeply into the bread. For flavor, I love adding minced garlic and fresh parsley. Garlic powder enhances the taste, making it robust. A pinch of sea salt and black pepper rounds out the flavors, making every bite irresistible. You can find the full recipe above. It’s a simple yet delightful way to enjoy cheesy pull-apart garlic bread at home. 1. Preheat the Oven Start by preheating your oven to 350°F (175°C). This is key for even baking. 2. Prepare the Garlic Butter Mixture In a small bowl, mix the softened butter, minced garlic, chopped parsley, garlic powder, sea salt, and black pepper. Use a fork to blend until smooth. 1. Cutting the Sourdough Take your loaf of sourdough bread and place it on a cutting board. Carefully slice the bread diagonally and horizontally. Make a grid pattern but don't cut all the way through. Keep cuts about one inch apart. 2. Filling the Cuts with Garlic Butter With a knife or spoon, fill each cut generously with the garlic butter mix. Make sure every crack is filled for maximum flavor. 1. Distributing the Shredded Cheese Now, sprinkle the shredded mozzarella and cheddar cheese into the openings of the bread. Push the cheese down gently to fill all spaces. 2. Wrapping and Baking the Bread Wrap the filled bread tightly in aluminum foil and place it on a baking sheet. Bake it in your preheated oven for 15 minutes. This helps the cheese melt and warms the bread. After 15 minutes, remove the foil. Let the top brown by baking for another 10-15 minutes. Watch for bubbling cheese and golden color. This recipe makes a delicious, cheesy pull-apart garlic bread that everyone will love. For the full recipe, check out the details above! How to Cut the Bread Correctly Cutting the bread is key. Start with a whole loaf of sourdough. Place it on a board. Use a serrated knife for clean cuts. Slice diagonally and then horizontally. Make cuts about 1 inch apart. Do not cut all the way through. This keeps the loaf intact for pulling apart. Ensuring Even Butter Distribution Even butter spread is vital. Mix your garlic butter well before using it. Use a small spoon or knife to fill each cut. Get the butter deep into each slice. This ensures every piece is rich in flavor. Monitoring the Cheese Melting Watch the cheese closely while it bakes. You want it to melt but not burn. After 15 minutes, check if it’s bubbling. If it is, that’s a good sign. Remove the foil to let it brown for extra flavor. Achieving the Golden Brown Finish For a perfect golden finish, bake uncovered. Keep an eye on it during the last 10 minutes. The bread should look crispy and golden. It will taste even better with that nice crunch. Presentation Ideas Serve your cheesy pull-apart bread on a wooden board. This adds a rustic touch. Garnish with parsley for a pop of color. It looks great and tastes amazing. Pairing Options (Dipping Sauces) Dipping sauces make this bread even more fun. Marinara sauce is a classic choice. You can also try garlic butter or ranch dressing. Each option adds more flavor to your bites. Explore different combinations to find your favorite! {{image_4}} You can mix up the cheeses for a new taste. Try using different cheese blends. You might use gouda for a smoky flavor or pepper jack for some heat. Mixing cheeses can change the whole dish. Adding cream cheese is a great way to boost creaminess. It makes the bread even richer. Simply blend it into your garlic butter mix. This extra step gives each bite a smooth finish. You can add herbs for a fresh twist. Basil or oregano can give your bread a bright taste. Just chop them finely and mix them into the garlic butter. This small change can make a big difference. If you want some spice, try red pepper flakes. They add warmth without overpowering the garlic. Just a pinch will do. Customize the heat to fit your taste buds. For those who need gluten-free options, use gluten-free bread. Many stores sell good-quality gluten-free loaves. Just make sure to choose one that suits your taste. If you're vegan, you can swap out the cheese and butter. Use vegan cheese and plant-based butter instead. This way, everyone can enjoy cheesy pull-apart garlic bread. You still get that delicious taste without dairy. For the full recipe, check the section above. To keep your cheesy pull-apart garlic bread fresh, follow these tips: - Best Practices for Refrigeration: Wrap the leftover bread tightly in plastic wrap. This helps keep moisture in and stops it from drying out. Place it in an airtight container. Store it in the fridge for up to three days. - How to Freeze Cheesy Pull-Apart Garlic Bread: If you want to save it longer, freezing is a great option. Wrap the bread in aluminum foil first. Then, place it in a freezer-safe bag. This way, it can last up to three months without losing flavor. Now, let’s talk about reheating your cheesy pull-apart garlic bread. - Best Methods for Reheating: The oven is the best choice. Preheat it to 350°F (175°C). Remove the bread from the fridge or freezer. If frozen, let it thaw in the fridge overnight. Cover the bread with foil while baking for 10-15 minutes. This keeps it warm and melty inside. - Avoiding Soggy Bread: To avoid sogginess, do not microwave the bread. This can make it rubbery. Always use the oven. If you want a crispy top, remove the foil for the last few minutes of baking. Enjoy the cheese bubbling and the crust golden! How to make Cheesy Pull-Apart Garlic Bread more flavorful? You can boost the flavor by adding more garlic. Try using roasted garlic for a sweeter taste. Adding a pinch of red pepper flakes brings heat, too. Fresh herbs, like basil or chives, also add a nice touch. Can I use different types of bread for this recipe? Yes! You can use Italian or French bread if you want a different taste. Just ensure the bread can hold the cheese and butter. A thicker crust works best for this cheesy bread. How long does it take to make Cheesy Pull-Apart Garlic Bread? The whole process takes about 40 minutes. You need about 10 minutes to prep and 30 minutes to bake. It’s quick and easy for a tasty snack or side dish. What if I don’t have fresh herbs? If you lack fresh herbs, use dried herbs instead. Dried parsley or Italian seasoning can work well. Just remember to use less than you would with fresh herbs, as they are more concentrated. How can I make this recipe spicier? To spice things up, add red pepper flakes or diced jalapeños. You can also swap out some cheese for pepper jack. This will give your garlic bread a nice kick! Is it possible to prepare this garlic bread ahead of time? Yes, you can prepare it ahead. Assemble the bread and wrap it tightly in foil. Store it in the fridge for up to 24 hours. When ready to bake, just add a few extra minutes to the cooking time. In this blog post, I shared a simple recipe for Cheesy Pull-Apart Garlic Bread. We covered the main ingredients like sourdough bread and cheese, and how to enhance flavor with garlic and herbs. I detailed each step from preparation to baking, plus tips for great texture. You can try variations to suit your taste or diet. Enjoy this bread fresh or stored for later. Remember, it’s all about creativity and fun in the kitchen. Dive in, explore flavors, and make it your own!

Cheesy Pull-Apart Garlic Bread Irresistibly Good Recipe

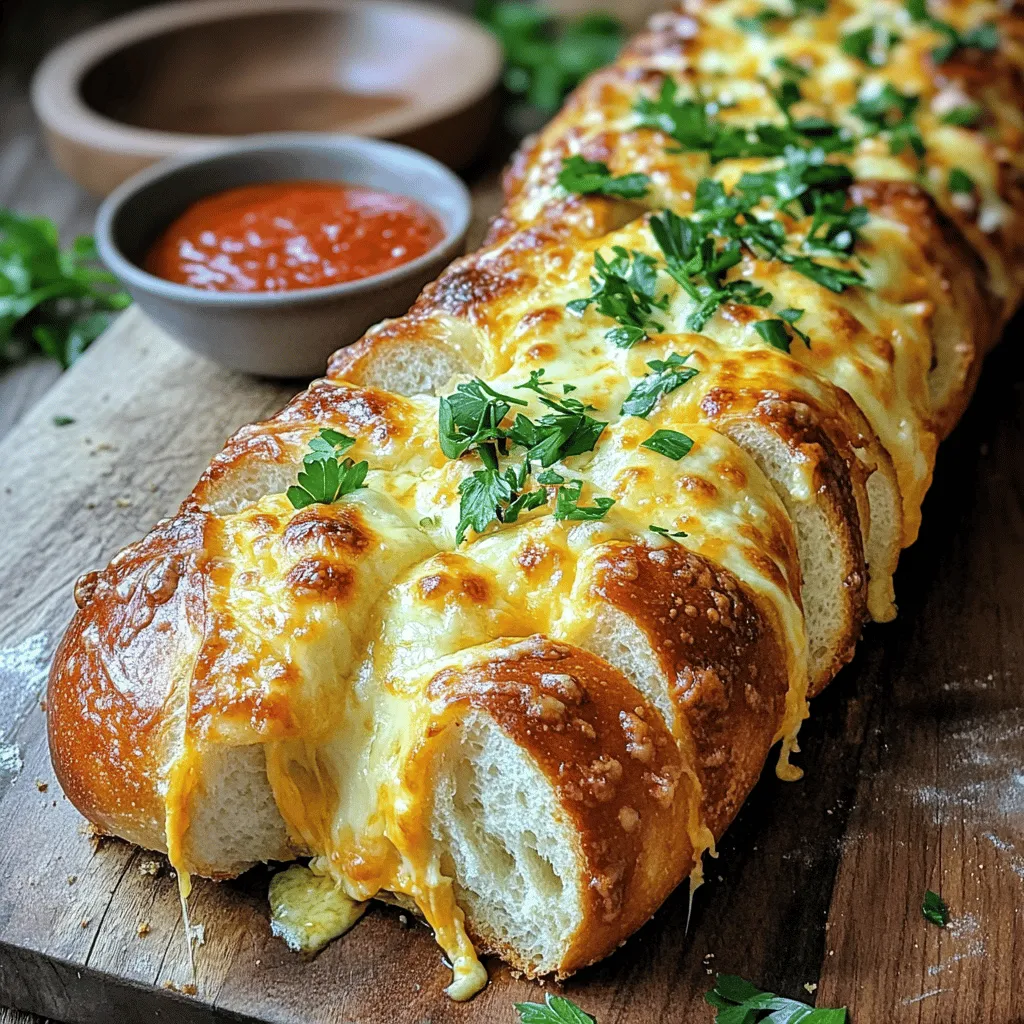
Are you ready to dive into the world of cheesy, garlicky goodness? My Cheesy Pull-Apart Garlic Bread recipe is a

To make garlic herb roasted baby potatoes, you need the following simple items: - 1.5 pounds baby potatoes, halved - 4 cloves garlic, finely minced - 3 tablespoons extra virgin olive oil - 1 teaspoon dried rosemary - 1 teaspoon dried thyme - 1 teaspoon dried oregano - Sea salt and freshly ground black pepper, to taste - Fresh parsley, chopped (for garnish) Fresh herbs and garlic are key to this dish. They bring bright flavors and aromas that lift the potatoes. Garlic adds a warm, rich taste. Fresh herbs, like parsley, rosemary, thyme, and oregano, give a garden-fresh feel. Using fresh ingredients makes your meal pop. They also provide health benefits, adding antioxidants and vitamins. If you don’t have certain ingredients, don’t worry! Here are some easy swaps: - Use regular potatoes instead of baby potatoes. Just cut them into smaller pieces. - Replace garlic with garlic powder if you’re in a pinch. - Use other herbs like basil or dill if you want different flavors. - Swap olive oil for melted butter for a richer taste. Experiment with what you have on hand. Cooking should be fun and flexible! For the complete process, check out the Full Recipe. Start by preheating your oven to 425°F (220°C). This step is vital. A hot oven helps the potatoes get crispy. It also cooks them evenly. In a large bowl, add 1.5 pounds of halved baby potatoes. Next, toss in 4 cloves of finely minced garlic. Add 3 tablespoons of extra virgin olive oil. Then, sprinkle in 1 teaspoon of dried rosemary, 1 teaspoon of dried thyme, and 1 teaspoon of dried oregano. Season the mix with sea salt and freshly ground black pepper. Use your hands or a spatula to gently coat the potatoes. Make sure each piece is covered well with the garlic and herbs. Line a baking sheet with parchment paper. This prevents sticking and makes cleanup easy. Spread the coated baby potatoes in a single layer on the sheet. Ensure they have enough space to roast well. Place the baking sheet in the oven. Roast the potatoes for 25-30 minutes. Halfway through, stir them gently to ensure even cooking. Look for a lovely golden-brown color and a tender texture. When done, take them out and let cool for a few minutes. Serve the garlic herb roasted baby potatoes in a dish. Finish by sprinkling chopped parsley on top for a fresh look. For the full recipe, check out the details above. To get those lovely crispy potatoes, start with dry baby potatoes. After washing, make sure to dry them well. This helps them crisp up in the oven. When you coat them with olive oil, don’t skimp. A good layer of oil helps create a nice crunch. Make sure to spread them out on the baking sheet. If they are too close, they will steam instead of roast. You can boost the flavor in many ways. Try adding lemon zest for a fresh twist. A sprinkle of paprika gives a nice smoky flavor. If you want some heat, add red pepper flakes. Fresh herbs like basil or dill can also be great additions. Experiment with what you have on hand. Each change can make the dish new and exciting. Even cooking is key to great roasted potatoes. When you cut the potatoes, try to make them all the same size. This ensures they cook at the same rate. Halfway through roasting, give them a stir. This helps them brown evenly and prevents sticking. Perfectly cooked potatoes should be golden and tender. Enjoy them fresh from the oven for the best taste! For the full recipe, check out Garlic Herb Roasted Baby Potatoes. {{image_4}} You can change the herbs and spices to fit your taste. For a bolder flavor, try adding smoked paprika or cumin. If you like a bit of heat, red pepper flakes work well. You can also swap in fresh herbs instead of dried ones. Use about three times more fresh herbs for the same flavor. Get creative with your spice choices. This recipe is already vegan and dairy-free, making it great for all diets. You can keep it simple with just the garlic and herbs. If you want more richness, add nutritional yeast for a cheesy flavor. This will boost the taste without adding dairy. It’s a great way to enjoy these potatoes while sticking to your dietary needs. Roasting other vegetables with your potatoes can add great flavor and texture. Carrots, bell peppers, and zucchini make excellent choices. Just cut them into similar sizes to the potatoes for even cooking. Brussels sprouts are another tasty option. Mix and match your favorites to create a colorful and vibrant dish. You can find the full recipe for Garlic Herb Roasted Baby Potatoes to try these ideas. After enjoying your garlic herb roasted baby potatoes, let them cool. Place them in an airtight container. Store them in the fridge. They stay fresh for about three to five days. If you want to keep them longer, consider freezing them. To reheat, preheat your oven to 350°F (175°C). Spread the potatoes on a baking sheet. Heat them for about 10 to 15 minutes. This helps restore their crispy texture. You can also use a microwave. However, this method can make them soft. To freeze, first cool the potatoes completely. Arrange them in a single layer on a baking sheet. Freeze them for about an hour. Once frozen, transfer them to a freezer-safe bag. They can last for up to two months in the freezer. When ready to eat, just reheat as described above. Enjoy them again, just like the first time! For the complete recipe, check out the [Full Recipe]. Yes, you can use larger potatoes. Just cut them into smaller pieces. Aim for similar sizes to ensure even cooking. The cooking time may change. Larger pieces may need more time in the oven. Always check for tenderness with a fork. To make Garlic Herb Roasted Baby Potatoes ahead, prep them in advance. You can wash, cut, and season the potatoes. Store them in the fridge for up to 24 hours. When ready to cook, just take them out and roast. This keeps the flavors fresh and tasty. These potatoes pair well with many dishes. Try serving them with grilled chicken or fish. They also go great with a fresh salad, steak, or roasted veggies. The flavors balance nicely with rich or light meals. For more ideas, check the Full Recipe for serving suggestions. This blog post covered how to make Garlic Herb Roasted Baby Potatoes. We explored ingredients, cooking steps, and helpful tips to achieve crispy potatoes. I also shared variations for flavor and storage advice. In conclusion, you now have the knowledge to make tasty roasted potatoes that everyone will love. Enjoy experimenting with this dish and make it your own!

Garlic Herb Roasted Baby Potatoes Simple and Tasty

Are you ready to make a side dish that turns simple potatoes into a flavor-packed delight? Garlic Herb Roasted Baby

Crispy Parmesan Zucchini Fries are simple to make. Here is what you need: - 2 medium zucchinis, trimmed and cut into fry shapes - 1 cup panko breadcrumbs - 1/2 cup freshly grated Parmesan cheese - 1 teaspoon garlic powder - 1 teaspoon onion powder - 1/2 teaspoon dried oregano - 1/2 teaspoon fine sea salt - 1/4 teaspoon freshly ground black pepper - 2 large eggs, beaten - Olive oil spray for cooking Each ingredient plays a key role in making these fries crispy and tasty. The panko breadcrumbs provide a great crunch. Freshly grated Parmesan gives a rich flavor. The spices bring out the best in the zucchini. Using eggs helps the coating stick well. Olive oil spray enhances the crispiness while baking. You can find the full recipe [here](#). Get ready to enjoy a healthy and delicious snack! Start by preheating your oven to 425°F (220°C). This high heat helps the zucchini fries get nice and crispy. While the oven warms up, line a large baking sheet with parchment paper. This will keep the fries from sticking and make cleanup easy. In a shallow bowl, mix together the panko breadcrumbs, freshly grated Parmesan cheese, garlic powder, onion powder, dried oregano, fine sea salt, and black pepper. Stir well so that all the flavors blend together. In another bowl, beat the two large eggs until the yolks and whites are fully combined. This will be your egg wash, which helps the coating stick to the zucchini. Take a zucchini fry and dip it into the egg wash. Make sure it gets fully coated, then let any excess egg drip back into the bowl. Next, roll the zucchini fry into the breadcrumb mixture. Make sure it is well coated with crumbs. Place the coated fry on the prepared baking sheet. Repeat this process with the rest of the zucchini fries. Arrange them in a single layer to help them cook evenly. Once all the fries are coated, lightly spray the tops with olive oil spray. This gives them a crispy finish. Put the baking sheet in the oven and bake for 20-25 minutes. Halfway through baking, flip the fries to ensure they crisp up on both sides. When they turn golden brown, they are ready. Allow the zucchini fries to cool for a few minutes after baking. This helps them become even crunchier before you enjoy them. For the full recipe, please refer to the detailed instructions above. To get the best crunch, use panko breadcrumbs. They are lighter than regular breadcrumbs. This lightness helps them crisp up nicely in the oven. When you coat your zucchini fries with panko, they will turn golden brown and crunchy. Another key is the olive oil spray. It gives the fries a nice finish. A light spray on top helps them crisp up. It’s better than drenching them in oil. This method keeps the fries light and healthy. For dipping sauces, marinara and ranch work great. Marinara adds a tangy flavor. Ranch gives a creamy touch. Both pair well with the fries. You can also try homemade dips if you feel adventurous! Presentation is fun too. Serve the fries in a cone or a bowl. Add a sprinkle of fresh parsley. It makes the dish pop with color. Your guests will love the look and taste! For the full recipe, check out the complete instructions above. {{image_4}} You can easily change the flavor of your crispy zucchini fries. For a spicy kick, add cayenne or paprika to your breadcrumb mix. Just a pinch can bring out the heat you crave. If you prefer a herby taste, use Italian seasoning or fresh herbs like thyme or basil. These changes can make your fries exciting and new each time you cook them. The cheese you use can also alter the taste of your fries. If you want a different flavor, try mozzarella or cheddar cheese instead of Parmesan. Both will melt well and add a nice touch. For those avoiding dairy, you can use vegan cheese options. Look for brands that melt nicely to keep that crispy, cheesy goodness. Each option gives your fries a unique twist that you’ll love. Check out the Full Recipe for more details! To keep your crispy Parmesan zucchini fries fresh, store them in an airtight container. This prevents air from making them soggy. Place a paper towel at the bottom of the container to absorb extra moisture. Refrigerate the container right away. Your fries will stay fresh for about 3 days. To reheat your zucchini fries, the oven is the best method. Preheat your oven to 400°F (200°C). Place the fries on a baking sheet in a single layer. Heat them for 10-12 minutes. This keeps them crispy. You can also use an air fryer. Just heat at 350°F (175°C) for 5-7 minutes. This method works well too. Enjoy your crispy fries again! For the full recipe, check out the earlier section. Yes, you can prepare zucchini fries ahead of time. First, cut the zucchinis into fry shapes. Then, coat them with the egg wash and breadcrumb mixture. Place the coated fries in a single layer on a baking sheet. Cover them with plastic wrap or store in an airtight container. Keep the fries in the fridge for up to 24 hours. When ready to cook, just bake them straight from the fridge. This method saves time and ensures a quick snack. To make zucchini fries without eggs, use a binding agent like flour or a plant-based milk. You can mix one tablespoon of flour with water to create a paste. This will help the breadcrumbs stick to the zucchini. Another option is to use a mixture of ground flaxseed and water. Combine one tablespoon of ground flaxseed with three tablespoons of water and let it sit for a few minutes. This will create a gel-like substance that works well for binding. Crispy Parmesan Zucchini Fries pair well with various dips. Marinara sauce is a classic choice. It adds a nice tang and flavor. Ranch dressing offers a creamy option that many love. You can also try garlic aioli for a rich taste. For a healthy twist, serve them with a yogurt-based dip. These dips enhance the flavors and make snacking fun! Yes, zucchini fries are a healthy snack option. Zucchini is low in calories and high in fiber. It also provides vitamins A and C, which are great for your health. Baking instead of frying reduces fat content, making them even healthier. Using panko breadcrumbs adds crunch without too many calories. Overall, zucchini fries are a tasty way to enjoy veggies while keeping your snack time nutritious. In this article, we explored how to make crispy Parmesan zucchini fries. We outlined the ingredients needed, provided step-by-step instructions for baking, and shared helpful tips. You learned about variations and how to store leftovers. Zucchini fries are tasty and a great snack option. They are simple to make, and you can customize them to fit your taste. Try these fries at home for a fun, healthy treat. Enjoy the tasty crunch and share with friends or family!

Crispy Parmesan Zucchini Fries Healthy and Delicious Snack

Looking for a healthy and tasty snack? Try my Crispy Parmesan Zucchini Fries! These fries are easy to make and

- Cauliflower florets and their preparation Start with one medium head of cauliflower. Cut it into bite-sized florets. Make sure they are even in size. This helps them cook evenly. Rinse the florets under cool water to clean them. Dry them well with a towel. This step ensures the batter sticks better. - Seasoning components: flour, spices, and buffalo sauce You will need one cup of all-purpose flour. You can use gluten-free flour if needed. Mix it with one cup of cool water to make the batter. Add one teaspoon of garlic powder, one teaspoon of onion powder, and one teaspoon of smoked paprika. These spices give the bites a nice flavor. Don’t forget half a teaspoon of salt and half a teaspoon of black pepper. For the main star, use one cup of buffalo sauce. You can buy it or make your own. - Optional garnish suggestions For a fresh touch, consider adding finely chopped parsley. This adds color and a bit of taste. You can also serve with ranch or blue cheese dressing. These dips pair well with the spicy flavor of the cauliflower. These ingredients come together to create a crunchy and flavorful snack. For the full recipe, check out the detailed steps to make these delicious bites. First, you need to preheat your oven to 450°F (232°C). This high heat helps the bites get crispy. Next, grab a baking sheet and line it with parchment paper. Using parchment paper is key. It stops the bites from sticking and helps with cleanup. Now it's time to make the batter. In a large bowl, mix one cup of flour with one cup of cool water. Add garlic powder, onion powder, smoked paprika, salt, and black pepper. Whisk it well until the batter is smooth and free of lumps. A good mix makes for a better coating. Take each cauliflower floret and dip it into the batter. Make sure they are fully coated. Let any extra batter drip off before placing them on the baking sheet in a single layer. Bake the coated florets for about 20 minutes. They should turn golden brown and crispy. While the florets bake, mix buffalo sauce with olive oil in another bowl. After the first bake, take them out and toss the hot florets in the sauce. Coat them well with the spicy mix. Then, return the coated florets to the baking sheet and bake for another 10-15 minutes. This makes them even crispier and lets the sauce stick. Follow these steps from the Full Recipe for the best results! To get that perfect crunch, batter consistency is key. You want it thick enough to coat the cauliflower but not too thick. A smooth, lump-free batter will cling well. If you plan to bake, preheat your oven to a high temperature. This helps create a crispy outer layer. Baking gives a lighter texture, while frying can add extra crunch. If you choose frying, be sure to watch the time closely to prevent burning. Want to spice things up? Adjust the heat by adding more buffalo sauce or a pinch of cayenne pepper. If you prefer a milder bite, mix in a bit of honey or brown sugar. You can also explore unique flavors. Try adding BBQ sauce for a sweet twist or teriyaki sauce for an Asian flair. Experimenting with your favorite sauces makes every batch special. For a fun garnish, sprinkle fresh herbs like cilantro or green onions for added freshness. Check out the Full Recipe for more ideas! {{image_4}} You can make Buffalo Cauliflower Bites in two ways: baking or frying. Baking is the healthier choice. It uses less oil and gives a crispy bite. Frying makes them crunchier and richer in flavor. Baking: Preheat your oven to 450°F (232°C). Coat the cauliflower in batter as instructed. Bake for about 20 minutes. This step helps them get golden brown. Toss them in buffalo sauce and bake again for 10-15 minutes. This method keeps them light and crispy. Frying: Heat oil in a deep pan. Dip each floret in batter and drop it in the hot oil. Fry until golden brown. This method gives a nice crunch but adds more calories. Use a slotted spoon to drain excess oil. Spice up your Buffalo Cauliflower Bites with different sauces. You can switch buffalo sauce for BBQ or teriyaki sauce. Each sauce brings a new taste to the dish. Alternative Sauces: Try BBQ for a sweet and tangy flavor. Teriyaki adds a sweet soy taste. You can mix sauces for a unique combo. Additional Spices: Add more spice to your batter. Try cayenne pepper for heat or smoked paprika for a rich flavor. Garlic powder and onion powder boost the taste too. These options let you customize your bites to fit your mood or guests. Enjoy making them your own! For the full recipe, check the instructions above. After you enjoy your buffalo cauliflower bites, store the leftovers in an airtight container. Place them in the fridge for up to three days. This keeps them fresh and tasty. Make sure the bites cool before sealing them. If you want to keep them longer, consider freezing them. They can last for about a month in the freezer. Just be sure to use a freezer-safe bag or container. When reheating, you want to restore that crispy texture. The best way is to use an oven. Preheat it to 375°F (190°C). Spread the bites on a baking sheet. Bake for about 10-15 minutes. This helps them regain their crunch. If you’re in a hurry, you can use a microwave, but they might lose some crispiness. For a quick fix, try a toaster oven. It works great and gives a nice texture. Enjoy your buffalo cauliflower bites again! For the full recipe, check out the previous section. Yes, you can make buffalo cauliflower bites gluten-free. Simply swap all-purpose flour for a gluten-free flour blend. Popular choices include almond flour, rice flour, or chickpea flour. Just make sure the flour you choose works well in batters. Adjust the liquid if needed, as some gluten-free flours absorb more moisture. Buffalo cauliflower bites shine with different dipping sauces. Classic choices are ranch and blue cheese. For a twist, try creamy avocado dip or garlic aioli. You can also serve them with a tangy yogurt sauce or honey mustard. Each sauce adds a fun layer of flavor. To make your bites spicier, add more buffalo sauce or use a hotter variety. You can mix in cayenne pepper or chili powder for extra heat. If you prefer milder bites, reduce the buffalo sauce or use a mild hot sauce. You can also pair them with cooling dips like ranch. Buffalo cauliflower bites stay fresh in the fridge for about three days. Store them in an airtight container to keep them crisp. If you want to enjoy them later, it’s best to reheat them in the oven. This helps restore their crunch. Buffalo cauliflower bites are great for many occasions. Serve them as a fun appetizer at parties or game days. They pair well with crunchy veggies, like carrot and celery sticks. You can also serve them alongside a light salad or with tacos for a tasty twist. Check out the Full Recipe for more ideas! Buffalo cauliflower bites are easy and fun to make. We covered the key ingredients, basic steps, and tips to get them just right. Whether you bake or fry, you can enjoy great flavors. Remember, adjust spices to match your taste. Store leftovers properly to keep them fresh. Enjoy experimenting with dips and sauces for more fun. Follow these steps, and you’ll make a tasty snack everyone loves. Your kitchen will become a hub for delicious buffalo bites!

Buffalo Cauliflower Bites Crunchy and Flavorful Snack

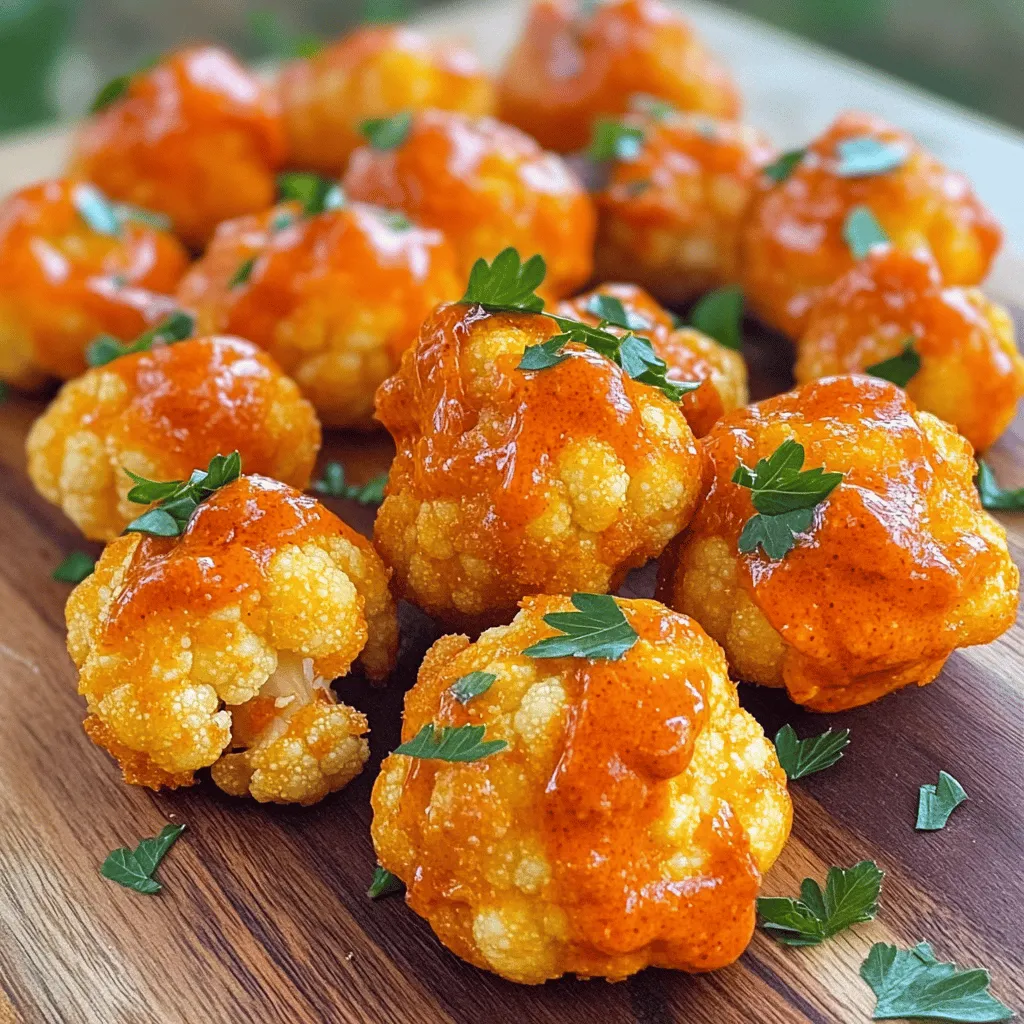
If you’re searching for a crunchy, flavorful snack that won’t ruin your diet, Buffalo Cauliflower Bites are the answer. These

- 2 cups all-purpose flour - 1 packet (2 1/4 tsp) active dry yeast - 3/4 cup warm water - 1 tablespoon granulated sugar - 1 teaspoon salt - 2 tablespoons extra virgin olive oil - 1 cup fresh spinach, finely chopped - 1 cup canned artichoke hearts - 1 cup cream cheese - 1/2 cup sour cream - 1 cup shredded mozzarella cheese - 1/2 teaspoon garlic powder - 1 egg, beaten - Coarse sea salt To make spinach artichoke dip stuffed pretzels, you need simple yet fresh ingredients. The dough starts with all-purpose flour and yeast, which gives it a nice rise. Warm water helps activate the yeast. Sugar adds a little sweetness, while salt enhances flavor. Extra virgin olive oil adds richness to the dough. For the filling, fresh spinach and artichoke hearts bring great taste and texture. Cream cheese and sour cream create a smooth base, while mozzarella adds cheesy goodness. Garlic powder gives it that savory kick that everyone loves. Gathering these ingredients is key. Each one plays a role in making the pretzels not only delicious but also fun to eat. Don't forget, you can find the Full Recipe for detailed instructions and tips! - Combine warm water, sugar, and yeast. - Let sit until frothy. To start, I take warm water and add sugar. The sugar helps the yeast wake up. I sprinkle the yeast on top and wait. In about 5-10 minutes, it becomes bubbly and frothy. This means the yeast is ready to work. - Mix flour and salt. - Form a dough and knead. Next, I grab a large bowl and mix flour with salt. I make a well in the middle. Then, I pour in the frothy yeast mix and some olive oil. I stir until the dough comes together. Now, I knead it on a floured surface for about 5 minutes. The dough should feel smooth and elastic. I form it into a ball, place it in a greased bowl, and cover it. It needs to rise for an hour. - Combine spinach, artichokes, and cheeses. - Mix thoroughly. While the dough rises, I prepare the filling. I take chopped spinach, artichokes, cream cheese, sour cream, mozzarella cheese, and garlic powder. I mix these ingredients well in a medium bowl. This filling is rich and creamy, perfect for our pretzels. - Divide and roll dough into ropes. - Fill and shape into pretzels. Once the dough has risen, I punch it down to remove air. I divide it into eight pieces and roll each piece into a rope, about 12 inches long. I flatten each rope slightly to add the filling in the center. I scoop 1-2 tablespoons of the spinach-artichoke mix on top. Then, I fold the dough over the filling and pinch it closed. Finally, I twist the ends to make a classic pretzel shape. - Prepare baking soda water bath. - Bake until golden brown. I fill a pot with water and bring it to a boil. I stir in baking soda to create a bath for the pretzels. I dip each pretzel in this bath for about 30 seconds. This step gives them that lovely chewy texture. After boiling, I place them on a baking sheet lined with parchment paper. I brush each pretzel with beaten egg for a golden look and sprinkle sea salt on top. Then, I bake them at 425°F for 12-15 minutes until golden brown. For the full recipe, check out the detailed instructions. To make the best pretzels, focus on dough consistency. The dough should be soft but not sticky. If it's too dry, add a little water. If it's too sticky, sprinkle in some flour. Fresh ingredients matter, too. Use fresh spinach and artichokes for the best flavor. They bring vibrant taste and color to the dish. Pair your stuffed pretzels with drinks for a fun snack time. They go well with light beers or sparkling waters. For extra flavor, add dipping sauces like ranch or extra spinach-artichoke dip. This adds a tasty twist and keeps every bite exciting. Presentation can make your pretzels shine. Serve them on a rustic wooden platter for a cozy look. Adding fresh herbs like parsley or basil can brighten the plate. These simple touches make your dish not only tasty but also inviting. {{image_4}} You can change the filling to make it your own. Add jalapeños for heat. This gives a spicy kick that many enjoy. You can also try different cheeses. Cheddar works well and adds a sharp flavor. A mix of mozzarella and cheddar is great too. Each option makes the dip bold and tasty. The dough can change as well. Whole wheat flour gives a nuttier taste. If you prefer gluten-free, use a gluten-free flour mix. You can also infuse the dough with herbs. Adding dried oregano or basil can boost the flavor. These options keep the dish fun and fresh. You can change how you cook the pretzels, too! For a crispy outside, try the air fryer. Cook at 375°F for about 10 minutes. If you want to use a slow cooker, make the filling and stuff the dough. Let it cook on low for about 4 hours. These methods change the texture but keep the flavor great. Store any leftover stuffed pretzels in the fridge. Wrap them in plastic wrap or foil. You can also use an airtight container. This method keeps the pretzels fresh and soft. You can freeze baked pretzels for later. Let them cool completely first. Place them in a freezer-safe bag or container. When you're ready to eat, thaw them in the fridge overnight. Reheat in the oven at 350°F for about 10 minutes. This will keep them warm and tasty. For the best taste, eat your pretzels within three days. After that, they may lose their charm. If they smell off or look dry, it’s time to toss them. Always trust your nose and eyes when checking for spoilage. To check if your pretzels are done, look for a deep golden color. They should feel firm to the touch and puffed up. If you tap one, it should sound hollow. This means the inside is cooked well. Yes, you can prepare these pretzels ahead. After shaping, cover them and store in the fridge for up to 24 hours. When ready, bake them straight from the fridge for a warm snack. You can also freeze them after boiling. To reheat, bake directly from the freezer. These pretzels taste great on their own. For extra fun, serve with more spinach-artichoke dip for dipping. You can also pair them with marinara sauce or a side salad for balance. Absolutely! You can try using cheddar, gouda, or pepper jack for a twist. Each cheese brings a new flavor. Just make sure the cheese melts well to keep the filling creamy. Prep time is about 20 minutes, with a total time of 1 hour and 15 minutes. Most of this time is for the dough to rise. It’s a fun project that’s worth the wait! You can find the Full Recipe with detailed instructions and ingredient measurements above. Enjoy making these tasty treats! To sum up, we explored making delicious Spinach Artichoke Dip Stuffed Pretzels. We covered all the ingredients, kitchen tools, and step-by-step instructions. You gained tips for perfecting your pretzels and learned about variations and storage options. These pretzels are fun to make and perfect for sharing. Enjoy experimenting with flavors and pairings. You have all the tools and knowledge to create a tasty treat right at home. Happy baking!

Spinach Artichoke Dip Stuffed Pretzels Delight

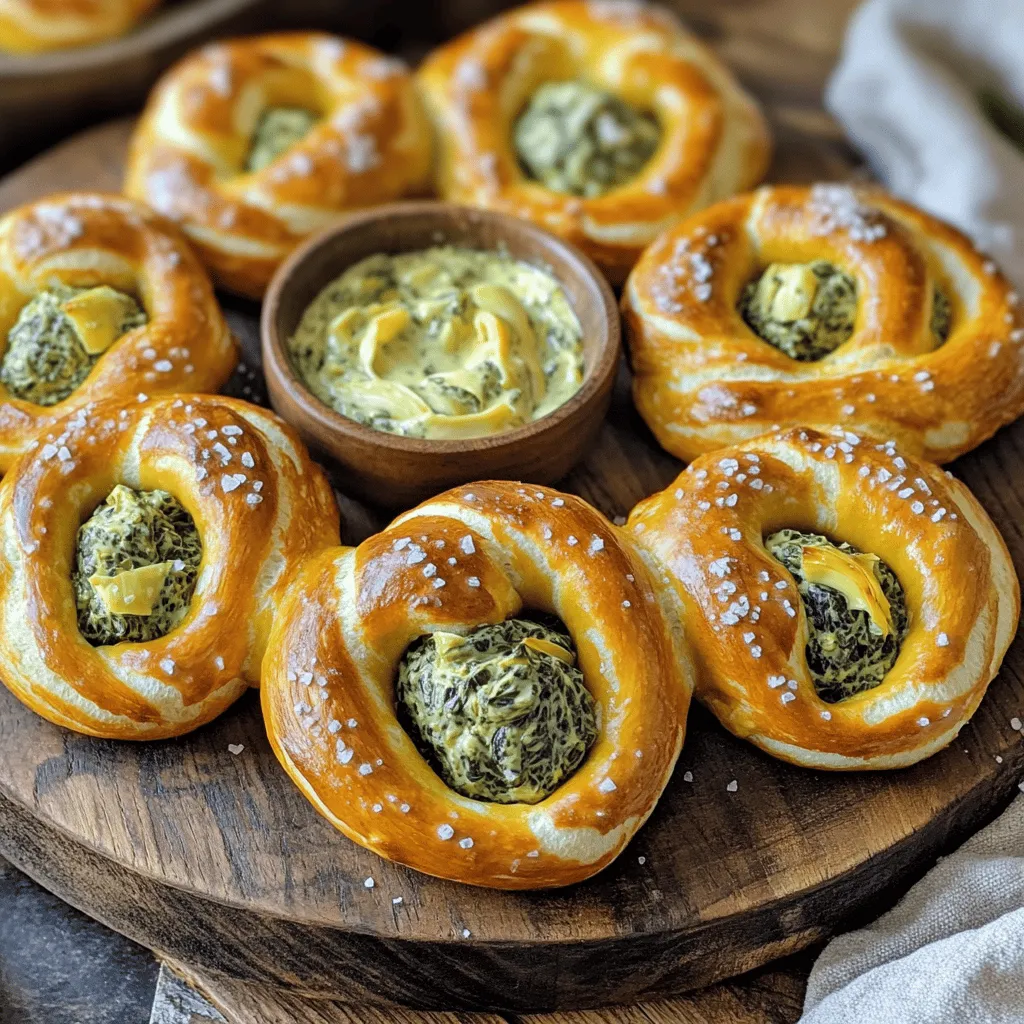
Are you ready for a fun twist on a classic favorite? Spinach Artichoke Dip Stuffed Pretzels bring all the creamy

To make delicious Jalapeño Popper Stuffed Mushrooms, you will need the following: - 12 large portobello mushrooms, stems removed - 4 oz cream cheese, room temperature - 1 cup shredded sharp cheddar cheese - 1/2 cup diced jalapeños (fresh for spice, pickled for tanginess) - 1/4 cup green onions, finely chopped - 1/2 cup panko breadcrumbs - 2 tablespoons olive oil - 1 teaspoon garlic powder - Salt and black pepper to taste - 1 tablespoon fresh cilantro, chopped (for garnish) You can enhance the flavor of your stuffed mushrooms in many ways. Try adding: - A pinch of smoked paprika for a smoky flavor - A dash of cayenne pepper for extra heat - Fresh herbs like thyme or parsley for brightness If you have dietary preferences, here are some easy swaps: - Use vegan cream cheese and cheese for a plant-based version. - Replace panko breadcrumbs with crushed gluten-free crackers for a gluten-free dish. - Swap portobello mushrooms with large button mushrooms if preferred. These adjustments help everyone enjoy this tasty treat! For the full recipe, check out the comprehensive cooking instructions. First, preheat your oven to 375°F (190°C). This step is key for even cooking. Next, line your baking sheet with parchment paper. This helps prevent sticking and makes cleanup easy. It is also important to use cream cheese at room temperature. This way, it mixes well with the other ingredients. In a large bowl, combine the softened cream cheese, sharp cheddar cheese, diced jalapeños, and green onions. Use a spatula or fork to blend these ingredients until smooth. Make sure there are no lumps. This will help create a rich and creamy filling. Season the mixture with garlic powder, salt, and pepper. Stir well to mix all flavors evenly. Take each portobello mushroom cap and fill it with the cheese mixture. Use the back of a spoon to press down firmly. This ensures the filling stays in place while baking. Don't overfill them, as the filling may spill out. Make sure your caps are well packed, but not overflowing. Place your stuffed mushrooms on the baking sheet with space between them. Bake for 20 to 25 minutes. You’ll know they’re done when the mushrooms are tender and the breadcrumbs are golden brown. Keep an eye on them to avoid burning. Once out of the oven, let them cool for a few minutes. Enjoy the wonderful aroma as you prepare to serve these delicious bites. For more details, check the Full Recipe. To balance flavors in your jalapeño popper stuffed mushrooms, use fresh jalapeños for heat. If you prefer less spice, try pickled jalapeños instead. For creaminess, make sure to blend the cream cheese and cheddar well. This mix should be smooth and easy to spread. To avoid soggy mushrooms, ensure they are dry before stuffing. You can pat them with a paper towel after rinsing. This step keeps your dish tasty. Achieving a crispy topping is key. Mix panko breadcrumbs with olive oil. This will help them brown nicely in the oven. Try adding spices like paprika or garlic powder to the breadcrumb mix for extra flavor. For crumb topping variations, consider using crushed tortilla chips or even grated Parmesan cheese. These options add crunch and depth to your dish. Presentation can elevate your dish. Serve the stuffed mushrooms on a bright platter. Garnish with extra cilantro or chili flakes for a pop of color. Pair these mushrooms with a cold drink, like a light beer or a refreshing lemonade. They also go well with sides like a fresh salad or crunchy veggie sticks. This combo makes for a fun and tasty meal. For the full recipe, check out the details above! {{image_4}} You can mix up the flavors in your jalapeño popper stuffed mushrooms. Sweet jalapeños give a nice twist to the dish. If you want more heat, use spicy jalapeños. For meat lovers, adding bacon or sausage will take these mushrooms to the next level. The savory meat adds depth and richness that pairs well with the creamy filling. If you need a gluten-free option, swap out the regular breadcrumbs for gluten-free ones. This keeps the crunch while being safe for gluten-free diets. For those on a low-carb plan, try using zucchini or bell peppers instead of mushrooms. They provide a great base for the filling and keep the dish fresh and light. You can also change the herbs and spices based on the season. In spring, fresh herbs like basil or parsley work well. In winter, try adding warm spices like nutmeg or cinnamon for a cozy feel. For festive occasions, consider adding holiday spices, such as thyme or sage, to give your stuffed mushrooms a seasonal flair. For the complete method to make these tasty treats, check the Full Recipe. To keep your Jalapeño Popper Stuffed Mushrooms fresh, follow these steps: - Allow the mushrooms to cool completely after baking. - Place them in an airtight container. - Store the container in the fridge. - They stay good for about 3-4 days. The best containers are glass or plastic with tight lids. These help keep the mushrooms from drying out. If you use a bowl, cover it with plastic wrap. This keeps moisture in and flavors locked. When you want to enjoy your leftovers, reheating correctly matters. Here’s how to do it: - Oven: Preheat to 350°F (175°C). Place mushrooms on a baking sheet. Heat for about 10-15 minutes. This method keeps the texture crisp. - Microwave: Place stuffed mushrooms on a microwave-safe plate. Heat for 1-2 minutes. Watch closely to avoid sogginess. For best results, use the oven. It helps retain that crunchy topping. You can freeze Jalapeño Popper Stuffed Mushrooms for later. Here’s how: - Prepare the mushrooms but do not bake them. - Place them on a baking sheet lined with parchment paper. - Freeze them for about 1-2 hours until solid. - Then, transfer them to a freezer bag. This method prevents them from sticking together. When ready to eat, thaw in the fridge overnight. Bake them straight from the fridge. Add a few extra minutes to the baking time. Enjoy your tasty treat! For the complete recipe, check out the Full Recipe section. To boost the heat, use fresh jalapeños instead of pickled ones. You can also add more diced jalapeños. If you dare, try adding a dash of cayenne pepper or a splash of hot sauce to the cheese filling. These additions will give your stuffed mushrooms a nice kick. Yes, you can make the filling in advance! Store it in an airtight container in the fridge for up to two days. Just remember to bring it back to room temperature before you stuff the mushrooms. This will help the filling blend well when you bake. These stuffed mushrooms pair well with many options. Try serving them with a fresh salad or some crunchy tortilla chips. For drinks, a cold beer or a zesty margarita complements the spicy flavors perfectly. These choices make for a great party spread. Absolutely! While portobello mushrooms are great, you can use large cremini or button mushrooms too. Each type brings a different flavor. If you want a smaller bite, mini mushrooms can work well, just adjust the baking time. Each variety will add its own twist to the dish. Jalapeño Popper Stuffed Mushrooms offer a tasty dish you can easily customize. We explored ingredients, preparation steps, and tips to perfect your recipe. You can adapt flavors and dietary needs while ensuring deliciousness. Remember to store and reheat leftovers properly for maximum enjoyment. These mushrooms are great for any gathering. Enjoy experimenting and sharing this fun recipe with friends and family!

Jalapeño Popper Stuffed Mushrooms Irresistible Recipe

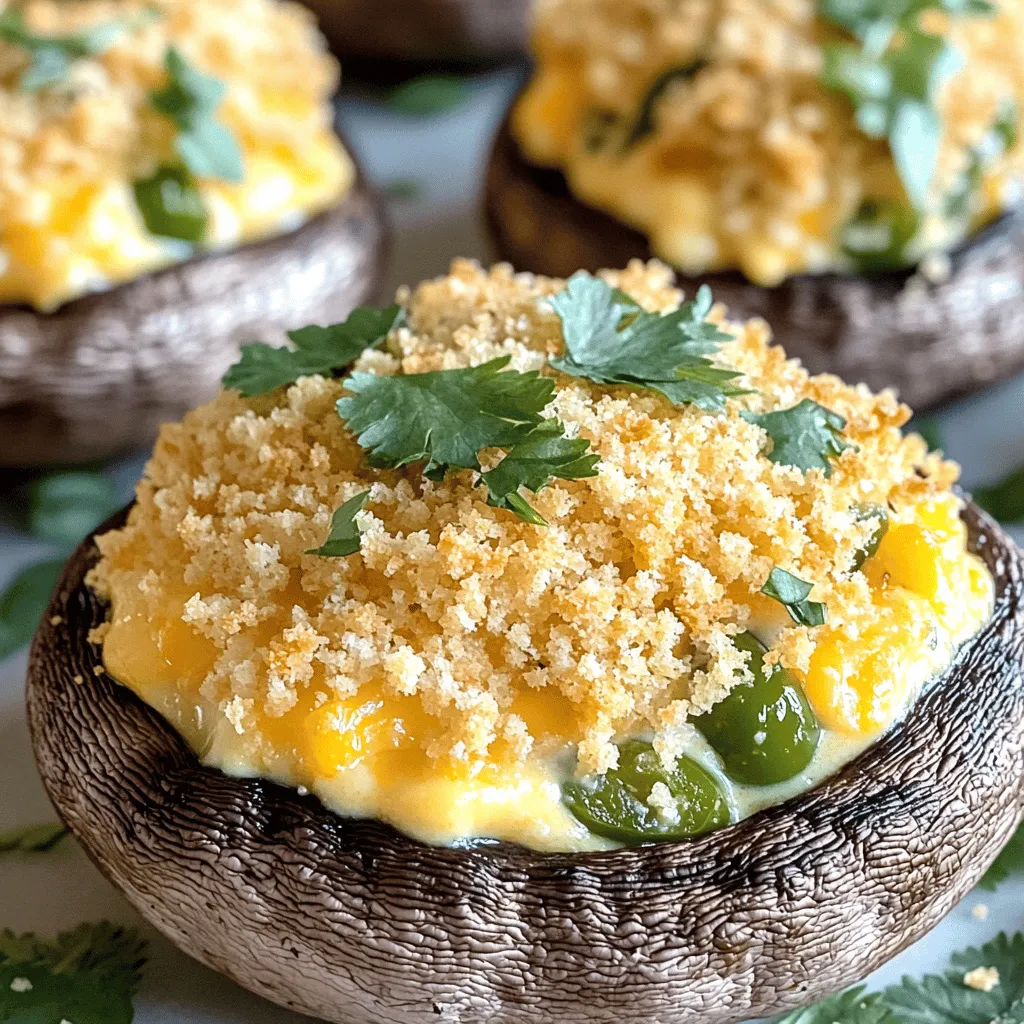
Are you ready to elevate your appetizer game? Jalapeño Popper Stuffed Mushrooms are the perfect mix of spicy, creamy, and

- 2 large cucumbers, sliced into 1/2 inch rounds - 8 oz cream cheese, softened to room temperature - 2 tablespoons sour cream - 1 tablespoon fresh dill, finely chopped - 1 tablespoon chives, finely chopped - 1 tablespoon lemon juice - 2 tablespoons Everything Bagel seasoning - Optional: cherry tomatoes, halved, for garnish These fresh and tasty bites are simple to make. Start with the cucumbers. I like to pick firm, large ones for the best crunch. Slice them into thick rounds, about half an inch each. This size helps hold the toppings well. Next, you need cream cheese. It must be soft and easy to spread. Mixing in sour cream makes it rich and creamy. To add flavor, I use fresh dill and chives. They give a nice herbal touch. A splash of lemon juice adds brightness to the mix. The key to the Everything Bagel flavor is the seasoning. This blend of sesame seeds, poppy seeds, and garlic gives a savory punch. You can sprinkle it on top for a flavorful finish. If you want, add cherry tomatoes for color and a fresh taste. Gather these ingredients, and you’re ready to create a delightful snack. For the full recipe, check the details above and enjoy crafting your Everything Bagel Cucumber Bites! Start by taking a medium bowl. Add 8 oz of softened cream cheese to the bowl. Then, mix in 2 tablespoons of sour cream. Next, add 1 tablespoon of fresh dill and 1 tablespoon of chives. Squeeze in 1 tablespoon of lemon juice for a zesty flavor. Use a spatula or hand mixer to blend everything until it’s smooth. This creamy mixture will be the star of your cucumber bites. Grab 2 large cucumbers and slice them into 1/2 inch rounds. Aim for uniform slices so they look great. Once sliced, take a clean paper towel and pat each cucumber round dry. This step is key! Drying the cucumbers helps the toppings stick better and keeps them from getting soggy. Now comes the fun part! Take a knife or small spatula to spread a generous dollop of the cream cheese mixture on each cucumber slice. Aim for about 1 tablespoon of the mixture per slice. Once you have spread the cream cheese, it’s time to add the seasoning! Sprinkle a pinch of Everything Bagel seasoning on top of each bite. This seasoning adds a burst of flavor that ties it all together. If you want to get fancy, place half a cherry tomato on top for a pop of color. Arrange your cucumber bites on a nice platter. Give them about 15 minutes in the fridge to let the flavors meld. Enjoy these tasty snacks! For a full recipe, check out the detailed instructions. To get a smooth spread, start with softened cream cheese. This makes mixing easy. Use a hand mixer or spatula to blend the ingredients until creamy. Aim for a thick and rich texture. If you find lumps, keep mixing. A smooth spread keeps your cucumber bites looking great. Sogginess can ruin your cucumber bites. To prevent this, dry each cucumber round. Use a clean paper towel to pat them dry gently. The less moisture, the better the toppings stick. You can also slice cucumbers right before serving. This keeps them fresh and crisp. A beautiful platter makes your bites shine. Arrange the cucumber rounds in a circle or row. Add cherry tomatoes on top for color. Use fresh dill sprigs for flair. You can also serve lemon wedges on the side for a zesty touch. This little detail makes your dish pop! {{image_4}} You can easily amp up the taste of Everything Bagel Cucumber Bites. Try adding smoked salmon on top. This adds a savory, rich flavor that pairs well with the cream cheese. Another great option is avocado. A creamy slice of avocado adds a smooth texture and a touch of healthy fat. Both toppings bring unique flavors to the cucumber bites, making them more exciting. If you want vegan options, swap the cream cheese with a plant-based cream cheese. This keeps the flavor while making it dairy-free. You can also use lactose-free cream cheese for a lighter choice. Both options let everyone enjoy this tasty snack without missing out. Pair these cucumber bites with different dips for fun. A tangy yogurt dip or a zesty hummus can add a new taste. You might also enjoy serving them with sparkling water or a light cocktail. These drinks balance the flavors nicely. For an extra touch, arrange the bites on a colorful platter. This makes serving more inviting and enhances the overall experience. For the full recipe, check out the Cooking section! Store leftover Everything Bagel Cucumber Bites in an airtight container. Place a layer of paper towels in the container. This helps absorb extra moisture. Keep them in the refrigerator for up to two days. The cucumbers may lose some crunch over time. Do not freeze assembled cucumber bites. Freezing makes the cucumbers soggy and mushy. Instead, you can freeze the cream cheese mixture. Store it in a sealed container for up to three months. When ready, thaw it in the fridge and assemble fresh bites. To keep the ingredients fresh, shop for cucumbers and herbs just before preparing. Choose firm cucumbers without soft spots. Wrap them in a damp paper towel and place them in a plastic bag. Store the herbs in water, like a bouquet, in the fridge. This keeps them vibrant and flavorful. Avoid chopping ingredients too early to maintain their taste and texture. Yes, you can make these bites ahead of time. Prepare the cream cheese mixture and slice the cucumbers. Store them separately in the fridge. Do not assemble them too early. If you mix them too soon, the cucumbers may get soggy. I suggest putting them together no more than a few hours before serving. This keeps the crunch and flavor fresh. If you need a cream cheese substitute, try Greek yogurt. It adds a nice tang and is healthy. You can also use cottage cheese for a lower-calorie option. For vegan bites, use cashew cream or a plant-based cream cheese. These alternatives keep the dish creamy while meeting different dietary needs. You can store the leftovers in the fridge for up to two days. Keep them in an airtight container. The cucumbers may lose some crunch after a day, but they will still taste good. If you notice any water from the cucumbers, drain it before eating. Enjoy these tasty bites even after the gathering! These Everything Bagel Cucumber Bites are fresh, easy, and delicious. We explored the key ingredients, including cucumber and cream cheese. You learned helpful steps to prepare and assemble them. I shared storage tips and tasty variations to suit different diets. These bites are perfect for parties or snacks. Enjoy experimenting with flavors! Your friends will love these treats, and you will too. Try them out and make your gatherings even better.

Everything Bagel Cucumber Bites Simple and Tasty Snack

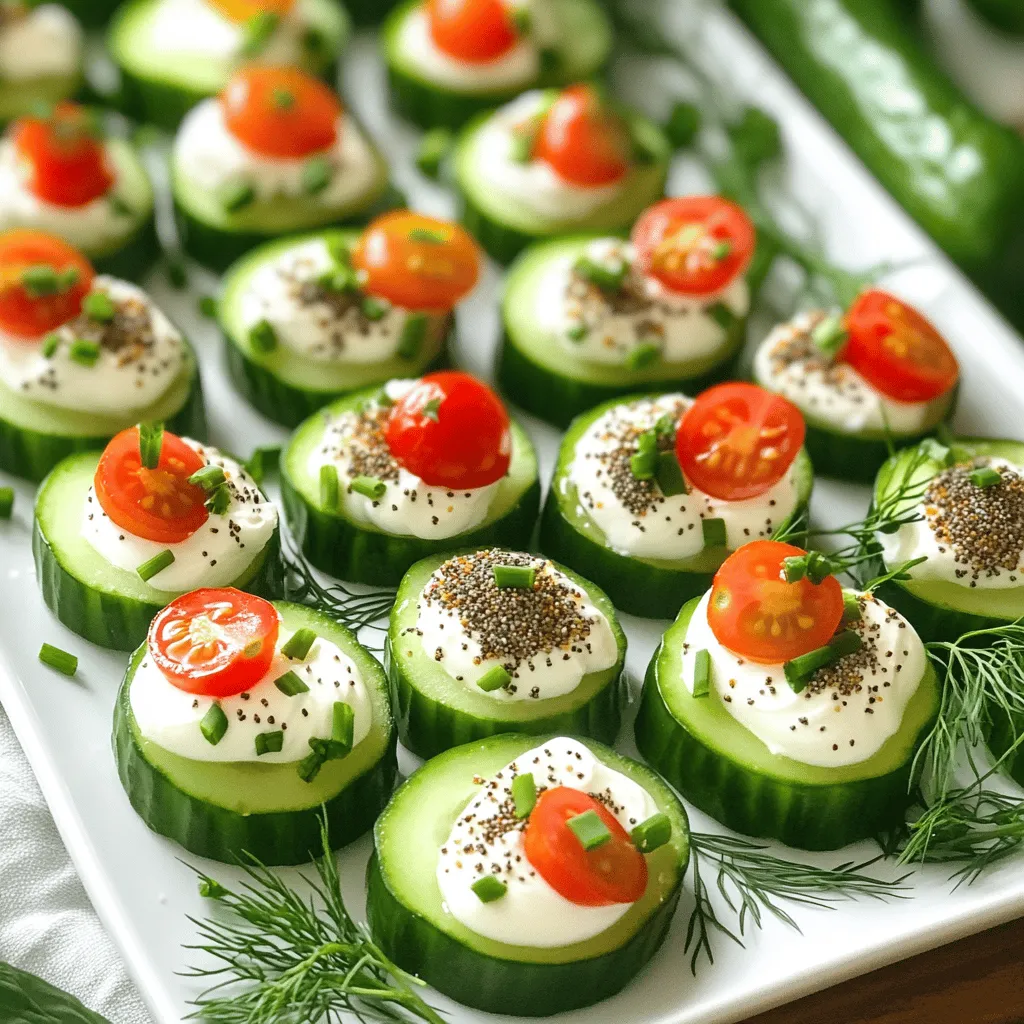
Looking for a fun and easy snack? Try my Everything Bagel Cucumber Bites! These tasty treats mix creamy flavors with

To make these tasty tacos, you need fresh and simple ingredients. Here’s what you will need: - 2 chicken breasts, diced into bite-sized pieces - 1 ripe mango, peeled and diced - 1 small red onion, finely chopped - 1 red bell pepper, diced into small cubes - 1 jalapeño, seeded and finely minced - 2 cloves garlic, minced - 1 teaspoon ground cumin - 1 teaspoon chili powder - 1 tablespoon olive oil - Salt and black pepper, to taste - 8 small corn tortillas - Fresh cilantro leaves, for garnish - Lime wedges, for serving These ingredients bring a blend of sweet, spicy, and savory flavors. The ripe mango adds a sweet touch that balances the heat from the jalapeño. You can add more ingredients to boost the taste of your tacos. Here are some fun options: - Avocado slices for creaminess - Sour cream for a rich texture - Shredded cheese for a savory kick - Radish slices for crunch - Pickled onions for extra tang Feel free to mix and match these options to make your tacos truly yours. Having the right tools makes cooking easier. Here’s what I suggest you use: - A medium bowl for marinating the chicken - A non-stick skillet for cooking the chicken - A separate bowl for mixing the mango salsa - A spatula for flipping the chicken - A clean kitchen towel to keep tortillas warm With these tools ready, you can prepare your Spicy Mango Chicken Tacos with ease. Check out the Full Recipe for a detailed guide on making this delicious dish! First, you need to marinate the chicken. In a medium bowl, mix diced chicken with minced garlic, ground cumin, chili powder, olive oil, salt, and pepper. Stir until the chicken is well coated. Let it sit for at least 15 minutes. This step is crucial. It allows the chicken to soak up all the great flavors. Next, heat a non-stick skillet over medium-high heat. Add the marinated chicken in a single layer. Cook for about 7 to 10 minutes. Stir it occasionally. You want the chicken to be nicely browned and fully cooked. Use a meat thermometer to check for an internal temperature of 165°F. This ensures your chicken is safe and juicy. While the chicken cooks, prepare the mango salsa. In a separate bowl, combine diced mango, chopped red onion, diced red bell pepper, and minced jalapeño. Squeeze fresh lime juice over the mix. Gently stir everything together. Add salt to taste. This salsa adds a fresh, sweet flavor that pairs perfectly with the spicy chicken. Now, it’s time to warm the tortillas. In a dry skillet or on a griddle, place the corn tortillas over medium heat. Warm each side for about 30 seconds until they are soft. This makes them easier to fold. Keep the tortillas warm by covering them with a clean kitchen towel. To assemble the tacos, take a warm tortilla and add a generous spoonful of the cooked chicken. Top it with a scoop of the colorful mango salsa. The bright colors make your taco look vibrant and inviting. Finish the tacos with fresh cilantro leaves on top. Serve them right away with lime wedges on the side. This lets everyone add a splash of zesty lime juice. It adds a nice kick to every bite. For more detailed instructions, check the Full Recipe. Look for a mango that feels slightly soft when you press it. A ripe mango has a sweet smell near the stem. Avoid any that have dark spots or wrinkles. The skin color can vary, so focus on feel and smell. A good mango will add a sweet, juicy flavor to your tacos. Use fresh chicken breasts for the best taste. Cut the chicken into small, even pieces. This helps it cook evenly. Always marinate the chicken for at least 15 minutes. This step adds lots of flavor. Cook the chicken until it reaches 165°F. This ensures it is safe to eat. Warm your tortillas in a dry skillet. Heat them for about 30 seconds on each side. This keeps them soft and pliable. Cover the warmed tortillas with a kitchen towel. This helps keep them warm while you assemble your tacos. Soft tortillas make for a better eating experience. Add your favorite toppings for extra flavor. Try sliced radishes for crunch or avocado for creaminess. You can also use different salsas, like pineapple or tomato. Want more heat? Add extra jalapeños or hot sauce. Get creative and make these tacos your own. For the full recipe, check out the Spicy Mango Chicken Tacos section. {{image_4}} You can use different proteins for your tacos. Chicken is great, but shrimp or fish works well too. For a heartier option, try beef or pork. Simply adjust the cooking time based on the protein you choose. Each option brings a unique taste and texture. Mixing spices can also change the flavor profile to fit your preference. For a vegetarian version, replace the chicken with black beans or lentils. Both options are filling and pack a protein punch. You can also use grilled vegetables like zucchini and bell peppers for added flavor. If you want a vegan twist, skip the chicken and add extra mango salsa. This keeps the dish fresh and delicious. Salsa can make or break your tacos. For a classic kick, use jalapeños or serrano peppers. If you prefer it mild, skip the spicy peppers. You can add fruits like pineapple or peach for a sweet twist. Fresh herbs, like cilantro or mint, can brighten your salsa too. Play with different ingredients to find your perfect balance. To store leftover tacos, first, separate the chicken and salsa from the tortillas. Place the chicken and salsa in airtight containers. Store them in the fridge for up to three days. Keep the tortillas in a separate bag. This helps them stay soft and fresh. When you're ready to eat, you can combine all the parts again. To reheat the chicken, place it in a skillet over medium heat. Stir until it is hot all the way through, which should take about 5 minutes. For the salsa, you can serve it cold or at room temperature. Warm the tortillas by placing them in a dry skillet for about 30 seconds on each side. This keeps them soft and tasty. If you want to freeze the tacos, first freeze the chicken and salsa separately. Use freezer-safe bags or containers. You can freeze them for up to three months. When you plan to eat them, thaw the chicken and salsa in the fridge overnight. Reheat the chicken in a skillet and warm the tortillas as mentioned above. Enjoy your easy meal prep! For the full recipe, check out the details above. To make Spicy Mango Chicken Tacos from scratch, start with fresh ingredients. Marinate diced chicken with garlic, cumin, chili powder, olive oil, salt, and pepper. Let it sit for 15 minutes. Cook the chicken in a skillet until browned and cooked through. Prepare the mango salsa by mixing diced mango, red onion, red bell pepper, jalapeño, and lime juice. Warm the corn tortillas in a skillet. Assemble the tacos with chicken and salsa. Enjoy the Full Recipe for all details. These tacos pair well with a fresh salad or corn on the cob. You can also serve them with refried beans or rice for a hearty meal. A side of guacamole or sour cream adds creaminess. Fresh fruit or a light dessert can balance the spice. Yes, you can use different tortillas. Flour tortillas work well if you prefer a softer bite. You may also try whole wheat or spinach tortillas for extra flavor. Just remember to warm them before serving for the best texture. The ingredients in Spicy Mango Chicken Tacos offer many health benefits. Chicken is a great source of lean protein. Mango provides vitamins A and C, plus fiber. Red bell peppers add vitamin C and antioxidants. Jalapeños can boost metabolism and add flavor with fewer calories. Garlic has immune-boosting properties. Together, they create a nutritious and flavorful meal. To make these tacos gluten-free, use corn tortillas. Ensure all spices and ingredients are gluten-free. Check labels on prepared items like sauces or salsas. This way, you can enjoy tasty tacos without gluten. You've learned how to make Spicy Mango Chicken Tacos from scratch. We covered key ingredients, easy steps, and useful tips. Remember, the right mango boosts the taste, while warming tortillas adds comfort. You can switch proteins or customize your salsa for variety. Store leftovers well for later meals, and reheat easily. This taco recipe is fun and tasty, perfect for sharing. Enjoy making these tacos and let your taste buds dance!

Spicy Mango Chicken Tacos Flavorful and Easy Recipe

Craving a burst of flavor in your meals? Look no further! My Spicy Mango Chicken Tacos combine juicy marinated chicken,

Older posts
Newer posts
← Previous Page1 Page2 Page3 Page4 … Page71 Next →

dsad

© 2025 tastyhatch • Built with GeneratePress

Our Policies

  • Copyright Policy
  • Cookie Policy
  • GDPR Policy
  • Privacy Policy
  • Disclaimer
  • Terms Of Use

More Information

  • Home
  • About
  • Contact
  • Appetizers
  • Dessert
  • Dinner
  • Drinks
©2025, tastyhatch About Back To Top