Skip to content
DisclaimerTerms Of UseGDPR PolicyCookie Policy

tastyhatch

  • Home
  • Drinks
  • Appetizers
  • Dinner
  • Dessert
  • About
  • Contact
  • Privacy Policy
DisclaimerTerms Of UseGDPR PolicyCookie Policy

Olivia

To make this tasty dip, you need: - 1 cup fresh spinach, finely chopped - 1 cup canned artichoke hearts, drained and roughly chopped - 1 cup cream cheese, at room temperature - 1/2 cup sour cream - 1/2 cup mayonnaise - 1 cup grated Parmesan cheese, divided - 1/2 cup shredded mozzarella cheese - 2 cloves garlic, finely minced - 1/2 teaspoon onion powder - Salt and freshly ground black pepper to taste - Olive oil for greasing These ingredients blend together to create a creamy and flavorful dip. Each one plays a key role in the taste and texture. The spinach adds a nice green touch, while the artichokes give a unique flavor. You can get creative with your dip! Here are some optional ingredients: - Fresh herbs like parsley or basil for added flavor - Chopped sun-dried tomatoes for a touch of sweetness - A dash of hot sauce for some heat - A squeeze of lemon juice for brightness Feel free to mix and match these options. They can make your dip special and fun! To prepare this dip, gather these kitchen tools: - A mixing bowl - A hand mixer or fork - A baking dish (around 8x8 inches) - A spatula for mixing - A knife and cutting board for chopping Having these tools ready will help you make the dip smoothly. You’ll enjoy every step of the cooking process! For the full recipe, check out the details provided earlier. 1. Preheat your oven to 350°F (175°C). 2. Grease an 8x8-inch baking dish with a little olive oil. 3. In a large bowl, mix the cream cheese, sour cream, and mayonnaise. Use a fork or mixer to make it smooth. 4. Next, add the chopped spinach and artichoke hearts. Fold them in gently. 5. Stir in the minced garlic, half of the Parmesan cheese, and all the mozzarella. 6. Add onion powder, salt, and pepper to taste. Mix well until everything is combined. 1. Transfer the dip mixture into the greased baking dish. Spread it evenly. 2. Place the dish in your preheated oven. Bake for 25-30 minutes. 3. Watch for the dip to become hot and bubbly. The top should turn golden brown. - Use room temperature cream cheese for easy mixing. - Fold ingredients gently to keep the dip fluffy. - Bake until bubbly for a creamy and smooth texture. - Let it cool for 5 minutes before serving to avoid burns. For the complete recipe, refer to the [Full Recipe]. To enhance creaminess, use full-fat cream cheese. Room temperature cream cheese blends easier. Mix it well with sour cream and mayonnaise until smooth. Adding more cheese, like cream or ricotta, also boosts richness. For great flavor, I love using garlic, onion powder, and fresh herbs. Try adding crushed red pepper for a kick. You can also mix in lemon juice for a fresh taste. Adjust salt and pepper to your liking, too. Serve this dip warm for the best taste. Use crispy tortilla chips or toasted baguette slices for dipping. You can also pair it with fresh veggies like carrots and bell peppers. For a nice touch, drizzle with olive oil and sprinkle more Parmesan cheese on top. Enjoy your dip as a fun snack or at parties! Check out the Full Recipe for more details. {{image_4}} You can switch up the flavors of your creamy spinach artichoke dip by using different cheeses. Try adding some gouda or cheddar for extra depth. Creamy brie can also add a rich twist. If you want a stronger flavor, use blue cheese. Mixing cheeses can give your dip a unique touch. Just remember to keep the total amount of cheese around two cups. If you love heat, spice up your dip. Add diced jalapeños or red pepper flakes for a kick. You can also mix in some hot sauce or sriracha to bring the heat. For a smoky flavor, try adding chipotle peppers in adobo sauce. Adjust the amount to your taste. This spicy twist will make your dip stand out at any gathering. You can make a healthier version of this dip without losing flavor. Use Greek yogurt instead of sour cream or mayonnaise. This swap will cut calories and add protein. You can also use low-fat cream cheese for a lighter choice. For a veggie boost, add chopped bell peppers or mushrooms. These changes make a tasty dip that fits your diet. Check out the Full Recipe for more ideas! To keep your dip fresh, let it cool first. Then, place it in an airtight container. Store it in the fridge. It will last for about 3 to 4 days. Make sure to label the container with the date. When you want to eat your leftover dip, preheat your oven to 350°F (175°C). Transfer the dip to an oven-safe dish. Heat it for about 15 to 20 minutes. You want it to be hot and bubbly. Stir halfway through to warm it evenly. If you prefer, you can also microwave it. Use a microwave-safe bowl and heat it in 30-second bursts, stirring in between. You can freeze this dip for later use. Place it in a freezer-safe container. It will last up to 2 months. When ready to use, thaw it in the fridge overnight. Reheat it in the oven as mentioned above. However, freezing may change the texture slightly. To help with this, add a bit of extra cream cheese when reheating. For the full recipe, check out the details provided earlier. Yes, you can prepare this dip ahead of time. Mix all the ingredients and place them in a baking dish. Cover it with plastic wrap and store it in the fridge. You can bake it later. Just remember to bake it straight from the fridge. This gives you a warm, tasty treat when you need it. You have many options for serving. Here are some great ideas: - Tortilla chips - Sliced baguette - Pita chips - Fresh veggies like carrots and celery - Crackers These choices add crunch and flavor. You can mix and match to suit your taste. The dip is ready when it is hot and bubbly. Look for a golden brown top. It usually takes about 25-30 minutes in the oven. You can check it by inserting a knife in the center. If it comes out warm, your dip is done! This blog post covered everything you need to make creamy spinach artichoke dip. We discussed key ingredients, how to add your own twist, and the tools needed. I shared tips for the best texture and flavor. You learned about tasty variations and how to store leftovers. Now, you have all the tools to enjoy this dip. It’s perfect for parties or a cozy night in. Happy cooking!

Creamy Spinach Artichoke Dip Simple and Tasty Snack

If you’re looking for a quick, tasty snack that impresses, you’re in the right place! My Creamy Spinach Artichoke Dip

- 1 cup rolled oats - 1 ½ cups almond milk (or any milk of your preference) - 1 medium apple, diced (choose a sweet variety like Fuji or Honeycrisp for optimal flavor) - 1 teaspoon ground cinnamon - 2 tablespoons maple syrup (adjust according to your sweetness preference) - 1 tablespoon chia seeds - ¼ cup Greek yogurt (optional, for added creaminess) - ¼ teaspoon vanilla extract - A pinch of salt - Chopped nuts (such as walnuts or pecans) for topping (optional) To make apple cinnamon overnight oats, gather these simple ingredients. Rolled oats form the base. They soak up the milk, making them creamy. I prefer almond milk, but you can use any milk you like. Next, choose a sweet apple. Fuji or Honeycrisp apples are my favorites for this recipe. Dice the apple into small pieces. This adds a nice crunch and sweetness. Ground cinnamon gives the oats their warm flavor. Use about one teaspoon for a cozy taste. Maple syrup adds sweetness, but you can adjust the amount based on how sweet you want it. Chia seeds help thicken the mixture and add nutrition. If you want extra creaminess, Greek yogurt is a great choice. Just a little enhances the texture. A touch of vanilla extract adds depth. Finally, a pinch of salt brings all the flavors together. You can top your oats with chopped nuts for added crunch and flavor. This ingredient list is complete and ready for your kitchen. For the full recipe, check out the details above. 1. Mixing all ingredients Start by taking a medium bowl. Add 1 cup of rolled oats and 1 ½ cups of almond milk. Then, toss in 1 medium diced apple, 1 teaspoon of ground cinnamon, and 2 tablespoons of maple syrup. Next, stir in 1 tablespoon of chia seeds, ¼ cup of Greek yogurt, ¼ teaspoon of vanilla extract, and a pinch of salt. Mix everything together well until it looks smooth and creamy. 2. Transferring to jars or containers Once your mixture is ready, grab two jars or airtight containers. Use a spoon to scoop the oat mixture evenly into each jar. Make sure to leave a little space at the top to allow for extra toppings later. 3. Sealing and refrigeration instructions After you fill the jars, seal them tightly. Place the jars in the fridge for at least 4 hours, but overnight is best. This soaking time helps the oats absorb the milk and flavors, making them creamy and delicious. 4. Morning preparation When morning comes, take your jars out of the fridge. Give the oats a good stir. If you like them creamier, add a splash more almond milk. To serve, top your oats with more diced apple, a sprinkle of cinnamon, and some chopped nuts if you want extra crunch. For the full recipe, refer to the Apple Cinnamon Delight Overnight Oats section. Enjoy your tasty breakfast! To get the best texture, you can adjust the liquid. If you like your oats thicker, use less milk. For creamier oats, add a little more milk. Store your oats in the fridge. This keeps them fresh and tasty. Soaking the oats overnight helps them absorb the liquid. It also makes them softer and easier to eat. You can add more spices to boost the flavor. Nutmeg or ginger works well with cinnamon. If you want extra sweetness, try using honey or agave syrup instead of maple syrup. Mixing in proteins can make your oats more filling. Greek yogurt, nut butter, or protein powder are great options. This way, you enjoy a tasty meal that keeps you satisfied longer. For the full recipe, check out the details above. {{image_4}} You can make your apple cinnamon overnight oats even more fun with different fruits. Bananas add a soft texture and sweetness. You can slice them and mix them in. Berries like strawberries or blueberries bring a burst of flavor. They also add a nice color. Seasonal fruits can change the vibe of your oats. For fall, try adding pumpkin puree and a sprinkle of pumpkin spice. It gives a warm, cozy taste. In spring or summer, fresh peaches or cherries can really brighten up your dish. You can mix and match to find your favorite flavor. If you need gluten-free options, choose gluten-free rolled oats. They work just as well as regular oats. Always check the label to be sure. For those who want dairy-free alternatives, almond milk is a great choice. You can also use oat milk or coconut milk for a creamy texture. If you want more protein, consider using dairy-free yogurt made from nuts or soy. These swaps keep your meal tasty and healthy. For the full recipe, you can refer to the Apple Cinnamon Delight Overnight Oats section. To keep your apple cinnamon overnight oats fresh, use airtight containers. Glass jars work great because they are easy to clean and do not stain. You can also use plastic containers if you prefer. Store your oats in the fridge right after you mix them. The oats stay good for about 3 to 5 days. The flavors get better as they sit. Just make sure to check for any odd smells or changes before eating. If you like your oats warm, you can heat them up. The best way is to use the microwave. Just place your oats in a bowl and heat for about 30 seconds. Stir and check the temperature. If they need more heat, microwave in 15-second bursts until warm. You can also add a splash of almond milk to make them creamy again. Serve your oats with extra diced apples or a sprinkle of cinnamon on top. Chopped nuts can add a nice crunch, too. Enjoy your tasty breakfast! You can keep overnight oats in the fridge for up to five days. This allows the flavors to blend well. Just make sure to store them in airtight containers. If you notice any odd smells or changes in texture, it's best to toss them out. Fresh oats will always taste better! Yes, you can freeze overnight oats! They freeze well for up to three months. To freeze, use freezer-safe containers. Just remember to leave some space at the top. This lets them expand as they freeze. When you're ready to eat, thaw them in the fridge overnight. Rolled oats are the best choice for overnight oats. They soak up the liquid nicely and create a creamy texture. Steel-cut oats are too tough and require longer cooking. Instant oats can become mushy and lose their shape. Stick with rolled oats for the best results! This recipe makes two servings. You can double or halve the recipe based on your needs. If you want to meal prep for the week, just multiply the ingredients. This way, you have tasty breakfasts ready to go! For the full recipe, check out the recipe section above. Overnight oats are simple and nutritious. You learned about key ingredients like rolled oats and almond milk. We discussed easy steps for preparation and tips for the best texture. You can explore fun fruit options and dietary substitutes too. Remember, these oats are versatile. Store them well for freshness, and enjoy your tasty breakfast every morning. Now, with these tricks and recipes, you can make overnight oats your new go-to breakfast. It’s time to get creative and find the perfect mix for you!

Apple Cinnamon Overnight Oats Easy and Tasty Recipe

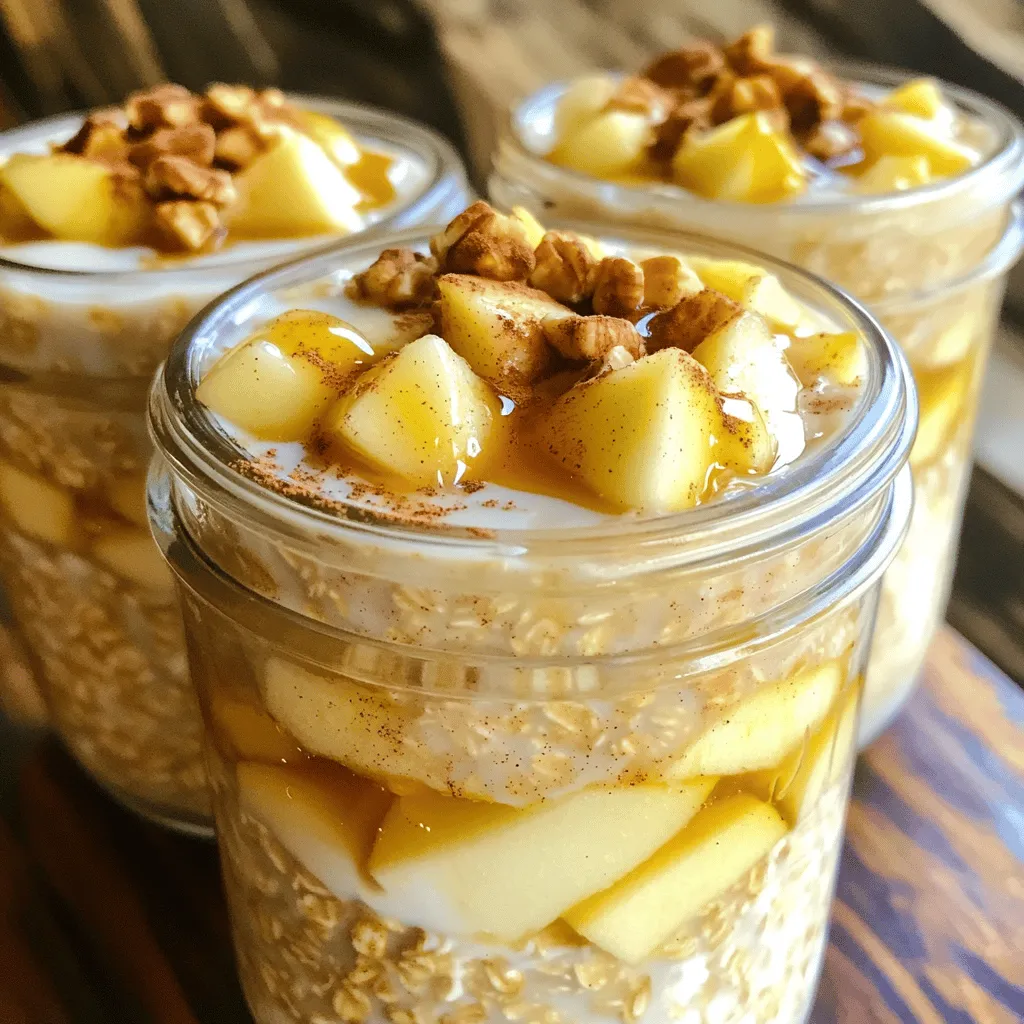
Ready for a delicious and easy breakfast that you can prepare in minutes? Apple Cinnamon Overnight Oats are your answer!

The base of this No-Bake Nutella Cheesecake is simple yet rich. You will need: - 2 cups cream cheese, softened to room temperature - 1 cup Nutella (or any chocolate hazelnut spread) - 1 cup heavy whipping cream Cream cheese gives the cheesecake its creamy and smooth texture. Make sure to use full-fat cream cheese for the best flavor. Nutella adds a rich chocolate hazelnut taste that everyone loves. Using high-quality Nutella will enhance the overall flavor of your cheesecake. The heavy whipping cream is crucial as it helps create a light and airy texture. Whipping it to stiff peaks makes your cheesecake fluffy and delightful. For the crust, you will need: - 1 ½ cups graham cracker crumbs - ½ cup unsalted butter, melted Graham cracker crumbs give a sweet and crunchy base. You can use store-bought crumbs for convenience or crush whole graham crackers at home. Unsalted butter adds richness and helps hold the crust together. If you want a gluten-free option, try using almond flour or gluten-free cookie crumbs. To make your cheesecake look stunning, you can add: - Chocolate shavings - Chopped hazelnuts Chocolate shavings add a beautiful touch and extra chocolate flavor. Chopped hazelnuts give a nice crunch that contrasts well with the creamy cheesecake. You can also use whipped cream or fresh berries as optional toppings to enhance the presentation. These little details make your dessert not only taste great but also look amazing when served. First, gather your graham cracker crumbs and melted butter. In a medium mixing bowl, combine these two. You want to stir until the mix looks like wet sand. This texture helps your crust hold together. Next, transfer the mixture into a 9-inch springform pan. Use your hands to press it down firmly. Ensure the layer is even. Now, place the pan in the refrigerator for about 10 minutes. This helps the crust set and stay in shape. Now, let’s make the filling. In a large bowl, add the softened cream cheese. Beat it with an electric mixer until smooth and creamy. This step is key for a rich cheesecake. Next, mix in the Nutella, powdered sugar, and vanilla extract. Blend until there are no lumps. This will create a velvety filling that tastes amazing. For a light texture, we need to fold in the whipped cream. First, whip your heavy cream in a separate bowl until it forms stiff peaks. This means the cream holds its shape well. Next, gently fold the whipped cream into the Nutella mixture. Use a spatula for this. Be careful not to mix too hard. You want to keep the air in the whipped cream. Fold until just combined. This step makes your cheesecake fluffy and delicious. Now, pour the filling over your chilled crust. Smooth the top with a spatula for a nice finish. Cover it and refrigerate for at least four hours. For the best flavor, let it chill overnight. Enjoy your creamy treat! For the full recipe, check [Full Recipe]. To make your cheesecake light and fluffy, whip the cream well. Use cold heavy cream for the best results. Start on low speed, then increase to high. Whip until you see stiff peaks. This means the cream will hold its shape well. When blending the cream cheese and Nutella, mix gently. Use a hand mixer or stand mixer on low speed. This helps avoid lumps. Scrape the bowl often to ensure everything blends evenly. You want a smooth, creamy mixture. Chilling is key to great flavor. For the best taste, let your cheesecake chill for at least four hours. However, overnight works best. This allows the flavors to meld together. The longer it chills, the better it tastes. Always cover your cheesecake with plastic wrap. This keeps it fresh and prevents it from absorbing odors from the fridge. If your crust is too crumbly, add more melted butter. Mix it well. This helps the crumbs stick together. You can also try pressing the crust more firmly into the pan. If your cheesecake doesn’t set properly, check the amount of heavy cream. It should be whipped to stiff peaks. If it’s too soft, the cheesecake may not hold. You can try placing it back in the fridge for a few hours. If all else fails, serve it as a delicious Nutella sauce over ice cream! For the complete recipe, check the Full Recipe. {{image_4}} You can add fun flavors to your Nutella cheesecake. Try mixing in a teaspoon of espresso powder for a mocha twist. You can also add a splash of orange zest for a bright citrus note. If you love peanut butter, swap out some Nutella for your favorite nut butter. Almond or cashew butter works great. Seasonal fruits and spices can give your cheesecake a fresh twist. For summer, fold in fresh strawberries or raspberries. In fall, add a pinch of cinnamon or pumpkin spice for warmth. For winter holidays, consider mixing in crushed peppermint or using eggnog flavoring. These options can elevate the cheesecake to match the season. You can make this cheesecake fit various diets. For a gluten-free crust, use almond flour or gluten-free graham crackers. If you need a dairy-free option, substitute cream cheese with a non-dairy cream cheese. Cashew cream is a great alternative. These adjustments let everyone enjoy a slice of this rich and creamy delight! To keep your no-bake Nutella cheesecake fresh, refrigerate it right away. Wrap it tightly in plastic wrap. You can also use an airtight container. This helps prevent it from drying out and absorbing other smells in your fridge. If you want to freeze your cheesecake, here’s how to do it right: 1. First, let the cheesecake chill in the fridge for 4 hours. 2. Once it’s firm, remove it from the springform pan. 3. Wrap the cheesecake in plastic wrap, then in aluminum foil. 4. Label the foil with the date. 5. Place it in the freezer. To thaw, move the cheesecake to the fridge for several hours or overnight. This keeps it creamy and tasty when served later. In the fridge, your cheesecake lasts about 5 days. If you freeze it, it can last for up to 2 months. Before you eat it, check for signs of spoilage. Look for changes in color or smell. If it smells off or looks strange, it’s best to throw it away. Enjoy your delicious cheesecake safely! Yes, you can make this cheesecake ahead of time. I suggest preparing it up to two days before you plan to serve it. This allows the flavors to blend beautifully. Just cover it tightly with plastic wrap and store it in the fridge. If you want a change from Nutella, you have options. You can try other chocolate hazelnut spreads, like Justin’s or Nutiva. For a homemade version, combine equal parts of creamy peanut butter and cocoa powder. You can also use almond butter mixed with cocoa for a nutty twist. To check if your cheesecake is set, gently shake the pan. If the center wobbles just a bit, it’s perfect. Refrigerate it longer if it still looks too loose. You want a firm texture, but not too hard. Enjoy the anticipation of waiting for this rich and creamy delight! This no-bake Nutella cheesecake is simple and fun to make. We started with high-quality ingredients like cream cheese, Nutella, and whipping cream. Then, we crafted a tasty crust and explored tips for the perfect texture. You can also customize your cheesecake with flavors or dietary options. Remember to chill it overnight for the best taste. Follow these steps for a delicious treat. Now, get ready to impress friends and family with your amazing cheesecake!

No-Bake Nutella Cheesecake Rich and Creamy Delight

Indulge your sweet tooth with a No-Bake Nutella Cheesecake that’s rich and creamy! In this post, I’ll guide you through

For a perfect Lemon Garlic Herb Grilled Chicken, gather these simple ingredients: - 4 boneless, skinless chicken breasts - 3 tablespoons extra-virgin olive oil - Juice and zest of 2 fresh lemons - 4 cloves of garlic, finely minced - 1 tablespoon fresh rosemary, finely chopped - 1 tablespoon fresh thyme, finely chopped - 1 tablespoon fresh parsley, finely chopped - Salt and freshly ground black pepper to taste These ingredients work together to bring out bright and fresh flavors. The chicken breasts serve as a blank canvas. The olive oil ensures moisture and helps the herbs stick. Lemon juice adds zing, while lemon zest enhances that citrus note. Garlic gives warmth and depth. Herbs like rosemary, thyme, and parsley add layers of flavor. Each herb brings its own unique touch, making the dish aromatic and inviting. Salt and pepper are essential for seasoning, elevating the overall taste. For the full recipe, check out the complete guide. With these ingredients, you are ready to create a delightful meal that impresses. Happy cooking! To start, gather your ingredients. You will need olive oil, lemon juice, lemon zest, garlic, and herbs. In a medium bowl, mix 3 tablespoons of olive oil with the juice and zest of 2 fresh lemons. Add 4 minced garlic cloves, 1 tablespoon each of chopped rosemary, thyme, and parsley. Season with salt and pepper. Use a whisk to blend until smooth. This marinade will give your chicken a great taste. Now, it's time to marinate the chicken. Take 4 boneless, skinless chicken breasts and place them in a large resealable bag or a shallow dish. Pour the marinade over the chicken. Make sure each piece gets a good coating. Seal the bag tightly or cover the dish with plastic wrap. Let the chicken sit in the fridge for at least 30 minutes. For best flavor, marinate for up to 2 hours. This process allows the chicken to soak in all those tasty flavors. Next, preheat your grill to medium-high heat. This step is vital for cooking the chicken evenly. After marinating, carefully remove the chicken from the bag, letting any extra marinade drip off. Discard the leftover marinade to keep things safe. Place the chicken on the grill and cook for about 6 to 7 minutes on each side. Look for nice grill marks and check that the internal temperature reaches 165°F (75°C). Once done, transfer the chicken to a plate. Let it rest for 5 minutes before slicing. This resting time helps keep the chicken juicy. For the full recipe, refer back to the ingredients and instructions above. To get the best flavor from your Lemon Garlic Herb Grilled Chicken, start with fresh ingredients. Use fresh lemons and herbs like rosemary, thyme, and parsley. Fresh garlic adds a strong punch, too. Marinate the chicken for at least 30 minutes. For even more flavor, let it sit for up to 2 hours. This time allows the chicken to absorb all those tasty herbs and lemon juice. For perfect grill marks, preheat your grill to medium-high heat. Make sure it’s hot before you add the chicken. Place the chicken breasts on the grill and don’t move them around too much. Let them cook for 6-7 minutes on one side before flipping. This will help create those beautiful grill lines. If you want deeper marks, turn the chicken 90 degrees halfway through cooking. After grilling, always let the chicken rest for about 5 minutes. This helps the juices stay inside the meat. If you cut it right away, the juices will run out. When serving, place the chicken on a nice platter. You can garnish it with lemon slices and extra herbs for a fresh look. This chicken goes well with grilled veggies or a crisp salad for a nice meal. For the complete recipe, check the Full Recipe section. {{image_4}} You can change the flavor of your Lemon Garlic Herb Grilled Chicken easily. Try adding different herbs like basil or cilantro. A splash of soy sauce can give it an Asian twist. For a spicy kick, add red pepper flakes or a dash of hot sauce. You can even use yogurt instead of oil for a tangy twist. Each change will bring out new tastes in your chicken. This grilled chicken tastes great with many sides. Fresh grilled veggies like zucchini and bell peppers fit perfectly. A light salad with lemon vinaigrette adds a nice crunch. You can also serve it with rice or quinoa for a filling meal. For a fun twist, make a chicken sandwich with the grilled meat and some fresh toppings. Don’t forget to drizzle some extra lemon juice before serving! If you don’t have a grill, don’t worry! You can cook this chicken in a grill pan on the stove. Just heat the pan over medium-high heat and follow the same cooking time. Another option is baking the chicken in the oven. Set it to 400°F (200°C) and bake for about 20-25 minutes. The chicken will still be juicy and full of flavor. For a smoky taste, you can also use a smoker. Each method gives you a unique result while keeping the chicken delicious. For the full recipe, check out the details above! After cooking, let your Lemon Garlic Herb Grilled Chicken cool down. Once cooled, store it in an airtight container. Make sure to refrigerate within two hours. Properly stored, it lasts up to four days in the fridge. This helps keep the chicken juicy and flavorful. If you want to keep it longer, freezing is a great option. Wrap the chicken tightly in plastic wrap, then place it in a freezer-safe bag. Remove as much air as possible to prevent freezer burn. This chicken can be frozen for up to three months. To use, thaw it overnight in the fridge. To reheat, preheat your oven to 350°F (175°C). Place the chicken in a baking dish and cover it with foil. Heat for about 15-20 minutes, or until warmed through. You can also reheat it in a skillet over medium heat. Add a splash of water or broth to keep it moist. Enjoy your flavorful delight, even on the second day! For the full recipe, check out the details above. For the best flavor, marinate chicken for at least 30 minutes. However, I recommend marinating it for up to 2 hours. This time allows the chicken to soak up the zesty flavors from the lemon and herbs. If you have more time, even longer can enhance the taste. Yes, you can use bone-in chicken for this recipe. Bone-in pieces add flavor and moisture. Just ensure you adjust the cooking time. Bone-in chicken may take longer to cook, about 10 minutes more per side. Always check for an internal temperature of 165°F (75°C) to ensure it's safe to eat. Great side dishes for Lemon Garlic Herb Grilled Chicken include: - Grilled vegetables like zucchini and bell peppers - A crisp garden salad with a light vinaigrette - Garlic mashed potatoes for a comforting touch - Quinoa or rice with herbs for a hearty option These sides complement the bright flavors of the chicken and elevate your meal. For the complete recipe, check out the Full Recipe section. We explored the easy process of making Lemon Garlic Herb Grilled Chicken. Start with fresh chicken breasts and a tasty marinade. Marinating the chicken helps enhance flavor. Grilling gives it great marks and a smoky taste. Remember, you can modify the marinade for variety. Store leftovers safely in the fridge or freezer for later. Stay confident in your grilling skills and impress anyone at your next meal. Enjoy your delicious chicken!

Lemon Garlic Herb Grilled Chicken Flavorful Delight

Ready to take your grilling game to the next level? This Lemon Garlic Herb Grilled Chicken recipe delivers bold flavors

- 2 cups cooked rice (white or brown) - 4 cups fresh broccoli florets - 1 cup shredded sharp cheddar cheese - 1 cup cream of mushroom soup (store-bought or homemade) - 1/2 cup milk - 1/2 cup onion, finely chopped - 2 cloves garlic, minced - 1/2 teaspoon salt - 1/2 teaspoon black pepper - 1/4 teaspoon paprika - 1 cup breadcrumbs (to create a crunchy topping) - 2 tablespoons olive oil (to coat the breadcrumbs) This dish is all about using fresh and simple ingredients. Start with cooked rice, which serves as the base. Broccoli adds a bright color and crunch. The sharp cheddar cheese gives us that rich, creamy flavor we love. You can use store-bought cream of mushroom soup, or make your own if you have the time. Milk helps to blend everything nicely, while onion and garlic add depth. Don't forget the seasonings! Salt and black pepper are must-haves. A little paprika adds a nice touch of warmth. The breadcrumbs on top create a lovely crunch and pair well with olive oil to help them brown. You can find the full recipe for this dish to guide you through the cooking process. Start by preheating your oven to 350°F (175°C). This step is key for even baking. A hot oven helps the casserole cook through. If the oven is not hot, the dish may bake unevenly. Bring a small pot of water to a boil. Place fresh broccoli florets in a steamer basket above the boiling water. Cover the pot with a lid. Steam the broccoli for about 5 minutes. This keeps them bright green and tender. Drain the broccoli and set it aside. In a large mixing bowl, add the cooked rice, steamed broccoli, shredded cheddar cheese, cream of mushroom soup, milk, chopped onion, minced garlic, salt, black pepper, and paprika. Mix all the ingredients well. This ensures that every bite is full of flavor. Grease a 9x13-inch casserole dish with non-stick spray or a bit of olive oil. Carefully pour the mixture into the dish. Spread it out evenly with a spatula. This helps the casserole cook evenly and makes it easier to serve. In a small bowl, mix the breadcrumbs with the olive oil. Stir until all the breadcrumbs are coated. This coating creates a nice crunchy texture on top. Sprinkle this mixture evenly over the casserole for the best results. Place the casserole in the preheated oven. Bake for 25-30 minutes. Check for doneness by looking for a bubbly filling and a golden brown topping. The dish should be hot throughout. For the full recipe, check out the details provided above. Enjoy this cheesy, comforting dish! Using fresh ingredients makes a big difference in taste. Fresh broccoli has a bright, crisp flavor. If you must use frozen, thaw it first. This helps keep it from becoming mushy. Fresh garlic and onion add depth too. You can substitute dried garlic or onion powder, but fresh is best. To make this casserole extra cheesy, mix different types of cheese. Sharp cheddar is great, but try adding mozzarella for stretch or gouda for a smoky flavor. Layer your cheese at the top and in the middle for a cheesy experience in every bite. You can even sprinkle some cheese on before baking for that gooey top. Every oven cooks differently. Keep an eye on your casserole the first time you make it. If your oven runs hot, check it a few minutes early. You want it bubbly and golden brown. If it’s not quite there after 30 minutes, give it a few more minutes. Cooking times can vary, so adjust as needed. For the full recipe, check out the main article. {{image_4}} You can make this dish fit your needs. For a gluten-free option, use gluten-free breadcrumbs. You can swap the cream of mushroom soup for a gluten-free version too. If you want a vegan casserole, replace cheese with a plant-based cheese. Use a vegan soup and dairy-free milk. For a low-calorie version, reduce the amount of cheese and use less cream of mushroom soup. You can boost the flavor easily. Try adding fresh herbs like thyme or basil. These herbs give a nice depth. You can also sprinkle in some garlic powder for extra kick. A touch of cayenne pepper adds heat, while lemon zest gives brightness. This casserole pairs well with many proteins. Serve it alongside grilled chicken or baked fish. It also tastes great with a simple salad. You can add roasted vegetables for more color and nutrition. For a heartier meal, serve it with meatloaf or steak. Each bite will satisfy your family. Once you finish your Cheesy Broccoli Rice Casserole, let it cool. Then, place it in airtight containers. This keeps the dish fresh and tasty. Store it in the fridge for up to three days. If you want to save it longer, consider freezing. To reheat, you can use the oven or microwave. The oven gives the best results. Preheat it to 350°F (175°C). Cover the casserole with foil to keep it moist. Bake for about 20 minutes or until hot. If you use a microwave, heat in short bursts. Stir in between to avoid cold spots. To freeze, let the casserole cool completely first. Then, wrap it tightly in plastic wrap and foil. This helps prevent freezer burn. It can last up to three months in the freezer. When ready to eat, thaw it overnight in the fridge. Reheat it in the oven for the best flavor and texture. For more details, check the full recipe. To make this dish vegan, you can swap out a few key ingredients. Here are some easy substitutions: - Use cooked quinoa or cauliflower rice instead of regular rice. - Replace the cheddar cheese with a vegan cheese or nutritional yeast for flavor. - Choose a plant-based cream soup, like mushroom or cashew cream. - Use almond milk or oat milk in place of regular milk. These swaps keep the dish creamy and tasty, while remaining vegan-friendly. Yes, you can use frozen broccoli! Here are some pros and cons to consider: - Pros: Frozen broccoli is quick and easy. It is often picked and frozen at peak freshness, so it can be just as nutritious as fresh. - Cons: Frozen broccoli can be more watery than fresh. This may make your casserole a bit soggier. To fix this, you can thaw and drain the broccoli before adding it. Using frozen broccoli is a great time-saver, especially on busy nights. Leftovers can be stored safely in the fridge for about 3 to 4 days. Here are some tips for safe storage: - Place leftovers in an airtight container to keep them fresh. - Label the container with the date so you know when to use it. - Reheat in the oven or microwave until hot throughout. If you want to keep leftovers longer, consider freezing them. They can last up to 3 months in the freezer. This blog covered how to make a Cheesy Broccoli Rice Casserole. We talked about key ingredients, like cooked rice and fresh broccoli, and handy tips for flavor and texture. You learned step-by-step instructions for a perfect bake. For the best results, use fresh ingredients and explore tasty variations. Storing leftovers safely is key for later enjoyment. Enjoy this dish as a satisfying meal that can fit different diets. Happy cooking and enjoy sharing your creation!

Cheesy Broccoli Rice Casserole Easy Family Favorite

Looking for a delicious dinner idea that will please the whole family? Try my Cheesy Broccoli Rice Casserole! It’s creamy,

- 1 cup quinoa - 2 cups vegetable broth or water - 1 cup cherry tomatoes, halved - 1 cucumber, diced - 1 bell pepper, diced - 1/2 medium red onion, finely chopped - 1 cup cooked chickpeas - 1/2 cup Kalamata olives, sliced - 1/4 cup fresh parsley, chopped - 1/4 cup fresh mint, chopped - 1/4 cup extra virgin olive oil - Juice of 1 lemon - 1 teaspoon dried oregano - Salt and black pepper to taste - 1/2 cup feta cheese, crumbled - Additional veggies like zucchini or carrots Health Benefits of Quinoa Quinoa is a superfood. It is full of protein, fiber, and vitamins. This grain helps build strong muscles and keeps you full. Quinoa is also gluten-free, making it great for many diets. Benefits of Fresh Vegetables Fresh veggies add color and crunch. They are packed with vitamins and minerals. Eating a mix of vegetables helps your body stay healthy and strong. Each bite brings a burst of flavor and nutrients, making the salad not only tasty but also good for you. For the full recipe, check out Mediterranean Quinoa Delight. Rinsing the Quinoa Start by rinsing the quinoa. Place it in a fine-mesh strainer. Run cold water over it for about 1-2 minutes. This step removes any bitter taste from the quinoa. It is important to rinse well. Cooking Process Next, bring 2 cups of vegetable broth or water to a boil in a medium saucepan. Once boiling, add 1 cup of rinsed quinoa. Cover the pot and reduce the heat to low. Let it simmer for about 15 minutes. When the liquid is gone, remove it from the heat. Let it sit for 5 more minutes, covered. Then, fluff the quinoa with a fork and let it cool. Cutting and Mixing Vegetables While the quinoa cools, chop your vegetables. Dice 1 cucumber and 1 bell pepper. Halve 1 cup of cherry tomatoes and finely chop 1/2 of a red onion. Drain and rinse 1 cup of chickpeas. Slice 1/2 cup of Kalamata olives. Add all these veggies to a large mixing bowl. Combining with Quinoa Once the quinoa cools down, add it to the bowl with the chopped vegetables. Fluff the quinoa with a fork as you mix it in. This helps to mix everything evenly and adds texture. Whisking the Dressing In a small bowl, whisk together 1/4 cup of extra virgin olive oil, juice of 1 lemon, 1 teaspoon of dried oregano, and a pinch of salt and pepper. This dressing adds flavor and ties the salad together. Tossing Ingredients Together Drizzle the dressing over the quinoa and veggie mixture. Gently toss everything to coat the ingredients well. Taste the salad and adjust the seasoning as needed. Allow the salad to rest for at least 20 minutes. This lets the flavors blend. For the best taste, chill the salad for a few hours before serving. You can find the Full Recipe for more details. Ingredient Substitutions You can swap quinoa with farro or bulgur for a different texture. For a crunchier bite, add nuts like almonds or walnuts. If you want more color, try adding shredded carrots or radishes. Instead of chickpeas, use black beans for a unique taste. Flavor Enhancements Boost the flavor by adding capers or sun-dried tomatoes. For a spicy kick, add a pinch of red pepper flakes to the dressing. You can also mix in some fresh basil or dill for a herby touch. Presentation Ideas Serve your salad in a large bowl for a family-style meal. Use individual plates to make it look fancy. Add a sprinkle of extra herbs or a lemon wedge for a bright touch. Pairing with Other Dishes This salad goes well with grilled chicken or fish. It also pairs nicely with pita bread and hummus for a complete meal. For a light lunch, serve it with a side of yogurt. Marinating Tips Let the salad sit for about 20 minutes before serving. This waiting time helps the flavors blend well. For the best taste, let it rest longer, even a few hours. Refrigeration Recommendations Store leftover salad in the fridge for up to three days. Keep it in an airtight container to stay fresh. Just give it a good stir before eating again. If it seems dry, add a splash of olive oil or lemon juice. Remember to check out the Full Recipe for detailed steps! {{image_4}} For a vegan twist, you can remove the feta cheese. This keeps the dish light and fresh. Instead, I love adding tofu or avocado. Tofu adds protein and creaminess. Avocado gives a rich texture and healthy fats. You can make this salad unique by using regional ingredients. Try adding sun-dried tomatoes or artichokes for a taste of Italy. You could also include roasted red peppers for a hint of sweetness. Incorporating different herbs can enhance the flavor too. Basil or dill can bring a nice touch to your salad. In summer, use fresh veggies like bell peppers and cucumbers. They add crunch and bright colors. For winter, root vegetables work great. Try diced carrots or roasted sweet potatoes. These will add warmth and heartiness to your dish. You can find the full recipe for Mediterranean Quinoa Delight to get started! To keep your Mediterranean quinoa salad fresh, store it in an airtight container. Place it in the refrigerator. It can last for up to three days. For longer storage, consider freezing it. However, the texture may change when thawed. If you choose to freeze, use a freezer-safe bag. Remove as much air as possible. When reheating, I recommend using the stovetop or microwave. Gently warm it on low heat. Stir occasionally to keep it moist. You can serve this salad cold or warm. Cold is refreshing, while warm enhances the flavors. To check if your salad is still good, smell it first. If it smells off, it’s best to toss it. Check for any mold or unusual texture. If you see any, do not eat it. To avoid waste, only make what you will eat in a few days. To make this salad vegan, you can skip the feta cheese. Instead, use a dairy-free cheese or leave it out altogether. You can add extra chickpeas for protein. This keeps the salad tasty and filling without any animal products. Yes, you can make this salad ahead of time. Store it in the fridge for up to three days. This salad tastes even better after the flavors mix together. Just make sure to keep the dressing separate if you want the salad to stay fresh. You can try different dressings for new flavors. A balsamic vinaigrette adds sweetness. A tahini dressing gives a creamy texture. You can even use a spicy dressing for a kick. Feel free to explore what you like best. Yes, you can use other grains like farro, barley, or brown rice. Each grain will give a different taste and texture. Cook them like you would cook quinoa. Just remember to adjust cooking times as needed. In this post, we explored the components of a delicious quinoa salad. We covered ingredients like quinoa, fresh veggies, and dressings. You learned step-by-step how to prepare, mix, and customize your salad easily. Tips for storing and variations catered to your preferences add great flexibility. In closing, quinoa salads are fresh, nutritious, and versatile. Enjoy creating your perfect dish!

Mediterranean Quinoa Salad Tasty and Nutritious Dish

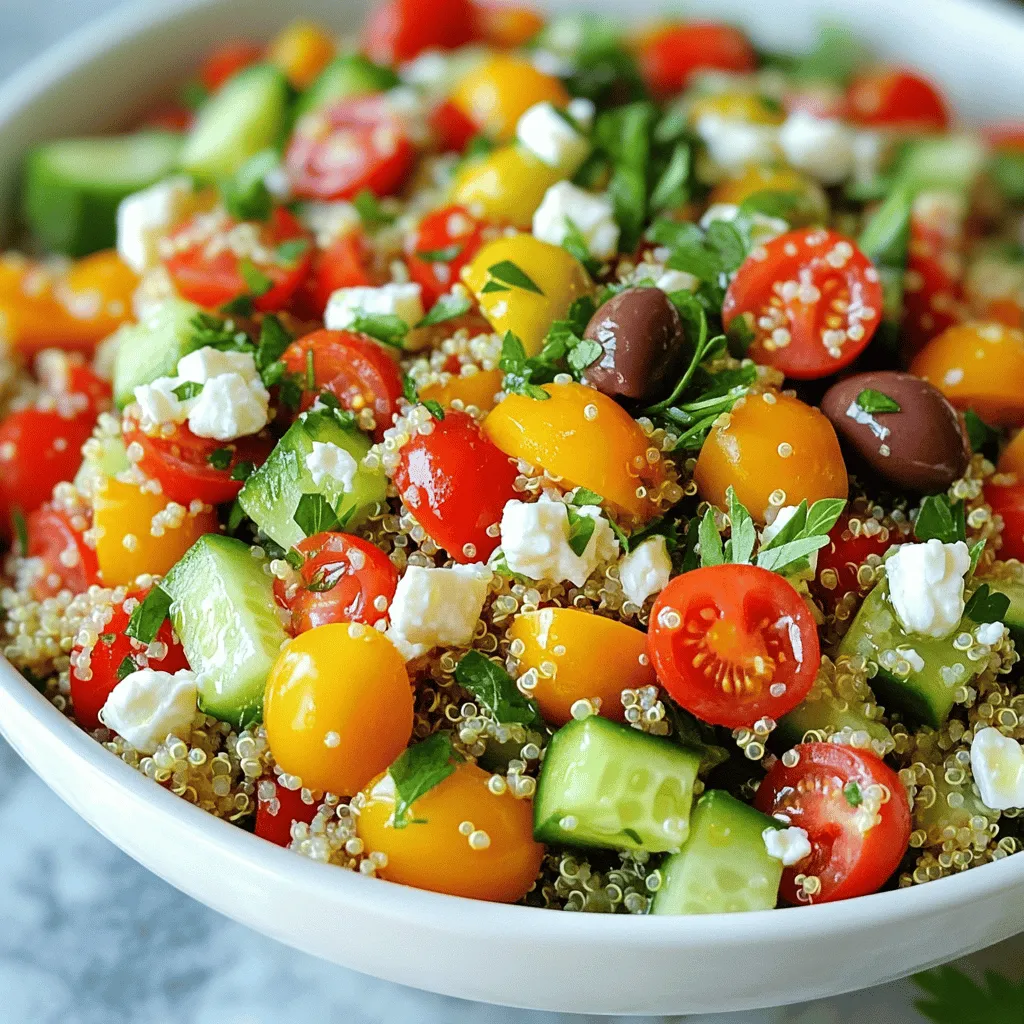
Are you ready for a dish that bursts with flavor and packs a nutritional punch? This Mediterranean Quinoa Salad is

For a tasty Instant Pot vegetable soup, you need simple, fresh, and pantry ingredients. This recipe is quick, easy, and healthy. You can find the full recipe below. - 1 medium onion, diced - 2 cloves garlic, finely minced - 2 medium carrots, sliced into rounds - 2 celery stalks, sliced - 1 bell pepper, diced (your choice of color) - 1 medium zucchini, diced - 1 cup green beans, cut into 1-inch pieces - 2 cups fresh spinach, roughly chopped - 1 tablespoon olive oil - 1 can (14.5 oz) diced tomatoes with their juices - 4 cups vegetable broth - 1 teaspoon dried oregano - 1 teaspoon dried thyme - 1 bay leaf - Salt and black pepper to taste - 1 cup frozen peas This selection of fresh and pantry ingredients makes a soup that warms the soul. Each item adds flavor and texture, making your meal both nourishing and satisfying. Start with the Instant Pot. Turn it on and select the Sauté mode. Add one tablespoon of olive oil. Wait for the oil to shimmer. Then, add one medium onion that you diced. Next, introduce two cloves of finely minced garlic. Cook these for about 3 to 4 minutes. You want the onion to become clear and smell good. Now, it’s time to add some color! Add two medium carrots sliced into rounds. Then, put in two celery stalks sliced. Next, add one diced bell pepper—any color you like. Follow with one diced medium zucchini and one cup of green beans cut into 1-inch pieces. Sauté these for another 3 to 4 minutes. Stir them gently until they start to soften. Pour in one can of diced tomatoes with their juices. Then, add four cups of vegetable broth. Sprinkle in one teaspoon each of dried oregano and dried thyme. Toss in one bay leaf and season with salt and black pepper. Stir all the ingredients well so they mix nicely. Secure the lid on the Instant Pot. Make sure the valve is set to Sealing. Select the Manual or Pressure Cook setting and set the timer for 8 minutes. Once the cycle is complete, carefully switch the valve to Venting. This lets out the steam. After the steam is gone, unlock and remove the lid. Stir in one cup of frozen peas and two cups of roughly chopped fresh spinach. The heat will wilt the spinach and warm the peas. Taste your soup and add more seasoning if you want. You can find the full recipe for this hearty dish above. Enjoy your nutritious Instant Pot Vegetable Soup! To prevent burn notices in your Instant Pot, always add enough liquid. The vegetable broth in this soup is key. If you notice some veggies stuck to the bottom, give it a good stir. Also, try to layer your ingredients properly. Place the broth at the bottom, then add the veggies, and finally the tomatoes. This method helps keep the soup from burning. Everyone has their own taste. After cooking, taste your soup. You might want more salt or pepper. Fresh herbs can also add flavor. Try adding a squeeze of lemon juice for extra brightness. If you like heat, a pinch of red pepper flakes can spice things up. Don't be afraid to experiment until it tastes right for you. You can swap ingredients based on what you have. Don’t have zucchini? Use yellow squash instead. No green beans? Peas work too! If you want a heartier soup, add cooked lentils or beans. Just remember, cooking times may change. Check your ingredients to keep the soup balanced. Always follow the Full Recipe for guidance, but feel free to make it your own! {{image_4}} You can easily add protein to your vegetable soup. This makes it heartier and more filling. Try adding cooked chicken, turkey, or even beans. If you want a vegetarian option, chickpeas work great. Simply stir them in after the soup cooks. This way, the protein blends well with the flavors. If you prefer a dairy-free or vegan soup, it's simple to adjust. Skip the cheese topping, and use a plant-based broth. Coconut milk is a fun swap for a creamy texture. It gives a nice sweetness too. You can also add nutritional yeast for a cheesy flavor without dairy. Experimenting with flavors can lead to new favorites. Add spices like cumin or smoked paprika for warmth. Fresh herbs like basil or cilantro can brighten the soup. A splash of lemon juice adds a zesty kick. Don't be afraid to play around with different vegetables too. Try using sweet potatoes or kale for a twist. Each change can make the soup feel new and exciting. For the full recipe, check out the Hearty Instant Pot Vegetable Soup. I love making a big batch of Instant Pot Vegetable Soup. It keeps well in the fridge. Store the soup in an airtight container. It lasts for about 4 to 5 days. Always let it cool before sealing. This helps keep the flavors fresh. If you want to save some for later, freezing is great. Use freezer-safe containers or bags. Make sure to leave some space for expansion. The soup stays good for about 2 to 3 months in the freezer. To thaw, move it to the fridge overnight or use the microwave. Reheating is easy! You can use the stove or microwave. If using the stove, heat it in a pot over low to medium heat. Stir often to avoid sticking. If using the microwave, heat in short bursts, stirring in between. Always check the temperature before serving. You can add a splash of broth if it gets too thick. Enjoy your warm, comforting bowl of soup! For the full recipe, check out the details above. Cooking Instant Pot vegetable soup takes about 30 minutes in total. This includes prep and cooking time. You will spend around 10 minutes preparing ingredients. The actual pressure cooking lasts 8 minutes. After that, you will need a few minutes for the pressure to release. Yes, you can use frozen vegetables in this soup. Frozen veggies save time and still taste great. Just add them in during the last step, like the recipe shows. The heat from the soup warms them up nicely. The soup will still be full of flavor and nutrition. You can add many spices to boost the flavor. Consider using cumin for warmth or smoked paprika for a smoky taste. You might try a pinch of red pepper flakes for heat. Fresh herbs, like basil or cilantro, also add a wonderful touch. Feel free to mix and match spices to find your favorite blend. In this blog post, we explored how to make a great Instant Pot Vegetable Soup. We covered the key ingredients, step-by-step instructions, and helpful tips to avoid burn notices. You learned how to store the soup and explore different variations. Now, you can create a tasty dish that fits your taste. Enjoy experimenting with your ingredients and flavors. Happy cooking and savor each bite!

Instant Pot Vegetable Soup Simple and Nourishing Meal

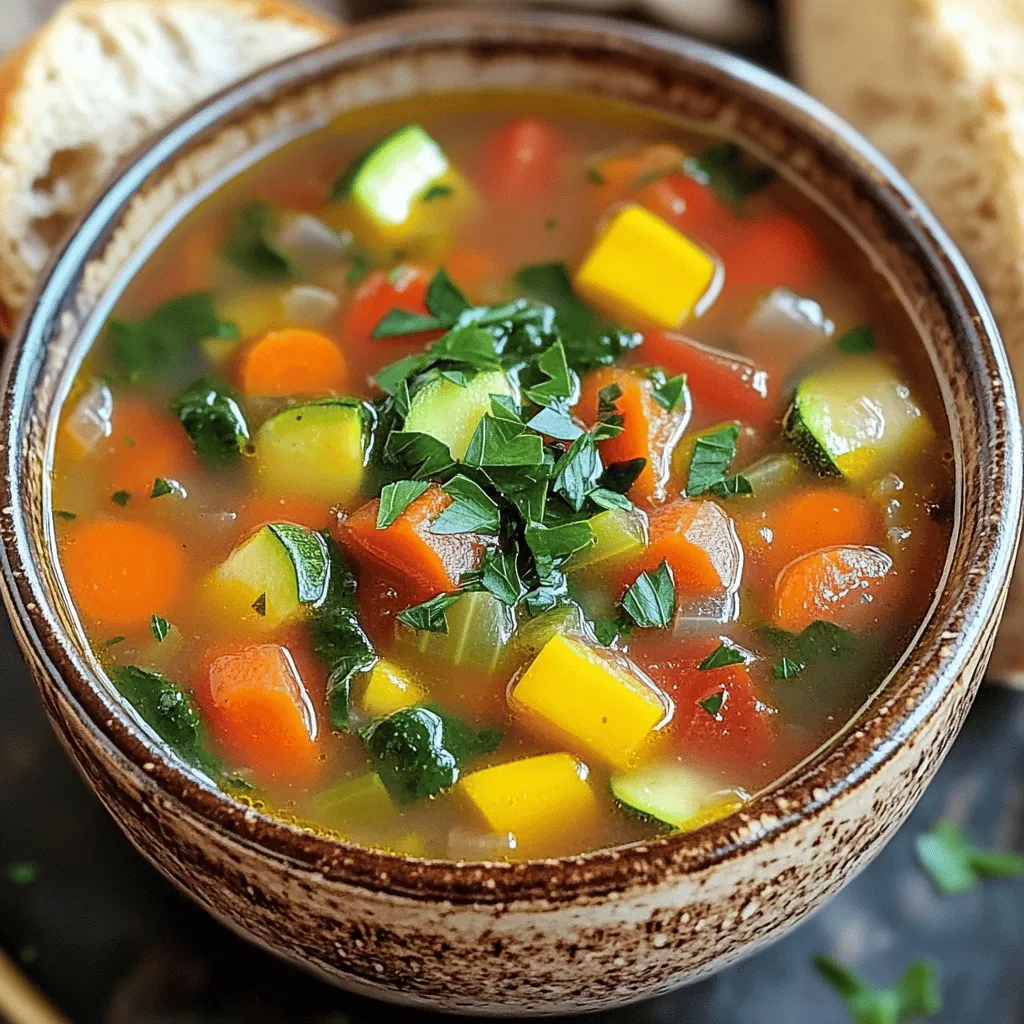
Looking for a quick and healthy dinner idea? This Instant Pot Vegetable Soup is your answer! Packed with fresh veggies

- 1 cup quinoa, thoroughly rinsed and drained - 2 cups vegetable broth - 1 can (15 oz) black beans, rinsed and drained - 1 cup corn (fresh or frozen) - 1 red bell pepper, diced into small pieces - 1 small red onion, finely chopped - 1 ripe avocado, diced - 1 cup cherry tomatoes, halved - 1 cup shredded lettuce (any preferred variety) - 1 teaspoon ground cumin - 1 teaspoon smoked paprika - 1 teaspoon chili powder - 2 tablespoons extra virgin olive oil - Salt and black pepper to taste - Fresh cilantro, for garnish - Lime wedges, for serving When I make vegan taco salad bowls, I focus on fresh, vibrant ingredients. Quinoa is my choice for a hearty base. It adds protein and a nutty flavor. Black beans and corn provide a lovely sweetness and texture. For the veggies, I love using a mix of colors. The red bell pepper adds crunch, while the cherry tomatoes bring juiciness. Red onions give a nice bite. Avocado adds creaminess, making the salad rich. Spices like cumin, smoked paprika, and chili powder are key. They awaken the dish with warmth and depth. I use olive oil to bring it all together and to enhance the flavors. Don’t forget salt and pepper; they are essential for balance. For a finishing touch, I sprinkle fresh cilantro on top. Lime wedges on the side allow for a fresh squeeze right before eating. This adds a bright zing to every bite. When you gather all these ingredients, you set the stage for a delicious meal. Check out the Full Recipe to bring these flavors to your table! To cook the quinoa, start by combining it with vegetable broth. This adds a nice flavor to the grain. Use a medium saucepan for this step. - Measure 1 cup of quinoa and rinse it well under cold water. - Add the rinsed quinoa to the saucepan along with 2 cups of vegetable broth. Bring the mixture to a boil over medium-high heat. Once it starts to boil, reduce the heat to low. - Cover the pot and let it simmer for about 15 minutes. - When the liquid is gone, remove it from heat and let it cool. This ensures your quinoa will be fluffy and tender. While the quinoa cooks, you can make the dressing. It’s quick and easy, and it adds a burst of flavor to your salad. - For the dressing, gather these ingredients: - 2 tablespoons extra virgin olive oil - 1 teaspoon ground cumin - 1 teaspoon smoked paprika - 1 teaspoon chili powder - Salt and black pepper to taste In a small bowl, mix all these ingredients. Use a whisk to blend them well. - This helps the oil and spices mix together smoothly. Set the dressing aside until you are ready to assemble your salad bowls. Now it’s time to put everything together. This part is fun and lets you get creative! - Start with the cooked quinoa as your base. Use about 1/2 cup per bowl. - Next, layer the colorful bean and veggie mixture on top. For the bean mixture, combine the following in a large bowl: - 1 can black beans, rinsed and drained - 1 cup corn (fresh or frozen) - 1 red bell pepper, diced - 1 small red onion, chopped - 1 cup cherry tomatoes, halved - Drizzle the dressing over the mixture and toss gently. After that, add a generous portion of diced avocado and shredded lettuce. - Aim for about 1/4 cup of each topping. Finish with a sprinkle of fresh cilantro. Serve with lime wedges on the side for extra zest. To make your bowls look great, use brightly colored dishes. Arrange each layer nicely, showing off all the ingredients. This makes the salad not only tasty but also a feast for the eyes! For the full recipe, check out the link provided. To cook quinoa correctly, rinse it well. This removes bitterness. Use two cups of vegetable broth for every cup of quinoa. Boil first, then lower to a simmer. Cook it for about 15 minutes until fluffy. Let it cool to keep the texture light. When it comes to spices, balance is key. Start with one teaspoon of cumin, smoked paprika, and chili powder. Taste as you mix. Adjust spices to your liking. If you want more heat, add a pinch of cayenne pepper. For milder flavor, reduce chili powder. The goal is to make it your own. Using colorful bowls makes the meal pop. Bright bowls highlight the vibrant ingredients. Arrange each part of the salad in sections. This makes it inviting and fun to eat. Layer the quinoa at the bottom. Then, add the bean and veggie mix on top. Place the avocado and lettuce last. Finish with fresh cilantro for a splash of color. Serve with lime wedges for a zesty kick. Your guests will love the look and taste. For the complete recipe, check out the Full Recipe. {{image_4}} If you're gluten-sensitive, you can still enjoy this salad. Quinoa is a great gluten-free grain. You can also swap black beans with chickpeas or kidney beans. Both are tasty and safe for gluten-free diets. Just make sure all your other ingredients are gluten-free too. Fresh veggies, herbs, and spices are often safe choices. For those avoiding soy, there are many protein options. You can use lentils instead of tofu. They add a nice texture and flavor. Another option is to add more beans. They give you protein and fiber. You can also use nuts or seeds for a crunchy twist. Just sprinkle some on top before serving. To make your salad even more exciting, think about adding fruits and extra veggies. Diced mango or pineapple can add sweetness. You might also try roasted sweet potatoes for warmth. Fresh herbs like parsley or basil can brighten the dish. If you love spice, add jalapeños or chili flakes for a kick. Each twist brings a new taste to your bowl. Check out the Full Recipe for more ideas! After making your vegan taco salad bowls, you may have some leftovers. To keep them fresh, store them in an airtight container. This container should be placed in the fridge. The salad will stay fresh for about three days. When storing, it’s best to keep certain components separate. For instance, store the quinoa and the bean mix apart from the lettuce and avocado. This way, the greens stay crisp. If you want to save your salad for later, freezing is a great option. You can freeze the quinoa and the bean mixture. To do this, place them in freezer bags. Squeeze out as much air as possible before sealing. This helps prevent freezer burn. When you want to eat the frozen salad, take it out the night before. Let it thaw in the fridge. To reheat, simply warm the quinoa and bean mix in a pan. You can serve it cold or warm, but add fresh toppings like avocado and lettuce after reheating for the best taste. Enjoy your meal! Yes, you can prepare this dish ahead of time. Cook the quinoa and store it in the fridge. Make the dressing and mix it with the beans and veggies. Keep them separate until you are ready to eat. This keeps everything fresh and crisp. Assemble the salad bowls just before serving. It takes only a few minutes to put together. If you want a different base, use brown rice or farro. Both options work well in this salad. You can also try bulgur or couscous for a quick cook time. Each grain adds a unique taste and texture. Choose what you like best for your taco salad bowls. To change the spice level, add more chili powder for heat. If you like it milder, reduce the chili powder. You can also add a dollop of vegan sour cream to cool it down. Taste as you go to find your perfect balance. Adjusting spice levels makes the dish fit your taste. This article covered key steps to make a delicious salad bowl. You learned about the best ingredients and how to cook quinoa perfectly. I shared tips for dressing, layering, and presentation to impress anyone. You also found helpful variations for gluten-free and soy-free diets. Remember, cooking should be fun and creative. Feel free to experiment with flavors and textures that you love. Enjoy your salad bowls, and don't hesitate to share your unique twists!

Vegan Taco Salad Bowls Flavorful and Nutritious Meal

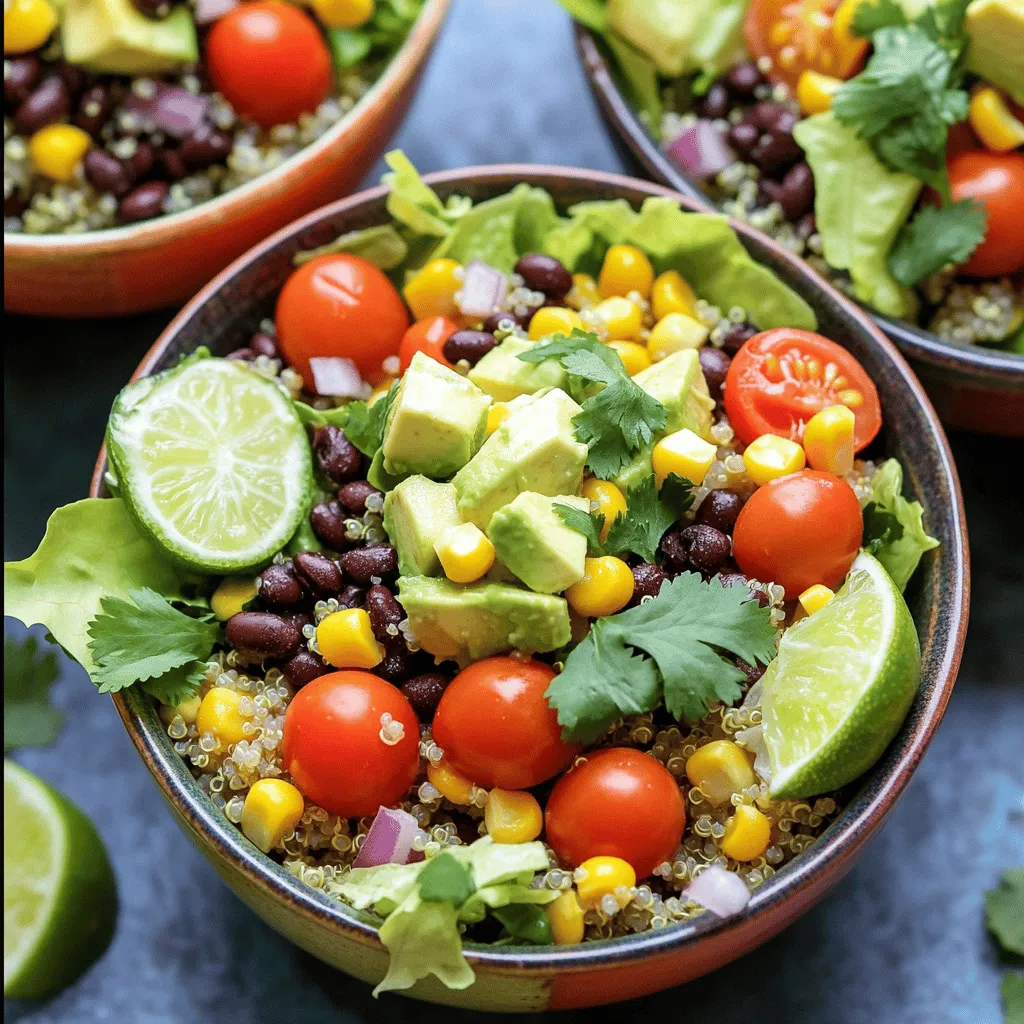
Looking for a delicious and healthy meal? Try my Vegan Taco Salad Bowls! Packed with protein, flavor, and colorful veggies,

- Zucchini: Use 4 medium zucchinis. Look for firm, shiny skin. Avoid soft or blemished zucchinis. They should be fresh for the best taste. - Basil: Use 1 cup of fresh basil leaves. Fresh basil adds a bright flavor. Dried basil lacks the same punch. - Pine Nuts: You need ½ cup of pine nuts. Toast them for a few minutes to unlock their rich flavor. This step enhances the pesto’s taste. - Olive Oil: Use extra virgin olive oil for the best flavor. It has a fruity taste that complements the dish. - Garlic: Use 1 clove of garlic, minced. Fresh garlic creates a bold taste. Avoid garlic powder for this recipe. - Parmesan Cheese: Use ¼ cup of grated Parmesan cheese. If you want a vegan alternative, use nutritional yeast instead. This works well for dietary needs. - Cherry Tomatoes: Adding 1 cup of halved cherry tomatoes brightens the dish. They add a sweet and juicy burst of flavor. - Red Pepper Flakes: Use ½ teaspoon for a spicy kick. This is optional, but it adds nice heat. - Nutritional Yeast: This is a great dairy-free cheese alternative. Sprinkle it on for added flavor without the dairy. For the full recipe, you can check the instructions provided. To start, you need to make zucchini noodles. You can use a spiralizer, a peeler, or a mandoline. Each tool gives you a different noodle shape. I love the spiralizer for its fun curls. Next, salting the zucchini is key. After slicing, place the noodles in a colander and sprinkle them lightly with salt. This helps pull out extra moisture. Let them sit for about 10 minutes. The result is a firmer noodle that holds sauce better. Now, let’s create the pesto sauce. First, gather your ingredients: fresh basil leaves, toasted pine nuts, minced garlic, and grated Parmesan cheese. In a food processor, add the basil, nuts, garlic, and cheese. Start blending these ingredients. As they mix, slowly drizzle in the olive oil. This method helps achieve a smooth blend. If your pesto is too thick, add more olive oil, one tablespoon at a time. Taste and season with salt and black pepper. Now, we can cook the zucchini noodles. First, rinse them under cold water to remove excess salt. Then, pat them dry with paper towels. Heat a large skillet over medium heat. Add a drizzle of olive oil. Sauté the zucchini noodles for about 2-3 minutes. You want them to soften but still have a crisp bite. Overcooking will make them soggy. To enhance flavor, add a little more olive oil while cooking. This makes the dish richer and more delicious. For the full recipe, check out the complete instructions in the article. Avoiding Sogginess: Key cooking practices To keep your zucchini noodles from getting soggy, it’s vital to salt them before cooking. This step pulls out moisture, ensuring they stay firm. After cutting your zucchini into noodles, sprinkle them with salt and let them sit for about 10 minutes. Rinse and pat them dry before cooking. This simple practice makes a big difference in texture. Keeping them al dente: Timing tips When sautéing your zucchini noodles, aim for a quick cook time. About 2-3 minutes over medium heat is perfect. You want them to be soft but still have a slight bite. Stir gently to avoid breaking the noodles. This method keeps them vibrant and fresh. Customizing Pesto: Substitutions and additions You can make pesto your own by swapping out ingredients. Try using walnuts instead of pine nuts for a different taste. You can also add spinach or arugula to boost nutrition. If you love spice, consider adding jalapeños or a pinch of cayenne pepper to your pesto blend. Serving Suggestions: Pairing with proteins or sides Zucchini noodles with pesto pair well with grilled chicken or shrimp. You can also serve them alongside a fresh salad or crusty bread. These options add more flavor and texture, making your meal more satisfying. Plating Techniques: Making the dish visually appealing To make your dish look great, use a large white plate. This helps the colors pop. Twirl the zucchini noodles into a nest shape in the center of the plate. This adds height and makes it more inviting. Garnishing Ideas: Creative toppings and herbs Top your dish with extra toasted pine nuts and fresh basil leaves. A sprinkle of Parmesan cheese adds a nice touch. For an extra kick, try some red pepper flakes on top. These garnishes not only enhance flavor but also make the dish more eye-catching. {{image_4}} Adding Vegetables: You can switch up the veggies based on the season. In summer, try adding thin slices of bell peppers or fresh corn. In fall, consider using roasted butternut squash or mushrooms for a heartier dish. These additions not only enhance flavor but also give you more color and nutrition. Incorporating Proteins: Adding protein boosts the meal’s heartiness. You can toss in grilled chicken for a filling option or shrimp for a light touch. If you prefer plant-based options, try adding tofu or chickpeas. These choices make the dish more satisfying and balanced. Vegan Pesto: If you're looking for a vegan twist, swap out the Parmesan. Use nutritional yeast instead. You can also switch pine nuts for sunflower seeds or cashews. This keeps the flavor rich while being dairy-free. Herb Mixes: Don’t be afraid to mix herbs for a unique taste. Combine basil with parsley or mint for something fresh. Each herb adds its own flair, making your pesto stand out. Gluten-Free Options: Zucchini noodles are naturally gluten-free. If you want more variety, you can use spiralized carrots or sweet potatoes. These options maintain the fun of noodles while being gluten-free. Low-Carb Alternatives: For a low-carb meal, stick with zucchini noodles. You can pair them with a protein like grilled salmon or sautéed spinach. This keeps the meal light and perfect for those watching their carb intake. For the complete process, check the Full Recipe. To keep your zucchini noodles with pesto fresh, store them in an airtight container. Place them in the fridge. They will stay good for about 3 days. If you want to store them longer, consider freezing. For this, lay the zucchini noodles flat on a baking sheet. Freeze them until solid, then put them in a freezer bag. They can last for up to 2 months in the freezer. When it’s time to enjoy your leftovers, you have options. The microwave is quick and easy. Just heat them for about 1-2 minutes. If you want better texture, use the stovetop. Heat a pan over medium-low heat, add a splash of olive oil, and warm the noodles gently. This method helps avoid mushiness. Stir them often and cook for about 3-5 minutes. Zucchini noodles can last up to 3 days in the fridge. If they smell bad or feel slimy, it's time to toss them. If you freeze them, use within 2 months for the best taste. Always check for signs of spoilage before eating. Keep an eye on color changes or off smells, and discard if you notice these signs. You can make zucchini noodles without a spiralizer using a few simple tools. A julienne peeler works well. It creates thin, noodle-like strands. A mandoline is another great option. Set it to a thin setting and slice the zucchini lengthwise. Both methods give you tasty noodles without needing extra gadgets. Yes, you can use regular pasta. However, the texture and flavor will differ. Zucchini noodles are lighter and soak up sauce well. Regular pasta is more filling and chewy. If you want a healthier dish, stick with zucchini noodles. They add freshness and fiber to your meal. Leftover pesto is a joy to have! Store it in an airtight container. It can last about a week in the fridge. To use it, mix with cooked pasta, spread on sandwiches, or drizzle over veggies. You can even use it as a pizza sauce for a fresh twist. This recipe is perfect for meal prep! You can make the zucchini noodles and pesto ahead of time. Store them separately in airtight containers. When you're ready to eat, just combine and heat. This keeps the noodles fresh and prevents sogginess. To add heat to the dish, try red pepper flakes. You can add ½ teaspoon when mixing in the pesto. For a bolder flavor, chop fresh chili peppers and toss them in. You can also use a spicy pesto sauce for an extra kick. Adjust the heat to your taste! To sum it up, fresh ingredients like zucchini, basil, and pine nuts create the best dishes. Use quality pantry staples like olive oil and garlic for flavor. Follow my steps to make perfect zucchini noodles and pesto. Customize the dish with seasonal veggies or proteins to match your taste. Store leftovers properly to keep them fresh. Enjoy sharing this simple, healthy meal with friends and family!

Zucchini Noodles with Pesto Flavorful and Simple Meal

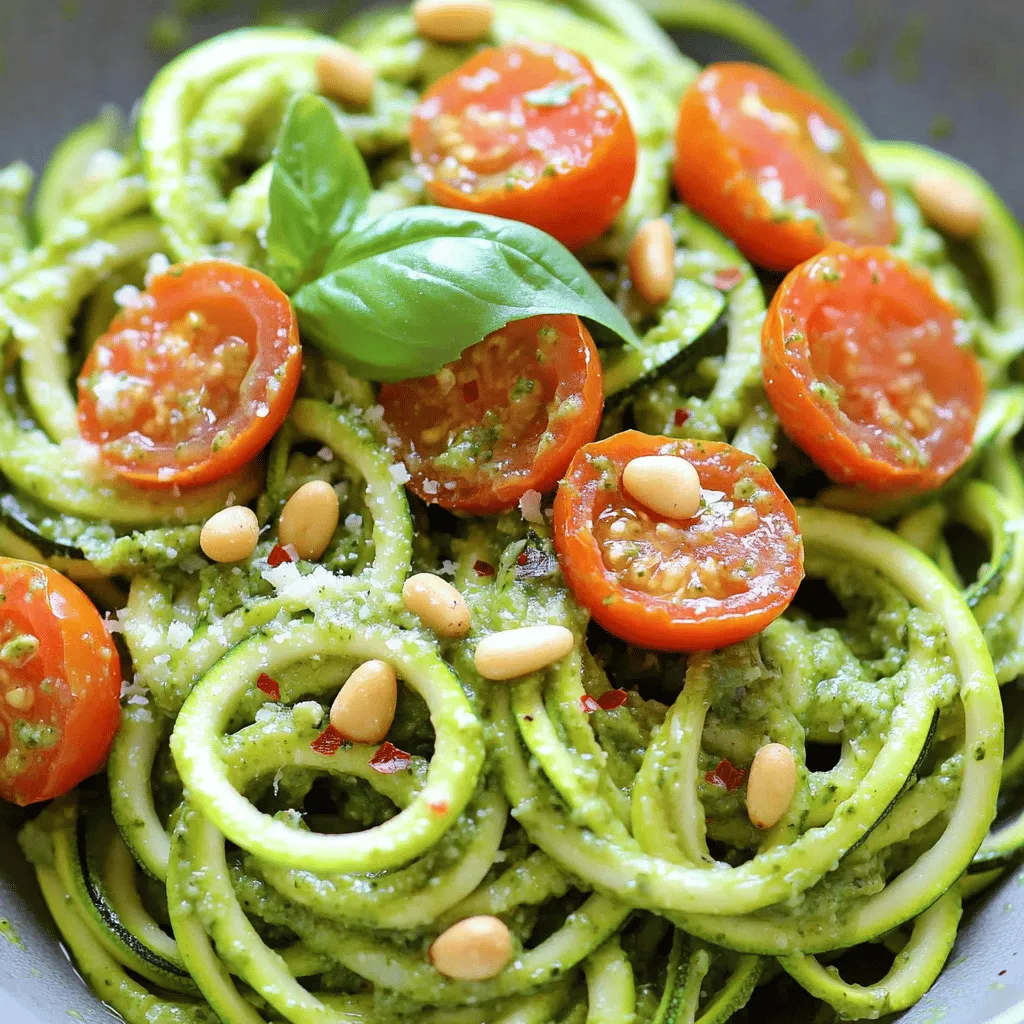
Are you ready to transform your meals with a fresh twist? Zucchini noodles with pesto are not only flavorful but

To make these delightful coconut macaroons, you will need: - 2 ½ cups unsweetened shredded coconut - 2/3 cup sweetened condensed milk - 1 teaspoon vanilla extract - ½ teaspoon almond extract - ½ teaspoon sea salt - 2 large egg whites - 1/4 cup granulated sugar These ingredients create a chewy and sweet base. The shredded coconut gives texture, while the condensed milk adds sweetness. The extracts bring out rich flavors that shine through. For the dark chocolate coating, gather: - 4 ounces dark chocolate (70% cocoa or higher), chopped This chocolate adds a rich and slightly bitter contrast to the sweet macaroons. Using high-quality chocolate makes a huge difference in flavor. If you want to elevate your macaroons, consider these options: - Sea salt flakes (for topping, optional) The sea salt flakes add a nice touch of flavor and balance the sweetness. You can also try adding lemon zest or a splash of orange extract for a fruity note. These ingredients will help you create a treat that looks great and tastes even better. For the full recipe, check out the cooking instructions. First, set your oven to 325°F (160°C). This will help the macaroons bake evenly. Next, grab a baking sheet. Line it with parchment paper. This step keeps the macaroons from sticking. In a large bowl, mix the unsweetened shredded coconut and sweetened condensed milk. Add the vanilla extract, almond extract, and sea salt. Stir until everything is well combined. It should feel sticky and hold together when pressed. Now, take another bowl and beat the egg whites. Use a handheld mixer on medium speed. Beat until soft peaks form, which takes about 2 minutes. Gradually add the granulated sugar and keep mixing until you reach stiff peaks. This usually takes 2-3 more minutes. Gently fold the egg whites into the coconut mixture. Use a spatula and mix carefully to keep the airy texture. Once no white streaks remain, spoon rounded mounds onto the baking sheet. Space them about 2 inches apart. Bake for 20-25 minutes. You want them golden brown on top. While the macaroons cool, melt the dark chocolate. Place the chopped chocolate in a microwave-safe bowl. Heat it in 30-second bursts, stirring each time. Keep going until the chocolate is smooth and melted. Once the macaroons are cool, dip their bottoms into the melted chocolate. Let any extra chocolate drip off, then place them back on the parchment paper. If you like, sprinkle sea salt flakes on top for extra flavor. Allow the chocolate to set at room temperature or chill them in the fridge until firm. For the full recipe, refer to the earlier section. To get the best texture in your macaroons, use unsweetened shredded coconut. This gives your treats a nice chew. Mixing the coconut with sweetened condensed milk creates a rich base. When you whip the egg whites, beat them until they form stiff peaks. This helps your macaroons rise and stay airy. Do not overmix the coconut and egg whites. Fold gently to keep that lightness. You can customize your macaroons in many ways. Try adding lemon zest for a zingy twist. If you like almond flavor, use more almond extract. You can even mix in chocolate chips or nuts for extra texture. Feel free to change the dark chocolate to milk or white chocolate if you prefer. Just remember to adjust the sweetness to balance the flavors. Serve your macaroons on a pretty plate for a nice touch. Add coconut flakes or a sprinkle of sea salt on top for extra flair. You can pair them with a cup of coffee or tea for a delightful snack. They also make great gifts when placed in a jar. For a fun twist, try serving them with fresh fruit or a scoop of ice cream. For the full recipe, check out the complete guide. {{image_4}} You can use many types of chocolate to coat your macaroons. Dark chocolate is rich and bold. Milk chocolate gives a creamier flavor. White chocolate adds sweetness without the cocoa touch. Try mixing different chocolates for a unique flavor. Each type adds its own twist to your treat. You can change the flavor of your macaroons with simple additions. Lemon zest gives a bright, fresh taste. It adds a zing that works well with coconut. Almond extract offers a nutty depth. Just a few drops can enhance the coconut flavor. Experiment with different flavors to find what you like best. Coconut macaroons are naturally gluten-free, making them a safe choice for many diets. To make them vegan, swap the egg whites with aquafaba. Aquafaba is the liquid from canned chickpeas and works well in meringues. Use a plant-based sweetened condensed milk for a fully vegan treat. These swaps keep the essence of the macaroons while catering to different needs. For the full recipe, check [Full Recipe]. To keep your coconut macaroons fresh, store them in an airtight container. This protects them from air and moisture. Place parchment paper between layers to prevent sticking. They stay good at room temperature for about a week. If you want them to last longer, consider freezing them. To freeze coconut macaroons, let them cool completely first. Then, place them in a single layer on a baking sheet. Freeze for about an hour until firm. After that, transfer them to a freezer-safe bag or container. They can stay frozen for up to three months. When you want to enjoy them, thaw at room temperature. To keep your macaroons tasty, avoid exposing them to heat or humidity. Store them in a cool, dry place. If you notice them getting hard, try wrapping them in a damp paper towel for a short time. This helps restore some moisture. Remember to check for any signs of spoilage before eating. Enjoy your delicious treats! You can tell your macaroons are done when they turn a nice golden brown. Bake them for about 20-25 minutes. If you touch the top, it should feel firm. Trust your eyes; golden color is key! Yes, you can make macaroons without egg whites. Use aquafaba, the liquid from canned chickpeas, instead. It works great as a substitute! Just whip it until it forms stiff peaks, just like egg whites. Coconut macaroons stay fresh for about one week at room temperature. Store them in an airtight container. If you want to keep them longer, you can freeze them for up to three months. The best way to melt chocolate is to use a microwave. Place chopped chocolate in a bowl and heat in 30-second bursts. Stir well after each burst until smooth. This method keeps the chocolate from burning and ensures a silky finish. For more tips and detailed steps, check out the Full Recipe! Coconut macaroons are simple and delicious. We covered the key ingredients, baking steps, and tips for perfect texture. You can customize these treats by adding flavors or using different chocolate coatings. Storing them properly ensures they stay fresh for longer. In the end, coconut macaroons can be a fun treat to make. Experiment with flavors and enjoy your sweet creations!

Coconut Macaroons with Dark Chocolate Irresistible Treat

If you love sweet treats, let me introduce you to Coconut Macaroons with Dark Chocolate. These bite-sized delights are crunchy

Older posts
Newer posts
← Previous Page1 … Page29 Page30 Page31 … Page44 Next →

dsad

© 2025 tastyhatch • Built with GeneratePress

Our Policies

  • Copyright Policy
  • Cookie Policy
  • GDPR Policy
  • Privacy Policy
  • Disclaimer
  • Terms Of Use

More Information

  • Home
  • About
  • Contact
  • Appetizers
  • Dessert
  • Dinner
  • Drinks
©2025, tastyhatch About Back To Top