Skip to content
DisclaimerTerms Of UseGDPR PolicyCookie Policy

tastyhatch

  • Home
  • Drinks
  • Appetizers
  • Dinner
  • Dessert
  • About
  • Contact
  • Privacy Policy
DisclaimerTerms Of UseGDPR PolicyCookie Policy

Olivia

To make a tasty no-bake tiramisu, you need these key items: - 1 cup strong brewed coffee, cooled to room temperature - 3 tablespoons unsweetened cocoa powder, divided - 16 oz mascarpone cheese, softened - 1 cup heavy cream - 1 cup powdered sugar - 1 teaspoon vanilla extract - 20-25 ladyfinger cookies - Dark chocolate shavings, for garnish These ingredients create the creamy and rich layers that define this classic dessert. You can play with flavors by adding: - Flavored coffee, like hazelnut or vanilla - Liquors, such as coffee liqueur or rum - Fresh fruit, like berries for a fruity twist Using these optional ingredients can change the taste, making your tiramisu unique. If you need to swap items, here are some ideas: - Use Greek yogurt instead of mascarpone for a lighter texture. - Substitute whipped coconut cream for the heavy cream in dairy-free versions. - Try sponge cake if you can't find ladyfingers. These substitutions keep the spirit of tiramisu while fitting your needs. For the full recipe, check the details I shared above. To start, brew 1 cup of strong coffee. Let it cool to room temp. Pour the cooled coffee into a shallow dish. Add 1 tablespoon of cocoa powder. Stir well until it dissolves fully. This coffee mixture will give a rich flavor to your tiramisu. Set it aside. Next, take 1 cup of heavy cream and pour it into a large mixing bowl. Use an electric mixer on high speed. Beat the cream until soft peaks form. Then, slowly add 1 cup of powdered sugar and 1 teaspoon of vanilla extract. Keep mixing until you reach stiff peaks. This makes the cream light and fluffy. In another bowl, add 16 oz of softened mascarpone cheese. Gently fold the whipped cream into the mascarpone. Mix until smooth and creamy. Be careful not to deflate the whipped cream. This combination gives your tiramisu its creamy texture. Now you have all the main components ready for your No-Bake Tiramisu. For the full recipe, you can refer back to the complete instructions above. To get the best texture in your no-bake tiramisu, focus on your cream. Whip the heavy cream until you see soft peaks first. Then, add the sugar and vanilla. Continue whipping until the cream is thick and holds its shape. This step is key for a light and airy dessert. When mixing the whipped cream with mascarpone, fold gently. This keeps air in the cream and ensures a smooth blend without being too heavy. Serve your tiramisu cold for the best taste. Cut it into squares for easy serving. You can add a sprinkle of cocoa powder or chocolate shavings on each piece for a nice touch. Pair it with a small cup of strong coffee or a dessert wine. This will enhance the flavors and make your dessert even more enjoyable. Some common mistakes can ruin your tiramisu. First, do not soak the ladyfingers too long in coffee. A quick dip is all they need. If they are too soggy, your dessert will be a mess. Second, avoid over-mixing the mascarpone and cream. This can cause it to lose air and become dense. Lastly, remember to chill it long enough. Letting it sit overnight gives the best flavor and texture. For the full recipe, check the link. {{image_4}} You can switch up the flavor of your no-bake tiramisu easily. For a chocolate twist, use chocolate-flavored ladyfingers. Mix cocoa powder into the mascarpone cream for a richer taste. If you want a fruity version, add fresh berries into the layers. You can even blend berry puree into the cream for a fun flavor. Another option is to use citrus zest in the mascarpone. Lemon or orange adds a bright, zesty note. Creating a vegan tiramisu is simple with a few swaps. Use coconut cream instead of mascarpone. Replace the heavy cream with a plant-based whipped topping. You can also opt for maple syrup instead of powdered sugar for sweetness. For a gluten-free version, choose gluten-free ladyfingers or use sponge cake made from almond flour. Make sure all your ingredients are labeled gluten-free for safety. Presenting your no-bake tiramisu can elevate its appeal. Use a clear dish to show off those beautiful layers. Garnish with a dusting of cocoa powder and dark chocolate shavings. You can also add fresh berries on top for color. Serve individual portions in small glasses for a fun twist. This way, everyone can enjoy their own little dessert. For more tips, check out the [Full Recipe]. To keep your no-bake tiramisu fresh, store it in the fridge. Use an airtight container or cover it tightly with plastic wrap. This helps prevent drying and keeps the flavors bright. It will taste best within three days, but it can last up to five days if stored properly. You can freeze no-bake tiramisu if you want to save some for later. First, cut it into portions. Wrap each piece tightly in plastic wrap, then place them in a freezer-safe container. This keeps them safe from freezer burn. It will stay good for about one month. When you're ready to eat, thaw it in the fridge overnight before serving. No-bake tiramisu is best served cold, so you do not need to reheat it. Just take it out of the fridge or freezer and let it sit for a few minutes. This helps it soften a bit. Garnish with fresh cocoa powder or chocolate shavings for an extra touch. Enjoy your delicious dessert! For detailed instructions, check the Full Recipe. Yes, you can make No-Bake Tiramisu in advance. This dessert tastes even better after sitting. I recommend preparing it the night before. This allows the flavors to blend well. Just cover it tightly and chill it in the fridge. I suggest using strong brewed coffee for the best taste. Espresso works great if you have it. The stronger the coffee, the richer the flavor. Avoid instant coffee for this recipe. It won't give you that authentic taste. No-Bake Tiramisu can last up to 4 days in the fridge. Store it in an airtight container to keep it fresh. After that, the texture may change. For the best taste, enjoy it within those days. You will love how it stays creamy and delicious! This blog post covered the key ingredients, step-by-step methods, and useful tips for making No-Bake Tiramisu. Remember to experiment with flavors and diets for a fun twist. Pay attention to texture and storing methods for the best results. With these insights, you can create a delicious treat everyone will enjoy. Now go ahead and impress your friends and family with your new skills!

No-Bake Tiramisu Easy and Flavorful Dessert Recipe

Looking for a dessert that’s simple yet packed with flavor? You’ve found it! This No-Bake Tiramisu recipe is a delightful

To make mango sorbet, you need just a few simple items: - 3 ripe mangoes, peeled and diced - 1/2 cup coconut water - 1/4 cup freshly squeezed lime juice - 1/4 cup agave syrup or honey - Pinch of sea salt These basic ingredients create a fresh and fruity treat. Choose ripe mangoes for the best flavor. The coconut water adds a light sweetness and a tropical twist. The lime juice brightens the taste and balances the sweetness. You can adjust sweetness based on your taste. I often use agave syrup for a mild sweetness. Honey is a great choice as well. If you want to skip added sugars, try using ripe bananas or dates. They blend well and keep the sorbet healthy. Garnishes can elevate your mango sorbet. I love using fresh mint leaves for a pop of color and flavor. You might also add some diced mango on top for a fun touch. A lime slice on the rim of the bowl adds a nice visual. These simple additions make your sorbet look great and taste even better. For the full recipe, check out Tropical Bliss Mango Sorbet. To make mango sorbet, start with ripe mangoes. Ripe mangoes will give you the best taste. You need three mangoes. Peel and dice them. Aim for small, even pieces. This helps them blend well later. After dicing, set the mango aside for now. Next, grab a blender or food processor. Add the diced mangoes to the blender. Then, pour in half a cup of coconut water. Add a quarter cup of freshly squeezed lime juice. Next, include a quarter cup of agave syrup or honey. You can adjust the sweetness as you blend. Finally, add a pinch of sea salt. Blend everything until it is smooth and creamy. Make sure there are no lumps left. Now, transfer the mango mixture to a shallow dish. Cover it tightly with plastic wrap. Place it in the freezer for about two hours. Check to see if the edges start to freeze. Once they do, take the dish out. Use a fork to scrape and mix the mixture well. This step is key to a fluffy texture. Return the dish to the freezer for another three to four hours. Scrape and mix every hour. This ensures even freezing. When fully set, the sorbet will be ready to serve. You can find the full recipe [here](#). Choosing ripe mangoes is key. Look for mangoes that give slightly when you press them. Their skin should be vibrant, with some red or yellow. A sweet aroma near the stem indicates ripeness. Avoid mangoes that feel hard or have dark spots. Ripe mangoes will help your sorbet taste amazing. Sweetness can change based on the mangoes. Taste your blended mix before freezing. If it's not sweet enough, add more agave syrup or honey. Blend again to mix it in well. Remember, you can always add more sweetener, but you can’t take it out. Adjust to find your perfect level. For a fluffy texture, mix your sorbet often while it freezes. After two hours, scrape the edges with a fork. Mix it well, so it stays light and airy. Repeat this every hour for four hours. This process prevents ice crystals and gives a smooth finish. Enjoy the refreshing, creamy result! {{image_4}} You can switch mangoes for other fruits in this sorbet. Try ripe peaches for a sweet twist. Pineapples give a tropical vibe, while berries add a tart flavor. The key is to use ripe fruit for the best taste. Blend these fruits just like the mangoes in the full recipe, and enjoy new flavors. If you want a vegan sorbet, use agave syrup as your sweetener. It’s plant-based and works great. For a sugar-free option, try using a sugar substitute like stevia. Just keep in mind that the sweetness can vary. Taste and adjust as needed. You can still enjoy a refreshing sorbet without sugar or animal products. Want to jazz up your mango sorbet? Add fresh coconut for a tropical touch. Grated coconut gives a nice texture and flavor. You can also mix in fresh mint for a cool taste. Just toss in a few mint leaves while blending. This small change can make your sorbet even more exciting and refreshing. To keep your mango sorbet fresh, store it in an airtight container. Make sure to press a piece of plastic wrap against the surface before sealing. This helps to reduce ice formation. Keep it in the coldest part of your freezer. Avoid opening the container often to maintain the right temperature. Mango sorbet can last up to two weeks in the freezer. After this time, it may lose its flavor and texture. For the best taste, try to enjoy it within the first week. If you plan to keep it longer, consider dividing it into smaller portions. This way, you can take out only what you need. If you notice ice crystals forming, don’t worry! You can revive the sorbet. Let it sit at room temperature for a few minutes. Then, use a fork to break up the ice. Stir it well to restore its creamy texture. Avoid refreezing without mixing, as this can make the sorbet icy and hard. Enjoy your Tropical Bliss Mango Sorbet straight from the freezer! For the full recipe, check out the details above. Yes, you can use frozen mangoes. They are a great option. Frozen mangoes save time and still taste good. Just make sure to thaw them a bit before blending. This will help you get a smooth texture. You know the sorbet is ready when it is firm but not rock solid. A good test is to use a fork. If you can scoop it easily, it’s ready. Let it sit out for 5-10 minutes before serving. This makes it easier to scoop and enjoy. If you don’t have coconut water, use water or juice instead. Pineapple juice gives a great tropical twist. You can also try almond milk for a creamier texture. Just keep in mind that these changes can alter the taste slightly. Mango sorbet is simple and fun to make. We covered the key ingredients, sweeteners, and garnishes. I shared step-by-step instructions from prep to freezing. You learned tips on how to pick ripe mangoes and adjust sweetness. We explored variations like fruit combos and vegan options. Lastly, I provided storage tips to keep your sorbet fresh. Now, you can enjoy delicious mango sorbet any time! Get creative and try new flavors. Your taste buds deserve it.

Mango Sorbet Simple and Refreshing Summer Treat

Looking for a cool, easy dessert to beat the heat? Mango sorbet is a simple and refreshing summer treat that

- Ripe bananas - Brown sugar - Ground cinnamon - All-purpose flour - Cornstarch - Baking powder - Salt - Oil for frying - Optional garnishes (nuts, ice cream, whipped cream) For this fried banana treat, start with ripe bananas. They should be soft and sweet. Brown sugar adds a rich flavor. Ground cinnamon gives warmth and spice. Next, gather your dry ingredients. All-purpose flour creates a nice coating. Cornstarch helps the banana become crispy. Baking powder adds lightness to the batter. Don't forget the salt; it enhances all the flavors. You need oil for frying. Vegetable or coconut oil works well. For a fun touch, add optional garnishes. Nuts, like walnuts or pecans, add crunch. Ice cream or whipped cream makes it extra special. This recipe is simple yet delicious. Check the Full Recipe for more details! In a small bowl, I mix the brown sugar and ground cinnamon. I stir until they blend well. This sweet mix will make the fried bananas even tastier. Next, I grab a medium mixing bowl. I whisk together all-purpose flour, cornstarch, baking powder, and salt. Once well combined, I slowly pour in water. I keep stirring until the batter is smooth. It should be thick enough to coat the banana slices without dripping too much. Now, I heat oil in a deep skillet. I aim for about one inch of oil in the pan. I set the heat to medium. When the oil reaches 350°F (175°C), it's ready to fry. I carefully dip each banana slice into the batter, making sure they are fully coated. Gently, I place them in the hot oil. I fry them in small batches for 2-3 minutes on each side until they turn golden brown and crispy. Once the bananas are fried, I use a slotted spoon to lift them out. I let them drain on paper towels to get rid of extra oil. While they are warm, I sprinkle the brown sugar and cinnamon mix over them. This adds a sweet crunch to each bite. To serve, I love placing the warm fried bananas on a plate. They look great with a scoop of vanilla ice cream or a dollop of whipped cream. For extra flair, I sprinkle some chopped nuts on top. This makes a simple sweet treat that everyone will enjoy. For the full recipe, check the details above. To make the best batter, you want it thick but smooth. Start by mixing the dry ingredients first. Use all-purpose flour, cornstarch, baking powder, and salt. Then, slowly add water. Keep stirring until it coats the back of a spoon. If it drips too fast, add a bit more flour. If it's too thick, add a splash of water. The right batter makes a big difference in how your fried bananas turn out. Oil temperature is key for crispiness. Heat the oil to about 350°F (175°C). If the oil is too cold, the bananas will soak up too much oil. If it's too hot, they might burn. You can test the oil by dropping a small amount of batter in. If it sizzles and rises, it’s ready. Fry in small batches to avoid overcrowding, which can cool the oil down. To make your fried bananas even better, think of adding spices. A pinch of nutmeg or cardamom can elevate the taste. You can also try drizzling with honey or chocolate after frying. For a crunchy touch, sprinkle chopped nuts on top. This will add texture and flavor, making your treat more exciting. {{image_4}} You can fry many fruits, not just bananas. Apples and plantains are great choices. Apples can add a nice crunch, while plantains give a rich, creamy taste. Both can be prepared the same way as bananas. Slice them thickly and dip them in the batter. Fry until golden brown for a fun twist. Want to change things up? Try adding chocolate or caramel drizzles after frying. Melt some chocolate chips or caramel sauce in a bowl. Drizzle it over your fried fruits for extra sweetness. You can also sprinkle sea salt for a sweet and salty mix. It will take your treat to a new level! If you're looking for a lighter option, consider using oats or almond flour instead of regular flour. You can also swap brown sugar for honey or maple syrup. These swaps give you a tasty treat with less guilt. Using coconut oil can also make it a bit healthier. Enjoy your fried fruit while feeling good about your choices! For the complete process, check out the [Full Recipe]. To keep your fried bananas fresh, store them in an airtight container. Let them cool first. Place a layer of paper towels at the bottom to absorb moisture. This helps keep them crispy. Refrigerate the container for up to two days. To reheat fried bananas, use an oven or air fryer. Preheat your oven to 350°F (175°C). Place the bananas on a baking sheet. Heat for about 10 minutes. This method helps them stay crispy. Avoid using the microwave, as it can make them soggy. You can freeze fried bananas for later use. First, let them cool completely. Then, place them in a single layer on a baking sheet. Freeze them for about one hour. Once frozen, transfer them to a freezer bag. They can last for up to three months. To reheat, bake them directly from the freezer at 350°F (175°C) for about 15 minutes. This keeps them crispy and delicious. For more details on making these tasty treats, check the Full Recipe. Using unripe bananas changes the taste. They are firmer and less sweet. This makes them chewy when fried. Ripe bananas are softer and have more flavor. They caramelize better, making your treat sweet and delicious. So, for the best taste, go with ripe bananas. For frying, I recommend vegetable or coconut oil. Both have high smoke points. They stay stable when heated and help achieve a crispy texture. You can choose based on your flavor preference. Vegetable oil is neutral, while coconut oil adds a hint of sweetness. You can store fried bananas in the refrigerator for about 2-3 days. Make sure they cool down first. Place them in an airtight container. When you want to enjoy them again, reheat in an oven for crispiness. Enjoy your treat fresh! For the full recipe, check the earlier section. You now understand how to make delicious fried bananas. We covered key ingredients, from ripe bananas to brown sugar. You learned how to prepare the sugar mix, create the batter, and fry the bananas to perfection. We also explored tips for the best results, variations for added fun, and storage methods to keep leftovers fresh. Try making them your own with different fruits or flavors. Enjoy your cooking journey and share this treat with friends and family!

Fried Banana with Brown Sugar Simple Sweet Treat

Imagine sinking your teeth into a warm, sweet fried banana drenched in brown sugar. This simple treat can make any

- 1 ½ cups graham cracker crumbs - ½ cup unsalted butter, melted - 2 tablespoons granulated sugar - 3 packages (8 oz each) cream cheese, softened - 1 cup granulated sugar - 1 cup packed brown sugar - 1 can (15 oz) pure pumpkin purée - 3 large eggs, at room temperature - 1 teaspoon pure vanilla extract - 1 teaspoon ground cinnamon - ½ teaspoon ground nutmeg - ½ teaspoon ground ginger - ½ teaspoon salt - 1 cup sour cream (full-fat recommended) - Whipped cream, for topping (optional) - Toasted pecans or walnuts, for garnish (optional) Using high-quality ingredients makes a big difference. I recommend using full-fat sour cream for creaminess. It adds richness and flavor. Always choose pure pumpkin purée, not the spiced type. This ensures your cheesecake has the best taste. When it comes to cream cheese, opt for a brand that contains high fat for a smooth finish. For cream cheese, I like Philadelphia. It provides a nice texture and flavor. For pumpkin purée, Libby's is a top choice. It has a deep, rich taste. As for graham crackers, Honey Maid works well. They have the perfect balance of sweetness and crunch. These brands help create that irresistibly smooth delight you want in a pumpkin cheesecake. To make a graham cracker crust, gather these ingredients: - 1 ½ cups graham cracker crumbs - ½ cup unsalted butter, melted - 2 tablespoons granulated sugar In a medium bowl, mix the graham cracker crumbs, melted butter, and sugar. Stir until the crumbs are fully coated. Press this mixture firmly into the bottom of a 9-inch springform pan. Make sure to create an even layer. Bake the crust in a preheated oven at 350°F for 8-10 minutes or until it turns lightly golden. After baking, remove it from the oven and let it cool completely. Cooling is key because it helps the crust stay firm when you add the filling. For the filling, you will need: - 3 packages (8 oz each) cream cheese, softened - 1 cup granulated sugar - 1 cup packed brown sugar - 1 can (15 oz) pure pumpkin purée - 3 large eggs, at room temperature - 1 teaspoon pure vanilla extract - 1 teaspoon ground cinnamon - ½ teaspoon ground nutmeg - ½ teaspoon ground ginger - ½ teaspoon salt - 1 cup sour cream Start by beating the softened cream cheese in a large bowl with an electric mixer. Mix until smooth and creamy. Gradually add the granulated and brown sugars. Keep mixing until it is well combined and smooth. Next, add the pumpkin purée to the cream cheese mixture. Then, add the eggs one at a time, mixing well after each. Add vanilla, cinnamon, nutmeg, ginger, and salt. Blend until all ingredients are mixed smoothly. Now, gently fold in the sour cream. Do this carefully to keep the filling light and airy. For the baking, set your oven to 325°F. Carefully pour the pumpkin filling into the prepared crust. Smooth the top with a spatula for even baking. Bake it for 60-70 minutes. The edges should be set, but the center can still jiggle slightly. Once baked, turn off the oven and leave the door slightly open. Let the cheesecake cool in the oven for about 1 hour. This helps prevent cracks on the surface. After that, put it in the refrigerator to chill for at least 4 hours. For best results, chill it overnight. This resting time helps the flavors blend and creates a smooth texture. Enjoy making this pumpkin cheesecake! For the complete recipe, you can refer to the Full Recipe section. To get a smooth and creamy cheesecake, start with room temperature ingredients. This helps everything mix well. Cold cream cheese can make lumps, which you want to avoid. Take your cream cheese, eggs, and sour cream out of the fridge ahead of time. Let them sit for about 30 minutes. Next, be careful not to overmix your filling. Once you add the eggs, mix just until combined. Overmixing can introduce air, which may cause cracks in your cheesecake. A smooth batter is key to a perfect texture. You can add more flavor to your pumpkin cheesecake. Try adding a pinch of allspice or cardamom for depth. A splash of maple extract can also bring a warm, sweet note. These small changes can make a big impact. For toppings, consider using whipped cream on top. You can also sprinkle toasted pecans or walnuts for a crunchy finish. Fresh cranberries or a drizzle of caramel can add a fun twist. Get creative with what you have! For the complete recipe, check the Full Recipe section. {{image_4}} To make a gluten-free pumpkin cheesecake, start by swapping the graham cracker crumbs. You can use gluten-free cookies or almond flour instead. These options give a nice flavor and texture. For the crust, mix the new crumbs with melted butter and sugar. Press this mixture into the pan like you would with the regular crust. To keep the cheesecake creamy, use full-fat cream cheese. This helps avoid a dry texture. Remember to avoid overmixing the filling. This keeps the cheesecake smooth and rich. If you need a dairy-free version, try using dairy-free cream cheese. Brands like Tofutti or Kite Hill work well. They offer a nice texture and taste. Replace the sour cream with coconut cream for extra richness. When adjusting the recipe, make sure all your ingredients are dairy-free. Mix everything just like in the full recipe. The same baking times will work for this version, so you can enjoy a creamy, dairy-free delight! To create a pumpkin cheesecake swirl, prepare the filling as usual. Once mixed, take about a cup of the filling and set it aside. Add cocoa powder or melted chocolate to the set-aside filling. This will create a rich chocolate flavor. To make the marbled effect, pour the original filling into the crust first. Then, dollop the chocolate mixture on top in random areas. Use a knife to gently swirl them together. Don’t overdo it; a few swirls create a beautiful pattern. You can also pair this swirl with flavors like caramel or maple for a fun twist! To keep your pumpkin cheesecake fresh, store it in the refrigerator. Place it in an airtight container or cover it tightly with plastic wrap. This will prevent it from absorbing other odors in the fridge. Your cheesecake stays fresh for about 5 to 7 days. If you want to save some for later, freezing is a great option. First, let the cheesecake cool completely. Then, wrap it in plastic wrap. After that, place it in a freezer-safe bag or container. This protects it from freezer burn. You can freeze it for up to 3 months. When you're ready to enjoy it, move the cheesecake to the fridge to thaw overnight. This keeps its smooth texture. After thawing, feel free to add whipped cream or nuts for a lovely presentation. Enjoy your delicious cheesecake, even after freezing! What is the best way to prevent cracks in the cheesecake? To prevent cracks, keep your oven at a steady temperature. You should also bake the cheesecake in a water bath. This keeps moisture in and helps the cheesecake cook evenly. Let it cool slowly. After baking, turn off the oven and leave the cheesecake inside for an hour. This helps it set without cracking. Can I make this cheesecake a day in advance? Yes, you can make this cheesecake a day ahead. In fact, it tastes even better after chilling overnight. It allows all the flavors to mix well. Just cover it tightly with plastic wrap and store it in the fridge. How do I know when the cheesecake is done? The cheesecake is done when the edges look set and the center is slightly jiggly. It will firm up as it cools. Use a toothpick to check—if it comes out clean from the edges, it's ready! What can I use instead of sour cream? If you don’t have sour cream, try Greek yogurt. It gives a similar creamy texture and flavor. You can also use cream cheese mixed with a bit of milk for a good substitute. How long can a pumpkin cheesecake be left out at room temperature? A pumpkin cheesecake can sit out for about two hours. After that, it should go back in the fridge. This keeps it fresh and safe to eat. Can I use fresh pumpkin instead of canned? Yes, you can use fresh pumpkin! Just cook it until soft and puree it. Make sure to drain any excess water. This keeps your cheesecake from getting too watery. For the best results, use about two cups of fresh pumpkin for this recipe. For the full recipe, check out the Heavenly Pumpkin Cheesecake section above! Making the best pumpkin cheesecake starts with a solid recipe. This heavenly pumpkin cheesecake combines the creaminess of cheese with the warmth of pumpkin. The Full Recipe highlights the right mix of flavors. You begin with the crust. The graham cracker crumbs give a nice crunch. The unsalted butter helps bind it together, while sugar adds sweetness. For the filling, you’ll need three packages of softened cream cheese. This is crucial for that smooth texture. You mix in granulated and brown sugar for depth. Pumpkin purée brings a rich, earthy taste. Don't forget the spices! Ground cinnamon, nutmeg, and ginger create that classic fall flavor. Next, you add eggs for stability and vanilla for a hint of sweetness. The sour cream rounds out the filling, making it extra creamy. Baking is key. The oven temperature should be set to 325°F. This slow baking helps prevent cracks. The center should jiggle slightly when done. After baking, cooling the cheesecake slowly in the oven helps keep it smooth. Chill it in the fridge for at least four hours. This waiting time allows the flavors to meld beautifully. When ready to serve, you can top it with whipped cream and nuts. These add texture and visual flair. Enjoy each slice as a special treat! This blog post covered how to make pumpkin cheesecake from scratch. You learned about key ingredients and quality brands for achieving the best taste. We went through a step-by-step process for making the crust and filling, along with tips to ensure the perfect texture. We explored variations for gluten-free and dairy-free options, plus ways to enhance flavor. Lastly, I provided storage tips and answered common questions. Embrace your creativity as you make this cheesecake. It's a fun recipe that can adapt to your taste and dietary needs. Enjoy every bite!

Best Pumpkin Cheesecake Irresistibly Smooth Delight

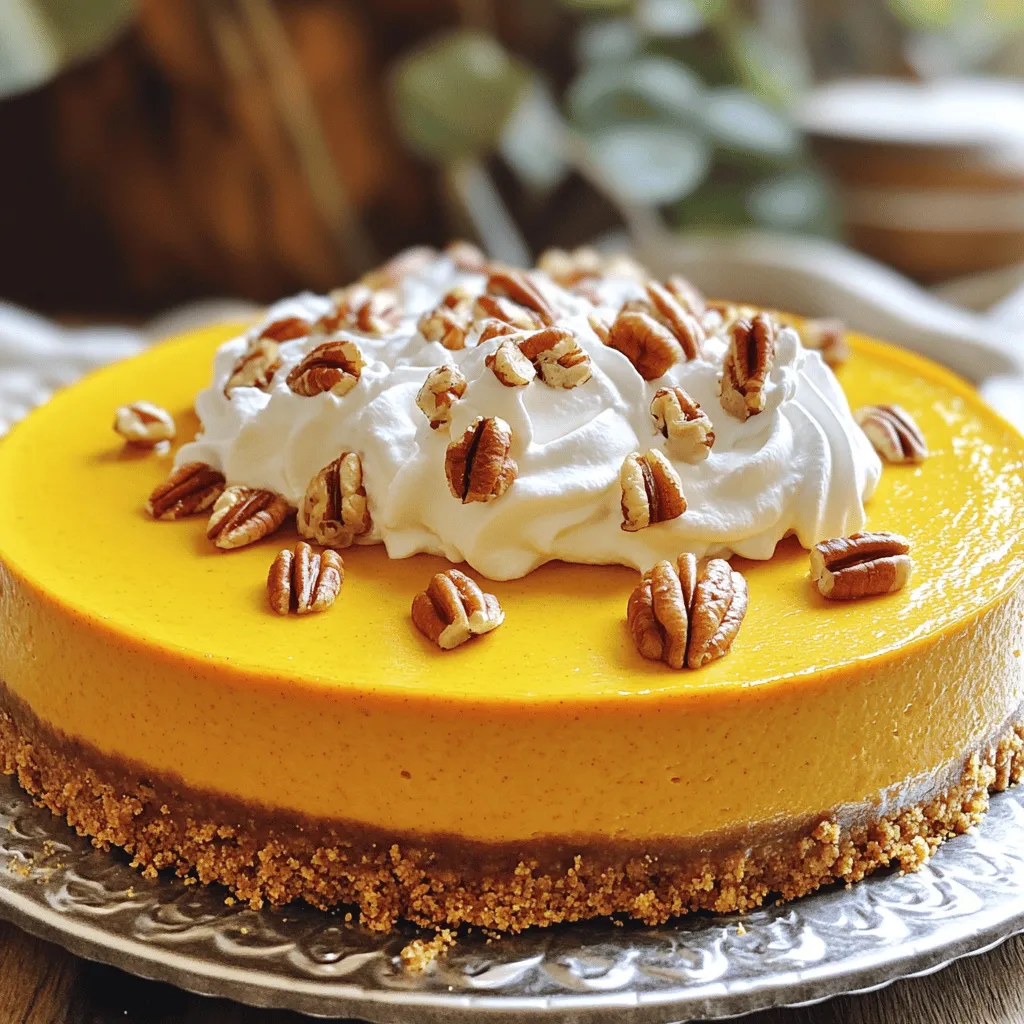
Are you ready to indulge in the creamiest pumpkin cheesecake ever? This Best Pumpkin Cheesecake Irresistibly Smooth Delight blends the

- 1 packet of digestive biscuits (approximately 250g) - 100g unsalted butter, melted - 1 can (400g) sweetened condensed milk - 3 ripe bananas, sliced - 300ml heavy cream - 2 tablespoons powdered sugar - 1 teaspoon vanilla extract - Grated dark chocolate or cocoa powder, for garnish Gather these ingredients before you start. The digestive biscuits make a crunchy base. The melted butter helps hold the crust together. Sweetened condensed milk turns into a rich caramel, essential for the banoffee flavor. Ripe bananas add sweetness and texture. Heavy cream makes the pie light and fluffy. Powdered sugar sweetens the cream, while vanilla extract adds depth. Lastly, garnish with dark chocolate or cocoa powder for a nice touch. You can find the full recipe linked above for more details. Enjoy making this easy banoffee pie! 1. Crushing the biscuits: Take your packet of digestive biscuits. You can use a food processor or a zip-lock bag to crush them. Aim for fine crumbs. This gives your crust a great texture. 2. Combining with melted butter: In a bowl, pour in the melted unsalted butter. Add your crushed biscuit crumbs. Mix well until each crumb is coated in butter. This will help hold the crust together. 3. Forming the crust: Now, take the mixture and press it into a 9-inch pie dish. Use your fingers or the back of a spoon to press it firmly into the bottom and up the sides. Chill it in the fridge for about 30 minutes. This helps it set nicely. 1. Simmering the condensed milk: Place an unopened can of sweetened condensed milk in a pot of water. Make sure the can is fully covered. Simmer gently for about 2 hours. Keep checking the water level. This makes the milk caramelize. 2. Cooling process: Once the time is up, remove the can from the pot. Let it cool completely before you open it. This step is very important to avoid any hot splashes. 1. Spreading caramel on the crust: After your crust is firm and the dulce de leche is cool, spread the caramel evenly over the biscuit base. This layer should be rich and smooth. 2. Arranging banana slices: Next, slice up your ripe bananas. Arrange them neatly on top of the caramel layer. Spread them out for a nice look. 3. Whipping the cream: In a new bowl, combine the heavy cream, powdered sugar, and vanilla extract. Use a hand mixer or whisk to whip until you get soft peaks. This gives the cream a light texture. 1. Topping with whipped cream: Gently spread the whipped cream over the bananas. Smooth it out for an even finish. This adds a fluffy layer on top. 2. Garnishing the pie: For the final touch, sprinkle grated dark chocolate or cocoa powder on top. This not only looks nice but adds extra flavor, too. 3. Chilling before serving: Place the pie back in the refrigerator. Let it chill for at least 1 hour. This allows all the flavors to blend together, making each bite delightful. For more details, check the Full Recipe. To make a great biscuit crust, spread the melted butter evenly over the crumbs. This ensures a tasty, firm base. After pressing the mixture into the pie dish, chill it for at least 30 minutes. This time helps the crust hold its shape and prevents it from crumbling when you slice the pie. You can get creative with your banoffee pie! Try adding a hint of chocolate or coffee to the whipped cream. These flavors enhance the dessert and give it a unique twist. Also, consider using other fruits like strawberries or kiwi on top of the bananas. They add color and a fresh taste. One common mistake is under-whipping the cream. Make sure to whip it until soft peaks form. This gives your pie a light, airy topping. Another error is not cooling the dulce de leche completely. If it's warm, it can make the crust soggy. Always let it cool down before you assemble the pie. For the Full Recipe, follow the steps closely, and enjoy this delightful dessert! {{image_4}} You can make banoffee pie even better by mixing flavors. Try using chocolate or graham cracker crumbs instead of digestive biscuits. This change adds a new taste and texture. Another fun twist is to mix in peanut butter. Spread a thin layer of peanut butter on the crust before adding the caramel. This adds a rich, nutty flavor that pairs perfectly with bananas. If you need gluten-free options, use gluten-free biscuits. They work just as well as regular ones. For a dairy-free version, swap heavy cream with coconut cream. It whips up nicely and adds a hint of coconut flavor. You can also find dairy-free condensed milk for the dulce de leche. These swaps keep the dessert tasty while meeting dietary needs. You can serve banoffee pie in fun ways. Drizzle some caramel or chocolate sauce over each slice. This adds a sweet touch that makes each bite special. You can also pair slices with a scoop of vanilla ice cream. The cold ice cream contrasts nicely with the creamy pie. Whipped cream on top makes it even more delightful. If you want to impress, add fresh fruit like strawberries or raspberries as a garnish. For the complete recipe and details, check out the Full Recipe. To keep your leftover banoffee pie fresh, store it in the fridge. Use an airtight container or wrap it tightly in plastic wrap. This helps to keep the flavors intact and prevents the pie from drying out. Make sure to eat it within three days for the best taste. Can you freeze banoffee pie? Yes, you can freeze it, but it’s best to freeze only the crust and caramel layer. If you freeze the whipped cream and banana slices, they might change texture. To properly freeze, wrap the pie tightly with plastic wrap and then foil. This protects it from freezer burn. When you’re ready to enjoy it again, thaw the pie in the fridge overnight. After thawing, add fresh bananas and whipped cream before serving. For the full recipe, check out the Delightful Banoffee Pie recipe. Banoffee Pie is a British dessert. It came to life in the 1970s. The name combines "banana" and "toffee." The first recipe appeared in a restaurant called The Hungry Monk. It quickly became popular for its sweet flavors. Now, many enjoy this pie worldwide. Yes, you can use store-bought caramel. It saves time and effort. But, it may lack the rich flavor of homemade dulce de leche. Pre-made caramel can be thicker. This can affect the pie's texture. If you prefer quick and easy, go for store-bought. If you have time, make your own for the best taste. Banoffee Pie lasts about 3 days in the fridge. Store it in an airtight container. Keep it covered to prevent drying out. If you add bananas, eat it soon. The bananas can brown and affect taste. Enjoy this pie fresh for the best experience. This blog post shared a simple and fun way to make Banoffee Pie. You learned about key ingredients like digestive biscuits, ripe bananas, and heavy cream. I detailed the steps to prepare the crust, make the dulce de leche, and assemble the pie. I also included helpful tips, variations to try, and storage advice. Banoffee Pie is versatile, delightful, and easy to customize. Whether you make it classic or try new flavors, enjoy this treat with friends or family. It's a recipe worth mastering!

Easy Banoffee Pie Delightful and Simple Dessert Recipe

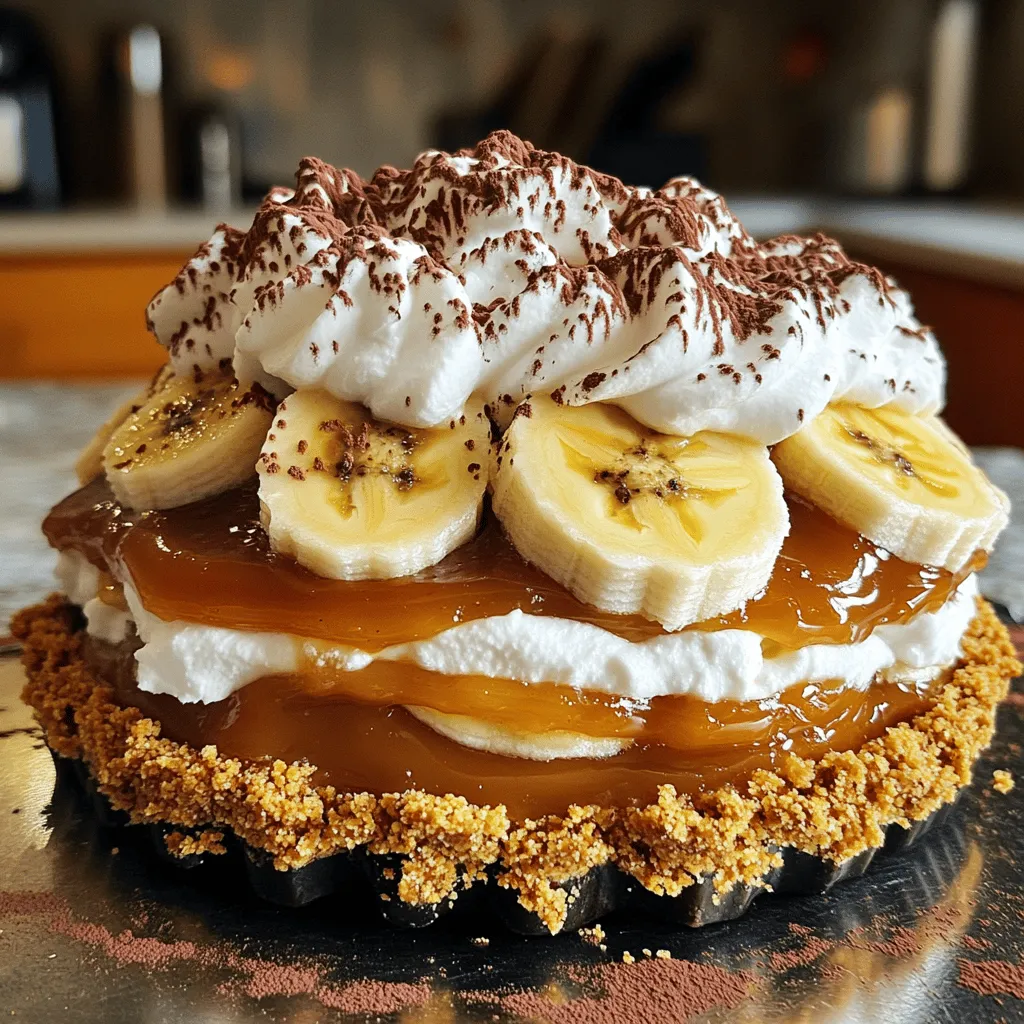
Want a sweet treat that’s easy to make and pure delight? Look no further than this Easy Banoffee Pie! With

To make Instant Pot Honey Garlic Chicken, gather these ingredients: - 1.5 lbs (680g) boneless, skinless chicken thighs - 1/3 cup honey - 1/4 cup low sodium soy sauce - 4 cloves garlic, finely minced - 1 tablespoon fresh ginger, finely minced - 1 tablespoon olive oil - 1 teaspoon sesame oil - 1/2 teaspoon crushed red pepper flakes (optional for heat) - 1/2 cup chicken broth - Salt and black pepper, to taste - 2 green onions, thinly sliced (for garnish) - Sesame seeds (optional, for garnish) You might not have all the ingredients on hand. Here are some easy swaps: - Chicken thighs: Use chicken breasts if you prefer. They cook faster, so check for doneness early. - Honey: Maple syrup can work as a sweet substitute. It adds a different flavor but is tasty. - Soy sauce: If you need a gluten-free option, try tamari instead. - Chicken broth: Vegetable broth is a good swap if you want a lighter taste. Garnishes make your dish look and taste better. Here are some ideas: - Green onions: They add a fresh crunch and color. - Sesame seeds: Toasted sesame seeds add a nice nutty flavor. - Chopped cilantro: For a burst of freshness, sprinkle some chopped cilantro on top. If you want to dive deeper into the cooking process, check the Full Recipe. Start by preparing the chicken thighs. First, season both sides with salt and black pepper. This step is key for great flavor. Use your hands to rub the spices in well. Make sure the chicken is evenly coated. This simple step makes a big difference in taste. Next, turn on your Instant Pot and select the 'Sauté' mode. Wait until it gets hot. Pour in the olive oil. When the oil shimmers, add the seasoned chicken thighs. Sear each side for 3 to 4 minutes. Look for a light golden-brown color. This adds a nice texture and flavor to the chicken. Now it's time to make the sauce. In a bowl, mix together honey, low sodium soy sauce, minced garlic, minced ginger, sesame oil, and crushed red pepper flakes. Whisk these ingredients until everything blends well. This sauce is what makes the honey garlic chicken so special. Pour the sauce over the browned chicken in the Instant Pot. Then, add chicken broth around the edges. Close the lid and ensure the valve is set to 'Sealing'. Set the timer for 10 minutes on 'Manual' or 'Pressure Cook'. This will help the chicken absorb all the tasty flavors. You can find the full recipe to ensure you have every detail! To get the best taste from your Instant Pot honey garlic chicken, follow these tips: - Use fresh garlic and ginger for a strong flavor. - Season the chicken well with salt and pepper. - Sear the chicken until golden brown for added depth. - Let the sauce mix well before adding it to the chicken. - Do not rush the natural pressure release; it keeps the meat tender. Cooking time can vary based on the chicken size. Here’s how to adjust: - For smaller chicken pieces, reduce the cooking time by 2 minutes. - Larger pieces might need 2-3 extra minutes. - Always check that the internal temperature reaches 165°F (75°C). - If unsure, add a few extra minutes to avoid undercooked chicken. If you want a thicker sauce, try these simple steps: - After cooking, switch the Instant Pot to 'Sauté' mode. - Remove the chicken and let the sauce simmer for 5-7 minutes. - Stir often to prevent burning at the bottom. - If needed, mix a cornstarch slurry (1 tablespoon cornstarch with 2 tablespoons water) and add it. - Stir until the sauce thickens to your liking. These tips will help you create the most delicious honey garlic chicken. For the full recipe, refer to the earlier section. {{image_4}} You can switch the chicken for other meats. Try using boneless pork or turkey. Both work well with the honey garlic sauce. If you use beef, choose thin cuts for quick cooking. Adjust the cooking time to keep the meat tender. To boost the flavor, add fresh herbs like thyme or cilantro. You can also toss in some veggies. Bell peppers and broccoli add color and nutrition. For a spicy kick, increase the red pepper flakes. You can also add a splash of rice vinegar for tanginess. For a vegetarian twist, replace the chicken with tofu or tempeh. Press the tofu to remove excess water before cooking. You can also use chickpeas for protein. Follow the same steps for cooking, adjusting time as needed. The honey garlic sauce will still shine, making it a delightful dish. Check out the Full Recipe for detailed cooking steps and tips. To keep your Instant Pot honey garlic chicken fresh, store it in an airtight container. Make sure to let it cool to room temperature before sealing. This helps prevent bacteria growth. You can keep it in the fridge for up to four days. If you plan to eat it later, consider freezing it instead. When you're ready to enjoy leftovers, reheating is simple. You can use the microwave or stovetop. If using a microwave, place the chicken in a microwave-safe dish. Heat it on medium power for a few minutes, stirring halfway through. For stovetop reheating, add a splash of chicken broth to a pan. Heat it on low until warmed through. This helps keep the chicken moist. Freezing is a great option if you want to save some for later. Place the chicken in a freezer-safe bag or container. Remove as much air as possible to avoid freezer burn. It will stay good for about three months in the freezer. When you're ready to eat, thaw it overnight in the fridge. Then, reheat using the methods above for a quick meal. For the full recipe, check out the original guide. Yes, you can use chicken breasts instead of thighs. Chicken breasts are leaner and cook faster. They will still soak up the honey garlic sauce well. Just be careful not to overcook them. Adjust your cooking time to about 8 minutes. This way, you’ll keep them tender and juicy. To make this dish in a traditional oven, start by preheating the oven to 375°F (190°C). Season the chicken as you would for the Instant Pot. In a large oven-safe dish, sear the chicken on the stove in olive oil for a few minutes on each side. Then, mix the honey garlic sauce and pour it over the chicken. Cover the dish with foil and bake for about 25-30 minutes. Check that the chicken reaches an internal temperature of 165°F (75°C) before serving. You can serve this chicken with many sides. Here are some great options: - Steamed rice - Noodles - Stir-fried vegetables - A fresh salad - Mashed potatoes These sides will complement the rich flavors of the honey garlic chicken. You can also add some sesame seeds and green onions on top for extra flavor and a nice look. For the full recipe, check out the details above! This post covered all you need to make Honey Garlic Chicken. We discussed the important ingredients along with substitutions and tasty garnishes. You learned step-by-step instructions for preparing and cooking the dish, plus tips to enhance flavor. We also explored variations for proteins and vegetarian options, as well as storage methods. In conclusion, try this simple recipe. It is sure to impress anyone. Happy cooking!

Instant Pot Honey Garlic Chicken Quick and Easy Meal

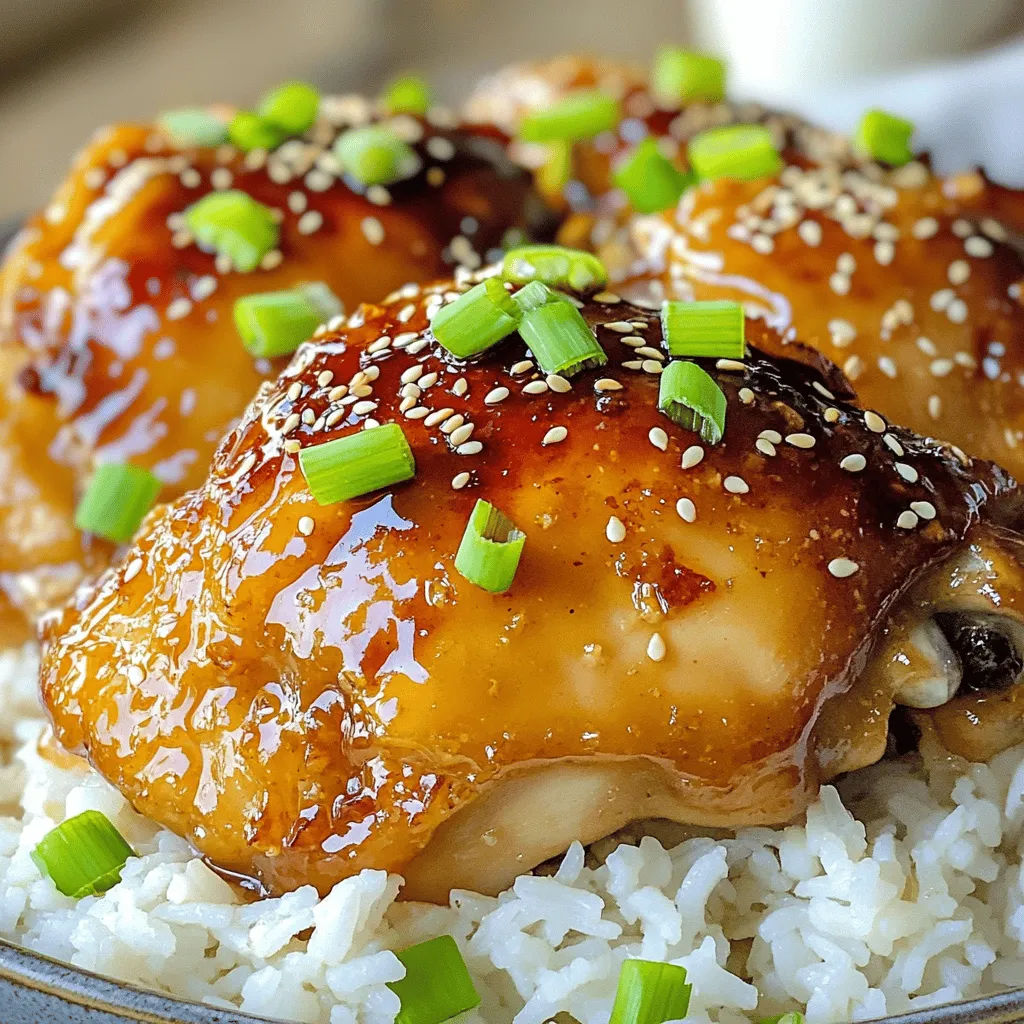
Looking for a quick and tasty dinner? My Instant Pot Honey Garlic Chicken is the answer! This dish delivers sweet

- 1 medium head of cauliflower, cut into bite-sized florets - 1 cup all-purpose flour (or gluten-free flour for a gluten-free option) - 1 teaspoon garlic powder - 1 teaspoon onion powder - 1 teaspoon smoked paprika - 1/2 teaspoon cayenne pepper (adjust according to your preferred spice level) - 1 cup buttermilk (or a plant-based milk mixed with 1 tablespoon vinegar for a vegan option) - 1/2 cup buffalo sauce (for example, Frank's RedHot) - 2 tablespoons olive oil - Salt and pepper to taste - Substitute all-purpose flour with almond flour for a nutty flavor. - Use oat milk instead of buttermilk for a dairy-free option. - Swap buffalo sauce for a milder hot sauce if you prefer less heat. - Chopped parsley for a fresh touch. - Sliced green onions for a mild onion flavor. - A drizzle of ranch or blue cheese dressing for extra creaminess. These ingredients make the air fryer buffalo cauliflower bites tasty and fun to eat. They are easy to find and perfect for a light snack or party dish. When you gather your ingredients, feel free to make adjustments based on your taste or diet. Enjoy experimenting! For the full recipe, check the details above. Start by rinsing the cauliflower under cold water. This step removes dirt and any debris. Next, cut the cauliflower into bite-sized florets. Try to keep them similar in size. This helps them cook evenly. After cutting, pat them dry with a clean towel. Removing excess moisture is key for crispiness. In a large bowl, mix together the flour, garlic powder, onion powder, smoked paprika, cayenne pepper, salt, and pepper. Whisk these dry ingredients well. This ensures all flavors combine. Gradually add in the buttermilk while stirring. Keep mixing until the batter is smooth and lump-free. A well-mixed batter coats the cauliflower nicely. Preheat your air fryer to 375°F (190°C) for about 5 minutes. This helps achieve a crispy texture. Lightly spray the air fryer basket with non-stick cooking spray. Take each cauliflower floret and dip it into the batter. Make sure it is fully coated. Let any excess batter drip off before placing it aside. Arrange the coated florets in a single layer in the basket. Avoid overcrowding to ensure even cooking. Air fry for 12-15 minutes. Shake the basket halfway through for even crispiness. The florets should turn golden brown and crispy. After cooking, place the hot cauliflower bites in a bowl. Add the buffalo sauce and olive oil, then toss gently. Ensure each piece is coated with the sauce. Return the sauced cauliflower to the air fryer basket. Cook for an additional 2-3 minutes. This lets the sauce set and enhances the flavor. Finally, serve your buffalo cauliflower bites hot and enjoy! For extra flair, sprinkle some chopped parsley on top. To get that crunchy texture, start with a dry cauliflower. After washing, pat it dry with a towel. This helps the batter stick well. When coating the florets, dip each piece fully in the batter. Let the excess batter drip off before air frying. This step prevents sogginess. Cook in batches if needed. Overcrowding the basket leads to uneven cooking. Shake the basket halfway through to get even crispiness. If you want more heat, add more cayenne pepper. Mix it into the dry ingredients. For a milder version, use less cayenne. You can also adjust the buffalo sauce amount after cooking. Remember, you can always add spice, but you can’t take it away! Serve these bites hot for the best taste. Use a rustic bowl for a nice touch. Drizzle extra buffalo sauce over the top. This adds a pop of color and flavor. Pair them with ranch or blue cheese dressing for dipping. Crunchy celery sticks are a great side for a classic buffalo experience. For more details on the full recipe, check out the Full Recipe section. {{image_4}} You can easily adapt this recipe to fit your diet. For a vegan version, replace buttermilk with plant-based milk mixed with vinegar. Use gluten-free flour instead of all-purpose flour to make it gluten-free. This way, everyone can enjoy the tasty buffalo cauliflower bites! Want to mix things up? You can add different flavors to your bites. Try garlic parmesan by adding grated vegan parmesan cheese to the batter. You can also add herbs like oregano or basil for a fresh twist. For a smoky touch, replace smoked paprika with chipotle powder. The options are endless! Feel free to swap out ingredients based on what you like. If you want a milder flavor, reduce the cayenne pepper. You can also use almond flour instead of regular flour for a nuttier taste. If you love spice, add more buffalo sauce or even a dash of hot sauce for extra heat. Make these bites your own! After enjoying your Air Fryer Buffalo Cauliflower Bites, store any leftovers in an airtight container. Keep them in the fridge for up to three days. This helps maintain their flavor and texture. If you're packing them for lunch, separate the bites from any sauce to keep them crisp. To reheat the cauliflower bites, use your air fryer for the best results. Set it to 350°F (175°C) and cook for about 5-7 minutes. This will restore their crunch. You can also use an oven if you don’t have an air fryer. Preheat it to 350°F (175°C) and bake for 10-15 minutes. If you want to save some bites for later, freezing is a great option. First, let the cooked bites cool completely. Then, place them in a single layer on a baking sheet and freeze until solid. After that, transfer them to a freezer bag. They can last up to three months in the freezer. When you're ready to eat them, just reheat directly from frozen in your air fryer or oven. For the full recipe, check out the detailed instructions included earlier. Enjoy your tasty snack! To make Air Fryer Buffalo Cauliflower Bites healthier, you can swap some ingredients. Use whole wheat flour instead of all-purpose flour. This adds fiber and nutrients. You can also use less buffalo sauce. Try mixing it with yogurt for a creamy dip. This reduces calories and adds protein. Finally, use an air fryer for less oil. This keeps the bites light and crispy. The best buffalo sauce is one that matches your taste. Frank's RedHot is a popular choice for its balance of heat and flavor. If you like a milder sauce, look for ones labeled "mild" or "medium." For more heat, try a hot sauce with extra cayenne pepper. Some brands even offer organic or gluten-free options. Always read the label for ingredients. Yes, you can make this recipe ahead of time. Prepare the cauliflower and batter, then store them separately in the fridge. This keeps them fresh for up to a day. When you're ready to cook, just coat the florets and air fry. If you want to store cooked bites, keep them in an airtight container. They can last for 3-4 days in the fridge. Reheat in the air fryer for a crispy finish. Check out the Full Recipe for more tips! This post covered everything you need to know about making Air Fryer Buffalo Cauliflower Bites. We explored the key ingredients, prep steps, and cooking methods. I shared tips for crispiness and spice adjustments. You can mix up flavors and accommodate dietary needs easily. In closing, enjoy this tasty dish as a snack or meal. It’s simple, fun, and satisfying. Now, get cooking and enjoy your delicious bites!

Air Fryer Buffalo Cauliflower Bites Tasty and Easy Snack

Looking for a snack that’s both tasty and easy to make? You’ve come to the right place! Air Fryer Buffalo

To make One-Pan Cheesy Taco Pasta, you need simple and fresh items. Here’s the list of ingredients: - 1 lb ground beef (or your favorite plant-based substitute) - 1 medium onion, diced - 2 cloves garlic, minced - 1 bell pepper, diced (choose any color for vibrant presentation) - 1 packet taco seasoning - 3 cups chicken broth (or vegetable broth for a vegetarian option) - 12 oz pasta (penne or rotini work best for this dish) - 1 cup canned diced tomatoes (drained) - 1 cup corn kernels (canned or frozen) - 1 cup shredded cheddar cheese - 1/2 cup cream cheese, softened - Fresh cilantro, chopped (for garnish) - Salt and pepper to taste - 1 tablespoon olive oil These ingredients work together to create a dish full of flavor. The ground beef adds protein, while the veggies bring freshness. Taco seasoning gives it that classic taco taste, and the cheese makes it creamy. You can easily swap the beef with a plant-based option for a lighter meal. Each ingredient plays a role in making this dish simple yet delicious. For the full recipe, check below! 1. Sauté vegetables and cook meat Start by heating olive oil in a large skillet over medium heat. Add the diced onion and bell pepper. Sauté these for about 3-4 minutes until they soften and smell great. Next, add the minced garlic and cook for another minute until it gets fragrant. Now, toss in the ground beef or plant-based substitute. Break it apart with a wooden spoon. Cook this for 5-7 minutes until it turns brown. 2. Adding seasonings and broth Sprinkle the taco seasoning over the meat. Stir well to make sure it coats the meat evenly. Pour in the chicken broth and bring the mix to a gentle simmer. This step adds a depth of flavor that makes the dish so tasty. 3. Cooking the pasta and combining ingredients Once the broth is bubbling, add the pasta, drained diced tomatoes, and corn. Stir everything together to combine well. Cover the skillet with a lid. Let it cook for about 10-12 minutes. Stir occasionally to prevent sticking. Check if the pasta is tender and has soaked up most of the liquid. 4. Final touches and serving recommendations After the pasta cooks, turn the heat to low. Gently fold in the softened cream cheese. Stir until it blends in smoothly. Next, add the shredded cheddar cheese. Mix until it melts and the dish becomes creamy. Taste your creation and add salt and pepper as needed. Remove the skillet from the heat. Let it sit for a few minutes to thicken up. Serve the cheesy taco pasta in bowls. Top each bowl with freshly chopped cilantro and extra cheese. A lime wedge on the side adds a nice zing. For more detailed steps, you can check the Full Recipe for One-Pan Cheesy Taco Pasta. - How to avoid overcooking pasta To keep your pasta firm, follow the package instructions for cooking time. Check it a minute or two early. It should be al dente, which means it has a slight bite. Then, drain it right away to stop the cooking process. - Achieving a creamy consistency with cheese Start with cream cheese and let it soften. Mix it in when the heat is low. Add shredded cheddar after that. Stir until it melts. This gives your pasta a rich, creamy texture. - Flavor enhancements with spices or additional ingredients You can spice things up! Add chili powder or cumin for more kick. For extra veggies, toss in spinach or zucchini. You can also use black beans for protein. These simple swaps make your dish even better! For detailed steps and a full list of ingredients, check the Full Recipe. {{image_4}} One-Pan Cheesy Taco Pasta is fun to make. You can easily change it up! Here are some great swaps. - Vegetarian alternatives: If you want a meat-free dish, use lentils or mushrooms instead of beef. Chickpeas also work well and add protein. - Different cheese options for flavor variations: Cheddar is great, but try pepper jack for spice. You can also mix in some mozzarella for a gooey texture. If you like blue cheese, crumbling it on top adds a zesty kick. - Adding extra vegetables or beans: You can boost nutrition by adding spinach, zucchini, or diced carrots. Black beans or kidney beans are also tasty additions. They add fiber and make the dish heartier. Feel free to experiment with your own ideas. Cooking is all about making it your own! For the full recipe, check out the One-Pan Cheesy Taco Pasta. To keep your One-Pan Cheesy Taco Pasta fresh, use an airtight container. Glass or plastic containers work great. Allow the pasta to cool down before sealing it. This keeps moisture out and helps prevent sogginess. When reheating, the best method is to use the stove. Place the pasta in a pan over medium heat. Add a splash of chicken broth or water to keep it moist. Stir often until it's heated through. You can also use the microwave. Just cover it with a damp paper towel to trap steam. For freezing, portion the pasta into freezer-safe bags or containers. Make sure to remove as much air as possible. This helps prevent freezer burn. The pasta can last up to three months in the freezer. When you’re ready to eat, thaw it in the fridge overnight and reheat as mentioned above. This method keeps your cheesy taco pasta tasty and ready for a quick meal! Can I use gluten-free pasta? Yes, you can use gluten-free pasta. Look for a brand that fits your taste. Gluten-free pasta cooks differently, so check the package for timing. How can I make it spicier? To spice it up, add diced jalapeños or a splash of hot sauce. You can also mix in some crushed red pepper flakes for more heat. What side dishes pair well with this recipe? This dish goes great with a fresh salad or some tortilla chips. You can also serve it with guacamole or salsa for extra flavor. Can I prepare it in advance? Yes, you can prepare it ahead of time. Cook the pasta and sauce, then store them in the fridge. When ready to eat, just reheat and add the cheese. For the best taste, try to eat it within three days. For the full recipe, you can find all the details to create this tasty meal. One-Pan Cheesy Taco Pasta is an easy and fun dish. You can use ground beef or a plant-based choice. Fresh veggies like onion and bell pepper add crunch. The right seasonings and cheese make it creamy and tasty. Remember, you can swap ingredients to fit your taste. Store leftovers well to enjoy later. With these tips, you can create a dish everyone loves. Try this recipe today, and enjoy the flavors you bring to your table!

One-Pan Cheesy Taco Pasta Simple and Flavorful Meal

Looking for a quick, tasty meal that won’t create a mountain of dirty dishes? One-Pan Cheesy Taco Pasta is here

- 2 boneless, skinless chicken breasts - 8 oz fettuccine pasta - 1 cup heavy cream - 1 cup grated Parmesan cheese - 4 cloves garlic, finely minced - 2 tablespoons olive oil - 1 teaspoon Italian seasoning - Fresh parsley, finely chopped - Lemon wedges - Additional spices for enhanced flavor Gather these ingredients to create your creamy garlic chicken and Parmesan pasta delight. Each element plays a key role in making this dish rich and flavorful. The chicken gives you protein, while the fettuccine provides a perfect base. Heavy cream and Parmesan cheese create that dreamy sauce we all love. Garlic adds a punch of flavor, and olive oil helps sear the chicken. Italian seasoning brings warmth and depth, while fresh parsley adds a bright finish. If you want to take it a step further, consider lemon wedges to add a zesty kick. Make sure to check the Full Recipe for more details. Enjoy cooking! - Start by filling a large pot with water. - Bring the water to a rolling boil. - Add a generous amount of salt to the boiling water. - Drop in the fettuccine and cook it according to the package directions. - Aim for al dente texture, usually around 8-10 minutes. - Before draining, reserve 1 cup of pasta water. - Drain the fettuccine and set it aside. - While the pasta cooks, take the chicken breasts. - Season both sides well with salt, pepper, and Italian seasoning. - Make sure the chicken is evenly coated for great flavor. - Heat olive oil in a large skillet over medium heat. - Wait until the oil shimmers before adding the chicken. - Cook the chicken for 6-7 minutes on each side. - Look for a golden brown color and an internal temperature of 165°F (75°C). - Once done, remove the chicken and let it rest for 5 minutes. - Slice the chicken into thin strips. - In the same skillet, add the minced garlic. - Sauté the garlic for about 1 minute until fragrant. - Be careful not to let it brown; stir frequently. - Gradually pour in the heavy cream. - Bring the cream to a simmer over low heat. - Slowly whisk in the grated Parmesan cheese. - Keep stirring until the cheese melts smoothly. - If the sauce is too thick, add some reserved pasta water. - Add the drained fettuccine to the skillet with the sauce. - Toss well to coat the pasta evenly. - Taste and adjust seasoning with more salt and pepper. - To serve, scoop the creamy pasta onto plates. - Arrange the sliced chicken on top. - Finish with freshly chopped parsley for color and flavor. - For a nice touch, serve with a lemon wedge on the side. For the full recipe, check out the steps above and get cooking! To ensure your chicken is juicy, don’t overcook it. Sear each side for just 6-7 minutes. Use a meat thermometer to check for 165°F (75°C). This keeps the chicken tender and moist. Achieving perfect pasta texture is simple. Cook fettuccine until al dente. This means it should be firm but not hard when you bite it. Always salt the boiling water well before adding the pasta. It enhances flavor. If your sauce thickens too much, use reserved pasta water to thin it. Add a little at a time and stir until you reach your desired creaminess. This helps maintain a smooth texture. For storing leftovers, place the dish in an airtight container. It keeps in the fridge for up to three days. When reheating, add a splash of water or cream to restore moisture. Pair this dish with a simple side salad. A fresh green salad adds crunch and balances the creamy pasta. You could also serve with garlic bread for a cozy touch. For wine recommendations, a crisp white wine works best. Try a Sauvignon Blanc or a Chardonnay. These wines complement the flavors without overpowering the dish. For a complete experience, check the Full Recipe for more details. {{image_4}} You can add many vegetables to this dish. Great choices include spinach, broccoli, or bell peppers. These veggies add color and nutrition. To include them, simply sauté them in the skillet before adding the garlic. Cook until they soften, then add the garlic and continue with the sauce. If you want to change the protein, try shrimp, turkey, or even tofu. Each option brings its own flavor. For shrimp, cook for just 3-4 minutes until they turn pink. If using turkey, ensure it is cooked through for safety. Tofu should be pressed and cooked until golden brown. For a gluten-free meal, swap out fettuccine for gluten-free pasta. Many brands offer great taste and texture. If you need a dairy-free option, use coconut cream instead of heavy cream and a plant-based cheese. These swaps keep the dish creamy without dairy. To keep your Creamy Garlic Chicken and Parmesan Pasta Delight fresh, use airtight Tupperware. Glass containers work well, as they don’t retain odors. Make sure to cool the dish before sealing it. This helps keep moisture in check. Store leftovers in the fridge right away. If you want to freeze the dish, it’s best to do this before adding the cream. This way, it will hold up better. Portion it in freezer-safe bags or containers. Label them with the date. When you want to eat it, let it thaw in the fridge overnight. Reheat in a pan over low heat, adding a splash of water or cream to help it come back together. In the fridge, your dish will last about three to four days. After that, the quality may drop. Look for signs of spoilage, like a sour smell or mold. If it smells off or looks different, it’s best to throw it away. Making this dish takes about 30 minutes in total. You will spend 15 minutes preparing the ingredients and cooking. The pasta cooks quickly, and the chicken sears fast. This dish is perfect for a busy weeknight meal. Yes, you can use other pasta types. Penne, rotini, or spaghetti work well. Just adjust the cooking time based on the pasta you choose. Follow the package directions for best results. If you need a substitute, you can use half-and-half or whole milk. For a dairy-free option, try coconut cream or cashew cream. These will change the flavor a bit, but they still taste great. This dish is great for meal prep! You can cook it ahead of time and store it in the fridge. Just divide it into meal-sized containers. Reheat in the microwave when you’re ready to enjoy. This blog post covered a delicious recipe for Creamy Garlic Chicken and Parmesan Pasta. We explored essential ingredients like chicken breasts, fettuccine, and garlic. I shared step-by-step cooking instructions to ensure you achieve perfect flavors and textures. We also discussed tips for storage and variations to suit different diets. In your kitchen, this dish can easily shine. Enjoy cooking and don't be afraid to make it your own!

Creamy Garlic Chicken and Parmesan Pasta Delight Dish

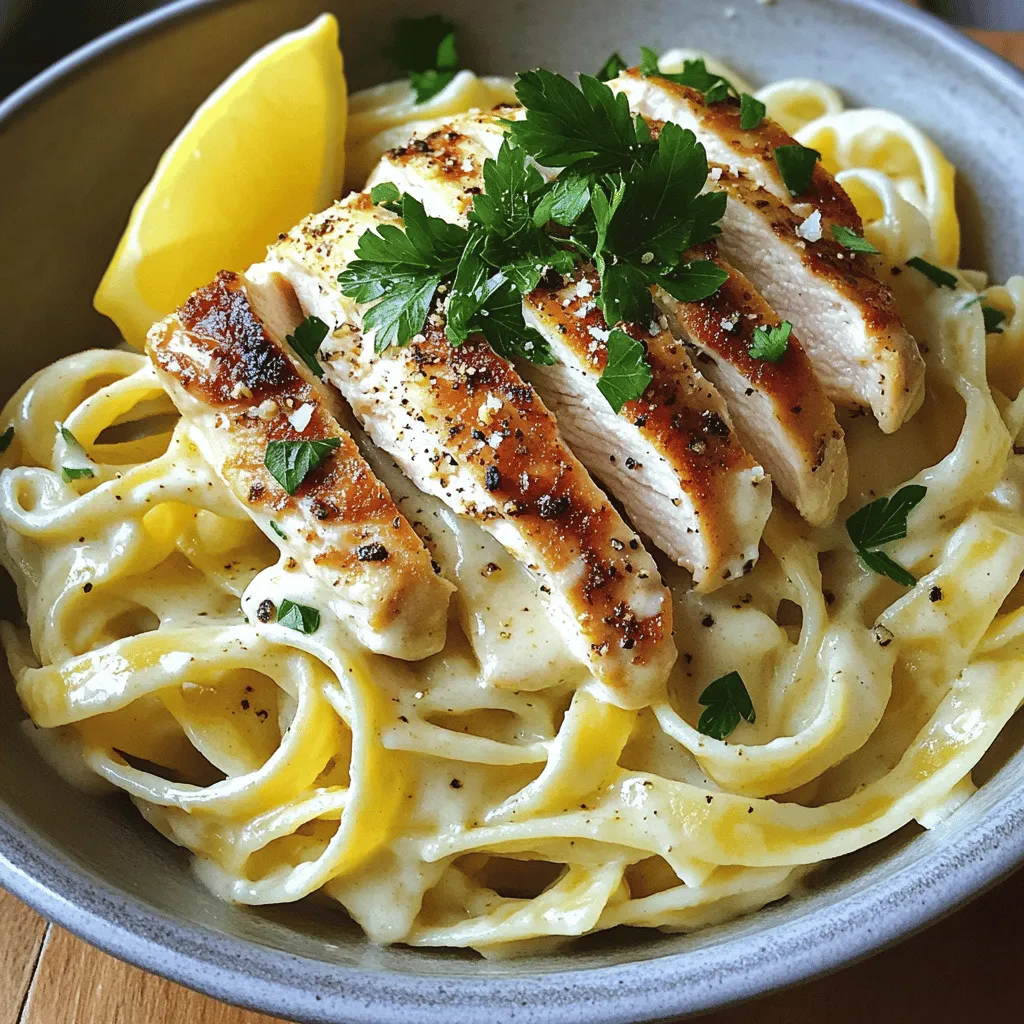
Looking for a quick, tasty dinner that impresses? My Creamy Garlic Chicken and Parmesan Pasta Delight is just what you

To make savory chicken Parmesan pillows, you'll need the following ingredients: - 1 lb cooked chicken breast, shredded - 1 cup ricotta cheese - 1 cup shredded mozzarella cheese - 1/2 cup grated Parmesan cheese - 1 large egg, beaten - 1 teaspoon garlic powder - 1 teaspoon Italian seasoning - Salt and pepper, to taste - 1 package (1 lb) refrigerated puff pastry sheets - 1 cup marinara sauce, for serving - Fresh basil leaves, for garnish Each ingredient plays a key role in the flavor and texture of the dish. The shredded chicken gives it a hearty base. Ricotta cheese adds a creamy texture, while mozzarella and Parmesan bring rich flavor. The egg acts as a binder, holding everything together. Garlic powder and Italian seasoning enhance the taste, making the filling extra delicious. Using refrigerated puff pastry sheets makes this dish easy and quick. They puff up beautifully, creating a golden crust. Serve your pillows with warm marinara sauce for dipping, and add fresh basil for a pop of color and freshness. For the full recipe, check out the detailed instructions to craft these delightful pillows. Enjoy the mix of flavors and textures in each bite! - Preheat your oven to 400°F (200°C) and prepare a baking sheet with parchment paper. - In a large bowl, mix the shredded chicken with ricotta, mozzarella, and Parmesan cheese. - Add the beaten egg, garlic powder, Italian seasoning, salt, and pepper. Mix until combined. - Lightly flour your work surface, then roll out the puff pastry sheets. Cut each sheet into four equal squares. - Spoon a generous amount of the chicken mixture into the center of each pastry square. - Carefully fold each square diagonally to form a triangle. Press and seal the edges tightly. - Place the filled pillows on the baking sheet. Bake for 20-25 minutes until golden brown. - While they bake, heat the marinara sauce in a saucepan over low heat. - Once the pillows are done, let them cool for a few minutes. Serve warm with marinara sauce and fresh basil leaves. For the full recipe, check the complete instructions above. Enjoy your cooking! To enhance the flavor, you can add some sautéed onions or chopped spinach. These add depth and nutrients. For a creamy texture, blend the cheeses well. This makes the filling smooth and easy to spoon into the pastry. Bake at 400°F for the best results. This high temperature ensures the pastry puffs nicely. Keep an eye on them; they should take about 20-25 minutes. Look for a golden-brown color to know they are done. When serving, place the pillows on a bright platter. This adds a pop of color. For garnishing, sprinkle fresh basil leaves on top. They add great flavor and make the dish look fancy. You can serve with warm marinara sauce for dipping, enhancing the overall experience. If you want more ideas, check out the [Full Recipe]. {{image_4}} If you want to switch up the chicken, consider using turkey or cooked sausage. These meats can add different flavors and textures. For the cheese, try mixing ricotta with feta or goat cheese. This change can create a unique taste in each bite. For a gluten-free option, use gluten-free puff pastry. Many brands offer this today, making it easy to find. If you prefer vegan, replace the chicken with sautéed mushrooms or lentils. Use cashew cheese instead of dairy cheese for a creamy texture without animal products. To spice things up, add red pepper flakes or cayenne pepper to the filling. This will give your pillows a kick. You can also mix in fresh herbs like basil or oregano for a burst of flavor. Adding finely chopped spinach or bell peppers into the filling can boost nutrition and add color. These variations make your chicken Parmesan pillows fun and exciting while keeping them delicious. Check the Full Recipe for the base method and let your creativity flow! To store leftovers, place the pillows in an airtight container. Keep them in the fridge for up to three days. Make sure they are fully cooled before sealing. This helps keep them fresh and tasty. To reheat, preheat your oven to 350°F (175°C). Place the pillows on a baking sheet. Cover them loosely with foil to keep moisture in. Heat for about 10-15 minutes until warm. This keeps the pastry crispy and the filling soft. For long-term storage, freeze the chicken Parmesan pillows before baking. Wrap each pillow in plastic wrap, then place them in a freezer bag. They can last for up to three months in the freezer. When ready to cook, take them out and thaw overnight in the fridge. This helps them cook evenly. You can then bake them as per the full recipe instructions. Chicken Parmesan Pillows are tasty pastries filled with chicken and cheese. They use puff pastry, which makes them light and flaky. Inside, you’ll find a mix of shredded chicken, ricotta, mozzarella, and Parmesan cheese. I also add garlic and Italian herbs for extra flavor. These pillows are baked until golden brown and served with warm marinara sauce for dipping. To create a vegetarian version, swap the chicken for vegetables. Chopped spinach, mushrooms, or artichokes work well. You can also use lentils or chickpeas for protein. Keep the cheese mixture the same, or try adding feta for a twist. This way, you’ll still get that creamy and cheesy filling. Yes, you can prep these pillows in advance. Assemble them and place them on a baking sheet. Cover and refrigerate for up to 24 hours before baking. If you need to store them longer, freeze them before baking. Just place them in the oven straight from the freezer, adding a few extra minutes to the bake time. These pillows pair well with a side salad or steamed vegetables. You can also serve them with garlic bread for a complete meal. For a fun twist, try them with a side of pesto or garlic aioli for dipping. Fresh basil leaves also make a nice garnish, adding color and flavor. You now have a complete guide to making Chicken Parmesan Pillows. We covered ingredients, step-by-step instructions, and helpful tips. You can customize the recipe with various fillings and adjustments. Store your leftovers properly to keep them fresh. Enjoy experimenting with flavors and serving ideas. This dish promises to be a hit. Happy cooking!

Savory Chicken Parmesan Pillows for Easy Dinner

Craving a fun twist on a classic dish? Try my savory Chicken Parmesan Pillows! These tasty bites combine tender chicken,

Older posts
Newer posts
← Previous Page1 … Page35 Page36 Page37 Page38 Next →

dsad

© 2025 tastyhatch • Built with GeneratePress

Our Policies

  • Copyright Policy
  • Cookie Policy
  • GDPR Policy
  • Privacy Policy
  • Disclaimer
  • Terms Of Use

More Information

  • Home
  • About
  • Contact
  • Appetizers
  • Dessert
  • Dinner
  • Drinks
©2025, tastyhatch About Back To Top