Skip to content
DisclaimerTerms Of UseGDPR PolicyCookie Policy

tastyhatch

  • Home
  • Drinks
  • Appetizers
  • Dinner
  • Dessert
  • About
  • Contact
  • Privacy Policy
DisclaimerTerms Of UseGDPR PolicyCookie Policy

Olivia

- 1 can (15 ounces) chickpeas, thoroughly drained and rinsed - 1 tablespoon extra virgin olive oil - 1 teaspoon garlic powder - 1 teaspoon smoked paprika - ½ teaspoon ground cumin - ½ teaspoon sea salt - ¼ teaspoon freshly ground black pepper - ¼ teaspoon cayenne pepper (optional) - Fresh parsley for garnish In this recipe, the chickpeas are the star. They are packed with protein and fiber. Using canned chickpeas makes this snack quick and easy. You want to drain and rinse them well. This step helps remove some of the sodium. Next, we add olive oil. It helps the spices stick and gives a nice flavor. Garlic powder adds depth, while smoked paprika gives a lovely smoky taste. Cumin and black pepper add warmth, and cayenne adds a kick if you like spice. Don't forget the sea salt! It brings out all the flavors in the mix. Finally, fresh parsley adds color and freshness when you serve the chickpeas. You can find the full recipe at the end of this article. Preheating your air fryer is key for great results. It helps cook the chickpeas evenly. Set the temperature to 400°F (200°C). Let it heat for about 5 minutes. This short wait makes a big difference in crispiness. Start by draining the chickpeas from the can. Rinse them under cool water to remove the canned flavor. Spread the chickpeas on a clean kitchen towel. Use another towel to gently pat them dry. Removing moisture is crucial for that lovely crunch. In a medium bowl, combine the dried chickpeas with olive oil, garlic powder, smoked paprika, cumin, sea salt, black pepper, and cayenne pepper if you like some heat. Toss everything well. Make sure the chickpeas are fully coated with the spices. Feel free to adjust the seasonings to suit your taste. Place the seasoned chickpeas in the air fryer basket. Arrange them in a single layer for even cooking. If your air fryer is small, you may need to do this in batches. Cook for 15-20 minutes, shaking the basket halfway through. They are ready when they look golden brown and crunchy. Once cooked, transfer the chickpeas to a cooling rack or a plate. Let them cool for a few minutes. Cooling helps them become even crispier, giving you that perfect snack. After cooling, put the crispy chickpeas in a nice serving bowl. Sprinkle chopped fresh parsley on top for color and flavor. You can also serve them with a creamy yogurt dip or zesty salsa for some extra fun. For the full recipe, check out Crispy Air Fryer Chickpeas! To get the best crunch from your chickpeas, moisture must go. After rinsing, lay them on a kitchen towel. Pat them dry gently. If you skip this step, they won’t get crispy. Different air fryer models may require slight changes. Always check the manual for best settings. If your air fryer runs hot, reduce the time by a few minutes. To spice up your chickpeas, think beyond the basic seasonings. You can add garlic powder, onion powder, or even mixed herbs. Try a sprinkle of chili powder for heat or curry powder for warmth. For dips, consider yogurt-based sauces or hummus. They pair perfectly with crispy chickpeas and add a creamy texture. One common mistake is overcrowding the basket. If you pile too many chickpeas in, they won’t cook evenly. Spread them out in a single layer for best results. Another pitfall is cooking at the wrong temperature. Always aim for 400°F (200°C). To avoid undercooked chickpeas, check them halfway through. Give the basket a shake to ensure even cooking. This will help you achieve that golden brown color and crunch you want. For the full recipe, check out the Crispy Air Fryer Chickpeas. {{image_4}} You can change the flavor of your crispy air fryer chickpeas by using different seasonings. BBQ seasoning adds a smoky touch. Italian herbs give a fresh and savory taste. If you like sweet snacks, try combining cinnamon with sugar. This mix creates a delightful contrast that makes a tasty treat. You can also use dried chickpeas for this recipe. Start by soaking them overnight. After soaking, cook them until they are tender. This process takes about 1 to 1.5 hours. You will need to adjust the cooking time in the air fryer. Cook them for about 20 to 25 minutes instead of the usual time. Crispy air fryer chickpeas are perfect for salads or bowls. Toss them in with fresh greens, veggies, and your favorite dressing. They add a lovely crunch and flavor. You can also use them for a healthy snack platter. Serve them with dips like hummus or yogurt. This makes for a fun and tasty snack option for any gathering. To store leftover crispy chickpeas, let them cool first. Once cool, place them in an airtight container. I recommend using a glass jar or a plastic container with a lid. These containers keep them fresh and crunchy. Avoid using paper bags, as they do not seal well. To reheat crispy chickpeas, use your air fryer for best results. Set the temperature to 350°F (175°C). Heat them for about 5 minutes. This method keeps them crispy. You can also use an oven, but it may take longer. Crispy chickpeas can last about 3 to 5 days when stored correctly. Check for any signs of softness or changes in color. If they feel soggy or have a strange smell, it’s best to toss them out. Always trust your senses when it comes to food safety. To make crispy chickpeas in an air fryer, follow these steps: 1. Preheat the Air Fryer: Set your air fryer to 400°F (200°C). 2. Prepare the Chickpeas: Drain and rinse a can of chickpeas. Pat them dry with a towel. 3. Season the Chickpeas: In a bowl, mix the chickpeas with olive oil and spices. Toss well. 4. Air Fry the Chickpeas: Place the chickpeas in the air fryer basket. Cook for 15-20 minutes. 5. Cool Down: Let them cool on a rack to get extra crispy. 6. Garnish and Serve: Add fresh parsley for color. Enjoy your snack! Yes, you can use dried chickpeas. Here’s how to prepare them: 1. Soaking: Soak dried chickpeas in water overnight. 2. Cooking: Drain and cook them in boiling water until tender (about 1-1.5 hours). 3. Drying: Make sure to dry them well before seasoning and air frying. Crispy chickpeas pair well with many dips. Here are a few ideas: - Creamy Yogurt Dip: Mix yogurt with herbs and lemon. - Spicy Salsa: A zesty salsa adds great flavor. - Hummus: Classic and always a hit. - Guacamole: For a creamy twist. Crispy air fryer chickpeas are a healthy snack. Here are some benefits: - High in Protein: They give you a good protein boost. - Fiber-Rich: Chickpeas are full of fiber, which aids digestion. - Low in Fat: Using minimal oil keeps them light. - Nutrient-Dense: They contain vitamins and minerals. To keep your chickpeas crispy, follow these tips: - Store in an Airtight Container: This keeps moisture out. - Avoid Stacking: Lay them flat instead of piling them. - Use Within a Few Days: They are best eaten fresh. Yes, you can freeze crispy chickpeas. Here’s how: 1. Cool Completely: Let them cool down first. 2. Flash Freeze: Spread them on a baking sheet. Freeze for 1-2 hours. 3. Store in a Bag: Transfer to a freezer bag. Remove air and seal tightly. When ready to eat, thaw and reheat in the air fryer for crispiness. For the full recipe, check the detailed instructions provided above. Making crispy chickpeas in an air fryer is easy and fun. We covered the main ingredients, talked about step-by-step instructions, and shared tips for the best results. You can add different flavors and enjoy them with dips. With proper storage and reheating, you can keep them crisp for snacking. Remember to avoid common mistakes to ensure perfect chickpeas every time. Experiment with new spices to find your favorite mix. Enjoy your cooking and snack time!

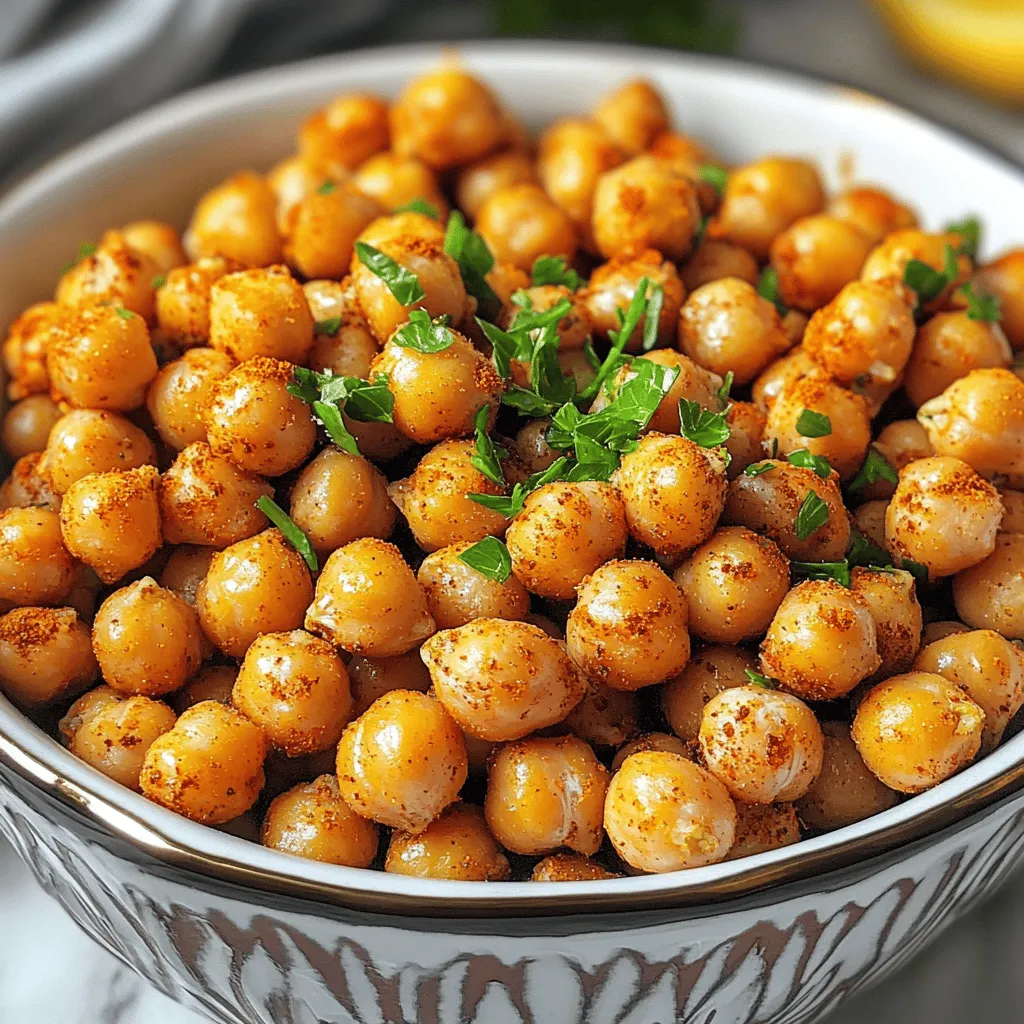
Crispy Air Fryer Chickpeas Flavorful and Healthy Snack

Looking for a snack that’s both tasty and healthy? Crispy air fryer chickpeas are your answer! With just a handful

- 1 cup unsalted butter, softened - 1 cup packed brown sugar - 1/2 cup granulated sugar - 2 large eggs - 2 teaspoons pure vanilla extract - 2 cups all-purpose flour - 1 teaspoon baking soda - 1/2 teaspoon sea salt - 1 cup chocolate chips - 1/2 cup soft caramel candies, chopped - Flaky sea salt for garnish You can swap out unsalted butter for coconut oil or margarine. This works well if you want a dairy-free option. For sugar, try coconut sugar or even honey. Both can add unique flavors. If you need a gluten-free choice, use almond or oat flour instead of all-purpose flour. These options can make your cookie just as tasty. You will need a cast-iron skillet or any oven-safe frying pan. This helps the cookie bake evenly and gives it a nice crust. An electric mixer makes mixing easy and quick. Don't forget mixing bowls to hold your ingredients. These tools are key to making your skillet cookie a success. For the full recipe, check out the details above. First, you need to preheat your oven to 350°F (175°C). This temperature is key for baking. It helps the cookie cook evenly and rise well. If the oven is not hot enough, your cookie might bake slowly. This can affect the texture and taste. Next, let’s prepare the cookie dough. In a large mixing bowl, cream the softened butter, brown sugar, and granulated sugar. Use an electric mixer on medium speed. Mix for about 3-4 minutes until fluffy. After that, add the eggs one at a time. Mix well after each egg. Then, stir in the vanilla extract until blended. In another bowl, whisk the flour, baking soda, and sea salt together. Gradually add this dry mix to the wet mix. Stir gently until just combined. It’s important not to over-mix. Finally, fold in the chocolate chips and chopped caramel candies. This ensures they are spread evenly in the dough. Now, it's time to bake! Spoon the dough into your prepared skillet. Use a spatula to spread the dough evenly. Place the skillet in your preheated oven. Bake for 25-30 minutes. The edges should turn golden brown, and the center should be set. To check if it’s done, insert a toothpick in the center. It should come out mostly clean, with a few moist crumbs. Once baked, take the skillet out of the oven. While it’s still warm, sprinkle flaky sea salt on top. This adds a nice flavor contrast. Let the cookie cool in the skillet for about 10 minutes. Then, slice it into wedges or serve it warm straight from the skillet. For the full recipe, check out the section above. Enjoy your delicious creation! To get a chewy center and crispy edges, use the right butter. Softened butter is key. Cream it well with sugars until fluffy. This step adds air and helps the cookie rise. Do not over-mix the dough after adding flour. Gentle folding keeps the texture light. Bake until the edges are golden. The center should look set but soft. Choosing between milk and dark chocolate can change the flavor. Milk chocolate adds a sweet, creamy touch. It melts beautifully and mixes well with caramel. Dark chocolate gives a rich, bold taste. It balances the sweetness of the cookie. I often use a mix of both for a layered flavor experience. For a delightful presentation, serve warm slices right from the skillet. Top them with a scoop of vanilla ice cream. Adding a drizzle of caramel sauce makes it special. You can also sprinkle extra flaky sea salt on top. This contrast of flavors will impress your guests and make them want more. For the full recipe, check the details shared earlier. {{image_4}} You can take your skillet cookie to the next level. Adding nuts boosts texture and flavor. Try using chopped walnuts or pecans. These add a nice crunch. You can also switch up the chocolate. Use dark chocolate for a richer taste. White chocolate adds a sweet twist. Mix and match to find your favorite! Making a vegan version is easy. Swap butter with coconut oil and use flax eggs. For sugar-free options, choose sweeteners like erythritol or monk fruit. These choices keep the cookie tasty and healthy. You can still enjoy this treat without eggs or sugar! Get creative with toppings! Serve warm slices with vanilla ice cream. Drizzle extra caramel sauce on top for a sweet touch. You can also sprinkle crushed nuts or sea salt for added flavor. Fresh berries make a great garnish too. These toppings make your skillet cookie look and taste gourmet! For the full recipe, check out the details above. To keep your caramel chocolate chip skillet cookie fresh, place it in an airtight container. This will help prevent it from drying out. If you have leftovers, store them at room temperature for up to three days. If you want to keep it longer, consider refrigeration. Just remember to bring it back to room temperature before serving for the best taste. When you're ready to enjoy leftovers, reheating is key. Preheat your oven to 350°F (175°C). Place a slice of the cookie on a baking sheet. Heat for about 5-10 minutes. You want it warm, not hot, to keep the cookie soft. For a quick fix, you can microwave a slice for about 15 seconds. This will make it gooey and delightful again. If you want to save some for later, you can freeze the cookie. First, let it cool completely. Then, wrap it tightly in plastic wrap or aluminum foil. You can also place it in a freezer-safe bag. It will stay fresh for up to three months. When you're ready to eat it, thaw it overnight in the fridge. Then, reheat as mentioned above for a fresh-out-of-the-oven taste. Yes, you can make the cookie dough ahead of time. This makes baking easy! Just prepare the dough, wrap it tightly in plastic wrap, and store it in the fridge for up to three days. If you want to keep it longer, freeze the dough for up to three months. When you're ready to bake, let it thaw in the fridge overnight. Then, scoop and bake as usual. Look for a few signs when baking your skillet cookie. The edges should turn golden brown. The center should appear set but slightly soft. A toothpick test works well, too. Insert it into the center, and it should come out with a few moist crumbs. If it comes out clean, it may be overbaked. Serving this cookie is part of the fun! I love to serve warm slices right from the skillet. Pair it with a scoop of creamy vanilla ice cream. Drizzle extra caramel sauce on top for a sweet touch. You can also sprinkle some flaky sea salt to enhance the flavors. This makes every bite special! In this post, we explored the ingredients and techniques for baking the perfect cookie. We covered essential tools, tips for great texture, and ways to personalize your treat. Remember, ingredients matter, so choose wisely for the best flavor. Don't shy away from making variations or trying new serving ideas. Lastly, properly store your cookies to keep them fresh and tasty. Now, you have everything to bake cookies that everyone will love. Enjoy your baking adventure!

Caramel Chocolate Chip Skillet Cookie Delight

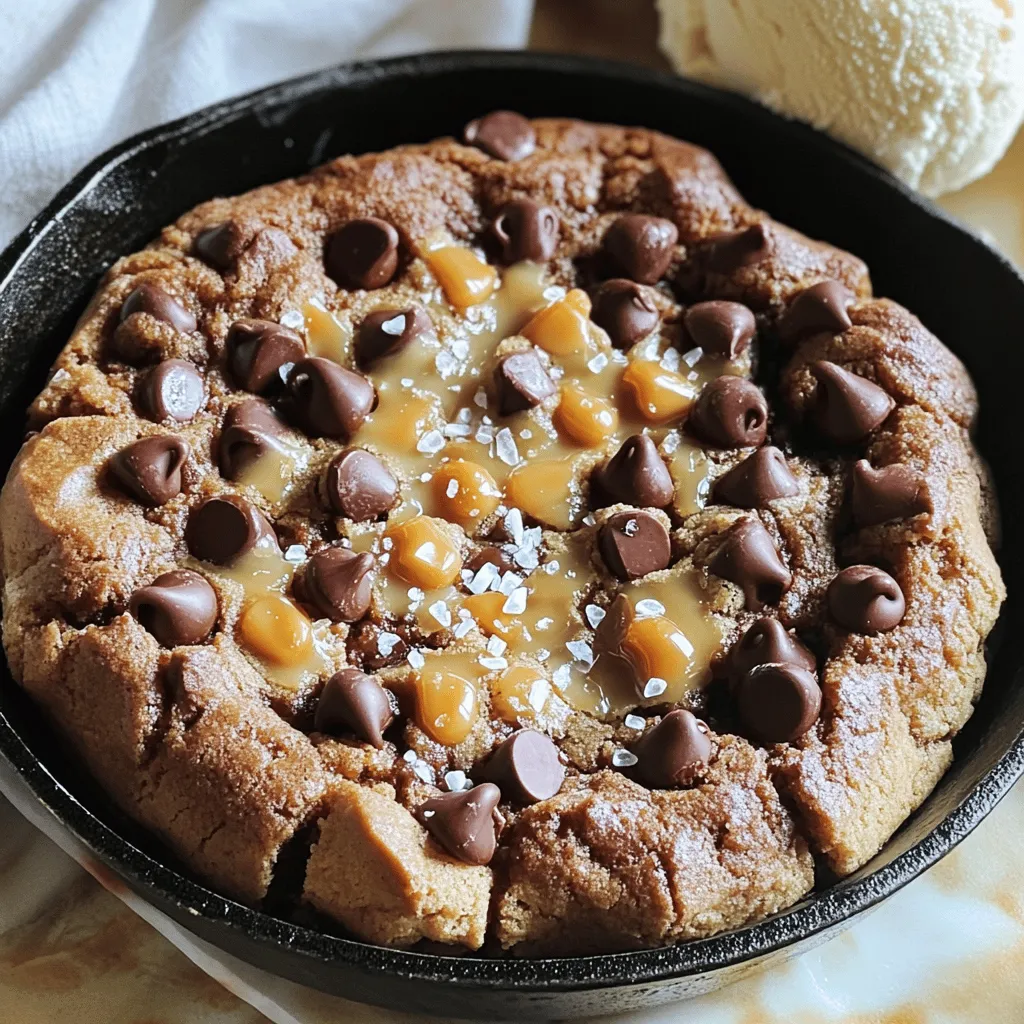
Get ready to indulge in a warm, gooey treat that combines rich chocolate and sweet caramel! My Caramel Chocolate Chip

- 1 cup unsalted butter, softened - 3/4 cup granulated sugar - 3/4 cup packed brown sugar - 2 large eggs - 1 teaspoon pure vanilla extract - 2 1/4 cups all-purpose flour - 1 teaspoon baking soda - 1/2 teaspoon salt - 1 cup semi-sweet chocolate chips - 1 cup mini marshmallows - 1 cup graham cracker crumbs To make S'mores cookie bars, you need simple ingredients. Start with butter. It gives a nice, rich flavor. You’ll also need both granulated and brown sugar. This mix makes the bars sweet and chewy. Eggs help bind all the ingredients together. They add moisture too. Vanilla extract gives a lovely aroma and taste. All-purpose flour is the base of the cookie. Baking soda helps it rise, while salt balances the sweetness. For that classic S'mores flavor, graham cracker crumbs are key. Chocolate chips bring a melty goodness to the bars. Mini marshmallows add that gooey texture we all love. - Mixing bowls - Spatula - Baking dish (9x13-inch) - Parchment paper (optional) You will need a few tools to make these bars. A mixing bowl helps you combine the ingredients easily. A spatula is perfect for spreading the dough. A 9x13-inch baking dish is necessary for baking. Using parchment paper makes it easy to lift the bars out after baking. With these ingredients and tools ready, you are set to create a delightful treat! To see the complete process, check the Full Recipe. - Preheat the oven to 350°F (175°C). - Grease or line your baking dish with parchment paper. - In a large bowl, cream together 1 cup of softened butter, 3/4 cup of granulated sugar, and 3/4 cup of packed brown sugar. Mix until light and fluffy. - Next, add 2 large eggs, one at a time. Mix well after each egg. Stir in 1 teaspoon of pure vanilla extract until combined. - In a separate bowl, whisk together 2 1/4 cups of all-purpose flour, 1 teaspoon of baking soda, and 1/2 teaspoon of salt. Slowly fold this mixture into the wet ingredients until just combined. - Pour half of the cookie dough into the prepared baking dish. Spread it evenly across the bottom. - Sprinkle 1 cup of mini marshmallows and 1 cup of semi-sweet chocolate chips over the first layer of dough. - Top it with the remaining cookie dough, spreading it carefully to cover the marshmallows and chocolate. - Bake your S'mores cookie bars for 25-30 minutes. Look for golden-brown edges and test with a toothpick; it should come out with a few moist crumbs. - Let the bars cool completely in the pan. If you used parchment paper, lift them out. Cut into squares and enjoy! For the full recipe, check out the details above. To make great S'mores cookie bars, avoid overmixing the dough. Overmixing can make the bars tough. Mix just until the flour disappears. This keeps the bars soft and chewy. Also, choose high-quality chocolate chips. Good chocolate adds rich flavor. Look for semi-sweet or dark chocolate, depending on your taste. Quality ingredients really shine through in this treat. For a special touch, drizzle melted chocolate over the bars. This adds a lovely shine and extra sweetness. You can also serve the bars with ice cream. The cold ice cream pairs well with the warm cookie bars. It creates a delicious contrast and takes the treat to the next level. If your cookie bars turn out dry, add a splash of milk. This can help restore moisture. You can also try baking for a shorter time next time. For underbaked bars, simply return them to the oven. Bake for a few more minutes until firm. Keep an eye on them to ensure they don't overbake. Adjusting the baking time can lead to perfect results every time. For the complete recipe, check the Full Recipe section. {{image_4}} You can make S'mores cookie bars even more fun and tasty with some easy changes. - Using gluten-free flour: You can swap out all-purpose flour for a gluten-free blend. This keeps the bars chewy and delicious for everyone. Look for a blend that works well in baking. - Experimenting with different chocolate types: Try using dark chocolate or white chocolate chips. Each type brings a unique taste. Mix and match to find your favorite combo. - Adding peanut butter chips: Adding peanut butter chips gives your bars a nutty twist. The sweet and salty mix makes each bite extra special. - Mixing in nuts or dried fruit: Chopped nuts like walnuts or pecans add crunch. Dried fruits like cranberries or cherries can bring a tangy flavor. Be creative and find what you love. - Holiday-themed S'mores bars: For the holidays, add festive touches. You can use colored marshmallows or sprinkle festive candies on top. It makes your bars look great and taste even better. - Incorporating spices like cinnamon: A pinch of cinnamon can warm up your bars. This simple spice can make a big taste difference, especially in fall or winter. Feel free to play around with these ideas to create your own special S'mores cookie bars. Enjoy the process and the tasty results! For the full recipe, check out the details above. To keep your S'mores cookie bars fresh, store them at room temperature. Place them in an airtight container. This helps prevent them from drying out. You can also cover them tightly with plastic wrap. Enjoy these treats within a week for the best taste. If you want to save your cookie bars for later, freezing is a great option. First, cut the bars into squares. Wrap each square in plastic wrap. Then, put them in a freezer-safe bag or container. They can last up to three months in the freezer. When you want to enjoy them, simply take them out and let them thaw on the counter for about an hour. S'mores cookie bars last about a week at room temperature. Check for signs of spoilage, like a dry or hard texture. If they have an off smell or changed color, it’s best to throw them away. Enjoy your treats while they are fresh! For the full recipe, check out the earlier section. To make S'mores cookie bars from scratch, follow these easy steps: 1. Prepare for Baking: Preheat your oven to 350°F (175°C). Grease a 9x13-inch baking dish or use parchment paper. 2. Cream the Base: In a bowl, beat 1 cup of softened butter with 3/4 cup of granulated sugar and 3/4 cup of brown sugar until fluffy. 3. Incorporate Eggs: Add 2 large eggs, mixing one at a time. Stir in 1 teaspoon of vanilla extract. 4. Combine Dry Ingredients: In another bowl, whisk 2 1/4 cups flour, 1 teaspoon baking soda, and 1/2 teaspoon salt. 5. Mix Wet and Dry: Fold the dry mix into the wet mix. It's okay to have some flour streaks. 6. Add S'mores Elements: Fold in 1 cup of graham cracker crumbs and 1 cup of semi-sweet chocolate chips. 7. Layer the Dough: Spread half the dough in the dish, then top with 1 cup of mini marshmallows and some reserved chocolate chips. 8. Top Off: Spread the rest of the dough over the marshmallows. 9. Bake to Perfection: Bake for 25-30 minutes until golden brown on the edges. 10. Cool and Serve: Let the bars cool completely before cutting them into squares. Yes, you can make gluten-free S'mores cookie bars. Use gluten-free flour instead of all-purpose flour. Brands like Bob's Red Mill or King Arthur Flour offer great options. They usually give similar results in texture and taste. Also, check your graham crackers. Some brands make gluten-free versions. To tell if your S'mores cookie bars are done, look at the edges. They should be golden brown. Insert a toothpick in the center. If it comes out with moist crumbs, the bars are ready. If it’s wet with batter, bake a few more minutes. To keep your S'mores cookie bars fresh, store them in an airtight container. They can stay at room temperature for up to a week. If you want to keep them longer, wrap them well in plastic wrap and freeze. They last up to three months in the freezer. Absolutely! You can make these cookie bars your own. Try different types of chocolate chips, like dark or white chocolate. Add peanut butter chips or nuts for extra crunch. You could even mix in dried fruits for a fun twist. Explore your taste and get creative with the recipe! For the full recipe, check the earlier section. You can make delicious S'mores cookie bars using simple ingredients and tools. Start by mixing butter, sugars, and eggs. Layer the dough with chocolate chips and marshmallows for a tasty treat. Remember to store them right for the best flavor. Explore variations, like adding peanut butter chips or trying gluten-free flour. These bars are easy to adjust to your taste. Now that you know how to make and store them, enjoy sharing these treats. You’ll impress family and friends with your baking skills!

S’mores Cookie Bars Irresistibly Sweet and Chewy Treat

Love the taste of s’mores? Imagine that flavor packed into a sweet, chewy cookie bar! In this guide, I’ll show

- 12 oz pasta (choose spaghetti or fettuccine) - 2 ripe avocados - 1 lime (juice and zest) - 2 cloves garlic The main ingredients for creamy avocado lime pasta are simple. I like to use spaghetti or fettuccine because they hold the sauce well. The ripe avocados bring a rich creaminess to the dish. You’ll get a fresh zing from the lime juice and zest. Garlic adds a bold flavor that makes every bite delicious. - Handful of cherry tomatoes (halved) - Toasted pine nuts - Fresh basil leaves I often add cherry tomatoes for a pop of color and sweetness. Toasted pine nuts give the dish a nice crunch. Fresh basil leaves on top add a lovely aroma and freshness. These garnishes make the pasta not just tasty, but also pretty. - Grated Parmesan cheese or nutritional yeast - Olive oil variations If you want a cheesy taste without dairy, use nutritional yeast. Grated Parmesan cheese works well too. You can change the olive oil for another oil if you prefer. This flexibility makes the recipe easy to adapt to your taste. For the full recipe, check out the detailed steps and instructions. - Bring salted water to a boil. - Cook the pasta according to package instructions. This usually takes about 8-10 minutes. - Once done, reserve 1 cup of the pasta water. Drain the pasta in a colander. Set it aside. - In a food processor, add the ripe avocados. - Squeeze in the lime juice and add the lime zest. - Add minced garlic and fresh basil leaves. - Blend until smooth and creamy. - If the sauce is thick, add a splash of reserved pasta water. Blend again for the perfect consistency. - In a large bowl, mix the cooked pasta with the avocado sauce. - Toss gently until every strand of pasta is fully coated. - If the pasta seems dry, add reserved pasta water a bit at a time. This helps the sauce cling beautifully to the noodles. For a complete guide, check the Full Recipe. To make your creamy avocado lime pasta even tastier, adjust the seasoning with salt and pepper. This simple step brings out the best in your dish. You can also add fresh lemon zest for an extra zing. The zest will brighten up the flavors and give your pasta a refreshing twist. If your sauce is too thick, use reserved pasta water to reach your desired creaminess. This step helps the sauce cling to the pasta, making every bite delightful. If you need a bit more smoothness, add a splash of high-quality olive oil. This not only enhances texture but also adds richness to the dish. For a stunning presentation, drizzle a little olive oil over the top before serving. Place a sprig of fresh basil at the center of each bowl for a pop of color. Pair your pasta with a simple salad or crusty bread. These sides complement the creamy pasta and round out the meal. For the full recipe, check out the provided link. {{image_4}} You can easily make this dish vegan. Simply replace the Parmesan cheese with nutritional yeast. This swap gives a cheesy flavor without dairy. You can also use a nut-free pesto sauce instead of the creamy avocado sauce. This will give you a fresh twist. Both options keep the dish light and tasty. Want to add more protein? Grilled chicken or shrimp are great choices. They pair well with the creamy avocado sauce. If you prefer a vegetarian option, add beans. Black beans or chickpeas work well for a protein boost. They also add a nice texture and flavor to the meal. Looking to spice things up? Try adding chili flakes or smoked paprika. These spices add warmth and depth to the dish. You can also incorporate seasonal vegetables, like spinach or zucchini. They not only enhance the flavor but also add nutrients and color. Enjoy experimenting with flavors and textures! Store any leftover creamy avocado lime pasta in an airtight container. This keeps it fresh and tasty. I recommend using it within 2-3 days for the best flavor. The avocado can brown over time, so eat it soon! You can freeze the pasta or the sauce separately. If you freeze the pasta, it might get mushy. For the sauce, freeze it in small portions. To thaw, move it to the fridge overnight. Reheat gently in a pan or microwave until warm. Add a splash of water if it seems too thick. Prevent the avocado from turning brown by adding a bit of lime juice. This helps keep its bright green color. When storing pasta, avoid letting it sit too long in the sauce. This keeps the pasta firm and not mushy. Enjoy your creamy avocado lime pasta at its best! To make creamy avocado lime pasta, first, cook your pasta. Use 12 oz of spaghetti or fettuccine. While the pasta cooks, blend two ripe avocados, lime juice, garlic, and fresh basil in a food processor. Once smooth, mix the avocado sauce with your drained pasta. Adjust the texture with reserved pasta water if needed. Season with salt and pepper. Serve with cherry tomatoes and toasted pine nuts on top. For the [Full Recipe], follow the detailed steps outlined. Yes, you can use different pasta types. Whole wheat or gluten-free pasta works well too. You might like penne or farfalle for a fun shape. Just cook them according to the package instructions. The creamy avocado sauce pairs well with any pasta. Leftover avocado pasta can be enjoyed cold as a salad. Add a splash of lime juice to brighten the flavor. You can also mix in cooked chicken or shrimp for a hearty meal. If you want, heat it gently in a pan, adding a bit of olive oil to keep it creamy. In this blog post, we explored making creamy avocado lime pasta. We covered the main ingredients and optional garnishes. I shared step-by-step instructions for cooking and combining. You learned tips for enhancing flavor and adjusting texture. We also discussed variations, storage tips, and answered common questions. This dish is simple, tasty, and fun to make. Enjoy experimenting with flavors and ingredients. I hope you feel inspired to create your own version of this meal. Happy cooking!

Creamy Avocado Lime Pasta Simple and Delicious Meal

Are you ready to elevate your pasta night? My Creamy Avocado Lime Pasta offers a fresh twist that’s both simple

To make a vibrant Lemon Herb Couscous Salad, you will need: - 1 cup couscous - 1 1/4 cups vegetable broth or water - 1/2 cup cherry tomatoes, halved - 1 cucumber, diced into small cubes - 1/4 cup red onion, finely chopped - 1/2 cup fresh parsley, finely chopped - 1/4 cup fresh mint, finely chopped - 1/4 cup extra virgin olive oil - Zest of 1 large lemon - Juice of 1 large lemon - Salt and freshly ground black pepper, to taste - 1/4 teaspoon red pepper flakes (optional, for a kick) If you don't have some ingredients, here are some great swaps: - Instead of couscous, use quinoa for a gluten-free option. - Swap cherry tomatoes for diced bell peppers for a different taste. - Use green onions in place of red onion for a milder flavor. - If you can't find fresh parsley, try cilantro for a unique twist. - Lemon juice can be replaced with lime juice for a zesty change. Each serving of this Lemon Herb Couscous Salad packs in great nutrition: - Calories: about 180 - Protein: 4g - Carbohydrates: 26g - Dietary Fiber: 3g - Sugars: 2g - Fat: 7g - Saturated Fat: 1g - Sodium: 150mg This salad is not just tasty; it also brings healthy benefits to your table. Enjoy! Start by boiling the vegetable broth or water in a medium saucepan. Once it bubbles, add the couscous with a pinch of salt. Stir it well, then cover the pot and take it off the heat. Let it sit for five minutes. This step lets the couscous absorb all the liquid. After the time is up, use a fork to fluff the couscous. This breaks up clumps and makes it nice and fluffy. Set the couscous aside to cool. While the couscous cools, grab a large mixing bowl. Add the halved cherry tomatoes, diced cucumber, finely chopped red onion, parsley, and mint. Toss the veggies gently. Next, in a small bowl, whisk together the olive oil, lemon zest, lemon juice, salt, and pepper. If you want it spicy, add red pepper flakes. Mix this dressing until it blends well. Once the couscous is cool, add it to the bowl with the veggies. Fold everything together gently to mix. Taste the salad and add more salt or pepper if needed. For the best flavor, cover the bowl with plastic wrap and chill it in the fridge for at least 30 minutes. This waiting time helps the flavors blend well. When ready to serve, dish it out in a large bowl or on individual plates. Garnish with extra parsley and lemon wedges for a fresh look. Enjoy your Lemon Herb Couscous Salad! For more detailed steps, check the Full Recipe. To make your Lemon Herb Couscous Salad shine, always use fresh herbs. Fresh parsley and mint boost flavor. If possible, choose organic vegetables for a brighter taste. Use a good quality olive oil; it makes a big difference. Zest the lemon before juicing for more zing. You can even add a pinch of sugar to balance the acidity. Let the salad chill for at least 30 minutes. This resting time helps all the flavors blend. If you have leftovers, store them in an airtight container. Keep the salad in the fridge for up to three days. To maintain freshness, avoid adding dressing until you’re ready to eat. If the salad seems dry after storage, add a splash of olive oil or lemon juice. This will revive the flavors. This salad is great for many events! For a picnic, pack it in a portable container. It pairs well with grilled meats or fish for a barbecue. You can also serve it as a light lunch or side dish at a dinner party. For a more festive touch, add some crumbled feta cheese or grilled chicken. Check out the Full Recipe for more ideas and tips to make this meal a hit! {{image_4}} You can boost the protein in your Lemon Herb Couscous Salad easily. Grilled chicken adds a savory touch. Chop it into bite-sized pieces and mix it in. Chickpeas are a great choice too. They add a nice texture and are full of protein. For a creamy twist, try adding feta cheese. Crumble it over the top for a salty flavor. These options make your salad more filling and satisfying. Mix seasonal fruits and vegetables into your salad for extra flavor. In summer, try adding diced peaches or fresh corn. In fall, roasted butternut squash adds sweetness. You can also toss in seasonal greens like spinach or arugula. These additions not only enhance the taste but also make your dish more colorful and appealing. Choose what’s fresh and local for the best results. To make this salad vegan, skip the feta or replace it with vegan cheese. You can also add more beans for protein, like black beans or lentils. Use a plant-based dressing, such as tahini or a balsamic vinaigrette. This keeps the salad tasty and light. Adjust the flavors to your liking, and enjoy a meal that everyone can share. For the full recipe, check out the link above. After enjoying your Lemon Herb Couscous Salad, store any leftovers properly. Place the salad in an airtight container. This helps keep the flavors fresh and prevents drying. Make sure to seal it well to avoid any spills in the fridge. This salad shines when served cold. If you prefer it warm, gently heat it in a pan over low heat. Stir occasionally to avoid sticking. If you are reheating, do so for only a few minutes. This keeps the ingredients from becoming mushy. If serving cold, simply remove it from the fridge and enjoy. When stored correctly, Lemon Herb Couscous Salad lasts about three days in the fridge. The flavors may deepen over time, making it even tastier! Just remember to check for any signs of spoilage before eating. Enjoy your fresh and vibrant salad throughout the week! For the full recipe, check out the detailed instructions above. To make this salad gluten-free, you can swap couscous for quinoa or rice. Both options work well and add a nice texture. Quinoa has a nutty flavor, while rice is mild and fluffy. Just cook them according to package instructions. After cooking, mix them with the same fresh veggies and lemon dressing. This way, you keep the taste and enjoy it gluten-free! Yes, you can use instant couscous! It cooks faster than regular couscous. Just follow the instructions on the package. Usually, you’ll add boiling water and let it sit for a few minutes. Then, fluff it with a fork and let it cool before mixing it with the veggies. The taste will still be fresh and zesty. You can serve couscous salad in many fun ways! Try these ideas: - Serve it in lettuce cups for a crunchy bite. - Use it as a filling for pita pockets. - Layer it in mason jars for a picnic. - Top it with grilled chicken or shrimp for protein. - Add crumbled feta cheese for a rich flavor. For the complete recipe, check the [Full Recipe]. This article covered the key steps to make a tasty Lemon Herb Couscous Salad. We looked at the essential ingredients and their substitutes. You learned how to prepare the salad, mix flavors, and store leftovers. Tips for perfecting taste and serving ideas were shared. In the end, this salad is easy, flavorful, and fun to make. Enjoy trying variations and sharing them at meals! Let your creativity shine with this dish.

Lemon Herb Couscous Salad Fresh and Flavorful Meal

Looking for a fresh and flavorful meal that’s easy to make? My Lemon Herb Couscous Salad is the perfect choice!

To make a delicious Chocolate Caramel Poke Cake, you need a few simple items. Here’s what you’ll need: - 1 box of chocolate cake mix - 3 large eggs - 1 cup of water - 1/2 cup of vegetable oil - 14 oz can of sweetened condensed milk - 1 cup of caramel sauce (store-bought or homemade) - 1 cup of heavy whipping cream - 1/4 cup of powdered sugar - 1 teaspoon of vanilla extract - Chocolate shavings or cocoa powder for garnish Gather these ingredients before you start. They are key to making your cake tasty and fun. Each item plays a part in the cake's flavor and texture. For example, the chocolate cake mix gives a rich base. The sweetened condensed milk adds creaminess, while the caramel sauce brings a sweet kick. The whipped cream topping adds lightness, balancing the cake's richness. You can find the full recipe at the end to guide you through the process. 1. Preheat the oven and prepare the baking pan First, set your oven to 350°F (175°C). Grab a 9x13 inch baking pan and grease it well. This helps the cake not to stick. 2. Make the cake batter using an electric mixer In a large bowl, mix the chocolate cake mix, eggs, water, and vegetable oil. Use your electric mixer to beat it on medium speed for about 2 minutes. The batter should be smooth and well mixed. 3. Pour and bake the cake until done Pour the cake batter into the greased pan. Bake it in the oven for 30 to 35 minutes. To check if it’s done, insert a toothpick into the center. If it comes out clean, the cake is ready. 1. Prepare the caramel mixture while the cake bakes In a separate bowl, mix together the sweetened condensed milk and caramel sauce. Stir them until they blend well. This will be the tasty topping for your cake. 2. Poke holes in the cake and add the caramel mixture When the cake is done, let it cool for about 10 minutes. Then, take the end of a wooden spoon and poke holes all over the cake. Make sure they are about 1 inch apart. 3. Prepare the whipped topping and spread over the cake In another bowl, whip the heavy cream, powdered sugar, and vanilla extract together. Use an electric mixer until you see stiff peaks form. Once the cake is cool, spread this whipped topping over the caramel-soaked cake. 1. Garnish and chill before serving For a beautiful finish, sprinkle some chocolate shavings or a dusting of cocoa powder on top of the whipped cream. Chill the cake in the fridge for at least 2 hours before serving. This helps all the flavors come together nicely. Choosing the right cake mix is key. I prefer a rich chocolate cake mix for deep flavor. Use three large eggs for a fluffy texture. The eggs help the cake rise well. Mix the batter until smooth, about two minutes. This ensures even baking. To keep the cake moist, watch your baking time. Bake at 350°F for 30-35 minutes. Insert a toothpick in the center; it should come out clean. If you bake too long, the cake may dry out. Let it cool in the pan for ten minutes before moving it. To achieve stiff peaks for your topping, use cold heavy cream. Mix it with powdered sugar and vanilla extract. Beat with an electric mixer until you see peaks form. This takes about three to five minutes. If you over-mix, it might turn into butter. For a twist, try other toppings. You can use whipped coconut cream or even cream cheese frosting. Both add unique flavors that pair well with chocolate and caramel. For a beautiful display, cut the cake into square pieces. Place them on dessert plates. Drizzle extra caramel sauce over each piece for a nice touch. A sprig of mint adds color and freshness to your dessert. Serve the cake chilled for the best taste. It enhances the flavors and makes each bite refreshing. Consider pairing it with a scoop of vanilla ice cream. This adds a creamy balance to the rich cake. For the full recipe, check out the rest of this article. {{image_4}} You can easily change the flavor of your chocolate caramel poke cake. Adding nuts or chocolate chips will give extra texture and taste. Walnuts or pecans work great for a crunchy bite. You can also use different cake mixes. For a lighter cake, try a vanilla mix. A red velvet mix adds a fun twist and a pop of color. If you need gluten-free options, look for a gluten-free chocolate cake mix. Many brands offer tasty choices that work well in this recipe. For vegan versions, use plant-based eggs or applesauce instead of eggs. You can replace the heavy cream with coconut cream for a rich, dairy-free topping. These adjustments keep the cake delicious and enjoyable for everyone. Seasonal fruits can add great flavors to your cake. In summer, try fresh strawberries or raspberries for a fruity touch. In autumn, consider adding pumpkin spice for a cozy flavor. For holiday themes, decorate with peppermint or add eggnog flavoring to the whipped topping. These small changes make your cake perfect for any occasion and add a special twist. Store your leftover poke cake in an airtight container. This keeps it fresh and moist. You can use a glass or plastic container. It’s best to keep the cake in the fridge. The cake stays good for up to five days. You can freeze this cake if you want to enjoy it later. First, slice the cake into pieces. Wrap each piece tightly in plastic wrap. Then, place them in a freezer-safe bag. This helps prevent freezer burn. The cake can last in the freezer for up to three months. When you’re ready to eat it, take out a piece. Thaw the cake in the fridge overnight for the best results. This helps keep the texture nice. Avoid thawing it at room temperature, as this may make it soggy. You can also reheat it if you want it warm. To bring back the original texture, reheat the cake gently. The microwave works, but keep it short. Start with 10 to 15 seconds. Check if it's warm enough, then enjoy. Using an oven is another option. Preheat it to 350°F (175°C) and place the cake inside for about 10 minutes. This helps keep the cake’s moistness and flavor intact. For more details, don’t forget to check the Full Recipe! A poke cake is a fun cake that has holes poked into it. After baking, you pour a liquid over the cake. This could be caramel, pudding, or fruit syrup. The liquid seeps into the holes and makes the cake moist. It adds flavor and makes each bite special. You can use many types of cake and toppings. Yes, you can make this cake ahead of time. It tastes even better after sitting for a while. To prepare it in advance, bake the cake and poke the holes. Pour the caramel mixture on top. Cover the cake and store it in the fridge. You can make it a day or two before serving. The chocolate caramel poke cake will last about 3 to 4 days in the fridge. Make sure to cover it well to keep it fresh. The flavors will blend and enhance over time. However, the cake is best enjoyed within the first few days. You can absolutely use homemade caramel sauce! Making your own caramel can add a personal touch. Just be sure to let it cool slightly before pouring it over the cake. Homemade caramel can be thicker than store-bought, so adjust the texture as needed. If you need a substitute for heavy cream, there are good options. You can use whipped topping or whipped coconut cream. Another choice is to blend milk with butter. This creates a creamy texture as well. These alternatives work well in the recipe and taste great too. For the complete recipe, see the section titled Full Recipe. This blog post covered every step to make a delicious chocolate caramel poke cake. We discussed the key ingredients, simple preparation, and creative variations. You also learned tips for perfecting the texture and serving this cake beautifully. In conclusion, enjoy experimenting with flavors and adjustments. This poke cake is not just a treat; it’s a fun way to impress friends and family. Now, get baking and delight everyone around you!

Chocolate Caramel Poke Cake Delightful Dessert Treat

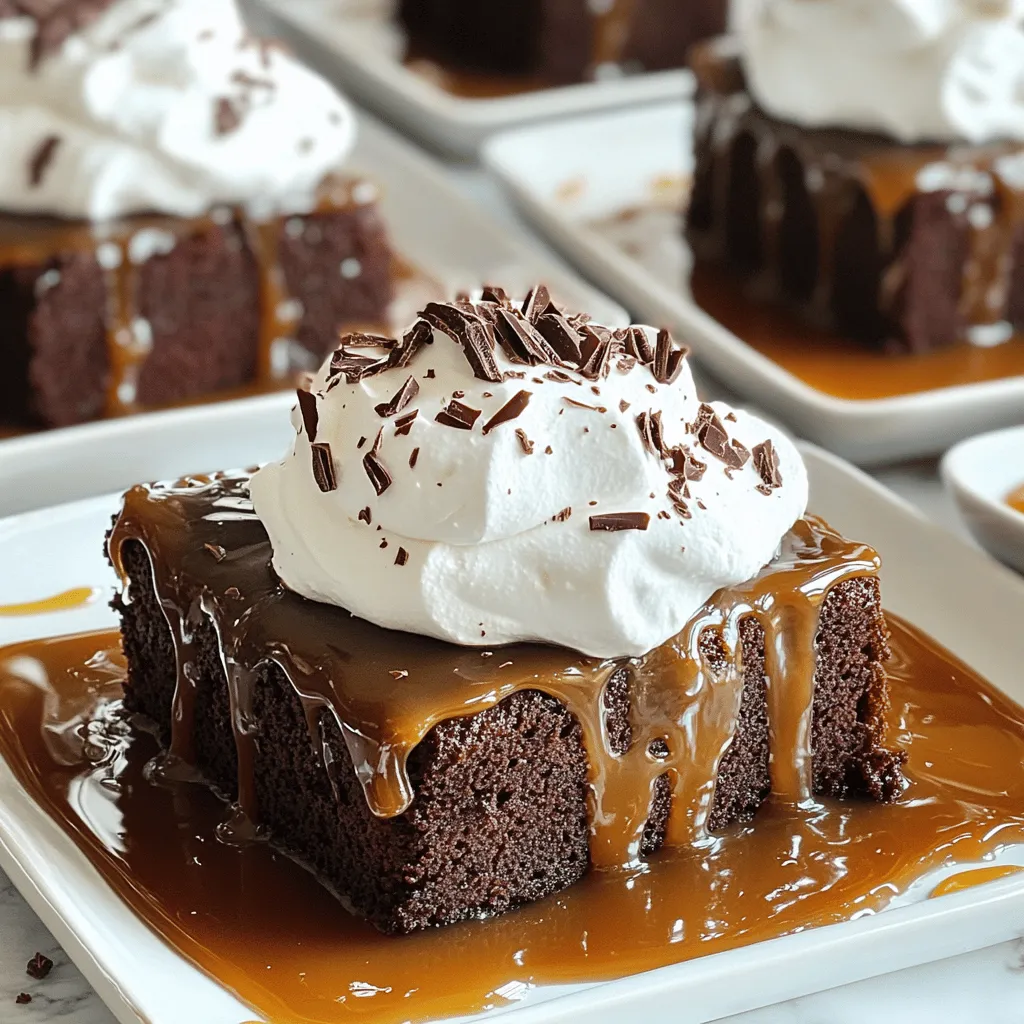
Craving a dessert that combines rich chocolate and sweet caramel? Let me introduce you to the delightful Chocolate Caramel Poke

To make Spinach Ricotta Stuffed Shells, you need a few simple ingredients that pack a lot of flavor. Here’s what you will need: - 20 jumbo pasta shells - 2 cups ricotta cheese - 1 cup fresh spinach, finely chopped - 1/2 cup grated Parmesan cheese - 1 cup shredded mozzarella cheese, divided - 1 large egg, lightly beaten - 1 teaspoon garlic powder - 1 teaspoon Italian seasoning - Salt and pepper to taste - 3 cups marinara sauce - Fresh basil leaves for garnish Each ingredient plays a key role in creating a balanced and tasty dish. The ricotta cheese gives a creamy base, while the spinach adds freshness and color. The mix of cheeses helps create a gooey, melty topping that everyone loves. The egg acts as a binder, holding the filling together nicely. When you choose your marinara sauce, look for one that is rich and flavorful. A good sauce can elevate your dish even more. Fresh basil leaves not only add a pop of color but also enhance the taste with their bright flavor. You can find the full recipe in this article to guide you through making this delightful meal. Set your oven to 375°F (190°C). Preheating is key. It ensures even cooking and helps the cheese melt perfectly. Bring a large pot of salted water to a boil. Add the jumbo pasta shells carefully. Cook them as per the package directions until they are al dente. This means they should be firm, not mushy. Once done, drain the shells and let them cool. Make sure they don’t stick together. In a big bowl, mix together the ricotta cheese, finely chopped spinach, grated Parmesan cheese, and half of the shredded mozzarella. Add the lightly beaten egg, garlic powder, Italian seasoning, and a pinch of salt and pepper. Stir until everything is creamy and well combined. Grab a spoon and fill each shell with about 2 tablespoons of the ricotta mixture. Place the stuffed shells gently in a greased baking dish. Try to keep them in a single layer. This way, they cook evenly. Pour the marinara sauce over the stuffed shells. Make sure every shell is covered. This keeps them moist while baking. Now, sprinkle the rest of the shredded mozzarella on top. This will create a bubbly, cheesy crust. Cover the baking dish with aluminum foil. This prevents the cheese from browning too fast. Bake for 25 minutes. After that, take off the foil and bake for another 15 minutes. Look for the cheese to be bubbly and golden brown. For the complete recipe, refer to the Full Recipe. To fill the shells evenly, use a small spoon. Scoop about 2 tablespoons of filling into each shell. Avoid overstuffing, as this can cause them to break. A piping bag can also help make filling easy. Cover the dish with foil for the first half of baking. This keeps the cheese from browning too fast. Check for doneness after 25 minutes. The cheese should be melted and bubbly. If it looks too soft, bake a little longer. Serve these shells with a side salad or garlic bread. A light tomato salad pairs well too. You can also add a sprinkle of fresh herbs. This adds color and flavor to your plate. Enjoy these delicious shells with your favorite drink! For the complete recipe, check out the Full Recipe. {{image_4}} You can change the filling up with different veggies. Try adding mushrooms for a rich taste. Zucchini brings a nice crunch. Artichoke hearts add a unique twist. You can also use roasted red peppers for a sweet touch. Just chop them small, so they fit well in the shells. Each veggie gives a new flavor that makes your dish fun. Want more protein? Adding chicken or sausage is an easy way. For chicken, use shredded rotisserie meat. Mix it in with the ricotta filling. If you like sausage, try sweet or spicy. Cook it first, then crumble it into the filling. Both options make the dish heartier and add great flavor. The sauce can change everything. Marinara is classic, but don’t stop there! Try alfredo sauce for a creamy twist. A homemade pesto sauce brings in fresh herbs. For a spicy kick, use arrabbiata sauce. Each sauce gives the dish a new vibe, so feel free to mix it up! For the full recipe, check out the Spinach & Ricotta Delight Shells. To store your spinach ricotta stuffed shells, let them cool first. Place them in an airtight container. You can refrigerate them for up to three days. If you want to keep them longer, freeze the shells. Wrap them well in plastic wrap, then place them in a freezer bag. They can last up to three months in the freezer. Just remember to label the bags with the date. When you are ready to enjoy your leftovers, preheat your oven to 350°F (175°C). Place the stuffed shells in a baking dish. Pour a little marinara sauce over them to keep them moist. Cover the dish with foil to prevent drying out. Bake for about 20 minutes. You can also reheat them in the microwave for about 2-3 minutes, but the oven gives better results. Leftover spinach ricotta stuffed shells stay good in the fridge for about three days. If kept in the freezer, they last up to three months. After this time, they can lose their flavor and texture. Always check for any signs of spoilage before eating. If in doubt, throw it out! For the complete recipe, check out the [Full Recipe]. Yes, you can prepare these stuffed shells in advance. You can fill the shells and place them in a baking dish. Cover them with marinara sauce and cheese. Then, wrap the dish tightly with plastic wrap. Store it in the fridge for up to 24 hours. When ready to bake, just remove the wrap and bake as directed. This makes it easy for busy days. If you need a substitute for ricotta cheese, try cottage cheese. It has a similar texture but is lower in fat. You can also use Greek yogurt for a tangy flavor. Silken tofu is a great vegan option too. Blend it until smooth for the right consistency. Each of these substitutes works well in the recipe. Look for a few signs to know your stuffed shells are done. The cheese should be melted and bubbly. The edges of the shells should be slightly golden. You can also check the sauce; it should be hot and steaming. If you have a food thermometer, the center should reach 165°F (74°C). These signs mean your dish is ready to enjoy. Absolutely! To make this recipe gluten-free, choose gluten-free jumbo pasta shells. Many brands offer great options that taste just as good. Make sure to check the labels for any hidden gluten. You can also try zucchini noodles or eggplant slices as a fun alternative. Both options will add unique flavors to your dish. In this post, we explored making Spinach Ricotta Stuffed Shells. We covered the ingredients, from pasta to fresh basil. You learned how to cook, prepare filling, and bake these shells perfectly. I shared helpful tips for stuffing and serving. You can even try variations, like adding different veggies or proteins. Remember, storing and reheating properly keeps your leftovers tasty. Enjoy creating this delicious dish and make it your own!

Spinach Ricotta Stuffed Shells Flavorful Dinner Delight

Are you ready to delight your taste buds? Spinach Ricotta Stuffed Shells combine creamy cheese, fresh spinach, and rich marinara,

- 1 pound fresh green beans, trimmed - 1 cup panko breadcrumbs - 1/2 cup freshly grated Parmesan cheese - 1 teaspoon garlic powder - 1 teaspoon onion powder - 1/2 teaspoon smoked paprika - Olive oil spray - 2 large eggs, beaten To create crispy air fryer green bean fries, you need a few key ingredients. Fresh green beans form the base. They bring a nice crunch and a bright flavor. Panko breadcrumbs add an extra layer of crispiness. Using freshly grated Parmesan cheese enhances the fries' savory profile. For seasoning, garlic powder, onion powder, and smoked paprika are essential. Garlic powder gives a nice kick. Onion powder adds a subtle sweetness. Smoked paprika lends a lovely depth of flavor. You will also need olive oil spray for that perfect golden finish. Beaten eggs act as the glue. They help the breadcrumbs stick to the green beans. Ready to dive into the full recipe? Check out the Full Recipe for step-by-step guidance! - Preheating the Air Fryer First, set your air fryer to 400°F (200°C). This heat helps cook the fries evenly and makes them crispy. Let it preheat for about 5 minutes. - Preparing the Coating Mixture In a medium bowl, mix together panko breadcrumbs, grated Parmesan cheese, garlic powder, onion powder, smoked paprika, salt, and pepper. Stir until everything is well combined. This mix adds flavor and crunch to the green beans. - Egg Dipping Process In a separate bowl, beat the two large eggs. Dip each green bean into the eggs, making sure to coat it well. Let any extra egg drip off. This step helps the breadcrumb mix stick to the beans. - Rolling in Breadcrumbs Next, take the egg-coated green bean and roll it in the breadcrumb mixture. Press gently so the crumbs stick well. This gives each fry a nice, crunchy coating. - Arranging in the Air Fryer Place the coated green beans in a single layer in the air fryer basket. Be sure not to overcrowd them. If needed, cook in batches to ensure they crisp up nicely. - Cooking Time and Techniques Lightly spray the green beans with olive oil. Air fry them for 8-10 minutes until they turn golden brown and crispy. Halfway through, shake the basket gently to help them cook evenly. Follow these steps for a tasty and simple snack that everyone will love! For the complete recipe, check out [Full Recipe]. To get your green bean fries nice and crispy, even coating is key. When you dip them in the egg, make sure they are fully covered. This helps the breadcrumbs stick and gives that crunch you want. After coating, roll each bean in the breadcrumb mix gently. Press down a little to ensure it sticks well. Using olive oil spray is another great tip. A light mist over the coated beans adds moisture, which helps them crisp up. It also adds a nice flavor. Don’t skip this step if you want that perfect crunch! When serving your green bean fries, think about the dips. They pair well with creamy ranch or zesty sriracha mayo. These sauces add fun flavors that make your snack even better. You can also sprinkle some extra grated Parmesan cheese on top for a tasty touch. Garnishing is simple. A few fresh herbs, like parsley or chives, can add color and freshness. It makes the dish look appealing too! One mistake many make is overcrowding the basket. If you pile too many beans in, they won’t crisp up well. It’s better to cook in batches. This way, each fry gets enough air and heat. Another mistake is skipping preheating. Always preheat your air fryer to 400°F (200°C) before cooking. This step helps the fries cook evenly and achieve that golden-brown color. Make sure to take this time to prepare your coating mix! {{image_4}} If you want a gluten-free snack, swap regular panko breadcrumbs for gluten-free ones. You can find these at most grocery stores. They provide the same crunch without the gluten. This change keeps your green bean fries tasty and safe for those with gluten sensitivities. For a dairy-free option, replace Parmesan cheese with nutritional yeast. It adds a cheesy flavor and is vegan-friendly. You can also try using vegan cheese shreds if you want a melty effect. This way, everyone can enjoy crispy green bean fries. You can boost the flavor of your green bean fries by adding spices. Try paprika, cayenne pepper, or even Italian herbs. A pinch of chili powder gives a fun kick. Mix these spices into the breadcrumb mixture for a zesty twist. Want to make your snack even healthier? Add other veggies! Carrot sticks or zucchini slices work great. Just cut them into fry shapes, coat them like green beans, and air fry. This adds color and nutrition to your snack. These green bean fries can be an appetizer or a side dish. Serve them as a starter with dipping sauces to impress guests. As a side, they pair well with burgers or grilled meats. Their versatility makes them a hit at any meal. Presentation matters! For a fun touch, serve the fries in a small basket lined with parchment paper. You can also sprinkle extra Parmesan on top for a gourmet look. Place a few dipping sauces on the side for extra flavor and fun. For the full recipe, check out the detailed guide on making crispy air fryer green bean fries! - Refrigeration Tips: Place leftover green bean fries in an airtight container. Store them in the fridge for up to three days. This keeps them fresh and tasty for snacking later. - Freezing Instructions: To freeze, arrange the green bean fries on a baking sheet. Make sure they do not touch each other. Freeze until solid, then transfer to a freezer-safe bag. They can last up to three months in the freezer. - Using the Air Fryer: For the best results, reheat in the air fryer at 350°F (175°C) for about 5 minutes. This will help restore their crispiness. - Oven Method: Preheat your oven to 375°F (190°C). Spread the fries on a baking sheet and bake for 10-12 minutes. This method also helps keep the texture nice and crispy. - Shelf Life in the Refrigerator: In the fridge, the fries stay good for about three days. Make sure to check for any signs of spoilage before eating. - Signs of Spoilage: Look for any off smells or changes in color. If they appear soggy or slimy, it's best to toss them. Enjoy your crispy air fryer green bean fries fresh for the best flavor! For the full recipe, refer to the earlier section. To make your green bean fries crispier, use panko breadcrumbs instead of regular ones. Panko gives a lighter and crunchier texture. Also, mist them with olive oil spray before cooking. This helps achieve that golden brown color. Don’t overcrowd the air fryer basket. Give them space to cook evenly. You can also shake the basket halfway through to ensure they crisp up all around. Yes, you can use frozen green beans. Just make sure to thaw and dry them well. Frozen beans may not be as crispy, but they still taste great. You may need to adjust the cooking time, so keep an eye on them. Look for a nice golden color as a sign they are done. Green bean fries taste amazing with many dipping sauces. Try creamy ranch for a classic taste. Zesty sriracha mayo adds a nice kick. You can also serve them with garlic aioli or a tangy barbecue sauce. Each sauce offers a fun twist to the flavor. You can easily change the seasoning for your green bean fries. Add cayenne pepper for heat or Italian herbs for a fresh taste. Try adding lemon zest for a citrusy kick. Use your favorite spices to make the dish more personal. The options are endless. Yes, this recipe is great for meal prep. You can make a large batch and store them. Keep the cooked green beans in the fridge for up to three days. To reheat, pop them back in the air fryer for a few minutes. This helps regain their crispiness. Enjoy your easy and tasty snack anytime! For the complete recipe, check out the Full Recipe. You now have a clear, step-by-step guide for making crispy green bean fries. We covered the right ingredients, coating techniques, and cooking methods to ensure great flavor. Remember to coat evenly and preheat your air fryer for the best results. Feel free to experiment with spices and serving styles to make the dish your own. With the right tips, you’ll avoid common mistakes and enjoy delicious green bean fries any time. Now, grab your ingredients and start cooking!

Crispy Air Fryer Green Bean Fries Tasty and Simple Snack

Looking for a tasty and simple snack? Crispy air fryer green bean fries are the answer! You’ll love how easy

- 1 cup mashed ripe bananas (about 2 large bananas) - 1 cup canned pumpkin puree - 1/2 cup unsalted butter, melted and slightly cooled - 1 cup packed brown sugar - 1/2 cup granulated sugar - 2 large eggs, at room temperature - 1 teaspoon pure vanilla extract - 2 cups all-purpose flour, sifted - 1 teaspoon baking soda - 1/2 teaspoon baking powder - 1 teaspoon ground cinnamon - 1/2 teaspoon ground nutmeg - 1/2 teaspoon salt - 1 cup semi-sweet chocolate chips - 1/2 cup chopped walnuts (optional) When picking bananas, choose ones that are very ripe. They should have brown spots. Ripe bananas give the bread great flavor and sweetness. Use canned pumpkin puree, not pumpkin pie filling. This makes sure your bread is not too sweet. For butter, always go for unsalted. This helps control the salt level in your bread. If you like nuts, pick fresh walnuts for the best crunch. You can swap out the mashed bananas for applesauce. This makes the bread moist and adds a different flavor. If you want a dairy-free option, use coconut oil in place of butter. For a gluten-free version, use almond flour or a gluten-free blend. You can also replace eggs with flaxseed meal mixed with water for a vegan option. Just mix 1 tablespoon of flaxseed with 2.5 tablespoons of water and let it sit for five minutes. For the full recipe, check out the complete list and instructions on making this delicious treat. First, I preheat the oven to 350°F (175°C). I grease a 9x5-inch loaf pan with butter or non-stick spray. In a large bowl, I mash two ripe bananas until smooth. Then, I add one cup of canned pumpkin puree and half a cup of melted butter. I let the butter cool a bit first to avoid cooking the eggs. Next, I mix in one cup of brown sugar, half a cup of granulated sugar, two large eggs, and one teaspoon of vanilla extract. I use a whisk or spatula to blend everything until it's smooth. In a separate bowl, I whisk two cups of sifted all-purpose flour, one teaspoon of baking soda, half a teaspoon of baking powder, one teaspoon of ground cinnamon, half a teaspoon of ground nutmeg, and half a teaspoon of salt. I make sure the mixture is uniform. Then, I slowly add the dry mix to the wet banana-pumpkin mix. I stir gently with a spatula until combined, being careful not to overmix. A few lumps are okay! Now, I fold in one cup of semi-sweet chocolate chips and half a cup of chopped walnuts if I want extra crunch. Then, I pour the batter into the greased loaf pan. Using a spatula, I smooth the top for an even rise. I place the pan in the oven and bake for 55-65 minutes. I check if it’s done by inserting a toothpick in the center. If it comes out clean with a few moist crumbs, it’s ready! After baking, I let the bread cool in the pan for about 10 minutes. Finally, I transfer it to a wire rack to cool completely before slicing. For the full recipe, check out the detailed instructions above. To create the best pumpkin chocolate chip banana bread, start with ripe bananas. Ripe bananas have spots and are soft. They add sweetness and moisture. Use canned pumpkin puree for a rich flavor. It's easy and saves time. When mixing your batter, use a gentle hand. Overmixing can make the bread dense. Aim for a few lumps in the batter; it helps keep the bread light. Watch out for these common mistakes. First, don’t skip the sifting step for flour. Sifting helps your bread rise well and keeps it fluffy. Second, use room-temperature eggs. Cold eggs can make your batter uneven. Lastly, check the baking time. Every oven is different. Start checking for doneness at 55 minutes. A toothpick should come out clean, with a few moist crumbs. To boost flavor, add spices like ground ginger or cloves. They work well with pumpkin and banana. You can also try adding a splash of maple syrup. It adds a nice depth to the sweetness. For texture, consider folding in nuts or seeds. Walnuts add crunch, while sunflower seeds bring a unique touch. Finally, let the bread cool completely before slicing. This step helps the flavors settle and improves the texture. For the full recipe, refer to the original instructions. {{image_4}} You can add nuts or seeds to your bread for extra crunch. Walnuts are a classic choice, adding a rich flavor. You can use 1/2 cup of chopped walnuts in the batter. Pecans also work well, giving a sweet taste. For a nut-free option, consider sunflower seeds or pumpkin seeds. Both seeds will add a nice texture without being overpowering. Just make sure to fold them in gently to avoid breaking the batter. To make your bread stand out, try adding spices or extracts. A teaspoon of ground ginger adds a warm kick. You can also use a pinch of cloves for a deeper flavor. If you want a subtle citrus note, add a tablespoon of orange zest. It brightens the taste and pairs well with pumpkin. For chocolate lovers, try adding a tablespoon of espresso powder. It enhances the chocolate flavor without being too strong. If you need a gluten-free option, you can use almond flour or a gluten-free blend. Almond flour gives a nutty flavor and moist texture. If using a gluten-free mix, ensure it has a binding agent like xanthan gum. Substitute the 2 cups of all-purpose flour with the same amount of your chosen flour. Adjust the baking time as needed, since gluten-free bread can bake differently. Enjoy your delicious pumpkin chocolate chip banana bread without worry! For the complete recipe, check out the Full Recipe. To store your leftover pumpkin chocolate chip banana bread, wrap it tightly in plastic wrap. You can also place it in an airtight container. This keeps the bread fresh and moist. Store it at room temperature for up to three days. If you want it to last longer, consider freezing it. Freezing is a great way to save your pumpkin chocolate chip banana bread. First, let the bread cool completely. Then, slice it into pieces for easy access later. Wrap each slice in plastic wrap and place them in a freezer bag. Remove as much air as possible before sealing. This method keeps the bread good for up to three months. When you're ready to enjoy, just take out a slice! Reheating is simple. If you want a warm slice, preheat your oven to 350°F (175°C). Place the slice on a baking sheet and heat for about 10 minutes. You can also microwave a slice for 15-20 seconds, but it may not stay as moist as when baked. For added flavor, spread a little butter or cream cheese on top before warming! Yes, you can use frozen bananas. Just thaw them first. Frozen bananas become soft and mushy. This makes them easy to mash. They also add great flavor to your bread. You can make this recipe healthier in a few ways. Here are some ideas: - Use whole wheat flour instead of all-purpose flour. - Replace half the sugar with applesauce or honey. - Add nuts or seeds for extra protein and fiber. - Use less butter or substitute with Greek yogurt. These swaps can give you a tasty treat with a bit less guilt. If you need an egg substitute, you have options. Here are some good choices: - Use 1/4 cup unsweetened applesauce for each egg. - Try 1/4 cup yogurt or silken tofu. - You can also use a flax egg, made by mixing 1 tablespoon of ground flaxseed with 3 tablespoons of water. These substitutes work well and keep your bread moist and delicious. For the Full Recipe, check out the complete details. We covered how to make delicious pumpkin chocolate chip banana bread step by step. We looked at key ingredients and tips for choosing them, plus how to swap them out. I shared baking tips, common mistakes, and ways to boost flavor. Variations allow you to customize the recipe further. Finally, storing and reheating tips keep your bread fresh and tasty. Enjoy baking and sharing this treat with friends!

Pumpkin Chocolate Chip Banana Bread Irresistible Treat

If you love warm, soft treats, you’ll adore my Pumpkin Chocolate Chip Banana Bread. It combines the rich flavors of

- 1 lb sirloin steak, diced into bite-sized pieces - 1 lb baby potatoes, halved - 4 tablespoons unsalted butter, divided - 5 cloves garlic, finely minced - 1 teaspoon fresh thyme leaves (or ½ teaspoon dried thyme) - 1 teaspoon smoked paprika - 1 teaspoon salt (adjust to taste) - ½ teaspoon black pepper (adjust to taste) - Fresh parsley, chopped, for garnish - 2 cups fresh spinach In this dish, I use sirloin steak for its great flavor and tenderness. Baby potatoes add a lovely creaminess. The unsalted butter is key for that rich garlic flavor. Garlic is the star here. It brings warmth and depth. Fresh thyme adds a hint of earthiness. Smoked paprika gives a slight kick and color. Adjusting salt and pepper lets you control the taste. For garnish, fresh parsley brightens the dish. Spinach adds color and nutrition. You can find the complete recipe in the Full Recipe section. Enjoy cooking this delightful meal! To start, boil the baby potatoes. Fill a large skillet with about 2 cups of water and bring it to a rolling boil. Add a pinch of salt to enhance the flavor. Carefully drop the halved potatoes into the boiling water. Boil them for around 10 minutes. You want them just tender enough to pierce with a fork. Once they are done, drain the potatoes and set them aside for later use. Next, it’s time to sear the steak. Use the same skillet and melt 2 tablespoons of butter over medium-high heat. Once the butter is hot, add the diced sirloin steak. Make sure not to overcrowd the pan, as this helps achieve a nice crust. Sear the steak for 3 to 4 minutes on each side. You want a golden crust to form. For doneness, aim for medium-rare to medium, which is about 130°F to 145°F. Once done, remove the steak and set it aside on a plate. Now, let’s cook the garlic and potatoes. Lower the heat to medium and add the remaining 2 tablespoons of butter to the skillet. Wait for the butter to melt completely. Then, stir in the minced garlic, thyme, smoked paprika, salt, and black pepper. Sauté this mixture for about 1 to 2 minutes. You want the garlic to be fragrant and slightly golden, but not burnt. This step adds a rich flavor to your dish. It’s time to combine everything. Add the boiled potatoes back into the skillet. Gently toss them in the garlic butter mixture. Allow the potatoes to cook for an additional 5 to 6 minutes. Stir occasionally to get a nice crispiness on the edges. This will elevate the dish to a new level of deliciousness. Now, let’s bring in the greens. Stir in the fresh spinach and continue cooking for another 1 to 2 minutes. You want the spinach to wilt and become vibrant. Once the spinach is ready, return the sautéed steak to the skillet. Toss all the ingredients together until everything is well combined. Finally, it’s time to garnish and serve. Remove the skillet from heat. Sprinkle freshly chopped parsley on top for a burst of color. Serve the hot skillet dish immediately while it’s still sizzling. This presentation not only looks great but also invites everyone to dig in right away. Enjoy this wonderful medley of flavors from the Garlic Butter Steak and Potato Skillet! Choosing the right cut of steak is key. For skillet cooking, sirloin works well. It’s tender and flavorful. Look for cuts with good marbling. Marbling means small fat lines in the meat. This fat melts and adds juiciness. Other great choices are ribeye or tenderloin. Tasting is important while cooking. Adjust seasoning to match your taste. You might want more salt or pepper. For richer flavors, add a splash of soy sauce or Worcestershire sauce. These add depth and umami. Fresh herbs like parsley or basil can brighten the dish too. A heavy-duty skillet is best for this dish. Cast iron or stainless steel works great. These materials heat evenly and keep their heat. You’ll also need a good spatula for flipping. A meat thermometer helps check steak doneness. These tools make cooking easier and more fun. For the Full Recipe, check your favorite cooking site. {{image_4}} You can easily swap the meat in this dish. Try using flank steak or ribeye for a rich flavor. If you want a plant-based meal, use portobello mushrooms or tempeh. Both options can soak up the garlic butter well. Feel free to play with flavors. Add fresh rosemary or oregano for a different twist. You can also try spices like chili powder for heat or cumin for a warm, earthy taste. If you want an international flair, consider adding soy sauce for an Asian touch or chimichurri for a South American kick. This dish isn’t just for the stovetop! You can make an oven-baked version. Simply combine everything in a baking dish and roast until golden. For a slow-cooker take, sear the steak first, then add all ingredients to the slow cooker. Cook on low for a few hours for a tender and rich meal. For the full recipe, check out the Garlic Butter Steak and Potato Skillet. To keep your Garlic Butter Steak and Potato Skillet fresh, use airtight containers. Glass or plastic containers work well. Allow the dish to cool completely before sealing. Store it in the fridge for up to three days. If you want to save it longer, consider freezing it. When reheating, use a skillet over low heat. This method helps keep the steak juicy and potatoes crispy. Add a splash of water or broth to keep it moist. Stir occasionally to heat evenly. Avoid using the microwave, as it can dry out the meat. Yes, you can freeze the steak and potato skillet. First, let it cool fully. Then, portion it into freezer-safe bags or containers. Remove as much air as possible. It will stay good for about three months. To reheat, thaw in the fridge overnight, then warm in a skillet. To tenderize steak, you can use a few simple methods. First, a meat mallet works well. Gently pound the steak to break down the fibers. Second, you can soak the steak in a marinade. Use acidic ingredients like vinegar or citrus juice for best results. Lastly, try salting the steak. A good sprinkle of salt can help draw moisture and flavor into the meat. Yes, you can add other vegetables! Carrots, bell peppers, or green beans work well. Just cut them into small pieces to cook evenly. If you want to try something new, add mushrooms for extra flavor. Feel free to mix and match based on what you have at home. To check if your steak is done, use a meat thermometer. Aim for 125°F for medium-rare, 135°F for medium, and 145°F for medium-well. If you don't have a thermometer, press the steak with your finger. A soft feel means it's rare, while a firmer touch means it's more cooked. Yes, this recipe is great for meal prep! Cook the steak and potatoes, then store them in containers. Keep them in the fridge for up to three days. When you're ready to eat, just reheat in the microwave or on the stove. This way, you have a quick and tasty meal ready to go. For the best flavors, don’t forget to check the Full Recipe for all the details! This blog post guided you through making a delicious skillet meal with sirloin steak and baby potatoes. You learned about key ingredients, step-by-step cooking instructions, and essential tips. Remember, fresh herbs and seasonings enhance flavor. Explore variations to keep your meals exciting. Proper storage and reheating help maintain taste. Cooking is fun and creative; make it yours. Enjoy every bite of your tasty creation!

Garlic Butter Steak and Potato Skillet Delight

Craving a hearty meal that’s full of flavor? My Garlic Butter Steak and Potato Skillet Delight fits the bill! This

Older posts
Newer posts
← Previous Page1 … Page4 Page5 Page6 … Page71 Next →

dsad

© 2025 tastyhatch • Built with GeneratePress

Our Policies

  • Copyright Policy
  • Cookie Policy
  • GDPR Policy
  • Privacy Policy
  • Disclaimer
  • Terms Of Use

More Information

  • Home
  • About
  • Contact
  • Appetizers
  • Dessert
  • Dinner
  • Drinks
©2025, tastyhatch About Back To Top