Skip to content
DisclaimerTerms Of UseGDPR PolicyCookie Policy

tastyhatch

  • Home
  • Drinks
  • Appetizers
  • Dinner
  • Dessert
  • About
  • Contact
  • Privacy Policy
DisclaimerTerms Of UseGDPR PolicyCookie Policy

Olivia

To make delicious Spicy Thai Chicken Lettuce Wraps, you need these key ingredients: - 1 lb (450g) ground chicken - 1 tablespoon vegetable oil - 3 cloves garlic, minced - 1 tablespoon fresh ginger, minced - 1 red bell pepper, diced - 1 carrot, grated - 2 green onions, thinly sliced - 1/4 cup soy sauce (substitute with tamari for gluten-free) - 2 tablespoons fish sauce (optional, for added depth of flavor) - 1 tablespoon sriracha (adjust according to your heat preference) - 1 tablespoon brown sugar - Juice of 1 lime - 1 head of butter or romaine lettuce, leaves carefully separated - Fresh cilantro and mint for garnish These ingredients pack a punch of flavor and are easy to find at your local store. You can customize your wraps based on what you have. Here are some options: - Ground turkey or pork instead of chicken - Add chopped mushrooms for extra texture - Use lime zest for more citrus flavor - Swap sriracha for another hot sauce if you prefer Feel free to mix and match based on your taste! Each ingredient brings its own health benefits: - Ground chicken is lean and high in protein. - Garlic and ginger help boost your immune system. - Bell peppers are rich in vitamins A and C. - Carrots provide beta-carotene for healthy eyesight. - Lettuce is low in calories and high in fiber. This dish is not just tasty but also nutritious. You get a great balance of flavors and health benefits, all in one meal! For the complete cooking instructions, check out the Full Recipe. Start by heating 1 tablespoon of vegetable oil in a large skillet over medium-high heat. Once the oil is hot, add 3 cloves of minced garlic and 1 tablespoon of minced ginger. Sauté these for about 30 seconds until they smell great but do not burn. Next, add 1 pound of ground chicken to the skillet. Cook it for 5 to 7 minutes, breaking it into small pieces with a spatula. Make sure the chicken is browned and fully cooked. While the chicken cooks, mix up a quick sauce. In a small bowl, combine 1/4 cup of soy sauce, 2 tablespoons of fish sauce (if you choose to use it), 1 tablespoon of sriracha, 1 tablespoon of brown sugar, and the juice of 1 lime. Whisk it together until it's smooth. Pour this sauce over the chicken mixture and stir well. Cook for another 2 minutes so that everything is well-coated in flavor. Now, it's time to add some color and crunch. Add 1 diced red bell pepper and 1 grated carrot to the skillet. Stir these in and cook for 2 to 3 minutes. This will soften the vegetables just a bit while keeping them crunchy. Once they are tender, remove the skillet from the heat and gently fold in 2 thinly sliced green onions. This step adds a fresh crunch to your dish. Now for the fun part—assembly! Take a whole lettuce leaf from your head of butter or romaine lettuce. Spoon a generous amount of the spicy chicken mixture into the center of the leaf. Feel free to add as much as you like! To finish, garnish the wraps with fresh cilantro and mint leaves. This adds a lovely aroma and freshness to your meal. For the full recipe, check out the complete instructions and tips. Enjoy creating these tasty wraps! To change the heat level, start with less sriracha. Taste the filling as you go. If you want more heat, add more sriracha a little at a time. You can also use fresh chili peppers for a fresher kick. For milder wraps, skip the fish sauce or sriracha. Use ground chicken for quick cooking. This meat stays tender when you cook it right. Make sure not to overcook it. Stir often and break the meat into small pieces. This helps it cook evenly. Cooking it on medium heat allows the flavors to blend without drying out the chicken. Make your wraps look great by using a colorful platter. Arrange the lettuce wraps neatly with lime wedges and herbs. Add fresh cilantro and mint for a pop of color. Let guests build their own wraps. This adds fun and makes it more interactive. For a personal touch, you can even serve with small bowls of extra sauce. For the full recipe, check out the details above. {{image_4}} If you want a vegetarian twist, swap ground chicken for mushrooms or tofu. Both add great texture and absorb flavors well. For a vegan option, use firm tofu and add extra veggies like zucchini or bell peppers. Crumble the tofu and sauté it just like the chicken. This keeps the dish filling and delicious. You can play with the sauce to mix things up. Try adding peanut butter for a creamy texture. You can also replace soy sauce with coconut aminos for a sweeter taste. For a tangy kick, add a splash of rice vinegar. Each change makes the wraps unique. If you have dietary restrictions, there are easy swaps. Use turkey instead of chicken for a leaner option. For gluten-free wraps, ensure your sauces use tamari instead of soy sauce. If you're avoiding sugar, replace brown sugar with a sugar substitute like agave or honey. These swaps keep the dish tasty while meeting your needs. For the complete recipe, check out the [Full Recipe] for Spicy Thai Chicken Lettuce Wraps. After enjoying your spicy Thai chicken lettuce wraps, you might have some filling left. To store it, let the filling cool to room temperature. Then, place it in an airtight container. This keeps the filling fresh for up to three days in the fridge. If you want to keep it longer, consider freezing it. When you're ready to eat the leftover filling, you can reheat it easily. Just take the filling out of the fridge or freezer. If frozen, let it thaw overnight in the fridge. To reheat, place it in a skillet over medium heat. Stir it gently until it warms through. This should take about 5 to 7 minutes. You can also use the microwave. Just heat in short bursts, stirring in between to avoid hot spots. Freezing is a great way to prepare meals ahead. You can freeze the filling right after cooking. Just let it cool, then transfer it to a freezer-safe bag or container. Be sure to remove as much air as possible. This helps prevent freezer burn. The filling can last up to three months in the freezer. When you’re ready to use it, thaw it in the fridge overnight. For a quick meal, you can cook it straight from frozen, just add a few extra minutes to the cooking time. For more details, check the full recipe. Yes, you can prepare the filling ahead of time. Cook the chicken and veggies, then store them in the fridge. Keep the sauce separate. Reheat the mixture before serving. This helps save time on busy days. Just assemble the wraps when you're ready to eat. If you want a change from lettuce, try these options: - Cabbage leaves: They are sturdy and add a nice crunch. - Collard greens: These have a mild flavor and hold fillings well. - Rice paper: Soak them in water for a few seconds to soften before wrapping. - Tortillas: A good choice for a heartier wrap. These alternatives keep the fun alive while exploring new flavors. You can easily make this dish gluten-free. Use tamari instead of soy sauce. Check fish sauce labels, as some brands may contain gluten. Always read labels to ensure your ingredients fit your needs. This way, you enjoy a tasty meal without worries. For the wraps, stick with fresh lettuce or gluten-free tortillas. For the complete recipe, check the Full Recipe. In this blog post, we explored how to make tasty Spicy Thai Chicken Lettuce Wraps. We looked at key ingredients, cooking steps, and helpful tips. You can adjust spiciness or swap ingredients for your needs. The dish has great nutritional value and easy storage options for leftovers. Remember, these wraps are fun to make and delicious to eat. Get creative with variations to suit your taste. Enjoy the bold flavors and make it your own!

Spicy Thai Chicken Lettuce Wraps Easy and Tasty Meal

If you crave a burst of flavor in a quick meal, Spicy Thai Chicken Lettuce Wraps are perfect for you.

To make Mango Coconut Chia Pudding, gather these simple ingredients: - 1 cup coconut milk (can use either canned or carton) - 1/4 cup chia seeds - 2 tablespoons maple syrup or honey (adjust according to sweetness preference) - 1/2 teaspoon vanilla extract - 1 ripe mango, diced (set aside a portion for topping) - Fresh mint leaves for garnish (optional) If you have dietary needs, here are some swaps: - Use almond milk or oat milk instead of coconut milk for nut-free options. - Swap maple syrup for agave syrup for a vegan-friendly sweetener. - Instead of honey, choose stevia or another sugar-free sweetener if needed. - If you can’t find fresh mango, use frozen mango chunks. Just thaw and dice them. Each ingredient in this recipe offers great health benefits: - Coconut milk provides healthy fats and keeps the pudding creamy. - Chia seeds are high in fiber, protein, and omega-3 fatty acids. - Maple syrup or honey adds natural sweetness and minerals like zinc. - Vanilla extract enhances flavor and may have antioxidant properties. - Mango is packed with vitamins A and C, boosting your immune system. - Fresh mint adds freshness and has digestive benefits. This recipe not only tastes great but also nurtures your body with wholesome ingredients. Enjoy making it! To start making this delicious treat, gather your ingredients. You need coconut milk, chia seeds, maple syrup or honey, vanilla extract, and a ripe mango. 1. In a medium bowl, mix the coconut milk, maple syrup, and vanilla extract. Use a whisk to blend it well. 2. Slowly add the chia seeds while stirring. This helps prevent clumps from forming. 3. Cover the bowl with plastic wrap or a lid. Place it in the fridge for at least 4 hours. Overnight is even better! This gives the chia seeds time to soak up the liquid. 4. Once chilled, take the bowl out of the fridge. Stir well to break up any clumps. 5. Get your serving glasses ready. Layer the chia pudding and diced mango. Start with pudding, then mango, and top with pudding again. 6. Finish each glass with more mango on top and add fresh mint leaves for garnish. 7. If you like, drizzle extra maple syrup or sprinkle toasted coconut on top for extra flavor. To save time, you can mix the ingredients the night before. This way, it’s ready in the morning. You can also prepare a big batch. Store it in the fridge for up to five days. This makes breakfasts or snacks super easy! The secret to the best chia pudding is the soaking time. Chia seeds need enough time to absorb the coconut milk. This creates a creamy texture. Stirring well after chilling helps, too. It breaks up any lumps. For a smoother pudding, blend the mixture before chilling. This way, you’ll have a delightful, silky texture. For the perfect presentation, use clear glass containers. You’ll show off those gorgeous layers! For the complete recipe, check out the [Full Recipe]. One big mistake is not mixing well. Chia seeds clump together if you don’t stir them enough. Always whisk the coconut milk and sweetener first. Then, add the chia seeds slowly while stirring. Another mistake is not letting it sit long enough. Chia seeds need time to absorb the liquid. Aim for at least four hours, or better yet, overnight. To boost flavor, use fresh ingredients. A ripe mango adds natural sweetness and vibrant taste. You can also add a pinch of salt. This will enhance the sweetness of the pudding. If you want more texture, try adding toasted coconut flakes on top. They give a nice crunch and extra coconut flavor. For a twist, mix in cocoa powder or a spoonful of almond butter. Serve in clear glasses to show off those lovely layers. You can create a fun dessert bar. Provide toppings like nuts, berries, or granola. This allows guests to customize their pudding. For a beautiful touch, add a sprig of fresh mint on top. You can also drizzle some extra maple syrup for sweetness. These small details make a big impact! {{image_4}} You can easily make this recipe vegan and gluten-free. The ingredients I use are already both. Coconut milk, chia seeds, and ripe mango are all plant-based. Use maple syrup for sweetness instead of honey. This way, everyone can enjoy this tasty treat without worries. You can change the flavor by adding fun ingredients. Here are some ideas: - Fruit: Add berries, bananas, or pineapple for extra sweetness. - Spices: Sprinkle cinnamon or nutmeg for a warm touch. - Nuts: Top with almonds, walnuts, or pecans for crunch. - Coconut: Use toasted coconut flakes to enhance the coconut flavor. Try mixing and matching to find your favorite combo! Customize this pudding to fit your taste buds. Here are some fun twists: - Chocolate lovers: Stir in cocoa powder or use chocolate almond milk. - Nutty flavor: Mix in almond or cashew butter for a creamy texture. - Tropical twist: Add passion fruit or kiwi for a zesty kick. - Dessert style: Drizzle chocolate or caramel sauce on top for a sweet finish. Feel free to experiment! This recipe is flexible and fun, just like your creativity in the kitchen. For the full recipe, check the main section. Store any leftover Mango Coconut Chia Pudding in an airtight container. This keeps the pudding fresh and safe. You can use glass jars or plastic containers. Make sure to keep it in the fridge. Avoid leaving it out at room temperature. You can keep the pudding for about 4 to 5 days in the fridge. After that, the texture may change. The pudding might get too thick or separate. Always check it before eating. If it smells off or looks strange, it is best to toss it out. If your pudding is too thick after storage, you can add a splash of coconut milk. Stir it well to bring back its creamy texture. You can also layer it with fresh fruit, yogurt, or granola. This adds new flavors and makes it fun to eat again. Yes, you can use other types of milk. Almond milk or oat milk works well, too. Just be sure to choose a milk that you enjoy. Each type will give your pudding a unique flavor. Chia seeds are ready when they swell and form a gel-like texture. This usually takes about 4 hours in the fridge. If they look thick and creamy, you did it right! Yes, you can make this recipe ahead of time. It stays good in the fridge for up to 5 days. This makes it great for meal prep. Just store it in an airtight container. Absolutely! This pudding is packed with fiber, healthy fats, and vitamins. Chia seeds offer omega-3s, while coconut milk adds creaminess. Plus, mango gives you a boost of vitamin C. Serve this pudding in clear glasses to show off the layers. Add fresh mango on top for extra color. Garnish with mint leaves for a fresh touch. You can also drizzle some honey on top for added sweetness. For the complete recipe, check out the Full Recipe section. Mango Coconut Chia Pudding is an easy and tasty treat. You learned about the ingredients, recipes, and tips. Discover how to make it healthy and fun. Remember to avoid common mistakes for the best texture. You can easily change flavors and add your favorite toppings. Keep your pudding fresh with proper storage. Enjoy making and sharing this delightful dish.

Mango Coconut Chia Pudding Tasty and Simple Recipe

Craving a simple yet dreamy treat? Look no further! My Mango Coconut Chia Pudding is a fun, healthy dessert you

For Lemon Garlic Butter Shrimp, gather these main ingredients: - 1 pound large shrimp, peeled and deveined - 4 tablespoons unsalted butter - 4 cloves garlic, finely minced - Juice and zest from 1 large lemon - 1 tablespoon fresh parsley, finely chopped - 1/2 teaspoon red pepper flakes (optional for a hint of heat) - Salt and freshly cracked black pepper to taste - Lemon slices, for garnish You can also add a pinch of paprika for extra flavor. If you want to change things up, you can use chicken or scallops instead of shrimp. For fresh ingredients, if you lack fresh parsley, use dried parsley. If you don’t have a lemon, lime juice works well too. You will need a large skillet to cook the shrimp evenly. A wooden spoon or spatula will help you stir the shrimp. A sharp knife and cutting board are also essential for prepping your garlic and parsley. 1. Preparing the shrimp for cooking Start by drying the shrimp well with paper towels. This step is key for a good sear. Moist shrimp will steam instead of sear, and we want that nice crust! 2. Prepping garlic and other ingredients Mince the garlic finely. You want it small so it cooks evenly. Squeeze the juice from the lemon into a bowl. Grate the zest too. Chop the parsley finely for a fresh finish. 1. Detailed cooking instructions In a large skillet, melt the butter over medium heat. Add the minced garlic and sauté for about one minute. You want it fragrant but not brown. Then, turn the heat to medium-high. Add the dried shrimp to the skillet. 2. Tips for achieving the perfect sear Season the shrimp with salt, black pepper, and red pepper flakes if you like heat. Cook for 2-3 minutes on each side. They will turn pink and opaque. Do not crowd the pan; this helps with searing. 1. Adding lemon juice and zest Just before the shrimp are done, add the lemon juice and zest to the skillet. Toss quickly to coat the shrimp in that buttery sauce. This adds bright, fresh flavor. 2. Incorporating parsley and presentation tips Remove the skillet from heat and stir in the chopped parsley. This adds color and a hint of freshness. Serve the shrimp hot, garnished with lemon slices and a sprinkle of parsley for a lovely look. For the full recipe, check the link above. To sauté shrimp well, start with dry shrimp. Pat them with paper towels. This helps them sear nicely. Heat your skillet before adding the butter. Use medium heat to melt the butter, then add the garlic. Stir it for one minute until you smell its great aroma. Keep an eye on the garlic so it doesn't burn. To prevent overcooking, cook shrimp for only 2-3 minutes per side. Look for that bright pink color. Once they turn opaque, they are ready. If you overcook shrimp, they become rubbery and tough. Nobody wants that! Adding herbs can lift the flavor. Fresh parsley adds a bright taste. You can also try basil or cilantro for variety. For spice, red pepper flakes offer a nice kick. Adjust the spice level by adding more or less. If you want more heat, use jalapeños or hot sauce. To make your dish look pretty, serve the shrimp on a white plate. This makes the colors pop. Garnish with lemon slices and extra parsley. A sprinkle of black pepper adds a nice touch too. Pair this dish with rice, pasta, or a fresh salad. These sides complement the buttery sauce well. For a fun twist, serve it with crusty bread to soak up the sauce. Get creative and enjoy your meal! You can find the full recipe [here](#). {{image_4}} You can easily change the taste of Lemon Garlic Butter Shrimp. Adding spices like paprika or cumin can give it a new spin. These spices can enhance the dish without overpowering the lemon and garlic. You can also add vegetables, making it even more colorful. Try bell peppers, spinach, or zucchini. Just sauté them before adding shrimp for a well-rounded taste. If you prefer gluten-free, this dish fits perfectly. All the ingredients are naturally gluten-free. For a lower-fat version, you can use less butter or swap it for olive oil. This will still keep the dish tasty while cutting back on fat. You can also use shrimp alternatives like chicken or tofu if you wish. Lemon Garlic Butter Shrimp can transform into a pasta dish easily. Just toss cooked pasta in the same sauce for a hearty meal. For an Asian twist, add soy sauce and sesame oil. This gives it a bold flavor with a hint of sweetness. You can garnish with green onions to add freshness. For the full recipe, check here [Full Recipe]. To keep your Lemon Garlic Butter Shrimp fresh, place it in an airtight container. Make sure to cool the dish before sealing it. Store the shrimp in the refrigerator. It will stay good for up to three days. If you want to keep it longer, freezing is a good option. To freeze your shrimp dish, let it cool completely. Then, place it in a freezer-safe bag or container. Remove as much air as possible to avoid freezer burn. You can keep it in the freezer for up to three months. When you are ready to eat, thaw the shrimp in the fridge overnight. For a quick method, run the sealed bag under cold water. Reheat in a pan over low heat until warm. Avoid cooking it too long to keep the shrimp tender. Food safety is key when handling shrimp. Always wash your hands before preparing food. Check that the shrimp is fresh before cooking. Fresh shrimp should smell like the ocean and not have a strong odor. If your shrimp looks discolored or slimy, it may be spoiled. Trust your nose and eyes, and when in doubt, throw it out. Always follow these safety tips to enjoy your meal worry-free! How long to cook shrimp for best results? Cook shrimp for 2-3 minutes on each side. They should turn pink and opaque. Overcooking makes them tough. Can I use frozen shrimp instead? Yes, you can use frozen shrimp. Just thaw them first. Dry them well before cooking. This helps them sear nicely. What to do if shrimp are rubbery? If shrimp are rubbery, you likely overcooked them. Cook them just until they turn pink. How can I enhance the lemon flavor? To boost lemon flavor, add more zest or juice. Fresh lemon juice makes a big difference. You can also add lemon slices for garnish. What drinks pair well with Lemon Garlic Butter Shrimp? White wine, like Sauvignon Blanc, pairs well. Sparkling water with lemon is a refreshing choice. Best sides to serve alongside this dish? Serve with rice or pasta to soak up the sauce. A fresh green salad or roasted veggies also pairs nicely. For the full recipe, check the link above. This blog post covered everything you need for a great Lemon Garlic Butter Shrimp. We discussed required and optional ingredients, tool recommendations, and preparation steps. You learned how to cook shrimp perfectly while enhancing flavor and presentation. By following these tips and exploring variations, you can create a dish that suits your taste. Whether you want to store leftovers or try new flavors, you now have the tools to impress. Enjoy cooking and make it your own!

Lemon Garlic Butter Shrimp Simple and Flavorful Dish

Get ready to impress your loved ones with my simple and flavorful Lemon Garlic Butter Shrimp recipe! This dish is

For this hearty vegan sweet potato chili, you will need: - 2 medium sweet potatoes, peeled and diced into 1-inch cubes - 1 can (15 oz) black beans, thoroughly rinsed and drained - 1 can (15 oz) kidney beans, thoroughly rinsed and drained - 1 can (15 oz) diced tomatoes, including their juices - 1 medium onion, finely diced - 3 cloves garlic, minced - 1 red bell pepper, diced - 2 tablespoons chili powder - 1 teaspoon ground cumin - 1 teaspoon smoked paprika - 1/2 teaspoon cayenne pepper (adjust to taste for heat) - 2 cups vegetable broth - 1 tablespoon olive oil - Salt and freshly ground black pepper, to taste - Fresh cilantro, chopped (for garnish) - Avocado slices (for serving, optional) Sweet potatoes are rich in vitamins A and C. They also offer fiber, which is good for digestion. Beans provide protein and fiber, making this dish filling and nutritious. Tomatoes are high in antioxidants, which help fight disease. Onions and garlic boost your immune system. The spices add flavor and may have health benefits, too. You can swap sweet potatoes for butternut squash for a different taste. If you don't have black beans, use pinto beans instead. Canned tomatoes can be replaced with fresh tomatoes, though you may need to adjust the cooking time. If you're out of vegetable broth, water works, but the flavor will be less rich. Use any bell pepper color if red is not available. First, gather your ingredients. You need sweet potatoes, black beans, kidney beans, diced tomatoes, onion, garlic, red bell pepper, chili powder, ground cumin, smoked paprika, cayenne pepper, vegetable broth, olive oil, salt, and pepper. Start by peeling and dicing two medium sweet potatoes into 1-inch cubes. Next, finely dice one medium onion and mince three cloves of garlic. Dice one red bell pepper, too. Rinse and drain the black and kidney beans. In a large pot, heat one tablespoon of olive oil over medium heat. Once the oil is hot, add the diced onion. Sauté the onion for 4-5 minutes until it looks soft and clear. Next, add the minced garlic and red bell pepper. Cook this mix for 2-3 minutes until it smells great and the peppers soften. Then, add the sweet potatoes and sauté for another 5 minutes. This step builds flavor and warmth. Now, sprinkle in two tablespoons of chili powder, one teaspoon of ground cumin, one teaspoon of smoked paprika, and half a teaspoon of cayenne pepper. Stir well so all the sweet potatoes get coated in spices. Let this mixture cook for 2 minutes to boost the spice aroma. Pour in one can of diced tomatoes and two cups of vegetable broth. Stir to mix everything. Increase the heat to bring it to a rolling boil. Once it boils, reduce the heat to low and cover the pot. Allow it to simmer for 20-25 minutes until the sweet potatoes are soft. After the sweet potatoes are tender, stir in the rinsed black beans and kidney beans. Cook for another 5 minutes, until the beans are warm. Taste the chili and add salt and pepper as you like. To ensure your chili has the right texture, chop the sweet potatoes into even pieces. This helps cook them evenly. When sautéing, don’t rush the steps. Let the onion and garlic soften fully before adding more ingredients. Simmer the chili long enough to let flavors blend but avoid overcooking the sweet potatoes. They should be soft but not mushy. To enhance the texture, you can add more vegetables or beans. This recipe offers a hearty dish that fills you up. Enjoy your Vegan Sweet Potato Chili with fresh cilantro and avocado slices for the best experience! For the complete recipe, check out the Full Recipe. You can easily control the heat in your vegan sweet potato chili. Start with just a little cayenne pepper and taste as you go. If you want it spicier, add more cayenne. You can also use fresh jalapeños instead. Just chop them finely and add them with the onions. Remember, you can always add more spice, but it's hard to take it away. Making this chili ahead of time is smart. It tastes even better the next day! Prepare the chili and let it cool. Store it in an airtight container in the fridge. You can keep it fresh for up to three days. You can also freeze it for up to three months. Just reheat on the stove or in the microwave when you're ready to eat. Pairing side dishes with your chili enhances the meal. Here are some great options: - Cornbread: Its sweet and buttery flavor matches well. - Rice: Serve it over brown or white rice for extra carbs. - Salad: A fresh green salad can balance the chili's richness. - Tortilla chips: Crunchy chips add texture and fun. - Avocado: Creamy avocado slices make a perfect topping. These sides will make your chili night even better! For the full recipe, check out the recipe section. {{image_4}} You can change up the flavor of your chili by adding different vegetables. Try using zucchini, corn, or carrots. Each veggie gives a unique taste and nutrition. For a colorful dish, mix in bell peppers of different colors. You can even add leafy greens like spinach or kale. They cook down well and boost the health factor. If you want more protein, consider adding lentils or chickpeas. They blend nicely with the flavors of the chili. You can also include vegan ground meat or tofu for a heartier dish. Just be sure to cook them well to soak up all the spices in the chili. To really enhance the taste, try adding fresh herbs like cilantro or parsley. A squeeze of lime juice brightens the dish. You can also mix in a tablespoon of maple syrup or agave for sweetness. Hot sauce can add a spicy kick if you prefer a bolder flavor. These small changes can take your chili from good to great! For the full recipe, check out the details in the main article. After enjoying your vegan sweet potato chili, store any leftovers in an airtight container. Let the chili cool to room temperature first. This helps prevent condensation and keeps your chili fresh. You can keep it in the fridge for up to five days. If you want to keep it longer, consider freezing it. When you're ready to enjoy your leftover chili, reheat it on the stove or in the microwave. If using the stove, place it in a pot over medium heat. Stir it often until it's hot throughout. This usually takes about 10 minutes. If using a microwave, heat it in short bursts, stirring between each burst, until hot. This helps ensure even heating. To freeze your chili, let it cool completely before transferring it to a freezer-safe container. Leave some space at the top, as liquids expand when frozen. You can keep it in the freezer for up to three months. When you're ready to eat it, thaw it in the fridge overnight. You can also use the microwave for quick thawing. For the best taste, reheat it on the stove after thawing. This way, you'll enjoy a warm, hearty meal anytime. For the full recipe, check the earlier section. Yes, you can use many types of beans in this chili. Feel free to swap black beans or kidney beans for pinto beans, cannellini beans, or chickpeas. Each bean brings its own flavor and texture to the dish. Just make sure to rinse and drain canned beans to remove excess salt and starch. You can even mix different beans for a fun twist! Absolutely! This chili is naturally gluten-free. It uses whole food ingredients like sweet potatoes, beans, and spices. Always check the labels on canned products, like diced tomatoes and vegetable broth, to ensure they are gluten-free. This way, you can enjoy the chili without worrying about gluten. To kick up the heat, add more cayenne pepper or chili powder. You can also include fresh jalapeños or serrano peppers for a fresh and spicy flavor. If you like smoky heat, try adding chipotle peppers in adobo sauce. Start with a little, taste, and adjust until it’s just right for you! Vegan Sweet Potato Chili is fun and easy to make. You learned about key ingredients, their benefits, and tasty substitutes. I shared step-by-step instructions to ensure a perfect chili every time. Tips on adjusting spice levels and side dishes make your meal even better. You can customize this chili with different veggies and proteins. Remember to store leftovers right and freeze for later. With all this info, you can enjoy a warm bowl of chili anytime!

Vegan Sweet Potato Chili Hearty and Flavorful Dish

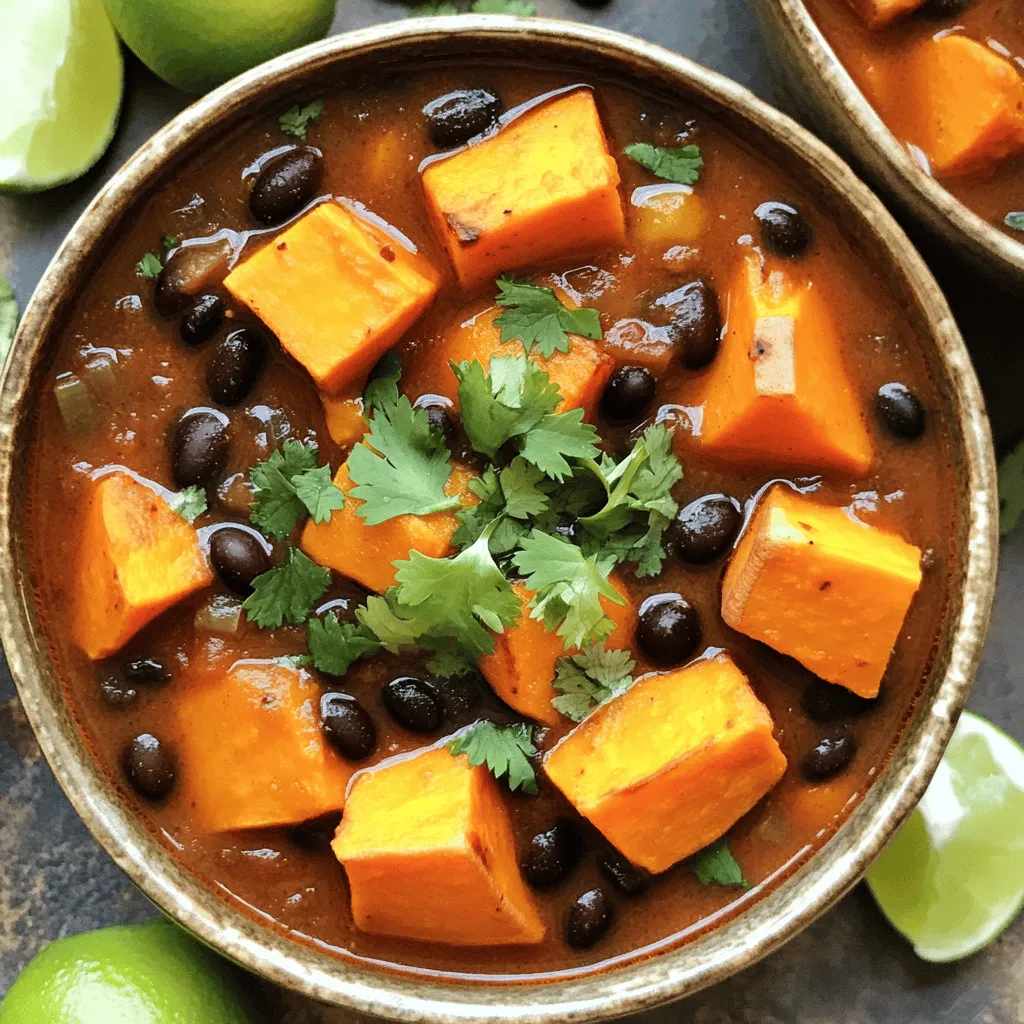
Looking for a warm, filling dish that’s good for you? This Vegan Sweet Potato Chili is hearty, flavorful, and packed

To make creamy spinach artichoke dip, you need key ingredients. Here’s what to gather: - 1 cup fresh spinach, finely chopped - 1 cup canned artichoke hearts, drained and roughly chopped - ½ cup cream cheese, softened - ½ cup sour cream - ½ cup mayonnaise - 1 cup shredded mozzarella cheese - ¼ cup grated Parmesan cheese - 2 cloves garlic, minced - 1 teaspoon fresh lemon juice - Salt and freshly ground black pepper to taste These ingredients create a rich and savory dip that everyone loves. You can boost the flavor of your dip with some optional add-ins. Consider these tasty options: - ¼ teaspoon red pepper flakes for a hint of spice - A dash of Worcestershire sauce for depth - Fresh herbs like parsley or dill for freshness Feel free to experiment with these add-ins. They can elevate your dip to new heights. This creamy spinach artichoke dip is not just tasty; it also offers some nutrition. Here’s a quick breakdown: - Serving Size: About 2 tablespoons - Calories: Approximately 130-150 per serving - Protein: About 4 grams - Fat: About 10 grams - Carbohydrates: About 5 grams - Fiber: 1 gram Remember, the dip pairs well with veggies and whole-grain chips for a healthier snack. For the full recipe, check out the details above. Enjoy your cooking! First, gather your ingredients. You will need fresh spinach, canned artichoke hearts, cream cheese, sour cream, mayonnaise, mozzarella cheese, Parmesan cheese, garlic, lemon juice, salt, pepper, and optional red pepper flakes. Make sure everything is ready before you start. Preheat your oven to 375°F (190°C). This step is crucial for even baking. 1. Create the Base: In a medium bowl, mix softened cream cheese, sour cream, and mayonnaise. Blend these until smooth. A hand mixer works well, but a spatula can do the job too. 2. Incorporate Spinach and Artichokes: Next, gently fold in the chopped spinach and artichoke hearts. Make sure they are mixed evenly into the creamy base. 3. Season and Enrich: Add minced garlic, lemon juice, shredded mozzarella, and grated Parmesan. Season with salt, pepper, and red pepper flakes if you like some heat. Mix until everything is well combined. 4. Prepare for Baking: Transfer the dip mixture into an oven-safe baking dish. Spread it evenly with a spatula. 5. Bake to Perfection: Place the baking dish in your preheated oven. Bake for 25-30 minutes. Look for bubbling hot dip with a golden top. 6. Let it Cool and Serve: After baking, let the dip cool for a few minutes. This helps avoid burns when you serve it. For a great presentation, serve the dip warm. Pair it with toasted pita chips, fresh vegetable sticks, or crispy tortilla chips. To make it even more appealing, sprinkle extra Parmesan cheese on top. Add a few fresh spinach leaves for a nice touch. Enjoy your creamy spinach artichoke delight! You can find the full recipe for more detailed steps. To make your dip super creamy, use full-fat cream cheese. This gives the dip a rich taste. Mix the cream cheese well. Use a hand mixer for a smooth blend. You can also add a bit more sour cream. This adds a nice tang. Want a healthier dip? Swap out the mayo for Greek yogurt. It still tastes great and adds protein. You can use low-fat cream cheese too. Fresh spinach can replace frozen spinach to cut down on sodium. Always drain and rinse canned artichokes to reduce salt. When mixing the dip, fold in the spinach and artichokes gently. This keeps the texture light. Spread the dip evenly in your baking dish. This helps it bake evenly. Bake until bubbly and golden. Keep an eye on it to avoid burning. For the best flavor, let it cool for a few minutes before serving. This makes it easier to scoop. Check out the Full Recipe for more details! {{image_4}} To make a spicy version, add red pepper flakes or diced jalapeños. Start with ¼ teaspoon of red pepper flakes. If you want more heat, add more to taste. Jalapeños give a fresh kick. You can mix them in with the other ingredients. This spicy twist will make your dip stand out at any party. For a vegan option, swap out dairy for plant-based ingredients. Use vegan cream cheese and sour cream. You can also try cashew cream for a rich texture. Make sure to check the cheese brands for vegan options. Nutritional yeast can add a cheesy flavor. This way, everyone can enjoy the dip, even those on plant-based diets. Cheese lovers can play with cheese varieties. Instead of just mozzarella, mix in gouda or cheddar. Each cheese brings its own flavor. You could even try feta for a tangy taste. Blend different cheeses for a unique twist. This variation adds depth to the classic recipe. For the full recipe, you can explore the delicious details and find the perfect balance of flavors. After you enjoy your Creamy Spinach Artichoke Dip, store leftovers in an airtight container. This keeps the dip fresh for up to four days. Make sure it cools down before sealing it. Label the container with the date so you know when to eat it. To reheat the dip, scoop it into a small oven-safe dish. Heat it at 350°F (175°C) for about 15-20 minutes. Stir it halfway through to warm it evenly. You can also use the microwave. Heat in 30-second bursts and stir in between. This keeps the dip creamy and delicious. You can freeze Creamy Spinach Artichoke Dip too! Place it in a freezer-safe container. Leave some space at the top for expansion. It will stay good for about three months. To use it, thaw it in the fridge overnight before reheating. This makes it easy to enjoy later without extra work. For the complete recipe, check out the Full Recipe. Yes, you can make this dip ahead. Prepare the dip, then cover it. Store it in the fridge for up to two days. When ready to serve, bake it as directed in the Full Recipe. This saves time for your party and keeps flavors fresh. You have many tasty options! Here are some ideas: - Toasted pita chips - Fresh vegetable sticks like carrots and celery - Crispy tortilla chips - Bagel bites or crackers - Sliced baguette Each option pairs well and adds fun to your gathering. When stored well, the dip stays fresh for three to four days in the fridge. Keep it in an airtight container. If you see any changes in smell or color, it’s best to toss it. Enjoy your creamy dip within this time for the best taste! This blog covered how to make Creamy Spinach Artichoke Dip. You learned about key ingredients and optional add-ins. We shared detailed steps for preparation and baking. There were tips to make it creamy and healthy options. You also discovered fun variations and smart storage methods. In the end, this dip is easy and fun to make. Enjoy it with friends or family. It'll be a hit at any gathering. Remember, you can customize it to fit your tastes!

Creamy Spinach Artichoke Dip Flavorful Party Favorite

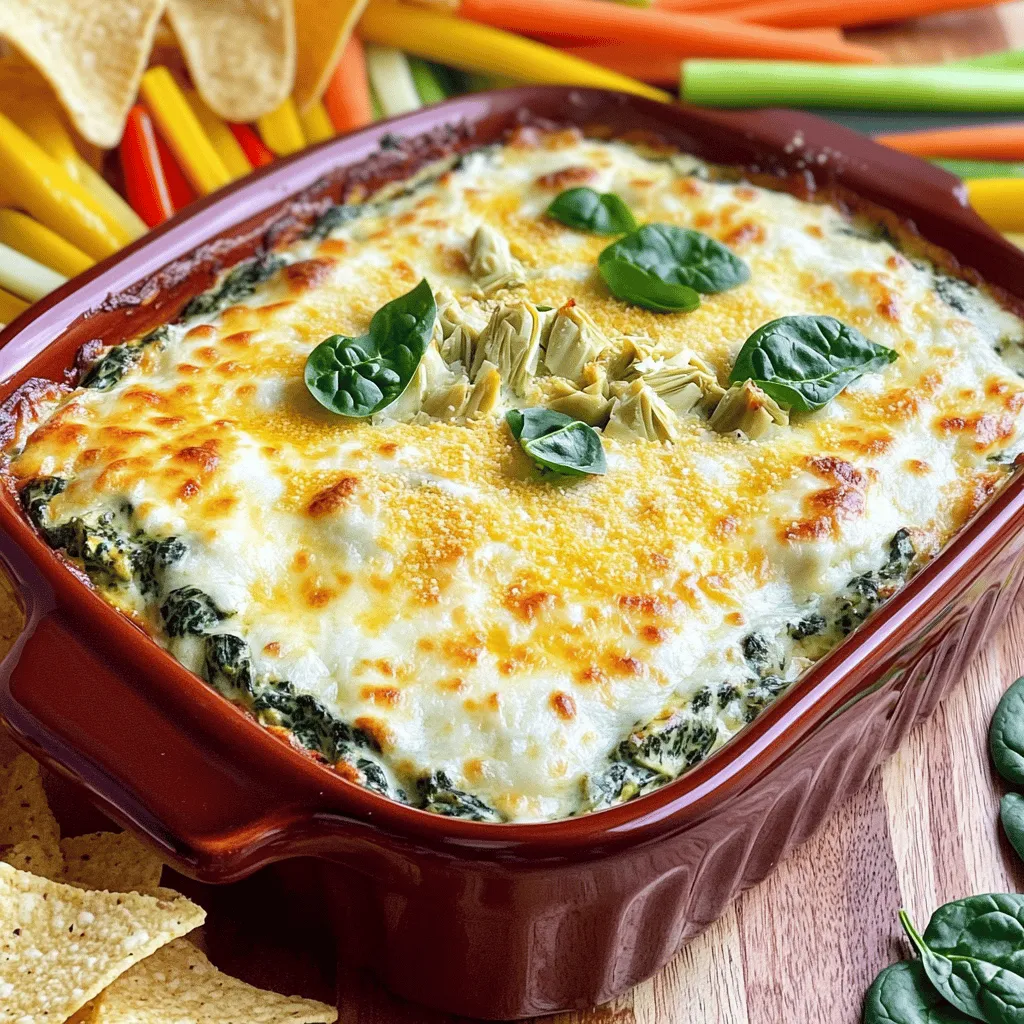
Looking for the perfect party dip? This Creamy Spinach Artichoke Dip is a crowd-pleaser! Packed with flavor, it’s easy to

To make a great pumpkin pie dump cake, you need some key items: - 1 can (15 oz) pumpkin puree - 1 can (12 oz) evaporated milk - 3 large eggs - 1 cup granulated sugar These ingredients create a creamy and rich base. The pumpkin puree gives it that classic flavor. The evaporated milk adds creaminess, while the eggs help bind everything together. You will also need a few more items to enhance the flavor: - 1 tablespoon pumpkin pie spice - 1 teaspoon vanilla extract - 1 box (15.25 oz) yellow cake mix - 1 cup unsalted butter, melted The pumpkin pie spice brings warmth and depth. Vanilla extract adds a sweet note. The yellow cake mix forms the topping, and melted butter ensures a crispy texture. For some extra flair, consider adding: - 1 cup chopped pecans - Whipped cream or vanilla ice cream for serving Chopped pecans give a nice crunch. Topping your slice with whipped cream or ice cream makes it a true treat! For full details, check the Full Recipe. - Preheat oven to 350°F (175°C). - Lightly grease the baking dish. - Combine pumpkin puree, evaporated milk, eggs, sugar, spice, and vanilla. - Whisk until smooth. To make the pumpkin base, I use a big bowl. First, I add one can of pumpkin puree. Then, I pour in one can of evaporated milk. Next, I crack in three large eggs. After that, I add one cup of granulated sugar, one tablespoon of pumpkin pie spice, and one teaspoon of vanilla extract. I whisk it all together until the mix is smooth and creamy. - Pour the pumpkin mixture into the dish. - Sprinkle cake mix over pumpkin layer. - Drizzle melted butter and add optional pecans. Now, I pour the pumpkin mixture into the greased dish. I spread it out evenly. Then, I open the box of yellow cake mix. I sprinkle it over the pumpkin layer. This step is key; I do not stir it. Next, I drizzle one cup of melted butter on top. If I want to add some crunch, I sprinkle one cup of chopped pecans over the butter. - Bake for 50-60 minutes. - Check for doneness with a toothpick. I place the baking dish in the oven. I bake it for 50 to 60 minutes. To check if it's done, I use a toothpick. I stick it in the center. If it comes out with a few moist crumbs, it’s ready. - Cool for 15-20 minutes before serving. - Suggested toppings for serving. Once it is baked, I take it out of the oven. I let it cool for 15 to 20 minutes. This helps it set. When I serve it, I love adding whipped cream or vanilla ice cream on top. For extra flair, I might drizzle some caramel sauce. Enjoy this simple and satisfying treat! For complete details, check the Full Recipe. To make a great Pumpkin Pie Dump Cake, do not stir the melted butter. Just drizzle it over the cake mix. This helps form a nice, crunchy topping. Checking doneness is also key. Insert a toothpick in the center; it should come out with a few moist crumbs, but not wet batter. This means your cake is ready! Oven temperatures can vary. If your oven runs hot or cold, adjust the bake time. Start checking around 45 minutes. To avoid a soggy bottom, make sure to spread the pumpkin mixture evenly. This way, it cooks through and sets well. Want to boost the flavor? You can add more spices. Try a pinch of nutmeg or cloves for extra warmth. When choosing your pumpkin, fresh pumpkin can taste great but is harder to work with. Canned pumpkin puree is easy and gives a nice, smooth texture. Both can work well in this recipe, so choose what fits your needs! {{image_4}} You can make your pumpkin pie dump cake even more fun! Try adding chocolate chips or caramel bits to the mix. These sweet bites melt and add richness to every bite. You can also play with spices. Instead of just pumpkin pie spice, mix in cinnamon or nutmeg for a warm twist. If you need a gluten-free option, look for a gluten-free cake mix. Many brands offer delicious choices that work well in this recipe. For a dairy-free version, use coconut milk in place of evaporated milk. You can also swap the butter for a dairy-free alternative, like coconut oil or vegan margarine. For a fun fall twist, try using apple pie spice instead of pumpkin pie spice. This change gives the cake a fresh taste that’s perfect for autumn. You can also create Thanksgiving-themed variations by adding nuts or cranberries. Chopped pecans or walnuts can give a nice crunch, while cranberries add a pop of tartness. For the full recipe, visit the [Full Recipe]. To keep your Pumpkin Pie Dump Cake fresh, store it in the fridge. First, let it cool completely. Then, cover it tightly with plastic wrap or aluminum foil. This keeps it moist and tasty. Try to eat it within three to four days for the best flavor. If you want to save some for later, freezing works well. First, cut the cake into portions. Then, wrap each piece in plastic wrap. Place the wrapped slices in a freezer-safe container or bag. This keeps them safe from freezer burn. When you're ready to enjoy, just thaw it in the fridge overnight. To reheat, you have a few options. You can use the microwave or the oven. If using the microwave, heat each piece for about 30 seconds. Check to see if it's warm. If you want to use the oven, preheat it to 350°F (175°C). Place the cake in a baking dish and cover it with foil. Bake for about 15 minutes. This helps keep the cake moist. For serving leftovers, try adding a scoop of vanilla ice cream or whipped cream on top. This adds a nice touch and makes it even better! You can make Pumpkin Pie Dump Cake from scratch. This recipe is simple and fun. You mix all the main ingredients in one bowl. Then, you layer it in a dish. For homemade, you could bake your cake and make your pumpkin filling. This recipe saves time and gives great flavor. Yes, you can use other cake mixes! A spice cake mix works well. You can also try yellow cake or even chocolate. Each mix adds a new twist to the pumpkin flavor. Just make sure the mix is dry, as in the original recipe. You can serve many things with this cake. Here are some tasty ideas: - Whipped cream - Vanilla ice cream - A drizzle of caramel sauce - Freshly brewed coffee - Hot apple cider These pairings enhance the flavors and make it even more special. Pumpkin Pie Dump Cake lasts well! In the fridge, it stays fresh for about 3 to 4 days. You can freeze it for up to 2 months. Just make sure to wrap it tightly. When you're ready, thaw it in the fridge overnight before serving. You now know the key ingredients and steps for making Pumpkin Pie Dump Cake. From mixing the pumpkin base to choosing your toppings, each part matters for a tasty treat. Remember, you can try different flavors or even adjust the recipe to fit your needs. Storing leftovers is easy, so you can enjoy them later. Dive into your baking adventure and make a dessert that brings smiles. Your kitchen will smell amazing, and your taste buds will thank you!

Pumpkin Pie Dump Cake Simple and Satisfying Treat

Craving a dessert that’s both simple and delicious? Look no further! This Pumpkin Pie Dump Cake combines the rich flavors

To make Cowboy Butter Chicken Pasta, you need fresh and simple ingredients. Here’s the list of what you will need: - 12 oz fettuccine or penne pasta - 1 lb boneless, skinless chicken breasts, cut into bite-sized cubes - 4 tablespoons unsalted butter, divided - 2 cloves garlic, minced - 1 teaspoon smoked paprika - 1 teaspoon onion powder - 1 teaspoon dried oregano - ½ teaspoon cayenne pepper (adjust according to your heat preference) - 1 cup cherry tomatoes, halved - 1 cup corn kernels (fresh or frozen) - ½ cup heavy cream - 1 cup shredded cheddar cheese - Salt and freshly ground black pepper, to taste - Fresh parsley, chopped, for garnish These ingredients come together to create a dish that’s rich and full of flavor. The chicken provides protein, while the pasta makes it hearty. The spices add warmth and depth, making every bite enjoyable. Fresh vegetables like cherry tomatoes and corn add a pop of color and sweetness. Don't forget to check the [Full Recipe](#) for all the steps to bring this meal to life! How to Cook the Pasta Properly To cook your pasta, start with a large pot. Fill it with water and add a good amount of salt. Bring the water to a boil. Once boiling, add 12 ounces of fettuccine or penne pasta. Follow the package instructions for cooking time. Stir the pasta occasionally to prevent sticking. Tips for Al Dente Texture For the best texture, cook the pasta until it is al dente. This means it should be firm when you bite into it. Usually, this takes about two minutes less than the package suggests. Before draining, save half a cup of the pasta water. This water helps to make the sauce creamy later. Seasoning Tips and Techniques Use 1 pound of boneless, skinless chicken breasts for this dish. Cut the chicken into bite-sized cubes. In a large bowl, season the chicken with salt, black pepper, smoked paprika, onion powder, oregano, and cayenne pepper. Mix well so every piece is coated in spices. Ensuring Even Cooking To cook the chicken, heat 2 tablespoons of unsalted butter in a large skillet. Once the butter melts, add the seasoned chicken. Cook it on medium heat. Stir it occasionally for about 6 to 8 minutes. You want the chicken to be golden brown and fully cooked. Infusing the Butter with Garlic In the same skillet, add the rest of the butter after you remove the cooked chicken. Let it melt, then add 2 minced garlic cloves. Sauté the garlic for about 1 minute. Watch closely so it doesn’t burn. It should smell amazing! Adding Vegetables for Flavor Next, add 1 cup of halved cherry tomatoes and 1 cup of corn kernels to the skillet. Cook these for about 3 to 4 minutes. Stir them occasionally until the tomatoes soften and release their juices. This step adds more flavor to the dish. Techniques for Combining the Pasta and Sauce Return the cooked chicken to the skillet. Pour in ½ cup of heavy cream and the reserved pasta water. Stir everything well to combine. Let it heat through. Finally, add the cooked pasta and toss gently. Gradually sprinkle in 1 cup of shredded cheddar cheese. Stir until it melts and the sauce becomes creamy. Adjust the seasoning with salt and black pepper to taste. For the full recipe, check out the details above. Enjoy making this Cowboy Butter Chicken Pasta! To make your Cowboy Butter Chicken Pasta shine, start by adjusting the spice levels. If you like it hot, add more cayenne. If you prefer mild, cut back on it. Balance is key in this dish. You want each bite to be full of flavor without overwhelming your taste buds. Next, enhance creaminess with the right amount of heavy cream. If you want it richer, add more cream. For a lighter version, reduce the cream and add a splash of pasta water instead. The goal is to create a smooth sauce that clings to every piece of pasta. Using a skillet helps cook the chicken evenly. Make sure your skillet is hot before adding the chicken. This helps it brown nicely. If the skillet is too cool, the chicken will steam instead of sear. To avoid overcooking the chicken, cut it into small, even pieces. This helps it cook faster and more evenly. Cook until it's golden brown and no longer pink in the center. This way, your chicken stays juicy and tender. Garnishing your dish is simple but impactful. Sprinkle fresh parsley on top for a pop of color. You can also add extra cheddar cheese for a cheesy finish. A light dusting of smoked paprika adds an inviting aroma. For sides, consider serving garlic bread or a fresh salad. These pairs complement the richness of the pasta well. This meal can be a feast for your eyes and your taste buds. Don't forget to check out the Full Recipe for detailed steps. {{image_4}} If you want to change up the protein, you have options. You can use shrimp or pork instead of chicken. Both add a nice flavor and cook quickly. If you prefer a meatless dish, try chickpeas or tofu. They absorb flavors well and add protein. To make this dish your own, consider adding different vegetables or herbs. Spinach, bell peppers, or zucchini would work great. Fresh herbs like basil or cilantro can brighten the taste. If you want more heat, add red pepper flakes or extra cayenne pepper. Spice is your friend in this dish! Switching up the pasta can change the whole meal. You can use spaghetti, rigatoni, or even whole wheat pasta. If gluten is a concern, look for gluten-free pasta made from rice or quinoa. They cook similarly and taste great in this dish. For the full recipe, check out Cowboy Butter Chicken Pasta. How do I store Cowboy Butter Chicken Pasta in the refrigerator? To store leftovers, let the pasta cool first. Then, place it in an airtight container. This way, it stays fresh for about 3 to 4 days. Make sure to keep the pasta and sauce together to maintain flavor. What are the freezing tips and techniques? To freeze this dish, let it cool completely. Then, use a freezer-safe container or bag. It will last in the freezer for up to 3 months. When freezing, leave some space in the container. This allows for expansion as the sauce freezes. What are the best methods for keeping the pasta creamy? To reheat, place the leftovers in a saucepan. Add a splash of milk or cream to keep it creamy. Heat it over low to medium heat. Stir often until warmed through to avoid burning. How do I avoid dryness when reheating? To prevent dryness, you can add a bit of reserved pasta water. This adds moisture back into the dish. Always cover the pan while reheating. This keeps the steam in and helps the pasta stay moist. You can use several tasty proteins instead of chicken. Here are some great options: - Shrimp: Cook quickly and add rich flavor. - Tofu: A great choice for vegans and vegetarians. - Sausage: Use spicy or mild for extra taste. - Ground beef: A hearty option that pairs well with the sauce. These proteins will make your Cowboy Butter Chicken Pasta just as delicious. If you like heat, try these tips to spice up your pasta: - Add more cayenne pepper for a stronger kick. - Toss in some crushed red pepper flakes. - Use hot sauce or a spicy seasoning blend. - Add diced jalapeños for fresh heat. Adjust the heat to match your taste. Yes, you can make this dish ahead of time. Here are some tips: - Cook the pasta and chicken ahead of time, then store separately. - Combine everything just before serving for the best taste. - Refrigerate leftovers in an airtight container for up to 3 days. Reheat gently on the stove for best results. These side dishes complement your meal nicely: - Garlic bread: Perfect for soaking up the sauce. - Caesar salad: A light and refreshing choice. - Steamed broccoli: Adds color and nutrition. - Corn on the cob: A sweet, crunchy addition. Feel free to mix and match for a full meal experience. This article covered all you need for making Cowboy Butter Chicken Pasta. We discussed key ingredients, step-by-step cooking methods, and handy tips. I offered variations for taste and dietary needs, plus storage advice. You now have a clear roadmap to create a delicious dish. You can mix flavors, adjust spices, and explore options that fit your taste. Enjoy cooking and sharing this dish with others for a great meal!

Cowboy Butter Chicken Pasta Simple and Flavorful Meal

Are you ready for a meal that’s simple yet bursting with flavor? Cowboy Butter Chicken Pasta combines creamy goodness with

- 2 medium sweet potatoes, peeled and diced into 1-inch cubes - 1 can (15 oz) black beans, drained and rinsed thoroughly - 1 can (14 oz) diced tomatoes with green chilies, undrained - 1 medium onion, chopped finely - 3 cloves garlic, minced - 1 red bell pepper, chopped into bite-sized pieces - 2 cups vegetable broth (low sodium preferred) - 2 teaspoons ground cumin - 1 teaspoon smoked paprika - 1 teaspoon chili powder - 1 tablespoon olive oil - Salt and black pepper to taste - Fresh cilantro, chopped, for garnish - Lime wedges for serving Use medium sweet potatoes for the best size. A 15 oz can of black beans works well. For the tomatoes, choose a can with green chilies for a nice kick. The onion should be medium-sized, while garlic needs to be fresh for great flavor. Dice the red bell pepper into small pieces for even cooking. For broth, low-sodium vegetable broth enhances the taste without too much salt. Use a tablespoon for olive oil and teaspoons for spices. Adjust salt and pepper per your taste. Fresh cilantro adds a nice touch, and lime wedges give a zesty finish. This recipe is vegetarian and can be vegan. It is naturally gluten-free. Check for low-sodium options if you need to watch your salt. Sweet potatoes provide fiber and vitamins. Black beans add protein and iron. Overall, this chili is healthy and comforting. Feel free to adjust the spice level to suit your taste. Gather your ingredients before you start. This makes cooking easier. Here’s what you need: - 2 medium sweet potatoes, peeled and diced into 1-inch cubes - 1 can (15 oz) black beans, drained and rinsed thoroughly - 1 can (14 oz) diced tomatoes with green chilies, undrained - 1 medium onion, chopped finely - 3 cloves garlic, minced - 1 red bell pepper, chopped into bite-sized pieces - 2 cups vegetable broth (low sodium preferred) - 2 teaspoons ground cumin - 1 teaspoon smoked paprika - 1 teaspoon chili powder - 1 tablespoon olive oil - Salt and black pepper to taste - Fresh cilantro, chopped, for garnish - Lime wedges for serving Make sure to wash and chop all your veggies first. This saves time when cooking. 1. Heat the olive oil in a large pot over medium heat. 2. Once hot, add the chopped onion. Cook for about 5 minutes until soft. 3. Stir in the minced garlic and chopped red bell pepper. Cook for 2-3 minutes until fragrant. 4. Add the diced sweet potatoes to the pot. Mix well and cook for 5 minutes. 5. Sprinkle ground cumin, smoked paprika, and chili powder over the veggies. Stir for 1-2 minutes. 6. Pour in the undrained diced tomatoes and vegetable broth. Stir and bring to a gentle simmer. 7. Add the drained black beans. Season with salt and black pepper. Cover and cook for 25-30 minutes. 8. Taste and adjust the seasoning. Add more chili powder for heat if desired. 9. Remove from heat and serve hot in bowls. Garnish the chili with fresh cilantro. Squeeze lime juice over the top for extra flavor. Serve it with lime wedges on the side. This chili goes great with cornbread or over rice. Enjoy your meal! For the full recipe, check out Cozy Sweet Potato & Black Bean Chili. To make your sweet potato and black bean chili shine, focus on the spices. Use fresh spices for the best taste. Ground cumin, smoked paprika, and chili powder add deep flavor. Sauté your onions until they are soft. This brings out their sweetness. Don't rush the cooking. Letting the sweet potatoes simmer helps them absorb all the tasty juices. One common mistake is using old spices. Old spices lose their flavor and can ruin your dish. Another mistake is not seasoning enough. Taste your chili as it cooks. Add salt and pepper gradually. Lastly, avoid overcooking the sweet potatoes. They should be tender but not mushy. You can change some ingredients if needed. If you don't have sweet potatoes, try regular potatoes. Canned black beans can be swapped for pinto beans. For a different flavor, use fire-roasted tomatoes instead of regular diced tomatoes. If you want a milder chili, skip the chili powder or use less. For a boost of protein, add cooked chicken or turkey. For the complete recipe, check out the Full Recipe. {{image_4}} This sweet potato and black bean chili is already vegan. All the ingredients are plant-based. You can enjoy it without worry. Use vegetable broth to keep it vegetarian-friendly. I love adding more beans or veggies for a heartier meal. Try adding corn or zucchini for extra texture. These additions keep the dish colorful and nutritious. If you want more protein, try adding quinoa or lentils. Both options blend well with the chili. Cook the quinoa separately and stir it in at the end. This method ensures it doesn’t get mushy. You can also add some cooked chicken or turkey if you prefer meat. Keep it lean to stay healthy. Adjust the spice to your taste. If you like it hot, add more chili powder or diced jalapeños. Start with a little, then taste as you go. You can also include cayenne pepper for an extra kick. For milder chili, cut back on the chili powder. Adding a dollop of yogurt or sour cream can balance the heat nicely. After enjoying your sweet potato and black bean chili, allow it to cool. Then, transfer it to an airtight container. It will stay fresh in the fridge for up to 4 days. Make sure to keep it covered to prevent it from drying out or absorbing other smells. Reheat your chili on the stove or in the microwave. For the stove, place it in a pot over medium heat. Stir it often until it's hot. If using the microwave, put it in a safe bowl and heat in 30-second bursts. Stir in between to ensure even heating. You can freeze this chili for later enjoyment. Let it cool completely before storing. Use freezer-safe containers or bags, leaving some space for expansion. It can last up to 3 months in the freezer. When you want to eat it, thaw it overnight in the fridge before reheating. Enjoy a warm bowl of chili anytime! For the full recipe, check out the Cozy Sweet Potato & Black Bean Chili section. Yes, you can use fresh black beans. However, they need to be cooked first. Soak them overnight in water. Then boil them until they are soft. This process takes time but adds a fresh taste. If you're in a hurry, canned beans save time and are just as tasty. Sweet Potato and Black Bean Chili lasts about 4 to 5 days in the fridge. Store it in an airtight container to keep it fresh. When you want to enjoy it again, just reheat it on the stove or in the microwave. The flavors blend even more over time! This chili pairs well with many sides. Here are some great options: - Cornbread for a sweet touch - Rice for a filling meal - Avocado slices for creaminess - A fresh salad for crunch - Tortilla chips for a fun snack For the full recipe, check out the Cozy Sweet Potato & Black Bean Chili section! In this blog post, we explored the ingredients, preparation, and cooking steps for Sweet Potato and Black Bean Chili. We covered tips for improving flavor and avoiding mistakes. You learned about variations, dietary options, and how to store leftovers. With these ideas, you can make a chili that fits your taste. Enjoy your cooking!

Savory Sweet Potato and Black Bean Chili Recipe

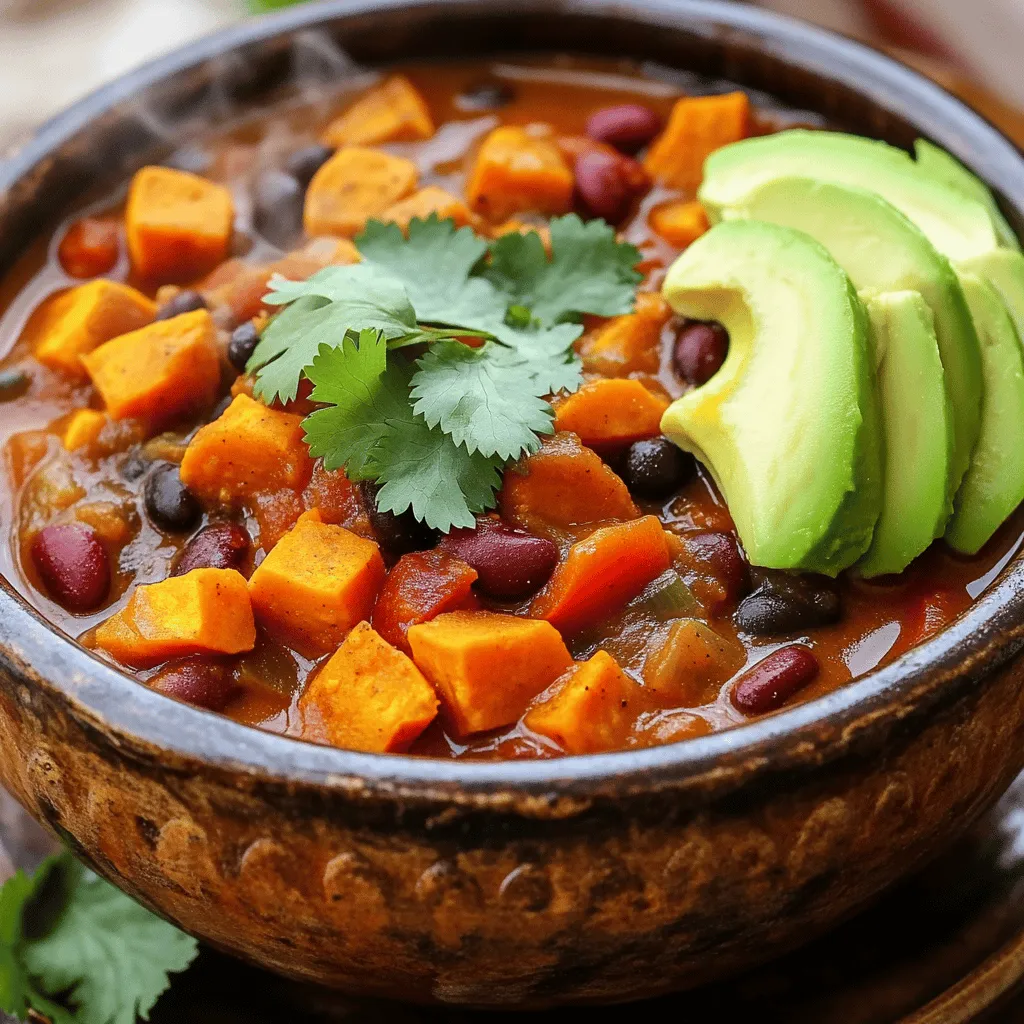
Looking for a hearty meal that’s easy to make? This Savory Sweet Potato and Black Bean Chili is just what

- 1 cup rolled oats - 1 ripe banana, mashed until smooth - 1 cup milk (choose from dairy or non-dairy options) These three main ingredients form the heart of your banana oatmeal pancakes. Rolled oats give the pancakes a hearty texture while providing fiber. The ripe banana adds natural sweetness and moisture, helping keep the pancakes soft. Milk binds everything and helps create a lovely, smooth batter. - 1/2 teaspoon baking powder - 1/2 teaspoon ground cinnamon - 1/4 teaspoon salt Baking powder is key for making the pancakes rise. Ground cinnamon gives them a warm flavor that pairs well with banana. Salt enhances the overall taste, balancing the sweetness from the banana. - 1 tablespoon honey or maple syrup - 1/2 teaspoon pure vanilla extract - Cooking spray or butter, for frying You can add honey or maple syrup for extra sweetness. Pure vanilla extract adds depth to the flavor. Cooking spray or butter prevents the pancakes from sticking to the skillet, ensuring easy flipping. For the complete recipe, check the Full Recipe. To make oat flour, start by blending rolled oats in a blender. Blend until the oats look like fine flour. This oat flour is key for fluffy pancakes. It gives them a nice texture and a nutty taste. In a large bowl, mix the oat flour with baking powder, ground cinnamon, and salt. Use a whisk to combine these dry ingredients well. This step ensures even flavor and rise in your pancakes. Next, take a ripe banana and mash it in a separate bowl. Aim for a smooth consistency with no lumps. Add the milk, egg (or flax egg), honey or maple syrup, and pure vanilla extract. Stir until everything is well mixed. Pour the wet banana mixture into your bowl with the dry ingredients. Gently mix until just combined. Do not overmix, as this can make the pancakes tough. Let the batter rest for five minutes. This allows it to thicken, which improves the texture. Heat a non-stick skillet over medium heat. Lightly grease it with cooking spray or butter. Pour about 1/4 cup of batter onto the skillet for each pancake. Cook for 2-3 minutes until bubbles form on top. When the edges look set, carefully flip the pancakes. Cook for another 2-3 minutes until golden brown. For more details, check the Full Recipe for Banana Oatmeal Pancakes. Enjoy your cooking! To make the best banana oatmeal pancakes, you must not overmix the batter. Overmixing can lead to tough pancakes. Mix just enough until you don’t see dry flour anymore. This keeps them light and fluffy. Resting the batter is also key. Let it sit for about 5 minutes. This allows the oats to absorb moisture, making the pancakes thicker and softer. Get creative with your toppings! Sliced bananas and fresh berries add great flavor. You can also sprinkle some nuts on top for crunch. When serving, drizzle warm maple syrup or honey. You can add a dollop of yogurt for creaminess. These toppings make your pancakes a real treat! Want smaller pancakes? Use about 2 tablespoons of batter. For larger ones, pour 1/2 cup of batter. Adjusting the size lets you cater to different tastes. Cooking times vary. Small pancakes take about 1-2 minutes per side. Larger ones need 3-4 minutes. Always look for bubbles on top before flipping! {{image_4}} You can easily switch up the flavor of your banana oatmeal pancakes. Adding chocolate chips is a favorite. Just fold in about 1/2 cup of mini chocolate chips into your batter. This gives a sweet twist to each bite. Incorporating nuts or seeds can add crunch and nutrition. Try adding 1/4 cup of chopped walnuts or pecans. You could also mix in some chia seeds or flaxseeds for added health benefits. For those following a vegan diet, you can use a flax egg instead of a regular egg. To make a flax egg, mix 1 tablespoon of ground flaxseed with 3 tablespoons of water. Let it sit for a few minutes to thicken. This works great in the pancake batter. If you need gluten-free options, use certified gluten-free rolled oats. They will keep your pancakes safe and delicious for anyone with gluten sensitivities. You can serve your pancakes in many ways. Stacking them high on a plate looks great and is fun to eat. Try making a tall stack for a special breakfast. For a lighter option, serve single pancakes. This way, you can control the portion size. You can also serve pancakes with fruit compote or jam. A homemade fruit compote made from berries or peaches adds a fresh taste. Simply cook the fruit in a pan with a little sugar until it breaks down. This adds sweetness and flavor to your pancakes. For the full recipe, you can refer back to the main section of this article. Enjoy trying these variations! For best results, store leftover pancakes in an airtight container. Place parchment paper between layers to keep them from sticking. They will last in the fridge for about 3 to 5 days. Make sure to cool pancakes completely before storing. This helps prevent sogginess. To freeze pancakes, stack them with parchment paper in between. Wrap the stack tightly in plastic wrap or place them in a freezer bag. This method keeps them fresh for up to 2 months. When you want to enjoy them, you can thaw them overnight in the fridge. Alternatively, leave them out at room temperature for a few hours. For reheating, the microwave works well. Heat pancakes for about 20-30 seconds. If you want them crispy, use a skillet. Heat on medium-low for 1-2 minutes on each side. This method keeps pancakes fluffy and warm. Enjoy your pancakes like they were just made! To make your pancakes fluffier, you can try a few tricks. First, use fresh baking powder to ensure it works well. Also, let the batter rest for five minutes after mixing. This allows the oats to absorb moisture and expand, creating a lighter texture. Lastly, avoid overmixing; mix just until combined. This keeps air in the batter, making your pancakes fluffy. Yes, you can use quick oats instead of rolled oats. However, the texture will change. Quick oats are finer and absorb more liquid. This makes your pancakes denser and less chewy. Rolled oats provide a heartier texture, which I prefer. If you use quick oats, adjust the liquid in your recipe slightly to avoid wet pancakes. You can easily make these pancakes without eggs by using substitutes. A popular choice is a flax egg. To make one, mix one tablespoon of ground flaxseed with three tablespoons of water. Let it sit for about five minutes until it thickens. You can also use applesauce or mashed banana for moisture and binding. Each substitute gives a unique flavor to the pancakes. There are many great toppings for your pancakes. Here are some popular and unique ideas: - Sliced bananas for extra banana flavor - Maple syrup for sweetness - Honey for a natural touch - Greek yogurt for creaminess - Fresh berries like blueberries or strawberries for a fruity kick - Chopped nuts for crunch Feel free to mix and match for a fun breakfast treat! For the full recipe, check out the detailed steps above. You now have a complete guide to making delicious banana oatmeal pancakes. We covered the main ingredients, step-by-step instructions, helpful tips, and even variations to keep things exciting. Remember, the key to great pancakes is the right texture and resting the batter. Feel free to experiment with toppings and adjust sizes based on your taste. Enjoy making these pancakes yourself and share them with family and friends for a delightful breakfast experience!

Savory Banana Oatmeal Pancakes Easy Breakfast Recipe

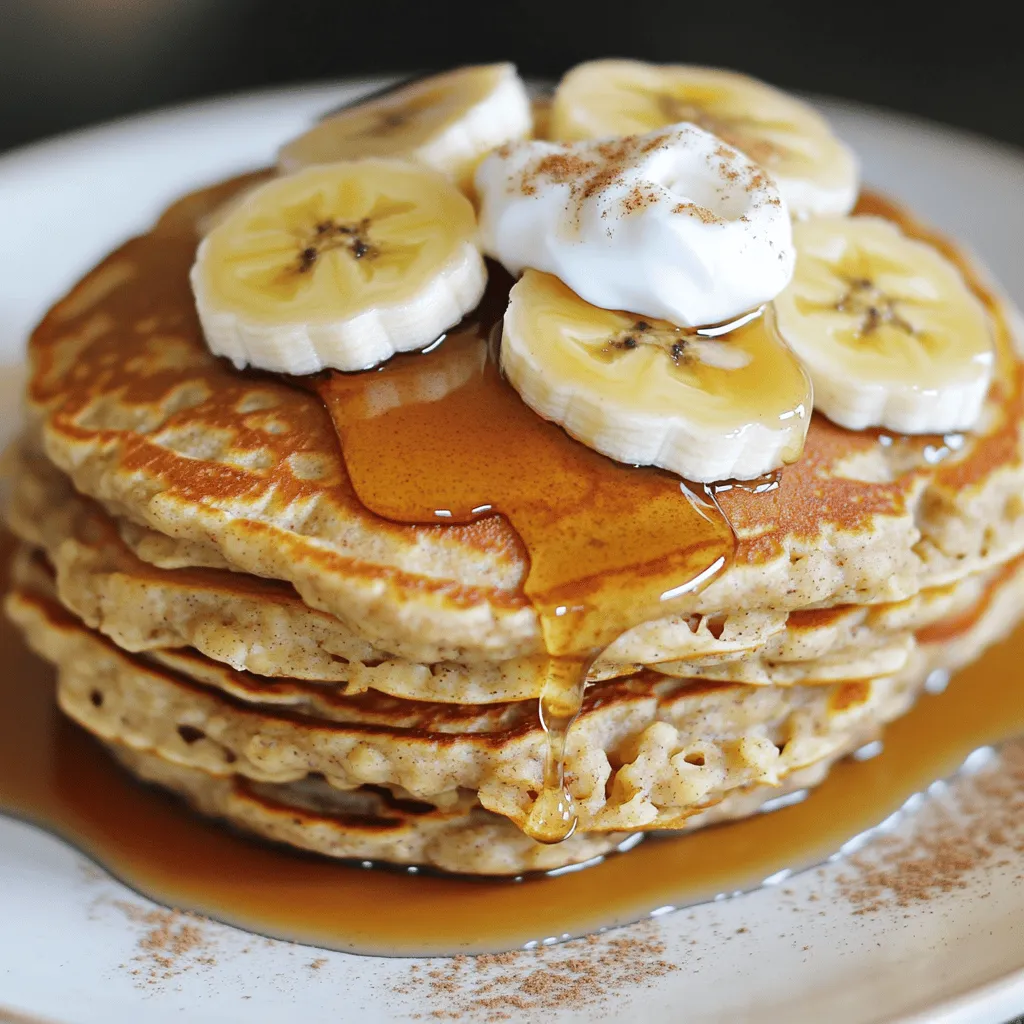
Start your day with my Savory Banana Oatmeal Pancakes, a simple yet delicious breakfast! You’ll love how easy it is

To make this tasty Chocolate Chip Cookie Dough Dip, you need simple, fun ingredients. This dip combines creamy flavors with sweet treats. You can serve it with fresh fruit, pretzels, or graham crackers. Everyone will love it! Here are the key ingredients you need: - 1 cup creamy peanut butter - 1/2 cup unsalted butter, softened at room temperature - 3/4 cup packed brown sugar - 1/2 cup granulated sugar - 1 teaspoon pure vanilla extract - 1 cup all-purpose flour (heat-treated for safety) - 1/4 teaspoon salt - 1/2 cup mini chocolate chips - Fresh fruit, pretzels, or graham crackers for dipping Each ingredient brings its own unique flavor to the dip. The peanut butter adds creaminess, while the sugars give it sweetness. The flour makes it thick and gives it that cookie dough feel. You can jazz up your dip with fun add-ins. Try adding: - Chopped nuts for crunch - Different types of chocolate chips like dark or white - A sprinkle of sea salt for flavor - A dash of cinnamon for warmth These add-ins can personalize your dip. You can mix and match based on what you have at home. Make it your own and enjoy! Start with a large bowl. Add 1/2 cup of softened unsalted butter and 1 cup of creamy peanut butter. Blend these two together with a hand mixer or whisk. Mix until it looks smooth and creamy. This step is key for a great dip texture. Next, slowly add in 3/4 cup of packed brown sugar and 1/2 cup of granulated sugar. Keep mixing until you see the mixture become fluffy. It should feel light and airy. This helps to sweeten the dip and gives it that cookie dough taste. Now, pour in 1 teaspoon of pure vanilla extract. Mix well until the vanilla blends into the creamy base. After that, it's time to add the dry elements. Carefully stir in 1 cup of heat-treated all-purpose flour and 1/4 teaspoon of salt. Use a spatula or wooden spoon for this. Mix by hand to avoid overworking it. Scrape down the bowl sides to get everything mixed evenly. Finally, gently fold in 1/2 cup of mini chocolate chips. Use a spatula for this step. Make sure the chips spread throughout the dip without over-mixing. This gives the dip a delightful chocolate burst in every bite. For more details, check the Full Recipe. When making chocolate chip cookie dough dip, some common mistakes can ruin your dip. First, don't skip heat-treating the flour. Raw flour can carry harmful bacteria. Always heat it in the oven for a few minutes. Second, avoid over-mixing your ingredients. This can make the dip too dense and tough. Lastly, make sure your butter is softened, not melted. Melted butter can make your dip runny. Mixing is key to a great chocolate chip cookie dough dip. Start by blending the peanut butter and butter until smooth and creamy. Use a hand mixer or whisk for the best results. When adding sugar, do it slowly. This helps the sugar blend well and keeps the dip fluffy. After adding the dry ingredients, mix gently. You want to combine them without losing that light texture. To achieve the perfect texture, focus on chilling the dip. After mixing, transfer it to a bowl and refrigerate for at least 30 minutes. This helps firm up the dip and melds the flavors. If the dip feels too thick, you can add a splash of milk to loosen it up. For a fun twist, try folding in different treats like nuts or sprinkles. This adds texture and flavor, making your dip even more delightful. {{image_4}} You can make a vegan version of this dip easily. Start by using almond or cashew butter instead of peanut butter. Replace the unsalted butter with vegan butter. For the sugars, stick with brown sugar and granulated sugar, as they are usually vegan. Use a plant-based milk to make it creamy. If you want a richer taste, add a bit of coconut cream. This dip remains just as tasty and is perfect for everyone. To make this dip gluten-free, swap the all-purpose flour for a gluten-free flour blend. You can find many options at your local store. Another great choice is almond flour, which adds a nutty flavor. Ensure that your sugars and chocolate chips are gluten-free, too. Enjoy this version without worry if you are gluten-sensitive! Want to mix things up? You can add flavors to your dip! Consider adding a dash of cinnamon or nutmeg for warmth. If you're feeling adventurous, try a splash of almond extract for a unique twist. You can also fold in butterscotch chips or white chocolate chips for a different taste. For a fun texture, add crushed nuts or sprinkles. These simple changes keep the dip fresh and exciting! For the full recipe, check out the detailed steps included above. After enjoying your Chocolate Chip Cookie Dough Dip, store any leftovers in an airtight container. This keeps the dip fresh and tasty. Make sure to refrigerate it right away. It’s best to use it within a few days. If you want to save some for later, freezing is a great option. Scoop the dip into a freezer-safe container. Leave some space at the top, as it may expand. Cover it tightly with a lid or plastic wrap. You can freeze it for up to three months. In the refrigerator, the dip lasts about five to seven days. If you freeze it, thaw it in the fridge overnight before serving. After thawing, enjoy it within three days for the best taste. No, raw flour can carry harmful bacteria. It may cause foodborne illness. To make it safe, you can heat-treat it. Simply spread the flour on a baking sheet. Bake it at 350°F for about five minutes. This kills off any germs and makes it safe to eat. Always remember, safety first! Yes, you can make this dip ahead of time! It tastes even better after chilling. Prepare it and store it in the fridge. Just cover it with plastic wrap or a lid. The flavors will mix and deepen as it sits. You can make it up to two days in advance. This makes it perfect for parties or gatherings. I love using fresh fruit, pretzels, and graham crackers. Fresh apples and strawberries add a nice crunch. Pretzels bring a salty flavor that pairs well. Graham crackers are sweet and chewy, a perfect match too. You can also try cookies or vanilla wafers! Choose what you like best for a fun experience. For the full recipe, check out the detailed instructions above. This blog post covered everything you need to make delicious chocolate chip cookie dough dip. We discussed essential ingredients and optional add-ins to customize your dip. I shared step-by-step instructions to ensure your success, along with tips to avoid mistakes and achieve perfect texture. Remember, you can explore fun variations like vegan and gluten-free options. Store leftovers properly for later enjoyment. With these insights, you can make a great treat that everyone will love. Enjoy your sweet creation!

Chocolate Chip Cookie Dough Dip Irresistible Treat

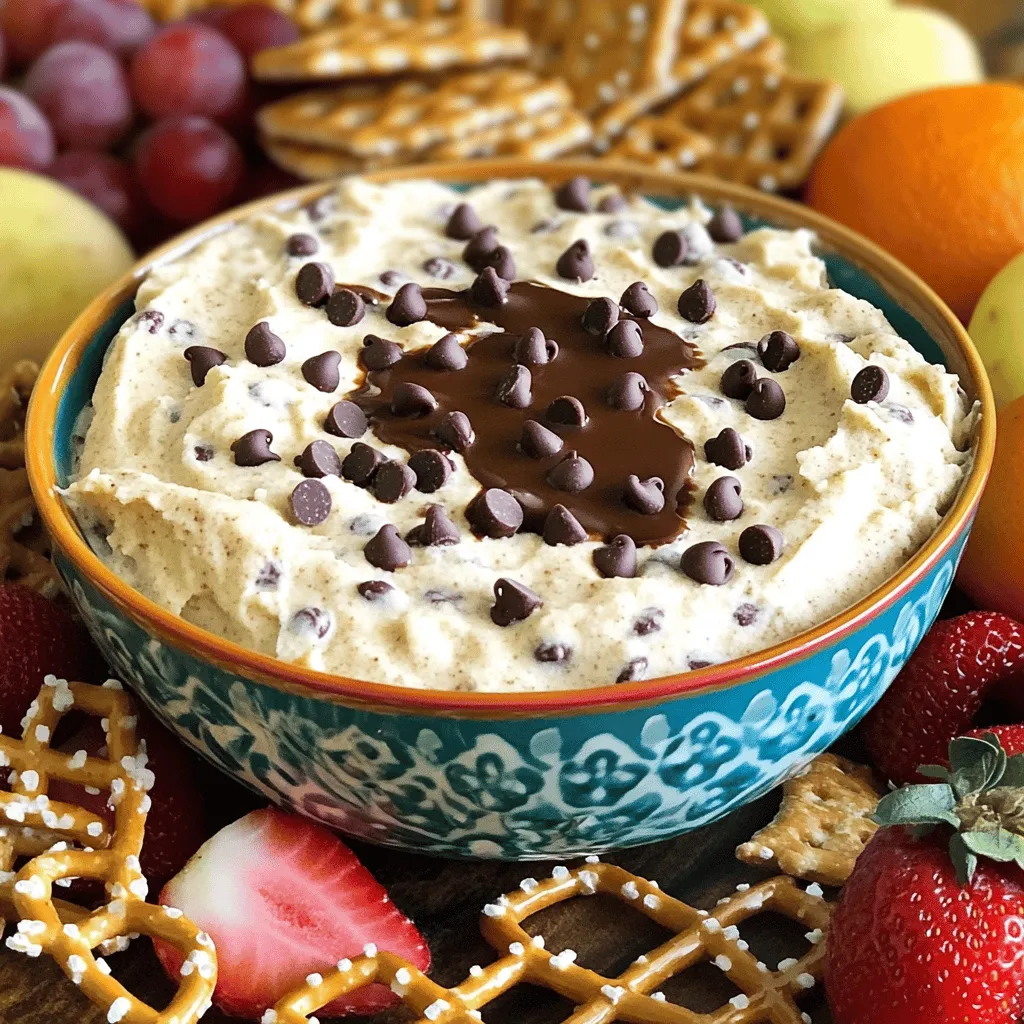
If you love chocolate chip cookies, you’re in for a treat! I’m sharing a simple and tasty recipe for Chocolate

Older posts
Newer posts
← Previous Page1 … Page64 Page65 Page66 … Page71 Next →

dsad

© 2025 tastyhatch • Built with GeneratePress

Our Policies

  • Copyright Policy
  • Cookie Policy
  • GDPR Policy
  • Privacy Policy
  • Disclaimer
  • Terms Of Use

More Information

  • Home
  • About
  • Contact
  • Appetizers
  • Dessert
  • Dinner
  • Drinks
©2025, tastyhatch About Back To Top