Skip to content
DisclaimerTerms Of UseGDPR PolicyCookie Policy

tastyhatch

  • Home
  • Drinks
  • Appetizers
  • Dinner
  • Dessert
  • About
  • Contact
  • Privacy Policy
DisclaimerTerms Of UseGDPR PolicyCookie Policy

Olivia

This snickerdoodle cream cheese apple pie combines sweet apples, creamy filling, and a spiced crust. It’s a fun twist on classic apple pie. You can find the full recipe below. - For the Crust: - 2 ½ cups all-purpose flour - 1 teaspoon ground cinnamon - ½ teaspoon baking powder - 1 teaspoon salt - 1 cup unsalted butter, cold and cubed - ½ cup granulated sugar - 1 large egg - For the Filling: - 4 medium apples (preferably Granny Smith or Honeycrisp), peeled, cored, and sliced - ½ cup packed brown sugar - 1 teaspoon ground cinnamon - 1 tablespoon fresh lemon juice - For the Cream Cheese Layer: - 8 ounces cream cheese, softened to room temperature - ½ cup granulated sugar - 1 teaspoon pure vanilla extract - 1 large egg - For the Topping: - ¼ cup granulated sugar - 1 tablespoon ground cinnamon - Large mixing bowl - Pastry cutter or fingertips - Rolling pin - 9-inch pie pan - Medium mixing bowl - Whisk or electric mixer - Measuring cups and spoons - Plastic wrap - Baking sheet This list makes sure you have all you need to create this delightful pie. Each ingredient plays a big role in making the flavors shine. Happy baking! To start, gather your ingredients for the crust. In a big bowl, whisk together 2 ½ cups of all-purpose flour, 1 teaspoon of ground cinnamon, ½ teaspoon of baking powder, and 1 teaspoon of salt. Mix well. Next, add 1 cup of cold, cubed unsalted butter. Use a pastry cutter or your fingers to work the butter into the dry mix until it looks like coarse crumbs. Then, stir in ½ cup of granulated sugar and 1 large egg. Mix until a soft dough forms. Shape this dough into a ball, wrap it in plastic, and chill it for at least 30 minutes. While the crust chills, prepare the apple filling. In a medium bowl, combine 4 sliced medium apples with ½ cup of brown sugar, 1 teaspoon of ground cinnamon, and 1 tablespoon of fresh lemon juice. Toss gently to coat all the apple slices. Let this mixture sit for 10-15 minutes. This helps the apples release some juices, making your filling juicy and flavorful. Now, make the cream cheese layer. In a separate bowl, beat 8 ounces of softened cream cheese with ½ cup of granulated sugar, 1 teaspoon of pure vanilla extract, and 1 large egg. Mix until it’s smooth and creamy, with no lumps. This layer adds a rich, tangy flavor to your pie. Preheat your oven to 350°F (175°C). Roll out about 2/3 of your chilled pie crust on a floured surface until it’s about 1/8-inch thick. Transfer this dough to a 9-inch pie pan, pressing it down to fit. Spread the cream cheese mixture evenly over the bottom of the crust. Then, layer the spiced apple filling on top. Make sure it’s evenly distributed. Roll out the remaining dough. You can cut it into strips for a lattice top or fully cover the filling. If covering, cut slits in the crust for steam to escape. Trim and crimp the edges. In a small bowl, mix ¼ cup of granulated sugar and 1 tablespoon of ground cinnamon. Sprinkle this mixture over the top crust. Bake the pie in the preheated oven for 45-50 minutes. The crust should be golden brown and the filling bubbling. After baking, let the pie cool for at least 30 minutes before slicing and serving. For the full recipe, don't forget to check out the complete guide! To make a great pie crust, keep your butter cold. Cold butter helps create a flaky texture. Use your hands or a pastry cutter to mix in the butter. Make sure not to overwork the dough; it should just come together. Chill the dough for at least 30 minutes. This step is key. It relaxes the gluten and prevents shrinkage. For the filling, I suggest using Granny Smith or Honeycrisp apples. Granny Smith gives a nice tartness, while Honeycrisp adds sweetness. You can also mix both for a balanced flavor. Peel, core, and slice the apples evenly for the best texture. This makes sure every bite has a good mix of apple and cream cheese. If you want a creamier layer, add an extra ounce of cream cheese. This gives more richness. You can also adjust the sugar based on your taste. If you like it less sweet, cut the sugar by a tablespoon. Mix well until there are no lumps. This ensures a smooth texture that pairs perfectly with the apples. Feel free to check the Full Recipe for more detailed steps! {{image_4}} If you need a gluten-free crust, use a mix of gluten-free flour. Look for a blend that includes xanthan gum. You can also try almond flour or coconut flour for a nutty flavor. Just remember, the texture may change a bit. Want to jazz up your pie? Consider adding chopped nuts, like pecans or walnuts, for crunch. You can also drizzle caramel sauce over the apples for a sweet twist. For a richer taste, mix in some butterscotch chips or chocolate chips. During fall, try making a pumpkin spice version of this pie. Add pumpkin puree to the cream cheese layer. Mix in pumpkin pie spice with the apples for a cozy flavor. You can even toss in some cranberries for a tart kick. For the full recipe, check out the Snickerdoodle Cream Cheese Apple Pie 🥧. To keep your snickerdoodle cream cheese apple pie fresh, first let it cool. Then, cover it tightly with plastic wrap or aluminum foil. This helps keep moisture in and prevents it from drying out. Store the pie in the fridge for up to 4 days. If you want to enjoy it later, freezing is a great option. To freeze the pie, let it cool completely. Wrap it in plastic wrap, then in aluminum foil. This double layer helps protect the pie from freezer burn. You can freeze it for up to 3 months. When you're ready to eat it, just thaw it in the fridge overnight before reheating. To reheat your pie, preheat your oven to 350°F (175°C). Remove any plastic wrap and cover the pie loosely with aluminum foil. Bake it for about 15-20 minutes, or until it's warm throughout. If you like a crisp crust, remove the foil for the last 5 minutes of baking. Enjoy your pie warm for the best taste! Yes, you can use store-bought crust. It saves time and effort. Look for a pie crust that is ready to roll out. It should fit a 9-inch pie pan. Just make sure to follow the package instructions for baking. To prevent the crust from burning, cover the edges with foil. This shields them from direct heat. Start checking your pie about 5 to 10 minutes before the end of baking time. If the crust looks golden, remove it from the oven. You can use mascarpone or Greek yogurt as a substitute. Mascarpone gives a rich and creamy texture. Greek yogurt adds a tangy flavor. Both options work well in the cream cheese layer. The pie will last about 3 to 5 days in the fridge. Store it in an airtight container. This keeps the filling fresh and prevents the crust from getting soggy. For longer storage, consider freezing it. Check the Full Recipe for more storage tips. This article covered how to make a delicious pie from scratch. We went through the ingredients, tools, and step-by-step instructions. I shared tips for a perfect crust and filling. You learned about fun variations and proper storage. Now, you have all you need to create a tasty pie. Enjoy the process and share your results with family and friends. Happy baking!

Snickerdoodle Cream Cheese Apple Pie Delightful Recipe

Get ready to impress your friends and family with my Snickerdoodle Cream Cheese Apple Pie! This delightful recipe combines the

To make tasty breakfast burritos, you need some key ingredients. Here’s what you will need: - 4 large flour tortillas - 6 large eggs - 1/2 cup milk - 1 cup diced bell peppers (mix of red, yellow, and green) - 1 cup diced cooked potatoes (or frozen hash browns) - 1/2 cup shredded cheese (cheddar or pepper jack) - 1/2 cup cooked and crumbled breakfast sausage (pork or plant-based) - 1/4 cup green onions, finely sliced - 1 teaspoon smoked paprika - Salt and freshly ground black pepper to taste - 1 tablespoon olive oil You can always switch things up. Here are some great add-ins or swaps: - Swap the cheddar for feta cheese for a tangy taste. - Add spinach for extra greens and nutrients. - Use turkey sausage or bacon for a different meat option. - Try adding avocado for creaminess. - Substitute the milk with a non-dairy option like almond milk. Serving your burritos with sauces can elevate the dish. Here are my top picks: - Salsa for a fresh kick - Sour cream for creaminess - Hot sauce for added heat - Guacamole for a rich flavor These ingredients and options will help you create savory breakfast burritos that are quick and delicious. Check the full recipe for more details! Start by grabbing a large mixing bowl. In this bowl, whisk together the eggs, milk, smoked paprika, salt, and pepper. Mix until it looks smooth. This mixture will be your base for a rich, fluffy filling. Next, take a large skillet and heat the olive oil over medium heat. Add the diced bell peppers and cooked potatoes. Sauté these for about 5 minutes. Stir them occasionally. You want the peppers to be tender and bright. They add color and flavor to your burritos. Pour the egg mixture into the skillet with the veggies. Stir gently to mix everything. Let it cook undisturbed for about 2 minutes. Then, stir occasionally until the eggs are just set. This should take around 5 to 7 minutes. You want the eggs to be soft, not dry. When your eggs are cooked, take the skillet off the heat. Fold in crumbled sausage, shredded cheese, and chopped green onions. Mix until the cheese melts. Now, warm the tortillas in a dry skillet or microwave. Place a scoop of the egg mixture in the center of each tortilla. Roll them up tightly, tucking the sides in. For a crispy finish, place the burritos seam-side down in the skillet. Cook them over medium heat for 2 to 3 minutes on each side. Look for a golden-brown color on the tortillas. This step adds great texture and flavor to your burritos. You can find the full recipe for these savory breakfast burritos above. Enjoy your cooking! To get the best results with your savory breakfast burritos, follow these techniques: - Use fresh ingredients. Fresh veggies add flavor and color. - Cook on medium heat. This helps the eggs cook evenly without burning. - Stir gently. Avoid over-stirring. This keeps the eggs fluffy and light. - Don’t rush. Let the eggs set slightly before stirring again. These tips ensure a delicious and perfectly cooked filling. You can make your burrito unique by changing the filling. Here are some ideas: - Use different cheeses. Try goat cheese or feta for a twist. - Add spices. Mix in chili powder for heat or cumin for depth. - Include more veggies. Spinach, mushrooms, or zucchini work well. - Try different proteins. Substitute bacon or tofu for the sausage. Get creative! Your burrito can reflect your tastes and preferences. Wrapping a burrito well keeps everything inside. Here’s how to do it: - Warm the tortilla. A warm tortilla is easier to fold. - Use the right amount of filling. Too much filling makes it hard to wrap. - Fold the sides in first. This keeps the filling secure as you roll. - Roll tightly. Start from the bottom and roll up while tucking in the sides. These steps help you achieve a neat and tasty burrito every time. {{image_4}} You can easily make vegetarian breakfast burritos. Swap out the sausage for black beans or sautéed mushrooms. Add more veggies like spinach or zucchini for extra flavor. If you want a vegan option, replace the eggs with scrambled tofu. Use plant-based cheese for a creamy touch. To spice things up, add jalapeños or hot sauce to the egg mixture. You can also use spicy sausage or chorizo for a kick. If you prefer milder flavors, skip the spicy ingredients. Try sweet peppers instead for a balanced taste. Get creative with your flavor choices! You can mix in fresh herbs like cilantro or parsley for a burst of freshness. Try adding different cheeses, such as feta or goat cheese, for a unique twist. You can even make a Mediterranean version by using olives and sun-dried tomatoes. Use the Full Recipe as a base, and let your taste buds guide you! To keep your breakfast burritos fresh, wrap each one in plastic wrap or foil. Place them in an airtight container or a zip-top bag. Store them in the fridge. They stay good for up to three days. Make sure to label your containers with the date. This way, you know when to eat them. You can freeze breakfast burritos for later. Wrap each burrito tightly in plastic wrap, then in foil. Put them in a freezer-safe bag. They can last for up to three months. When you’re ready to eat, take one out. Unwrap it and place it on a plate. Microwave it for about 2-3 minutes, or until heated through. You can also bake them in the oven at 350°F (175°C) for about 20 minutes. This keeps the tortilla nice and crispy. Food safety is very important. Always wash your hands before handling food. Make sure to cook eggs until they are firm. This helps kill any germs. Never leave cooked food out at room temperature for more than two hours. If you’re unsure about the freshness, throw it away. It’s better to be safe than sorry. Enjoy your savory breakfast burritos without worry! If you need an egg substitute, consider using tofu. Silken tofu works well. You can also try chickpea flour mixed with water. This mix mimics the texture of eggs when cooked. Yes, you can make breakfast burritos in advance. Prepare the filling, then wrap the burritos and store them. Place them in the fridge for up to three days. For longer storage, freeze them. To check if the eggs are done, look for a firm texture. They should not be runny. The color should be bright yellow. A good rule is to cook them for 5-7 minutes, stirring gently. Flour tortillas are best for breakfast burritos. They are soft and flexible. Corn tortillas can work too, but they may crack when rolled. Choose a size that fits your filling amount. To reheat frozen burritos, unwrap them first. Microwave them for about 2-3 minutes on high. Alternatively, bake them in an oven at 350°F for 20-25 minutes. This method keeps them warm and tasty. For more details on creating these delicious burritos, check out the Full Recipe. In this post, we explored tasty breakfast burritos, starting with key ingredients. I shared steps for preparing the egg mixture and sautéing vegetables. We discussed tips for customizing and wrapping your burritos. I also highlighted easy ways to store leftovers and reheat them. Remember, breakfast burritos can be fun and flexible. Try new flavors or tweak ingredients to suit your taste. With these simple tips and recipes, you'll enjoy the perfect burrito every time. Make your mornings delicious!

Savory Breakfast Burritos Quick and Delicious Recipe

Do you want a quick and tasty breakfast? Try these savory breakfast burritos! Packed with rich flavors and fresh ingredients,

- 2 ripe avocados - 4 slices of whole-grain bread - 4 large eggs - 1 tablespoon white vinegar - Salt and pepper to taste - 1 teaspoon red pepper flakes (optional) - 1 tablespoon lemon juice - Fresh herbs (such as cilantro or parsley) for garnish When making avocado toast with poached egg, it is key to know your portions. This recipe serves four, so each person gets one slice of toast. Here’s how to adjust for larger groups: - For eight servings, double the ingredients. - For smaller groups, cut the recipe in half, using one avocado and two eggs. You can swap out whole-grain bread for any bread you like. Try sourdough or gluten-free bread for a different taste. If you want a vegan option, replace the eggs with cooked chickpeas or tofu. This keeps the dish healthy and tasty while meeting your diet needs. Toasting your bread is key to a great avocado toast. I prefer whole-grain bread for its nutty flavor and texture. You can toast it in a toaster or on a skillet over medium heat. If using a skillet, flip the bread halfway to ensure even toasting. Once toasted, let the bread sit on a wire rack. This helps keep it crisp. If you stack the toast right away, it may get soggy. The crunchiness of the bread makes each bite delightful. While your bread toasts, it’s time to prepare the avocados. First, cut them in half and remove the pits. Use a spoon to scoop the green flesh into a bowl. To mash the avocado, add a splash of lemon juice, plus a pinch of salt and pepper. Use a fork to mash it all together. I like to keep some chunks for extra texture. If you want more flavor, try adding garlic powder or diced tomatoes. These little tweaks elevate the taste. Now let’s move on to poaching the eggs. Start by filling a medium pot with about 3 inches of water. Bring it to a gentle simmer on medium heat. Add one tablespoon of white vinegar; this helps the egg whites firm up. Crack each egg into a small bowl. With a spoon, stir the water to create a whirlpool. Gently slide an egg into the center. Repeat this for the other eggs, but don’t overcrowd the pot. Let the eggs cook for 3-4 minutes. You want the whites set and the yolks runny. When they’re done, use a slotted spoon to lift each egg out. Let any water drain before placing them on a paper towel. This step is important to keep your toast from getting soggy. For the full recipe, check out the detailed instructions provided above. To make a perfect poached egg, timing is key. Cook each egg for about 3-4 minutes. This way, the whites set while the yolk stays runny. Use a timer to keep track. For tools, a slotted spoon helps lift the eggs easily. A small bowl lets you crack the eggs without mess. To avoid mistakes, add vinegar to the water. This helps the egg whites firm up. For a tasty boost, try adding seasonings. A pinch of salt and pepper is a must. Red pepper flakes add a nice kick. You can also mix in fresh herbs like cilantro or parsley. Want a nutritional boost? Add sliced tomatoes or spinach. These ingredients provide more vitamins and minerals. If you prefer a creamier texture, consider adding Greek yogurt or a drizzle of olive oil. Serve your avocado toast on a colorful platter. This adds visual appeal. Use a wooden board for a rustic look. Drizzle a bit of olive oil on top for richness. For plating, stack the toast high with the poached egg. Garnish with fresh herbs for a pop of color. You can also add lime wedges on the side for a zesty touch. This makes your dish look mouth-watering and inviting. For the full recipe, check out the details above. {{image_4}} You can make your avocado toast even better by adding toppings. Here are some popular choices: - Smoked salmon - Crispy bacon - Crumbled feta cheese Adding vegetables can also bring more crunch and flavor. Try: - Sliced radishes - Cherry tomatoes - Spinach or arugula These toppings not only taste great but also make your meal more colorful. Switching up the bread can change the whole dish. Here are some ideas: - Sourdough for a tangy flavor - Rye bread for a hearty bite - Gluten-free bread for those with dietary needs Each type of bread adds a unique twist to your avocado toast. You can create exciting flavors with different spices and herbs. For a spicy kick, try: - Sriracha for heat - Harissa for a North African flair Fresh herbs can also change the taste. Consider using: - Cilantro for a bright flavor - Basil for an Italian twist These simple changes can make your avocado toast a new experience every time. For the full recipe, check out the link above. To keep your avocado toast fresh, store it right. First, separate the poached eggs from the bread. Place the toast and mashed avocado in airtight containers. This method helps keep them from getting soggy. For the poached eggs, put them in a bowl with a damp paper towel. Cover the bowl tightly. This keeps them moist and safe. You can reheat the bread in a toaster for a quick fix. If you want it warm but not hard, use the oven. Set it at a low temperature and check often. For poached eggs, gently place them in hot water for a minute. This warms them without cooking further. Always check the eggs so they stay runny. To stop your mashed avocado from browning, use lemon juice. The acid helps keep it bright green. Store any leftover avocado in an airtight container. Press plastic wrap against the surface to limit air exposure. You can also add a thin layer of water on top. This will help keep it fresh for a day or two. To make a perfect poached egg, you need water at the right temperature. Bring a pot of water to a gentle simmer, about 180°F to 190°F. Add one tablespoon of white vinegar to help the egg whites stay together. Crack an egg into a small bowl. Stir the water to create a whirlpool. Gently slide the egg into the center. Cook for 3-4 minutes. The whites should be set and the yolk runny. Use a slotted spoon to lift the egg out, draining any excess water. Yes, you can meal prep avocado toast! Prepare the avocado mixture ahead of time. Mash the ripe avocados and mix in lemon juice, salt, and pepper. Store this in an airtight container. Toast the bread just before serving for the best texture. You can also pre-poach eggs. Store them in cold water in the fridge. When ready to eat, reheat the eggs in hot water for a few minutes. Avocados are rich in healthy fats, vitamins, and fiber. They help improve heart health and lower cholesterol. Eggs provide high-quality protein and essential nutrients like vitamin D and choline. Together, they make a balanced meal. This combination can help keep you full and satisfied. To make this recipe vegan, skip the eggs and use a plant-based alternative. You can use silken tofu, mashed chickpeas, or a mixture of nutritional yeast and lemon juice for creaminess. Replace whole-grain bread with a vegan option. You can also add toppings like sliced tomatoes, radish, or sprouts to enhance flavor and nutrition. For the full recipe, check the full recipe section. This article covers making delicious avocado toast with poached eggs. You learned about the ingredients, measurements, and swaps. We discussed toasting bread, mashing avocados, and perfecting poached eggs. I shared tips for flavor and presentation, along with storage advice and meal prep options. Avocado toast is versatile and tasty. It is easy to customize with different toppings. Enjoy experimenting with flavors and variations!

Nutritious Avocado Toast with Poached Egg Recipe

Avocado toast with a poached egg is not just a beautiful meal; it’s a powerhouse of nutrition! In this recipe,

To make spicy garlic roasted chickpeas, you will need the following core ingredients: - 1 can (15 oz) chickpeas, thoroughly drained and rinsed - 2 tablespoons extra virgin olive oil - 4 cloves garlic, finely minced - 1 teaspoon smoked paprika - 1 teaspoon ground cumin - 1/2 teaspoon cayenne pepper (or adjust to desired heat level) - Salt and black pepper to taste - 1 tablespoon fresh lemon juice - Fresh parsley, finely chopped (for garnish) These ingredients create a perfect blend of flavors. You can add more cayenne for extra heat or a dash of cayenne for a milder taste. Using fresh herbs is key for flavor. Fresh parsley adds a bright touch. You can also try fresh cilantro for a different twist. The quality of your ingredients impacts the final dish. Always choose the best you can find. For the full recipe, check out the detailed steps to enjoy this crunchy flavor bomb! Start by preheating your oven to 400°F (200°C). This temperature helps the chickpeas get that perfect crunch. While the oven heats, focus on the chickpeas. Open a can of chickpeas and drain them well. Rinsing them under cold water removes excess salt and helps with flavor. Next, spread the chickpeas onto a clean kitchen towel. Pat them dry gently. This step is key to getting crispy roasted chickpeas. If they have too much moisture, they won't crisp up well. In a large bowl, mix together the olive oil, minced garlic, smoked paprika, ground cumin, cayenne pepper, and a pinch of salt and black pepper. Stir until you see a smooth mixture. The oil helps the spices stick to the chickpeas. This blend packs a punch of flavor that enhances the dish. Line a baking sheet with parchment paper. This makes cleanup easy and helps the chickpeas roast evenly. Spread the chickpeas in a single layer on the sheet. Make sure they’re not crowded; this helps them roast better. Place the baking sheet in the preheated oven. Roast for 25 to 30 minutes. Halfway through, shake the pan gently. This ensures even cooking and browning. Your chickpeas are ready when they turn golden brown and crispy. For an extra burst of flavor, drizzle fresh lemon juice over the hot chickpeas right after roasting. Garnish with finely chopped parsley for a fresh touch. You can find the full recipe above for all details and measurements! To make your chickpeas super crunchy, start with pre-drying. After rinsing, spread the chickpeas on a clean kitchen towel. Pat them dry gently. This step is key to removing moisture. Less moisture means more crunch. For oven settings, preheat to 400°F (200°C). This temperature works best for roasting. It creates a nice golden brown color. You can spice up this dish with extra flavors. Consider adding cayenne for more heat or curry powder for warmth. Try smoked paprika for a deeper taste. Mix and match spices to find your perfect blend. Garnishing can really elevate the dish. Top with fresh parsley or a sprinkle of chili flakes. You can also add lemon zest for a fresh twist. A bright garnish makes your dish pop! These chickpeas shine as a snack. Serve them in a bowl for a crunchy treat. They also work well as salad toppings. Add them to greens for a protein boost. Pair your chickpeas with dipping sauces. Hummus or tzatziki make great choices. You can also try a spicy yogurt dip. These dips enhance the chickpeas' bold flavors. For the full recipe, check out the main section. Enjoy your cooking! {{image_4}} You can change the flavor of spicy garlic roasted chickpeas by trying different spices. For a sweet kick, add cinnamon and a touch of brown sugar. If you prefer smoky flavors, use smoked paprika with a dash of chipotle powder. You can also try curry powder for a unique twist. Feel free to mix and match spices based on what you like. You can also switch up the legumes. While chickpeas are delicious, you can use black beans or white beans. Each legume has its own taste and texture, making your snacks even more fun! If you want a lighter option, reduce the olive oil. You can also try air frying the chickpeas. This method cuts down on oil and still gives you that great crunch. For a gluten-free snack, check your spices to make sure they are gluten-free. Most spices are safe, but it’s always good to double-check! If you're vegan, this recipe is already perfect for you. Just follow the recipe with no changes needed. Using seasonal herbs and spices can make your chickpeas even tastier. In spring, try adding fresh dill or basil. In fall, mix in some sage or thyme. These herbs add a fresh taste that matches the time of year. You can also customize the spices based on holidays. For a festive twist, add nutmeg or allspice during the winter months. This not only makes it fun but keeps your dishes exciting all year round. For the full recipe, check back to see how to make these spicy garlic roasted chickpeas. To keep your spicy garlic roasted chickpeas fresh, use an airtight container. Glass or plastic containers work well. Make sure the chickpeas are completely cool before sealing. This helps prevent moisture build-up. Store them in a cool, dry place, away from sunlight. If you have extra, you can freeze them. Just spread them on a baking sheet first, then transfer to a container once frozen. This keeps them crunchy for longer. When stored properly, chickpeas can last up to five days in the fridge. If frozen, they can stay good for about three months. To reheat, preheat your oven to 350°F (175°C). Spread the chickpeas on a baking sheet and heat for about 10 minutes. This method helps them regain their crunch. You can also use an air fryer for quick reheating. Just a few minutes at 350°F (175°C) works wonders! Enjoy your flavorful snack again without losing that perfect crisp! Spicy garlic roasted chickpeas are versatile. They pair well with many dishes. Here are some ideas: - Salads: Sprinkle them on greens for crunch. - Bowls: Use them in grain bowls with quinoa or rice. - Dips: Serve with hummus or yogurt dip for a fun snack. - Soups: Top soups for added texture and flavor. These chickpeas can fit into many meals. Get creative and enjoy! Yes, you can prepare spicy garlic roasted chickpeas in advance. Here are some tips: - Storage: Keep them in an airtight container. This helps keep them fresh. - Reheating: To restore crunch, reheat them in the oven. A short time at 350°F (175°C) works well. Making them ahead saves time. You can enjoy them whenever you want! Adjusting the spice level is easy. Here’s how: - Less Heat: Cut back on cayenne pepper. You can even leave it out. - More Heat: Add extra cayenne or try chili powder for a different kick. - Mild Option: For a milder flavor, use smoked paprika alone. Tailor the spice to your taste. Enjoy your flavor journey! You learned how to make delicious roasted chickpeas. We covered key ingredients and their importance, like fresh herbs. You now know how to prep, mix spices, and roast for perfect crunch. I shared tips for serving and creating fun variations. You can customize flavors based on your taste and season. Finally, I explained storage methods to keep your snacks fresh. Enjoy trying this tasty treat!

Spicy Garlic Roasted Chickpeas Crunchy Flavor Bomb

Are you ready to make a snack that packs a punch? My Spicy Garlic Roasted Chickpeas are a crunchy flavor

- 1.5 pounds beef sirloin, thinly sliced - 16 ounces mushrooms, sliced - 12 ounces egg noodles - 1 cup beef broth - Worcestershire sauce - Dijon mustard - Thyme - Black pepper - Olive oil - Salt - Flour - Fresh chopped parsley - Additional sour cream for serving To make a great beef stroganoff, you need a few key ingredients. First, the beef sirloin gives a tender bite and rich flavor. You want to slice it thinly for quick cooking. Next, mushrooms add a savory depth. I recommend cremini or button mushrooms for their taste and texture. Egg noodles are essential for this dish. They soak up the sauce, creating a comforting meal. Beef broth acts as the base, delivering a hearty flavor. Seasonings play a big role, too. Worcestershire sauce and Dijon mustard add a tangy kick. Thyme and black pepper enhance the overall taste. Don't forget olive oil for sautéing and flour to help thicken the sauce. For a beautiful finish, sprinkle fresh parsley on top. You can also add a dollop of sour cream for creaminess. This combination of flavors makes the dish truly delicious. For the complete list and amounts, check the Full Recipe. First, set your Instant Pot to the 'Sauté' function. Pour in the olive oil and let it heat for a minute. Then, add the thinly sliced beef sirloin. Brown the beef on all sides for about 5-7 minutes. This step adds great flavor. Once browned, take the beef out and place it on a plate. This helps keep it juicy while cooking the rest. Next, add the finely chopped onion to the pot. Cook it for 3-4 minutes until it’s soft and clear. Then, add the minced garlic and stir for about a minute. This brings out a lovely smell. After that, toss in the sliced mushrooms. Cook them for 5-6 minutes until they are soft and let their juices release. This adds depth to your dish. Now it’s time to bring it all together. Pour in the beef broth, Worcestershire sauce, and Dijon mustard. Sprinkle in the dried thyme and black pepper. Stir it well and scrape any browned bits from the bottom. This adds even more flavor. Return the browned beef to the pot and mix it in. Secure the lid on the Instant Pot. Choose the 'Pressure Cook' setting and set the time for 10 minutes. This cooks the beef and melds all the flavors. After that, let the pressure release naturally for 5 minutes, then use the quick release to let out any remaining steam. Now, add the egg noodles to the pot and stir them into the sauce. Lock the lid again and set the Instant Pot to 'Pressure Cook' for another 4 minutes. This cooks the noodles perfectly. When done, release the pressure quickly once more. To finish, mix the sour cream and flour in a small bowl until smooth. Stir this into the beef stroganoff to thicken the sauce. Heat it through but don't let it boil. Add salt to taste, and you are ready to serve. For the full recipe, check the previous section. To make a great sauce, you need balance. Sour cream adds creaminess and tang. Blend it with flour to thicken. Start with one cup of sour cream and two tablespoons of flour. Mix them well in a bowl. Then stir this mixture into the hot stroganoff. This keeps your sauce smooth and tasty. Timing is key for egg noodles. Add them after the beef cooks. This way, they soak up the sauce's flavor. Set your pot to 'Pressure Cook' for just four minutes. This cooks them perfectly. Keep an eye on the timer. Overcooked noodles turn mushy, which you want to avoid. Taste is personal, so adjust as needed. You might want more salt or herbs. Fresh parsley adds a nice touch. If you like heat, add red pepper flakes or hot sauce. Start small and add more until it’s just right for you. This makes your beef stroganoff unique and delicious. For the [Full Recipe], check the previous sections to follow along and create this dish! {{image_4}} If you want a gluten-free meal, try using gluten-free noodles. Many brands offer great choices. You can also use rice instead of noodles. For a dairy-free option, swap sour cream for coconut cream or cashew cream. You can use plant-based butter in place of regular butter. If you want a low-fat version, choose lean beef and low-fat sour cream. You can make this dish more flavorful by adding herbs like basil or oregano. Fresh herbs can brighten up the meal. Try adding spices like paprika or garlic powder for extra taste. You can also mix in vegetables like peas or carrots. These veggies add color and nutrition. Feel free to get creative and adjust according to your taste! For sides, garlic bread pairs well with beef stroganoff. A simple green salad can also balance the meal. If you want a beverage, a light red wine enhances the flavors. You can also serve sparkling water with lemon for a refreshing touch. These sides and drinks complement the rich taste of the stroganoff. Enjoy your meal with these delicious options! To store your Instant Pot beef stroganoff, let it cool first. Place it in an airtight container. This helps keep it fresh and tasty. You can keep it in the fridge for about 3 to 4 days. If you want to enjoy it later, make sure to label the container with the date. If you want to freeze beef stroganoff, use a freezer-safe container. Make sure to leave some space at the top for expansion. It keeps well for up to 3 months in the freezer. When you’re ready to eat, thaw it overnight in the fridge. To reheat, warm it on the stove over low heat. This keeps the flavor and texture just right. Batch cooking is a great way to save time. You can make a large pot of beef stroganoff on the weekend. Portion it out in containers for quick meals during the week. To reheat, you can use the microwave or stovetop. Just add a splash of broth or water to keep it moist. This way, you have a delicious meal ready when you need it. For the full recipe, check the detailed instructions provided earlier. Yes, you can! If you want to switch it up, try chicken or pork. Ground beef also works well. Each type brings a unique taste. Just remember to adjust cooking times as needed. For chicken, cook it until no longer pink. For pork, ensure it is tender before serving. If your sauce is thin, don’t worry! You can thicken it easily. First, mix 1 tablespoon of cornstarch with cold water. Stir this mixture into your sauce and cook until it thickens. Another option is to add more flour or sour cream. Both will help create a richer texture. To spice things up, try adding crushed red pepper flakes or hot sauce. You can also include diced jalapeños or serrano peppers for extra heat. If you enjoy bold flavors, consider using a spicy mustard instead of Dijon. This adds a nice kick! This blog post explored making Instant Pot Beef Stroganoff, starting with key ingredients. We covered the main elements, including beef sirloin, mushrooms, and egg noodles. I shared step-by-step instructions for sautéing and cooking, along with tips for perfecting the sauce and noodles. We also discussed dietary adjustments, storage advice, and common questions. Remember, you can customize this dish to fit your taste. Enjoy this quick recipe with friends and family. It’s a win for dinner!

Instant Pot Beef Stroganoff Quick and Flavorful Meal

Are you ready for a quick and delicious dinner? This Instant Pot Beef Stroganoff recipe packs big flavor into just

- 1 cup unsalted butter, softened - 3/4 cup brown sugar - 1/4 cup granulated sugar - 1 large egg - 1 extra egg yolk - 2 1/4 cups all-purpose flour - 1 teaspoon baking soda - 1/2 teaspoon fine sea salt - 1 cup semi-sweet chocolate chips - 1/2 cup chopped nuts (optional) - Flaky sea salt for garnish Gather these ingredients to make your chocolate chip cookie skillet. The butter provides rich flavor and a soft texture. The sugars add sweetness and help the cookie rise. The egg and yolk enrich the dough and keep it moist. Next, the dry ingredients work together to build structure. Flour gives the cookie its body. Baking soda helps it rise, while salt brings out the sweet flavors. For the fun part, add chocolate chips for that melty goodness. If you like, throw in some nuts for crunch. Finally, sprinkle flaky sea salt on top for a touch of flavor. This blend creates a cookie experience you can’t resist. Check out the Full Recipe for more details. - Preheat the oven to 350°F (175°C). This ensures even baking. - Cream the butter and sugars until fluffy. Use a mixer for the best texture. - Add egg, extra yolk, and vanilla to the mix. This adds richness and flavor. - Combine until smooth. A well-mixed dough makes for a better cookie. - Whisk flour, baking soda, and salt in a separate bowl. This helps even mixing. - Gradually combine with wet mix. Stir gently to keep the dough soft. - Fold in chocolate chips and nuts. This adds delicious bites of flavor. - Prepare the skillet by greasing it. Use butter or cooking spray for easy removal. - Spread dough evenly in the skillet. Use a spatula for a smooth surface. - Bake for 25-30 minutes. Look for golden edges and a soft center. - Cool slightly and sprinkle with sea salt. This brings out the sweet taste. - Slice and serve warm from the skillet. Enjoy with friends or family. For the complete experience, check the Full Recipe. Baking time can change with your oven. If it runs hot, check early. If it runs cool, add a few minutes. The goal is golden edges and a soft center. A toothpick is your best friend. Insert it in the middle to check for doneness. It should come out with a few moist crumbs. If it’s wet, bake a little more. Serve your warm cookie skillet with ice cream for a tasty treat. Vanilla or chocolate ice cream works great. Drizzle chocolate sauce on top for extra sweetness. You can also sprinkle chopped nuts or extra chocolate chips for added crunch. Fresh berries make a colorful touch, too. A cast iron skillet is perfect for baking this cookie. It holds heat well and gives a nice crust. If you don’t have one, use an oven-safe skillet. An electric mixer makes mixing easy. A good spatula helps spread the dough evenly. These tools will make your baking experience smoother. Find the [Full Recipe] for a delicious chocolate chip cookie skillet that’s easy to make! {{image_4}} You can easily switch up the flavor of your chocolate chip cookie skillet. Try using different types of chocolate. Dark chocolate adds a rich taste, while white chocolate gives a creamy touch. You can also mix them for a fun twist. Another way to enhance flavor is by adding extracts. Hazelnut or almond extracts can offer a unique taste. Just a teaspoon can change the whole vibe of the cookie. Experiment with these ideas to find your favorite! For those looking to make a healthier cookie, consider gluten-free substitutions. Use almond or coconut flour instead of all-purpose flour. This keeps the cookie tasty while catering to gluten-free diets. You can also reduce sugar or butter. Try using half the sugar. Or, replace butter with applesauce or Greek yogurt. These options help cut calories but still keep your cookie delicious. If you need nut-free options, skip the nuts in the recipe. The cookie will still be soft and sweet. You can also add seeds like sunflower or pumpkin seeds for a crunchy bite without nuts. For a vegan version, swap the egg for flaxseed meal mixed with water. Use a plant-based butter instead of regular butter. These simple swaps let you enjoy a cookie skillet that fits your dietary needs. Enjoy these variations to make your chocolate chip cookie skillet your own! For the complete recipe, check out the Full Recipe. To store leftover cookie skillet, let it cool first. Cover it tightly with plastic wrap or aluminum foil. You can also use an airtight container to keep it fresh. These containers help maintain the cookie's soft texture and flavor. For freezing, cut the cookie skillet into pieces. Wrap each piece in plastic wrap, then place them in a freezer-safe bag. This helps keep them fresh for up to three months. When ready to eat, thaw them in the fridge overnight. To reheat, pop them in a preheated oven at 350°F (175°C) for about 10-15 minutes. This will restore the warm, gooey center. The cookie skillet lasts about 3 to 5 days when stored properly at room temperature. Watch for signs of spoilage, like a dry texture or an off smell. If you see any mold, it's best to toss it. Enjoy your decadent chocolate chip cookie skillet while it’s fresh! For the full recipe, check the earlier section. It takes about 25 to 30 minutes to bake a chocolate chip cookie skillet. Your oven's heat can change baking time. To check if it's done, look for golden edges. The center should be soft but not raw. If you want a gooey center, bake it for 25 minutes. Yes, you can make the dough ahead of time! Mix it and store it in the fridge. Use an airtight container for best results. You can keep it for up to two days. When ready to bake, let the dough sit at room temp for 15 minutes. This helps it spread evenly in the skillet. If your cookie skillet is undercooked, don’t worry! You can pop it back in the oven for a few more minutes. Keep an eye on it to avoid burning. A toothpick can help check doneness. Insert it in the center; if it comes out wet, bake more. You can use different skillets, but cast iron works best. It holds heat well, giving an even bake. If using a non-stick skillet, ensure it is oven-safe. Avoid glass or ceramic as they can crack in high heat. Always grease your skillet to prevent sticking. You now have all the steps to make a delicious cookie skillet. Remember the main ingredients, the easy instructions, and the fun variations. Don’t forget the tips for perfecting your bake, storing leftovers, and answering common questions. A cookie skillet is fun to make and share. Explore new flavors and enjoy the warmth of fresh cookies. Baking shouldn't be complicated; it should be a joy. Dig in and savor every bite!

Chocolate Chip Cookie Skillet Delight in One Pan

Are you ready to indulge in a warm, gooey treat? This Chocolate Chip Cookie Skillet is the perfect dessert for

- 1 lb chicken breast, cut into thin strips - 1 red bell pepper, sliced - 1 yellow bell pepper, sliced - 1 red onion, sliced - 3 cloves garlic, finely minced - 2 tablespoons extra virgin olive oil - 1 tablespoon chili powder - 1 teaspoon ground cumin - 1 teaspoon paprika - 1 teaspoon smoked paprika - Salt and pepper, to taste - 8 small flour or corn tortillas - Fresh cilantro, chopped (for garnish) - Lime wedges (for serving) For this recipe, I love using fresh and colorful ingredients. The chicken breast gives a juicy base. The bell peppers and onion add a sweet crunch. Garlic brings a lovely aroma that makes the dish pop. The seasonings are key. Chili powder gives a warm kick. Cumin adds a rich, earthy taste. Paprika and smoked paprika add depth and a bit of smokiness. Always adjust salt and pepper to your liking. Lastly, I recommend small tortillas. They wrap perfectly around the filling. Fresh cilantro adds a bright touch, and lime wedges give a zesty finish. For the full recipe, check out Sizzling Sheet Pan Fajitas. Enjoy cooking! - Preheat your oven to 400°F (200°C). This helps the fajitas cook well. - In a large mixing bowl, combine the chicken, red and yellow bell peppers, red onion, and minced garlic. Stir gently so all the pieces mix well. - In a small bowl, whisk together olive oil, chili powder, ground cumin, paprika, smoked paprika, and a pinch of salt and pepper. - Drizzle this spice mix over the chicken and veggies. Use your hands or a spatula to toss everything. Make sure they are all coated nicely. - Spread the seasoned chicken and veggies on a large sheet pan in one even layer. This helps them roast instead of steaming. - Place the pan in the oven and bake for 20-25 minutes. Check the chicken's temperature; it should reach 165°F (75°C). The veggies will be tender and look roasted. For great fajitas, spread the chicken and veggies in one even layer on the sheet pan. This helps them roast perfectly. If they overlap, they will steam instead. Always check the internal temperature of the chicken. It should reach 165°F (75°C) to ensure it's safe to eat. Warm your tortillas for the best taste and texture. Heat them in a skillet for 30 seconds on each side. This makes them soft and easy to fold. For garnishing, sprinkle fresh cilantro on top and serve with lime wedges for a zesty finish. Arrange the fajitas on a large platter. Use colorful garnishes and lime wedges around the edges. This makes the dish look inviting. For a fun twist, let guests build their own fajitas. It adds an interactive element to your meal. {{image_4}} You can easily switch up the main protein in your fajitas. Swap chicken for beef or shrimp. Both options add their own flavors and textures. You might also want to add more veggies. Zucchini and mushrooms are great choices. They soak up the spices and add color to your dish. Don't be afraid to experiment with spices and marinades. Try adding cumin, garlic powder, or even lime juice for a fresh twist. You can also use different types of tortillas. Flour wraps are soft, while corn tortillas add a nice crunch. Choose what you love best! If you're looking for gluten-free options, there are many tortillas available. They taste great and fit any diet. For a vegetarian version, use beans or tofu instead of meat. Both options are filling and delicious! With these variations, you can create a meal that fits your taste. You can find the Full Recipe above for more details. To store your fajita leftovers, let them cool first. Place the fajitas in an airtight container. They can stay fresh in the fridge for up to three days. When reheating, use a skillet over medium heat. Add a splash of water to keep them moist. Cover the skillet to trap steam and heat evenly. You can also repurpose leftovers in a salad or quesadilla for a tasty twist. Yes, you can freeze fajitas! To freeze, place the cooled fajita mix in a freezer bag. Squeeze out all the air and seal tightly. They will keep for up to three months. To thaw, place the bag in the fridge overnight before reheating. This keeps the flavor and texture just right. To make fajitas on a stovetop, heat a large skillet over medium-high heat. Add olive oil and let it warm. Next, add your sliced chicken, peppers, and onions. Cook for about 10-15 minutes, stirring often. Make sure the chicken is browned and the veggies are tender. Season with spices like chili powder and cumin, just like in the oven method. Yes, you can! Fajitas are very flexible. You can use beef, shrimp, or even tofu. Each protein adds a unique flavor and texture. Just adjust the cooking time to ensure everything cooks well. Chicken is popular, but don’t be afraid to try something new. Sheet Pan Fajitas go great with various sides. Here are some ideas: - Spanish rice - Refried beans - Guacamole - Salsa - Corn on the cob These sides add flavor and make your meal more filling. To check if the chicken is fully cooked, use a meat thermometer. The internal temperature should be 165°F (75°C). If you don’t have a thermometer, cut a piece of chicken in half. The meat should be white, not pink. Make sure it looks juicy but not raw. Yes, Sheet Pan Fajitas can be healthy! They are loaded with veggies and lean protein. You can control the oil and spices you use. If you choose whole grain tortillas, that adds more fiber. This recipe can fit well into a balanced diet. To adjust the spiciness, change the amount of chili powder. If you like it milder, use less. You can add sweet peppers to balance the heat. To make it spicier, add jalapeños or hot sauce. Taste as you go to find your perfect level. This article covered how to make delicious Sheet Pan Fajitas. We discussed the key ingredients, like chicken and peppers, and the simple steps to prepare them. I shared tips for cooking and serving, along with fun variations and storage advice. You can swap proteins, try new flavors, or even make vegetarian options. Fajitas are great for gatherings. I hope you feel excited to create your own tasty fajitas at home! Enjoy every bite.

Sheet Pan Fajitas Tasty and Quick Dinner Recipe

Looking for a quick and tasty dinner? Sheet Pan Fajitas are the answer! This simple recipe makes cooking fun and

- 1 cup fresh broccoli florets - 1 red bell pepper, thinly sliced - 1 yellow zucchini, cut into half-moons - 1 medium carrot, julienned - 1 cup snap peas, trimmed and cleaned - 3 cloves garlic, minced - 1 teaspoon fresh ginger, grated - Sea salt and freshly ground pepper to taste - 2 green onions, thinly sliced (for garnish) - A sprinkle of sesame seeds (for garnish) - 2 tablespoons soy sauce (or tamari for gluten-free option) - 1 tablespoon sesame oil - 1 tablespoon olive oil When you create a quick veggie stir-fry, fresh vegetables are key. You want a mix of colors and textures. I like to use broccoli, red bell pepper, zucchini, carrots, and snap peas. Each brings its own flavor and crunch. Next, I add aromatics. Garlic and ginger elevate the taste. Their scents fill the kitchen as they cook. I use sea salt and fresh pepper to season. For garnish, I add sliced green onions and sesame seeds. They add a nice touch and some crunch. For oils and sauces, I use a mix of soy sauce and sesame oil. They bring together all the flavors. Olive oil serves as the base for cooking. These ingredients make a quick and healthy meal. You can find the full recipe for more details. Enjoy your cooking! - Heat olive oil in a large skillet or wok over medium-high heat. - Test oil temperature with a piece of garlic for sizzling. Start by heating the olive oil in your skillet or wok. This oil gives a nice flavor and helps cook the veggies. You want the oil to be hot but not smoking. To check if it's ready, drop in a piece of garlic. If it sizzles right away, you are good to go. - Add minced garlic and grated ginger, sautéing for 30 seconds until fragrant. Once the oil is hot, add minced garlic and grated ginger. These two add great flavor. Stir them for about 30 seconds. You want to see them turn light golden and smell that lovely aroma. This step is key because it builds the base flavor for your stir-fry. - Stir-fry broccoli, bell pepper, and carrot for 3-4 minutes. - Incorporate zucchini and snap peas for an additional 2-3 minutes. - Drizzle with soy sauce and sesame oil, cook together for 1 minute. Now it’s time to add in the veggies. Start with the broccoli, bell pepper, and carrot. Stir-fry these vegetables for 3 to 4 minutes. You want them to soften but still hold a bit of crunch. Next, mix in the zucchini and snap peas. Cook these for another 2 to 3 minutes. After that, drizzle soy sauce and sesame oil over everything. Stir to coat all the veggies. Let them cook together for one minute. This step makes sure the flavors blend well. Follow this process, and you’ll have a bright and tasty veggie stir-fry ready to enjoy. For a detailed recipe, check the Full Recipe. To make your Quick Veggie Stir-Fry even tastier, adjust the seasoning. Use sea salt and freshly ground pepper. This simple step brings out the natural flavors of your fresh vegetables. Fresh veggies offer the best taste and nutrition, so choose them wisely. Once your stir-fry is ready, transfer it to a serving platter or individual bowls. This makes it look more inviting. For a pop of color, garnish with thinly sliced green onions and a sprinkle of sesame seeds. These small touches enhance the appeal of your meal. Stir-fry your vegetables on high heat for the best texture and taste. This method helps them cook quickly while staying bright and tender-crisp. Make sure to move them around the pan often. Keeping the veggies moving helps them cook evenly and stay vibrant. {{image_4}} You can mix and match your veggies. Use seasonal or favorite ones. Try adding mushrooms for an earthy taste. Baby corn can add a fun crunch too. Bell peppers come in many colors, so feel free to switch them up. Carrots can be replaced with snap peas for a fresh twist. The more variety you add, the more fun your stir-fry becomes! Need a protein boost? Tofu, chicken, or shrimp work great. If you use tofu, press it first to remove water. Chicken cooks quickly, so cut it into small pieces. Shrimp is fast too; just watch it turn pink. Adjust your cooking time based on what protein you choose. This keeps everything tender and juicy. Want to change the flavor? Go for different sauces! Teriyaki adds sweetness, while hoisin gives a rich taste. You can also add chili flakes for some heat. A splash of lime juice can brighten it up too. Experiment with your favorite flavors to make this dish your own. Don’t forget to taste as you go along! For the full recipe, check out the Quick Veggie Stir-Fry section. Store any leftover veggie stir-fry in an airtight container in the fridge. This keeps it fresh. Consume leftovers within 2-3 days for the best taste. If you wait longer, the veggies may lose their crunch. You can freeze leftover stir-fry in a freezer-safe container. It’s best to use it within 1-2 months. This helps keep the flavors and texture intact. Remember to label the container with the date. Reheat the stir-fry in a skillet over medium heat. This method gives the best texture. Stir occasionally to heat evenly. You can also use a microwave if needed. Just be careful not to overcook it. This can make the veggies soggy. For the best results, enjoy your Quick Veggie Stir-Fry fresh. Check out the Full Recipe for more tips! - Prep Time: 10 minutes | Total Time: 15 minutes | Servings: 2-3 - Yes, but adjust cooking time as frozen veggies may require longer to cook. - Use coconut aminos or liquid aminos for a soy-free option. - Yes, if tamari is used in place of soy sauce. - Add a protein like tofu or chicken directly in the stir-fry process when sautéing aromatics. - Other oils like avocado oil or grapeseed oil can be used as alternatives to sesame oil. In summary, this quick veggie stir-fry recipe is easy and flavorful. You need fresh vegetables, aromatics, and a few sauces. Cooking is quick, taking only about 15 minutes. Don't hesitate to try different veggies or proteins for variety. Store leftovers properly to enjoy later. This dish is not just healthy; it can also fit various diets. Now, you can make a delicious meal that is both satisfying and nutritious! Enjoy your cooking!

Quick Veggie Stir-Fry Flavorful and Healthy Meal

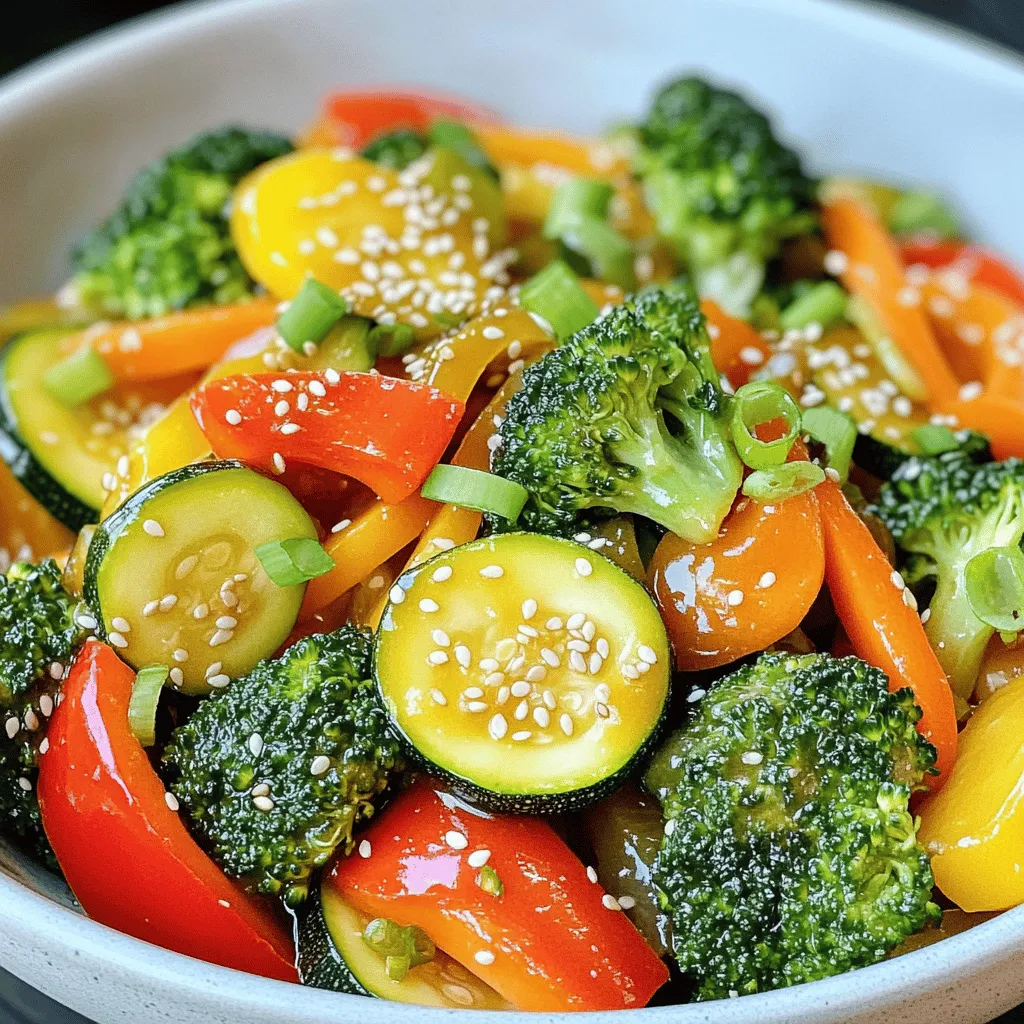
Are you looking for a quick, healthy meal that bursts with flavor? A Quick Veggie Stir-Fry is your answer! Packed

- 1 pound large shrimp, peeled and deveined - 3 tablespoons olive oil - 4 cloves garlic, minced - Zest and juice of 1 large lemon - 1 teaspoon red chili flakes - 1 teaspoon smoked paprika - Salt and black pepper to taste - 2 cups baby spinach - 1 cup cherry tomatoes, halved - Fresh parsley, chopped - Lemon wedges for serving You need fresh shrimp for this dish. Choose shrimp that smell like the ocean. Look for a firm texture and bright color. Olive oil helps the shrimp cook and adds flavor. Use high-quality olive oil for the best taste. Garlic is key! Minced garlic gives a strong, tasty punch. Don’t let it brown, or it can taste bitter. Lemon adds zest and brightens the dish. You will use both the juice and zest for full flavor. Red chili flakes add a touch of heat. Adjust the amount based on your spice level. Smoked paprika gives a nice, smoky flavor. It adds depth and warmth to the dish. For seasoning, salt and black pepper are essential. They bring all the flavors together. Baby spinach adds color and nutrients. It wilts quickly, making it a great addition. Cherry tomatoes add sweetness and juiciness. Halve them for even cooking. Fresh parsley is perfect for garnishing. It adds a fresh, herbaceous note. Lemon wedges are great for serving. They add an extra zing when squeezed over the dish. For the full recipe, check out the detailed instructions on preparing and cooking this meal. Enjoy the burst of flavors in every bite! - Start by prepping the shrimp. Peel and devein them. - Next, pat the shrimp dry with paper towels. This helps them cook well. - Heat a large pan over medium heat. Add the olive oil. - Once the oil is hot, add minced garlic. Sauté until it smells great. - Now, add the shrimp to the pan. Season with salt, pepper, smoked paprika, and chili flakes. - Cook for 2-3 minutes on one side until they turn pink. Flip and cook for another 2 minutes. - Once cooked, pour in lemon juice and add lemon zest. Stir well to coat the shrimp. - Toss in halved cherry tomatoes and baby spinach. Cook for another 2-3 minutes. - The spinach should wilt, and the tomatoes should soften. - Serve hot, garnished with parsley and lemon wedges. For the full recipe, you can check out the complete instructions in the recipe section. Enjoy your meal! - Choosing fresh shrimp: Always look for shrimp that smell like the ocean. Avoid any that smell fishy. Fresh shrimp should be firm and have a shiny shell. If possible, buy shrimp from a trusted source. - Why drying shrimp matters: Dry shrimp helps them sear well. When you pat them dry, they lose extra moisture. This leads to a better texture and more flavor. Wet shrimp can end up steaming instead of getting that nice sear. - Adjusting spice levels with chili flakes: If you like heat, add more chili flakes. Start with one teaspoon, then taste. You can always add more, but you can’t take it out. This way, you control the spice level. - Adding extra herbs for flavor: Fresh herbs can elevate your dish. Try adding fresh basil or cilantro. They add bright flavors that pair well with lemon and shrimp. - Serving suggestions for a beautiful dish: For a stunning plate, use a shallow platter. Arrange the shrimp and veggies in the center. Drizzle the pan juices over the top. This makes the dish look vibrant and inviting. - Using garnishes effectively: Fresh parsley adds a lovely green touch. Scatter it over the dish just before serving. Lemon wedges not only look nice but also add zest when squeezed. They make the dish pop with color and flavor. {{image_4}} You can swap shrimp for chicken or tofu. Chicken cooks well and adds protein. Tofu gives a nice texture and is great for vegans. For veggies, try zucchini, bell peppers, or asparagus. Each adds a unique taste and color. Citrus options can change the flavor. Try lime or orange juice for a twist. You can also add spices like cumin or coriander. Fresh herbs like basil or cilantro can brighten the dish, making it more vibrant. You can grill the shrimp for a smoky flavor. Grilling gives a nice char and is fun for summer meals. If you prefer, you can pan-fry it like the recipe suggests. One-pan meals save time and clean-up, making cooking easier. To keep your leftover shrimp fresh, place them in an airtight container. Make sure to cool the shrimp to room temperature before sealing. This helps prevent moisture build-up, which can cause spoilage. Cooked shrimp can last in the fridge for 3 to 4 days. If you notice any off smells or changes in texture, it's best to discard them. If you want to save shrimp for later, freezing is a great option. Place the shrimp in a single layer on a baking sheet. Freeze until solid, then transfer them to a freezer-safe bag. Remove as much air as possible before sealing. Properly frozen shrimp can last for up to 3 months. When you're ready to eat, thaw the shrimp in the fridge overnight. To reheat, place them in a skillet over low heat. Add a splash of water or olive oil to help with moisture. Cook until heated through, ensuring they don’t become tough. Enjoy your flavorful shrimp! For the full recipe, check out the details above. How to tell when shrimp are fully cooked? You can tell shrimp are cooked when they turn pink and opaque. They will also curl into a C shape. If they look gray or feel soft, they need more time. Cooking shrimp too long makes them tough, so keep a close eye on them. Can I make this recipe without garlic? Yes, you can skip the garlic if you want. The dish will be less flavorful, but you can add other spices. Consider using onion powder or fresh herbs for a different taste. What to serve with one-pan lemon garlic shrimp? I love serving this shrimp with rice or pasta. They soak up the lemon and garlic sauce well. You can also add a fresh salad for crunch and color. Is this dish suitable for meal prep? Absolutely! This dish stores well in the fridge. You can make it ahead and reheat it. Just be careful not to overcook the shrimp when reheating. Can I use frozen shrimp for this recipe? Yes, frozen shrimp work great. Just thaw them before cooking. Pat them dry to help them sear nicely. This helps keep the flavors bright. What are some low-carb side dishes to pair with it? Try serving it with zucchini noodles or cauliflower rice. Both are low in carbs and taste great with shrimp. You can also add steamed broccoli or asparagus for extra veggies. In this blog post, I detailed a tasty shrimp dish using simple ingredients. You learned about the main ingredients, preparation steps, and cooking process, along with tips to enhance flavor. I also shared variations you can try and how to store leftovers for later enjoyment. Remember, this dish is both easy to make and delicious. You can adapt it to fit your tastes. Enjoy cooking and experimenting with flavors that you love!

One-Pan Lemon Garlic Shrimp Quick and Flavorful Meal

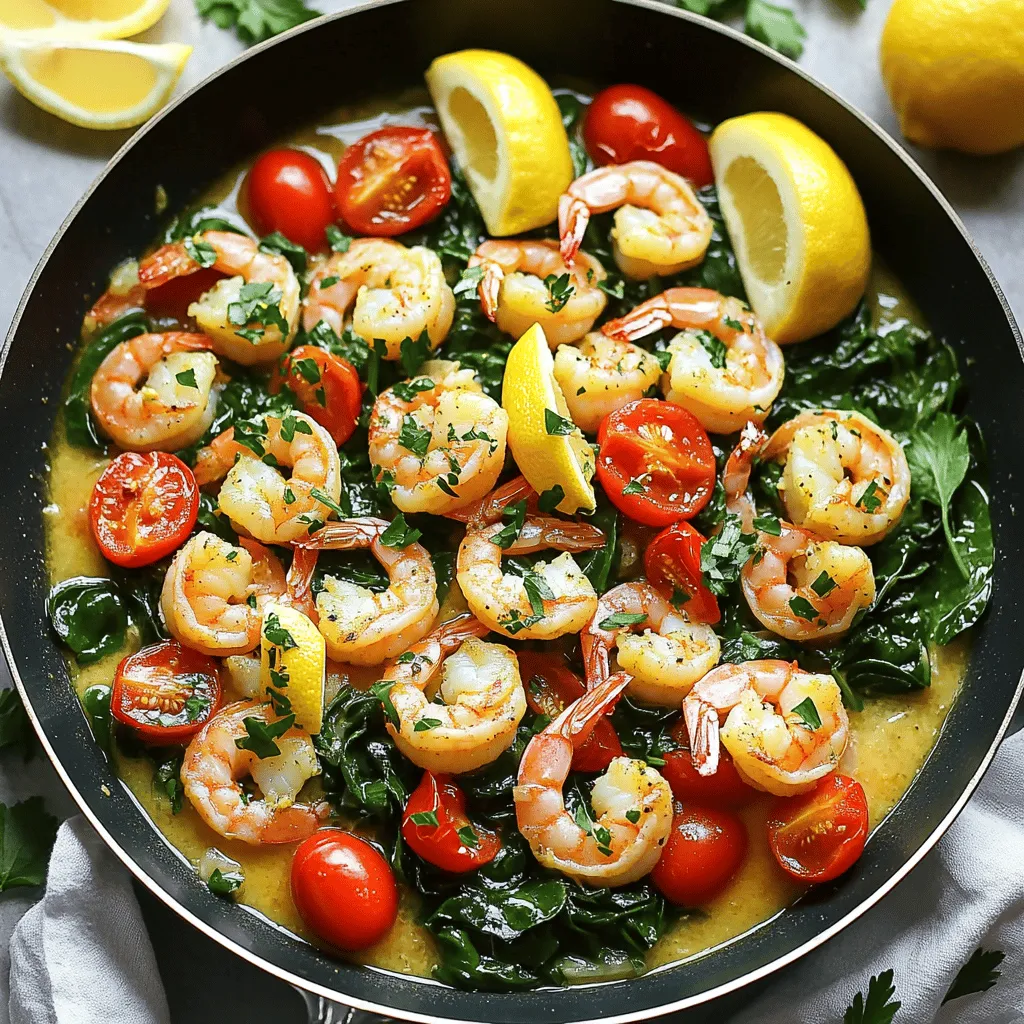
Looking for a quick and flavorful meal? You’re in the right place! This One-Pan Lemon Garlic Shrimp recipe is simple

- 1 cup frozen spinach, thoroughly thawed and squeezed to remove excess moisture - 1 can (14 oz) artichoke hearts, drained and finely chopped - 1 cup cream cheese, softened at room temperature - 1/2 cup sour cream - 1/2 cup mayonnaise - 1 cup shredded mozzarella cheese, plus extra for topping - 1/2 cup grated Parmesan cheese - 2 cloves garlic, minced - 1/2 teaspoon red pepper flakes (or to taste for a kick) - Salt and pepper to taste - Fresh parsley, finely chopped, for garnish I love how the main ingredients create a rich and creamy dip. The frozen spinach gives a fresh taste, while the artichoke hearts add a unique texture. Cream cheese, sour cream, and mayonnaise combine to form the base. Together, they make the dip smooth and indulgent. The shredded mozzarella and grated Parmesan add a cheesy depth. Garlic gives it a savory punch, and seasonings like red pepper flakes bring warmth. This dip is not just tasty; it’s a crowd-pleaser! - For cream cheese, you can use Greek yogurt for a lighter option. - Swap sour cream with more cream cheese or plain yogurt. - Instead of mayonnaise, try avocado or a vegan mayo. - Use cheddar or gouda if you want a different cheese flavor. These substitutions help you tailor the dip to your taste or dietary needs. I enjoy experimenting with different cheeses, as they can change the dip’s flavor entirely. Feel free to mix and match based on what you have. Enjoy exploring these options! You can find the full recipe to guide you through the process. 1. First, preheat your oven to 350°F (175°C). This helps the dip bake evenly. 2. In a large mixing bowl, combine the cream cheese, sour cream, and mayonnaise. Use a hand mixer or spatula to mix until smooth. This base gives the dip its creamy texture. 1. Next, add the minced garlic, red pepper flakes, salt, and pepper to the bowl. Mix well to blend all flavors. 2. Gently fold in the chopped artichoke hearts and drained spinach. Combine until everything is mixed nicely. This step adds a hearty feel to the dip. 3. Now, stir in the shredded mozzarella and grated Parmesan cheese. Set aside a small handful of mozzarella for later. This blend of cheeses adds richness to the dip. 1. Transfer the mixture to a greased baking dish, spreading it evenly. Sprinkle the reserved mozzarella on top. This will create a delicious, cheesy crust. 2. Place the baking dish in the oven and bake for 25-30 minutes. Look for a bubbly dip with a golden brown top when it’s ready. 3. Once baked, remove the dish from the oven and let it cool for a few minutes. This allows the flavors to settle. 4. For a fresh touch, garnish with finely chopped parsley before serving. This adds color and a hint of freshness. Enjoy this creamy spinach and artichoke dip warm with your favorite dippers! You can find the full recipe for a clear guide. To achieve the best texture for your creamy spinach and artichoke dip, focus on ingredient temperatures. Start with room-temperature cream cheese. Cold cream cheese can result in clumps. Soften it well before mixing. Warm ingredients blend easily, creating a smooth dip. Using thawed and drained spinach is key. Excess moisture can make the dip watery. Squeeze the spinach tightly to remove any extra water. This step ensures a thicker and creamier texture. Pair your dip with crispy tortilla chips, toasted baguette slices, or fresh veggie sticks. These options add great crunch and flavor. For parties, consider serving it in a bread bowl. This creative touch invites guests to dig in. You can also use mini cups for individual servings. This makes it easy for guests to enjoy without sharing. Proper storage helps keep your dip fresh. Place any leftovers in an airtight container. This keeps moisture out and flavor in. Your dip will stay good in the fridge for up to three days. When ready to enjoy again, reheating is simple. Use the oven for the best results. Preheat it to 350°F (175°C). Bake for about 15 minutes until warm. For a quicker option, you can use the microwave. Heat in 30-second intervals, stirring between each. This method works well but may not crisp the top. {{image_4}} You can easily change the taste of your creamy spinach and artichoke dip. Try adding spices like cumin or smoked paprika for a unique flavor. Fresh herbs like basil or thyme also work well. They add aroma and taste that enhance this dish. Mixing different types of cheese can also create a new twist. For example, use goat cheese for a tangy flavor or pepper jack for a spicy kick. Combining cheddar with mozzarella gives a rich, cheesy burst. Tailor the cheese to suit your taste! If you want a lighter dip, swap regular cream cheese for low-fat cream cheese. You can also use plain Greek yogurt in place of sour cream and mayonnaise. This change keeps the dip creamy while cutting calories. For vegan options, use cashew cream or tofu as a base. Nutritional yeast can replace cheese for a savory taste. There are many ways to make this dip healthier without losing flavor! Serving this dip can be fun! Consider individual servings in small ramekins. This looks nice and makes it easy for guests to enjoy. You can also create a dip platter. Arrange your dip with colorful veggies, chips, and bread around it. This makes it look inviting and festive. People love to dig in when it looks good! To keep your creamy spinach and artichoke dip fresh, let it cool first. After cooling, transfer it to a clean, airtight container. This helps prevent air from spoiling the flavors. Make sure to seal it well. Store the container in the fridge. In the fridge, your dip lasts about 3 to 5 days. Make sure to check for changes in smell or texture before eating. If you want to keep it longer, freezing is a good option. You can freeze the dip for up to 3 months. When freezing, use a freezer-safe container and leave some space for expansion. When it’s time to enjoy your leftovers, you have two choices: oven or microwave. To reheat in the oven, preheat it to 350°F (175°C). Place the dip in an oven-safe dish and cover it with foil. Bake for 15 to 20 minutes, or until hot. For the microwave, put the dip in a microwave-safe bowl. Heat it for 1 to 2 minutes, stirring halfway through. Both methods work great, but the oven gives a nice crisp top. You can serve this dip with many tasty options. Here are some popular dippers: - Tortilla chips - Toasted baguette slices - Fresh vegetable sticks like carrots and celery - Pita chips - Crackers These choices create a fun spread. Mix and match to suit your taste. Yes, you can prepare this dip in advance. Here’s how: 1. Mix all the ingredients and place them in your baking dish. 2. Cover it tightly with plastic wrap. 3. Store it in the fridge for up to 24 hours. When ready to serve, just bake it right from the fridge. You may need to add a few extra minutes to the baking time. Yes, this dip can be gluten-free. Most ingredients are safe. Just check: - Tortilla chips and crackers for gluten-free options. - Ensure your mayonnaise is gluten-free if sensitive. This way, everyone can enjoy it! To add heat, try these tips: - Use more red pepper flakes for a bigger kick. - Add diced jalapeños or serrano peppers. - Mix in hot sauce to taste. Start small and adjust to your spice level. Cheese makes this dip creamy and rich. Here are my top picks: - Mozzarella for a mild, stretchy texture. - Parmesan for a sharp, nutty flavor. - Cream cheese for a smooth base. Feel free to mix different cheeses for new flavors. For the full recipe, check out the [Full Recipe]. You now have a detailed guide for making Creamy Spinach and Artichoke Dip. We covered the main ingredients, preparation steps, and baking instructions. I shared helpful tips and variations to suit your taste. Remember, you can substitute ingredients to make it just right for you. Whether it's for a party or a cozy night in, this dip can be a hit. Enjoy creating and sharing this tasty treat with friends and family!

Creamy Spinach and Artichoke Dip Flavorful Delight

Are you ready to indulge in a rich and creamy treat? My Creamy Spinach and Artichoke Dip is the perfect

Older posts
Newer posts
← Previous Page1 … Page67 Page68 Page69 … Page71 Next →

dsad

© 2025 tastyhatch • Built with GeneratePress

Our Policies

  • Copyright Policy
  • Cookie Policy
  • GDPR Policy
  • Privacy Policy
  • Disclaimer
  • Terms Of Use

More Information

  • Home
  • About
  • Contact
  • Appetizers
  • Dessert
  • Dinner
  • Drinks
©2025, tastyhatch About Back To Top