
Pickle Ranch Chicken Enchiladas Flavorful Dinner Idea
Looking for a fun and tasty dinner idea? I’ve got just the recipe for you: Pickle Ranch Chicken Enchiladas! This
Looking for a fun and tasty dinner idea? I’ve got just the recipe for you: Pickle Ranch Chicken Enchiladas! This
![- 1 cup chopped pecans - 1 cup pitted cherries, chopped (fresh or frozen) - 1 ½ cups rolled oats - ½ cup almond flour - ½ cup honey or maple syrup - 1/4 cup coconut oil, melted - 1 teaspoon vanilla extract - ½ teaspoon ground cinnamon - 1/4 teaspoon salt - 1/4 teaspoon baking powder To make Cherry Pecan Breakfast Bars, gather these simple ingredients. Each one plays a key role in flavor and texture. The chopped pecans add a nice crunch, while the cherries bring a sweet and tangy taste. Rolled oats serve as a hearty base, giving the bars their chewy texture. Almond flour adds a nutty flavor and keeps the bars moist. Honey or maple syrup sweetens them naturally, making breakfast a treat. Melted coconut oil binds everything together and keeps the bars from drying out. Vanilla extract enhances the flavors, while cinnamon adds warmth. Salt and baking powder help balance the sweetness and ensure the bars bake perfectly. With these ingredients ready, you can easily make a nutritious snack. Check the [Full Recipe] for more details on creating these delicious bars! Begin by preheating your oven to 350°F (175°C). Prepare an 8x8-inch baking pan by lining it with parchment paper. This extra paper makes it easy to lift the bars out later. In a large mixing bowl, combine the rolled oats, almond flour, chopped pecans, ground cinnamon, salt, and baking powder. Stir the mixture well until all dry ingredients are mixed evenly. Melt the coconut oil. Then, whisk it with honey or maple syrup and vanilla extract. Mix until the ingredients form a smooth blend. Pour the wet ingredients over the dry mixture. Stir gently until everything is well combined. Next, gently fold in the chopped cherries, being careful not to break them apart. Transfer the mixture to the prepared baking pan. Press it down firmly and evenly to cover the edges. Bake for 25-30 minutes or until the edges turn golden brown. Let the bars cool for about 10 minutes. Use the overhanging parchment to lift the bars out of the pan. Cut them into squares or rectangles. Enjoy your Cherry Pecan Breakfast Bars! For the full recipe, check out the detailed instructions above. To get the texture you want, adjust the baking time. If you like chewier bars, bake for 25 minutes. For crunchier bars, go for 30 minutes. Press the mixture firmly into the pan. This helps create denser bars that hold together well. To boost the flavor, add a teaspoon of vanilla or almond extract. This simple change makes a big difference in taste. You can also try adding spices like nutmeg or cardamom. These spices add warmth and depth. They can make your bars even more exciting. These bars taste great warm or at room temperature. Serve them with some yogurt or fresh fruit. This adds a nice touch and makes for a balanced breakfast. For a fun twist, try serving with a drizzle of honey or maple syrup on top. {{image_4}} You can mix up the fruits in these bars. Substitute cherries with blueberries or raspberries for a new taste. Both fruits add a sweet and tangy flavor. If you want a different twist, try dried fruits. Cranberries or apricots work well and add a chewy texture. If you prefer a different nut, replace pecans with walnuts or almonds. Both add healthy fats and a nice crunch. For extra nutrition, consider adding seeds. Sunflower seeds or chia seeds boost the nutrient value and add a fun texture. For those avoiding gluten, make sure your oats and almond flour are certified gluten-free. This ensures that everyone can enjoy these tasty bars without worry. It’s simple to adjust the recipe for different diets while keeping the flavor strong. Check out the Full Recipe for more details on how to make these delicious Cherry Pecan Breakfast Bars! To keep your Cherry Pecan Breakfast Bars fresh, store them in an airtight container. You can keep them at room temperature for up to 5 days. If you want them to last longer, refrigerate them. This will help maintain their flavor and texture. If you want to save some for later, freezing is a great option. Wrap each bar individually in plastic wrap. You can freeze them for up to 3 months. When you're ready to enjoy one, simply thaw it in the refrigerator or at room temperature. This way, you can have a tasty treat ready when you need it! Yes, use maple syrup and eliminate any non-vegan ingredients. This way, you keep it plant-based and still tasty. Modify the amount of honey or maple syrup to your taste. Start with less and add more if needed. Substitute with butter or a different neutral oil if preferred. This keeps the bars moist while changing the flavor. Look for golden brown edges and a firm center. Use a toothpick to check for doneness; it should come out clean. Yes, they are packed with oats, nuts, and fruits for a nutritious breakfast choice. These ingredients provide fiber and healthy fats. Yes, adding dark chocolate chips can enhance flavor without being too sweet. It gives a nice balance to the bars. For the full recipe, check out the recipe section above. In this blog post, we covered how to make delicious Cherry Pecan Breakfast Bars. We listed ingredients and provided step-by-step instructions for baking. You learned tips to adjust texture and flavor, while also exploring different variations. Remember, these bars are versatile and healthy. Experiment with your favorite fruits or nuts. Storage options keep them fresh for days, making them a great grab-and-go snack. Enjoy creating your own tasty versions!](https://tastyhatch.com/wp-content/uploads/2025/07/b95b7c11-6139-496d-93fb-da79595b7291.webp)
Are you craving a quick, healthy breakfast that packs a flavor punch? Look no further! My Cherry Pecan Breakfast Bars
![- 2 boneless, skinless chicken breasts, diced into bite-sized pieces - 1 cup long-grain rice, thoroughly rinsed and drained - 2 cups low-sodium chicken broth These main ingredients form the base of the dish. The chicken adds protein, while the rice serves as the hearty foundation. When you rinse the rice, it helps remove excess starch. This step keeps the rice from being too sticky. - 1/2 cup dill pickles, finely chopped - 1/4 cup pickle juice - 2 tablespoons ranch seasoning mix - 1 medium onion, diced - 2 cloves garlic, minced - 1 cup cherry tomatoes, halved - 1 tablespoon olive oil - Salt and black pepper to taste These flavorful additions elevate the dish. The dill pickles and pickle juice give a tangy kick that makes it stand out. The ranch seasoning mix provides a creamy, herby flavor. Onion and garlic bring aromatic notes, while cherry tomatoes add sweetness and color. - Fresh dill for garnish (optional) A sprinkle of fresh dill on top gives a pop of color and enhances the flavor. It adds a fresh note that complements the pickle flavors well. - Extra dill pickle slices (optional) Adding extra pickle slices around the dish can add a nice touch. They not only look great but also provide a crunchy texture. You can use these as a fun, tangy side that complements the meal. For the full recipe, check here: [Full Recipe]. Before you start cooking, gather your ingredients. This makes the process smooth and fun. You will need: - 2 boneless, skinless chicken breasts, diced into bite-sized pieces - 1 cup long-grain rice, thoroughly rinsed and drained - 2 cups low-sodium chicken broth - 1/2 cup dill pickles, finely chopped - 1/4 cup pickle juice - 2 tablespoons ranch seasoning mix - 1 medium onion, diced - 2 cloves garlic, minced - 1 cup cherry tomatoes, halved - 1 tablespoon olive oil - Salt and black pepper to taste - Fresh dill for garnish (optional) Now, let’s get cooking! 1. Start by heating the olive oil in a large skillet over medium heat. Add the diced onion and minced garlic. Sauté them for about 3 to 4 minutes. You want the onion to become soft and fragrant. 2. Next, toss in the diced chicken. Season it with salt, black pepper, and ranch seasoning mix. Cook the chicken for about 6 to 8 minutes, stirring often. You want it to turn golden brown. 3. Once the chicken is browned, add the rinsed rice to the skillet. Stir the rice for about 2 minutes. This toasting helps the rice soak up all the tasty flavors. 4. Carefully pour in the chicken broth. Then, add the chopped dill pickles and pickle juice. Increase the heat to bring the mix to a gentle boil. 5. When you see bubbles, reduce the heat to low. Cover the skillet and let it simmer for 15 to 20 minutes. The rice should be tender and absorb most of the liquid. 6. In the last 5 minutes, gently fold in the halved cherry tomatoes. This warms them up without making them mushy. 7. After cooking, remove the skillet from heat. Allow it to sit covered for an extra 5 minutes. This step helps the flavors to blend better. 8. Before serving, fluff the rice with a fork. Taste it and adjust the seasoning if needed. Garnish with freshly chopped dill for a bright touch, if you like. For the full recipe, check out the [Full Recipe]. Enjoy making this tasty meal! To make sure your rice comes out just right, rinse it well before cooking. This helps remove extra starch. Use long-grain rice for a fluffy texture. When you add the broth, bring it to a gentle boil first. Once boiling, lower the heat and cover your skillet. This locks in steam and helps the rice cook evenly. Let it simmer without peeking. To boost the flavor of your dish, use low-sodium chicken broth. This keeps the taste rich without being too salty. The addition of dill pickles and pickle juice adds a tangy kick. Mixing in cherry tomatoes right at the end keeps them fresh and bright. Don't forget to taste your dish before serving. You can adjust the seasoning to fit your taste. Serve your Pickle Ranch Chicken and Rice Skillet in the skillet for a cozy feel. If you choose to transfer it, use a large bowl. Top the dish with fresh dill for color. You can also arrange extra dill pickle slices around the plate. This adds a fun touch and makes the meal look inviting. Pair this skillet meal with a simple green salad. A light vinaigrette works well to balance the flavors. You can also serve it with crusty bread for a hearty meal. If you want a drink, a cold lemonade is refreshing. These pairings make your meal even more delightful. For the full recipe, check out the details above. {{image_4}} Alternative Proteins You can switch out the chicken for turkey or shrimp. Both options work well. If you prefer a plant-based meal, try using chickpeas or tofu. These swaps keep the dish tasty and fun. Different Rice Varieties Long-grain rice is great, but you can also use jasmine or basmati rice. These varieties add unique flavors. For a hearty twist, try brown rice. Just remember, brown rice may need more cooking time. Spicy Additions Want a kick? Add some diced jalapeños or red pepper flakes. These ingredients boost the heat level. You can also try a spicy ranch seasoning mix for extra flavor. Creamy Twists For a creamy texture, stir in a bit of cream cheese or sour cream. This addition makes the dish rich and smooth. Greek yogurt is another option that adds creaminess without too many calories. You can find the full recipe [here](#). - Storing Leftovers: Allow the Pickle Ranch Chicken and Rice Skillet to cool down first. Once cool, place it in an airtight container. You can store it in the fridge for up to four days. This way, you can enjoy it later without losing flavor. - Reheating Instructions: When you’re ready to eat, reheat the skillet in a pot on low heat. Stir it often to warm evenly. You can add a splash of chicken broth if it seems dry. Heat until it reaches your desired temperature. - How to Freeze: If you want to keep it longer, freezing is a great choice. Place cooled leftovers in a freezer-safe container. Leave some space at the top, as the rice may expand. Seal it tight to prevent freezer burn. You can freeze it for up to three months. - Thawing Tips: To thaw, move the container to the fridge a day before you plan to eat. For quicker results, you can also use the microwave. Once thawed, reheat as mentioned above, ensuring it is heated all the way through. Enjoy every bite of your delicious Pickle Ranch Chicken and Rice Skillet while keeping it fresh! For the complete guide on how to make this dish, check the Full Recipe. Can I use brown rice instead of white rice? Yes, you can use brown rice. It adds a nutty flavor. However, it takes longer to cook. You should increase the cooking time to about 40-45 minutes. Use 2.5 cups of chicken broth for better moisture. What if I don't have ranch seasoning? No ranch seasoning? No problem! You can mix dried herbs like dill, parsley, and garlic powder. This mix will still give you great flavor. Adjust to your taste for the best results. How to make it gluten-free? To make this dish gluten-free, choose gluten-free chicken broth. The rice is naturally gluten-free, so you can use it without worry. Always check labels on your broth for gluten. Can this recipe be made in advance? Yes, you can prepare this dish ahead of time. Cook it as directed and let it cool. Store it in the fridge for up to three days. When ready to serve, reheat it on low heat. Add a splash of broth if it seems dry. For the full recipe, check the details above! This blog post covered all the key steps to make a great chicken and rice dish. We explored main ingredients, cooking instructions, and useful tips for the best results. You learned about variations to suit your taste and how to store leftovers safely. Remember, cooking is about experimenting and having fun. Don't hesitate to make it your own. Enjoy your meal, and share your creations with others. Keep cooking and exploring new flavors!](https://tastyhatch.com/wp-content/uploads/2025/07/6b66558c-3f06-4e7d-87f2-74289c1d5d9c.webp)
Are you ready to spice up your dinner routine? You’ll love this Pickle Ranch Chicken and Rice Skillet! It brings
![- 1 cup rolled oats - 1/2 cup shredded unsweetened coconut - 1/2 cup dried cherries, roughly chopped - 1/4 cup honey or maple syrup - 1/4 cup almond butter (or your favorite nut butter) - 1/2 teaspoon pure vanilla extract - 1/2 teaspoon ground cinnamon - 1/4 teaspoon fine sea salt - 1/4 cup chopped nuts (optional) To create these delicious Cherry Coconut Breakfast Bars, you need a few key ingredients. Rolled oats form the base. They provide fiber and keep you full. The shredded coconut adds a sweet, chewy texture. Dried cherries bring a burst of flavor and natural sweetness. Honey or maple syrup acts as a binding agent too. Almond butter gives the bars creaminess and healthy fats. If you want to switch things up, try these options: - Instead of honey or maple syrup, use agave nectar or brown rice syrup. - For nut allergies, sunflower seed butter or soy nut butter works well. - You can replace dried cherries with cranberries, apricots, or raisins. Each bar packs a nutritious punch: - About 150 calories per serving - Carbs: 20g, Fats: 7g, Proteins: 4g - Ingredients like oats and nuts provide energy and support heart health. Enjoy these bars as a tasty snack or a quick breakfast. They are filling and easy to make. You can find the full recipe earlier in this article if you want to make them today! Start by preheating your oven to 350°F (175°C). This step is key to getting the bars just right. Next, take an 8x8-inch baking dish and line it with parchment paper. Let the paper hang over the sides. This makes it easy to lift the bars out later. In a large mixing bowl, combine the following dry ingredients: - 1 cup rolled oats - 1/2 cup shredded unsweetened coconut - 1/2 cup dried cherries, roughly chopped - 1/4 cup chopped nuts (if using) - 1/2 teaspoon ground cinnamon - 1/4 teaspoon fine sea salt Mix these ingredients well to ensure they blend together evenly. This will give your bars a great taste and texture. In another bowl, whisk together: - 1/4 cup almond butter (or any nut butter you like) - 1/4 cup honey or maple syrup - 1/2 teaspoon pure vanilla extract Keep whisking until the mixture is smooth. This helps the flavors combine nicely. Now, pour the wet mixture over the dry ingredients. Stir it all together until everything is evenly coated. The mixture will be thick and sticky, so don’t worry if it feels tough to mix. Just use some elbow grease! Next, transfer the mixture to your prepared baking dish. Use a spatula or your hands to press it down firmly. This helps create a solid base. Bake in the oven for 18 to 20 minutes. Look for golden edges and a set center to know they’re done. Once you take them out of the oven, let the bars cool in the pan for about 10 minutes. After that, use the parchment paper to lift the bars out. Place them on a wire rack to cool completely before cutting them into squares or bars. For the complete Cherry Coconut Breakfast Bars recipe, check the [Full Recipe]. To get the best texture, press the mixture tightly into the baking dish. This helps the bars hold together well. The key is to pack it down firmly. When they bake, this tight packing creates a chewy, dense bar. You want the edges to be golden brown. The center should feel set but not dry. Keep an eye on them while baking to avoid burning. These bars go great with yogurt or fresh fruit. Try serving them with a dollop of Greek yogurt on the side. You can also add some sliced bananas or berries for extra flavor. For gatherings, present the bars on a rustic wooden board. A sprinkle of shredded coconut or fresh cherries on top adds a nice touch. Wrap each bar in parchment paper for a neat and portable snack. You can prepare these bars in advance for busy mornings. Make a batch and store them in the fridge. They stay fresh for about a week. For longer storage, freeze the bars. Wrap each one individually in plastic wrap and place them in a freezer bag. When you need a quick snack, just thaw them for a few minutes. Enjoy the convenience of having tasty bars ready to go! {{image_4}} You can mix up the flavor of your Cherry Coconut Breakfast Bars easily. Try adding different dried fruits like cranberries or apricots. These fruits add a nice twist and extra sweetness. You can also include chocolate chips for a rich treat. A hint of citrus zest, like lemon or orange, brightens the taste. These small changes can make your bars exciting and fun. If you want gluten-free bars, use certified gluten-free oats. They work just as well and keep the bars tasty. For a vegan option, swap honey with a plant-based sweetener like agave syrup. You can also use almond butter or peanut butter made from nuts. This way, you can enjoy the bars while sticking to your diet. Want an energy boost? You can add superfoods like chia seeds or flaxseeds. These tiny seeds pack a punch of nutrition. They help keep you full and give you lasting energy. If you need more protein, try adding protein powder to the mix. This addition makes the bars even more filling and satisfying. To keep your Cherry Coconut Breakfast Bars fresh, store them in an airtight container. This helps prevent moisture loss. I recommend using glass or plastic containers with a tight seal. Keep the bars in a cool, dry place or in the fridge. If you store them in the fridge, they stay fresh longer and taste great. You can freeze these bars for later use. Wrap each bar in plastic wrap, then place them in a freezer bag. Make sure to remove as much air as possible from the bag. This helps prevent freezer burn. When you’re ready to enjoy, take a bar out and let it thaw in the fridge overnight. For best texture, avoid microwaving them. Let them sit at room temperature for a few minutes before eating. In the fridge, these bars stay fresh for about one week. Look for signs of spoilage like mold or an off smell. If they become hard or lose flavor, it’s best to toss them. When stored correctly, they remain tasty and nutritious for many days. You can use fresh cherries, but they change the texture. Fresh cherries add moisture, making the bars softer. You may need to bake them longer to set. I recommend chopping them small and removing the pits. Absolutely! These bars are great for kids. They are tasty and healthy. The mix of oats, cherries, and coconut provides energy. Plus, kids love the sweet flavor. Yes, you can make these bars nut-free. Use sunflower seed butter instead of almond butter. This keeps the bars creamy and tasty. You can also skip the nuts entirely if needed. To make these bars gluten-free, use certified gluten-free oats. Regular oats may contain gluten. Check the package to be sure. This way, everyone can enjoy them safely. For even cutting, let the bars cool completely. Use a sharp knife for clean edges. Lift the bars out using the parchment paper. Cut them into squares or rectangles, as you like. Cherry Coconut Breakfast Bars are a tasty and healthy option. We explored key ingredients, substitutions, and nutritional info. You learned how to mix, bake, and store these bars. Remember, you can adjust flavors and cater to diets. Whether for a busy morning or a snack, these bars are simple to make. Enjoy experimenting with different options and share them with friends. Get ready to savor every bite!](https://tastyhatch.com/wp-content/uploads/2025/07/7dff5243-fcde-44a3-94d7-12e7e9c4bf98.webp)
Start your day right with my Cherry Coconut Breakfast Bars! These tasty treats pack a punch of flavor and nutrition.
![Let's dive into the fresh and vibrant components of this Avocado Chickpea Salad. Each ingredient brings its own unique flavor and texture, making this dish a delightful treat. Here’s what you need: - 1 can (15 oz) chickpeas, thoroughly rinsed and drained - 2 ripe avocados, diced into bite-sized pieces - 1 medium cucumber, diced - 1 cup cherry tomatoes, halved - 1/4 small red onion, finely chopped - 1/4 cup fresh cilantro, roughly chopped - Juice of 2 fresh limes - 2 tablespoons extra virgin olive oil - 1 teaspoon ground cumin - Salt and black pepper to taste Each ingredient plays a key role. The chickpeas add protein and a hearty texture. Ripe avocados bring creaminess and healthy fats. The cucumber adds a refreshing crunch, while cherry tomatoes offer a burst of sweetness. Red onion gives a slight bite, and cilantro adds a fresh herbaceous note. Lime juice and olive oil together create a zesty dressing, and cumin spices it up just right. By using these simple yet impactful ingredients, you’ll create a salad that is not just colorful but also packed with nutrients. For the full recipe, check out our detailed instructions to make this dish shine! - Rinse and drain chickpeas. - Dice avocados, cucumber, and cherry tomatoes. - Finely chop red onion and cilantro. Start by rinsing the chickpeas under cold water to remove any canning liquid. This step helps to improve the flavor. After draining, place them in a large bowl. Next, dice the avocados into bite-sized pieces. Use a sharp knife for clean cuts, making it easy to mix later. Then, chop the cucumber and cherry tomatoes. The cucumber adds crunch, while the tomatoes bring sweetness. Lastly, finely chop the red onion and cilantro. These ingredients add vibrant flavors to your salad. - Combine chickpeas and avocados in a bowl. - Add remaining diced ingredients and herbs. - Drizzle dressing and seasonings. In the same bowl, gently mix the chickpeas with the diced avocados. This keeps the avocado pieces intact. After that, add the cucumber, cherry tomatoes, and chopped onion. Toss them together to distribute the flavors evenly. Next, sprinkle the chopped cilantro over the salad. Drizzle the fresh lime juice and olive oil on top. This dressing brightens the dish. Finally, season with ground cumin, salt, and black pepper. Mix everything lightly so the avocados stay chunky. - Toss to combine without mashing avocados. - Allow to rest for flavor melding. Once everything is mixed, toss gently. You want to combine the ingredients without mashing the avocados. They should remain intact for the best texture. Let the salad sit for about 10 minutes. This resting time allows the flavors to meld beautifully. Enjoy your fresh and flavorful Avocado Chickpea Salad! For a complete guide, check the Full Recipe. - Use ripe avocados for best flavor and texture: Choose avocados that yield slightly when you press them. This softness means they are ripe and ready. Ripe avocados add creaminess to the salad and enhance the overall taste. - Let the salad sit to enhance flavors: After mixing, allow the salad to rest for about 10 minutes. This time lets the flavors blend and develop. The salad will taste even better after this short wait. - Adjust seasoning to personal taste: Everyone's taste buds are different. Start with a pinch of salt and pepper, then adjust as needed. Feel free to add more lime juice or cumin if you want a bolder flavor. - Serve in a large shallow bowl or individual plates: A wide bowl allows guests to see all the colorful ingredients. For a more personal touch, serve in individual plates to make it feel special. - Garnish with cilantro leaves and lime wedges: A few fresh cilantro leaves on top make the dish pop. Add a lime wedge for guests to squeeze over their salad, giving it a bright, zesty finish. For the complete recipe, check out the [Full Recipe]. {{image_4}} You can easily change this salad by adding protein. Grilled chicken or shrimp works well. Both add a nice texture and flavor. If you want a salty kick, try adding feta cheese. It blends perfectly with the creamy avocado. To make your salad even better, think about adding more veggies. Diced bell peppers add crunch and color. If you like heat, toss in some jalapeños. You can also switch up the herbs. Fresh mint or parsley gives a bright, fresh taste. Feel free to play with the dressing too. Instead of lime juice, you can use lemon juice. It gives a tangy twist. For a different flavor, try a balsamic vinaigrette. This adds a sweet and sour punch that makes the salad exciting. For the complete instructions, check the Full Recipe. Store leftovers in an airtight container in the fridge. This keeps the salad fresh and tasty. Make sure to seal it tight to avoid any odors from other foods. Consume within 2-3 days for best freshness. The avocados may brown after a couple of days. Eating it sooner ensures you enjoy the bright flavors and perfect texture. Not recommended for freezing due to texture changes. Freezing can make avocados mushy. If you want to save some, consider keeping the chickpeas separate from the avocado until you serve it. Generally up to 2-3 days if stored properly. Store it in an airtight container. This keeps the salad fresh and tasty. The flavors will meld together over time, but the avocados may brown. Yes, but consider adding avocados last to prevent browning. You can prepare the other ingredients in advance. Just mix them together and add the avocado when you are ready to serve. This way, the salad stays bright and appealing. It pairs well with grilled meats or as a light lunch on its own. You can enjoy it with grilled chicken or fish. This salad also makes a great side dish at any meal. For a quick lunch, serve it with some crusty bread. If you want more ideas, check out the Full Recipe for more tips! This Avocado Chickpea Salad combines fresh ingredients for a tasty dish. We reviewed key ingredients, from chickpeas to ripe avocados. I walked you through the simple steps for prep and mixing. Remember to let it rest for the best flavor. Feel free to adjust seasonings or add your favorite proteins. With tips on storage and serving, this salad is a versatile choice. Enjoy a healthy dish that is quick and fun to make!](https://tastyhatch.com/wp-content/uploads/2025/07/aae68864-fe58-4f3f-acbc-c6d4be00da21.webp)
Looking for a fresh and tasty salad that’s easy to make? Try this Avocado Chickpea Salad! Bursting with flavors from
. Enjoy making this dish! 1. Preheat your oven to 425°F (220°C). This step helps the sweet potatoes roast evenly. 2. In a bowl, mix the cubed sweet potatoes with 1 tablespoon of olive oil. Add smoked paprika, ground cumin, sea salt, and black pepper. Toss well to coat. 3. Spread the sweet potatoes on a baking sheet in a single layer. Make sure they don't touch each other. 4. Roast them for 25-30 minutes. Flip them halfway to get a nice, golden brown color. 1. Rinse 1 cup of quinoa under cold water. This removes any bitterness. 2. In a saucepan, add the rinsed quinoa and 2 cups of vegetable broth. Bring it to a boil over medium-high heat. 3. Once boiling, reduce the heat to low. Cover the pan and let it simmer for 15 minutes. 4. After 15 minutes, remove it from the heat and let it sit, covered, for another 5 minutes. Fluff the quinoa with a fork and set it aside. 1. In a large mixing bowl, combine the fluffy quinoa, a can of drained black beans, and diced red bell pepper. 2. Drizzle the remaining tablespoon of olive oil over this mix. Add a dash of sea salt and pepper. Gently toss to combine. 3. To assemble the bowls, create a base with the quinoa mixture. Layer on the roasted sweet potatoes. 4. Add fresh baby spinach and sliced avocado on top. 5. Finish with chopped fresh cilantro and serve with lime wedges for that zesty flavor. For the complete recipe and instructions, check out the Full Recipe. To get the perfect roast on your sweet potatoes, start by cutting them into even 1-inch cubes. This helps them cook at the same rate. Toss them in olive oil and spices to coat well. Spread them out on a baking sheet, ensuring they don't touch. This allows for even roasting and prevents steaming. While the sweet potatoes roast, you can fluff up your quinoa for a light texture. Once it’s cooked, let it sit covered for a few minutes. Then, use a fork to gently fluff it up. This keeps it from becoming mushy and helps each grain stand out. To present your bowls nicely, use deep bowls to layer each ingredient. Start with a base of quinoa, then add the sweet potatoes. Top it off with fresh spinach and avocado slices. For that extra touch, drizzle a bit of olive oil or squeeze fresh lime juice over the top. For toppings, consider adding a sprinkle of chopped cilantro or a few slices of jalapeño for heat. Crumbled feta or a dollop of yogurt can add creaminess. These little extras make the dish burst with flavor and look more inviting. For the full recipe, check out the Roasted Sweet Potato Quinoa Delight. {{image_4}} Vegan adaptations This recipe is already vegan-friendly! You don’t need to change much. The sweet potatoes, quinoa, and black beans make a complete meal. If you want extra protein, add tofu or tempeh. You can also use a vegan yogurt as a topping for creaminess. Gluten-free alternatives Quinoa is naturally gluten-free, making it perfect for those with gluten issues. If you swap black beans for lentils, that’s still gluten-free. Always check labels on packaged ingredients to ensure they're gluten-free. Other beans or grains to use If you want a different flavor, try chickpeas or kidney beans. For grains, you can use farro or bulgur. Each option brings a new taste and texture to your bowl. They all pair well with sweet potatoes. Different vegetables or toppings Feel free to mix in other veggies like roasted zucchini, kale, or corn. For toppings, consider using nuts, seeds, or a dollop of salsa. These swaps can change the dish and keep it exciting. Remember, the sky's the limit with this recipe. Check out the Full Recipe for more ideas. To keep your roasted sweet potato quinoa bowls fresh, follow these tips: - Cool down: Let the bowls cool to room temperature before storing. - Containers: Use airtight containers to prevent moisture loss. - Fridge storage: Place in the refrigerator. They should stay good for 3-5 days. When reheating, keep the texture nice and tasty. Here’s how: - Oven method: Preheat your oven to 350°F (175°C). Spread the bowls on a baking sheet. Heat for about 10-15 minutes until warm. - Microwave method: Use a microwave-safe bowl. Heat for 1-2 minutes. Stir halfway to heat evenly. These methods will help keep your roasted sweet potato quinoa bowls delicious and ready to enjoy again! Can I use frozen sweet potatoes? Yes, you can use frozen sweet potatoes. They are convenient and save time. Just make sure to cook them a bit longer, as they need extra time to roast. How long do leftovers last? Leftovers last about 3 to 4 days in the fridge. Store them in an airtight container. If you want to keep them fresh, eat them sooner rather than later. What are the nutritional benefits of this recipe? This recipe is packed with nutrients. Sweet potatoes are high in fiber and vitamins. Quinoa adds protein and essential amino acids. The beans provide extra fiber and iron, making this bowl healthy and filling. Can I prepare this dish in advance? Yes, you can prepare this dish in advance. Cook the quinoa and roast the sweet potatoes. Store them separately in the fridge. When ready to eat, just combine and enjoy. What can I pair this dish with? You can pair this bowl with grilled chicken or fish for added protein. A side salad also works great. For a vegetarian option, add some feta cheese or nuts for extra flavor and crunch. Roasted sweet potato quinoa bowls are nutritious and easy to make. We covered the main ingredients, like sweet potatoes and quinoa, and discussed how to prepare and combine them. You learned tips for perfect roasting and serving suggestions too. Don't forget the fun part—customizing with your favorite ingredients. These bowls are a healthy choice for any meal. Enjoy experimenting with flavors and variations that fit your taste. Dive in, have fun, and make it your own!](https://tastyhatch.com/wp-content/uploads/2025/07/9405452c-98d8-4c0f-b6cf-02abbcf34579.webp)
If you love healthy meals that are easy to make, you’re in for a treat! Roasted Sweet Potato Quinoa Bowls
. Enjoy making these tasty BBQ chickpea lettuce wraps! To get the best texture for chickpeas, mash them lightly. You want a mix of whole and mashed chickpeas. This mix adds a nice bite. If you like it spicier, add cayenne pepper. Start with a little. You can always add more to suit your taste. If you want to swap BBQ sauce, use teriyaki sauce or homemade spicy mustard. Both add a great flavor twist. Fresh herbs like mint or dill can replace cilantro or parsley. They provide a fresh taste and a fun change. Serve your wraps in a fun way. Use a large platter for a colorful display. You can arrange the wraps in a circle or stack them high. For garnishing, add a sprinkle of sesame seeds or sliced green onions. These small touches make a big difference. {{image_4}} You can get creative with your sauces. BBQ sauce is great, but you can make your own. A simple blend of tomato paste, vinegar, brown sugar, and spices can work wonders. If you want a different taste, try teriyaki sauce. It adds a sweet and salty flavor that pairs well with chickpeas. For a spicy twist, go for buffalo sauce. This sauce will give your wraps a nice kick. You can add more veggies to your wraps. Try diced carrots, shredded cabbage, or sliced radishes for extra crunch. You can also add proteins like tofu or seitan. These options will give your wraps a hearty feel. Just cube the tofu and sauté until golden. It brings a nice texture and flavor. Make sure all your ingredients are vegan. Check your BBQ sauce and other sauces for animal products. To enhance vegan flavors, use fresh herbs like basil or mint. They add brightness to your dish. Nutritional yeast can also give a cheesy flavor without dairy. For the full recipe, check out the BBQ Chickpea Lettuce Wraps . After making BBQ chickpea lettuce wraps, store them in the fridge. They last for about 3 days. Use airtight containers for best results. This helps keep the wraps fresh and tasty. You can freeze the chickpea mixture! Just place it in a freezer-safe bag. Remove as much air as possible before sealing. To reheat, thaw in the fridge overnight. Then, warm it in a skillet for about 5-7 minutes. To freshen up stored wraps, add fresh veggies. This keeps the crunch and flavor. For reheating, warm the chickpea mixture gently. Serve it in new lettuce leaves for a crisp bite. Enjoy the fresh taste of these delightful wraps! The best lettuce for wraps is either butter lettuce or iceberg lettuce. Butter lettuce is soft and pliable. It holds fillings well without tearing. Iceberg lettuce is crisp and sturdy. It provides a nice crunch. Both types work great in BBQ chickpea lettuce wraps. Yes, you can make this recipe in advance. For best results, prepare the chickpea mixture ahead of time. Store it in an airtight container in the fridge. Assemble the wraps just before serving. This keeps the lettuce crisp and fresh. Yes, this recipe is gluten-free. However, check the BBQ sauce label. Some sauces contain gluten. Look for gluten-free options. You can also make homemade BBQ sauce using gluten-free ingredients. To boost protein in this recipe, try adding cooked quinoa or diced tofu. You can also mix in some edamame. These options will enhance the protein content without changing the flavor too much. Yes, you can use canned chickpeas. They are convenient and save time. Just make sure to drain and rinse them well. Canned chickpeas are softer than dried ones. This makes them easier to mash and mix into the BBQ sauce. For the full recipe, check the details above. You can make tasty chickpea lettuce wraps easily using simple ingredients. We covered what you need, how to prepare, and tips to customize your dish. Remember, you can mix and match sauces and toppings for your taste. Whether you want to eat fresh or store leftovers, these wraps are flexible. Enjoy your cooking adventure and share your delicious creation!](https://tastyhatch.com/wp-content/uploads/2025/07/66939dd3-e90b-4e69-89cd-754b393fd0a3.webp)
Looking for a quick, healthy meal that’s packed with flavor? BBQ Chickpea Lettuce Wraps offer the perfect balance of taste
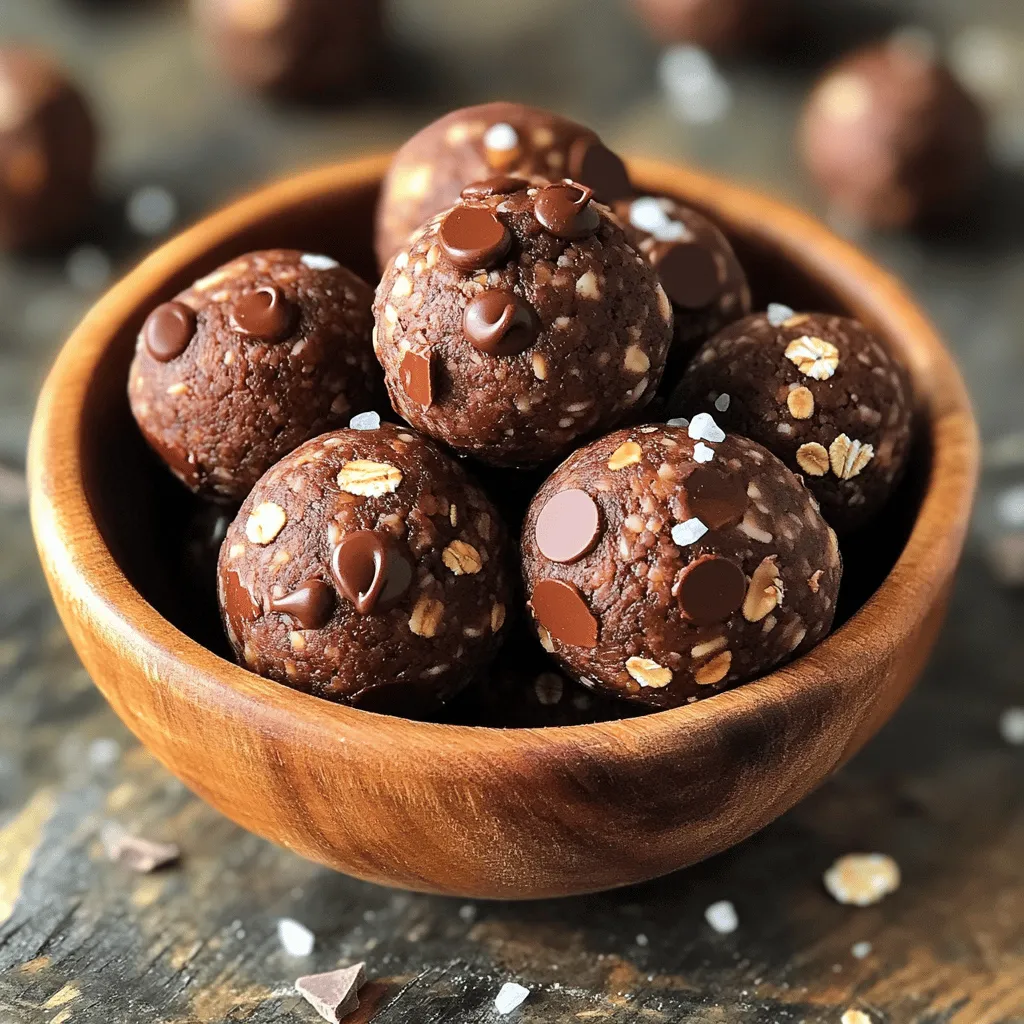
Looking for a quick, tasty snack that’s good for you? I’ve got just the thing! These No Bake Chocolate Energy
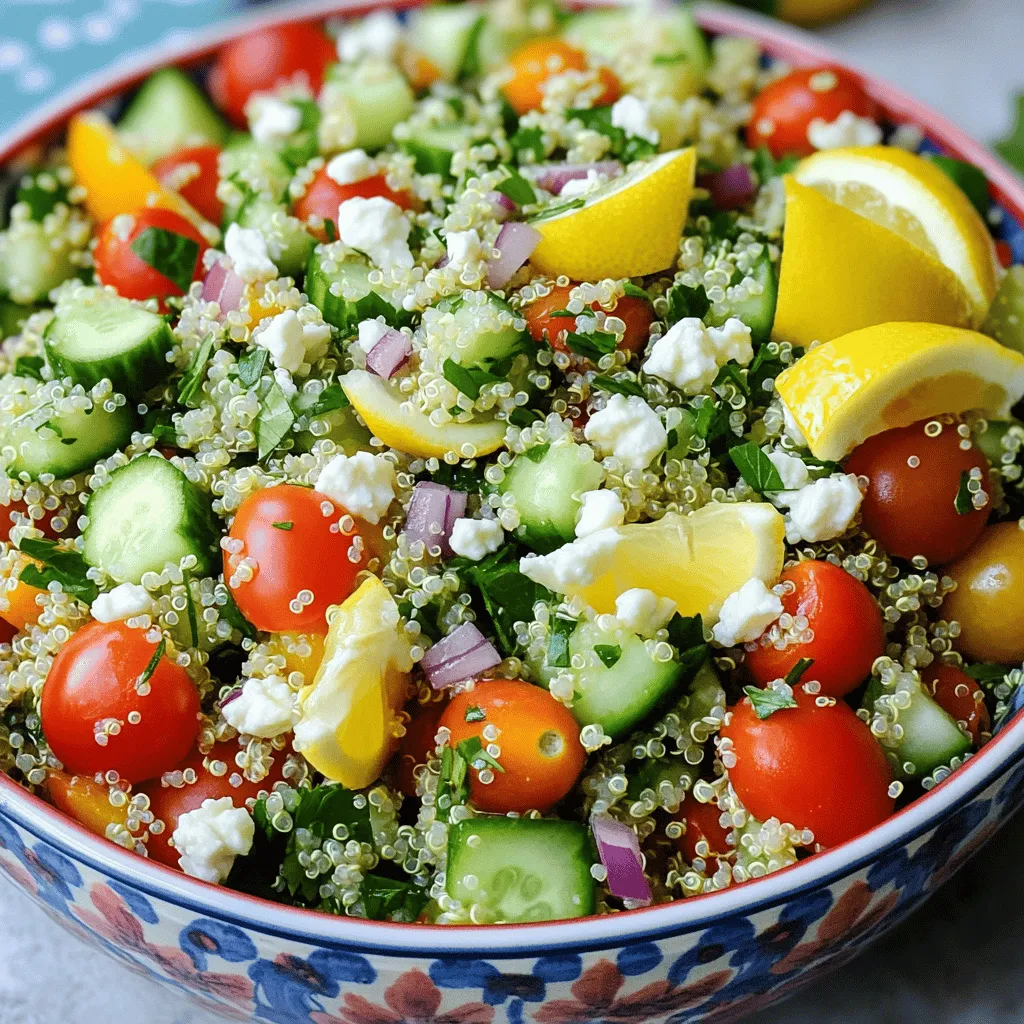
Looking for a fresh and healthy dish that’s easy to prepare? You’ve found it! This Lemon Herb Quinoa Salad bursts
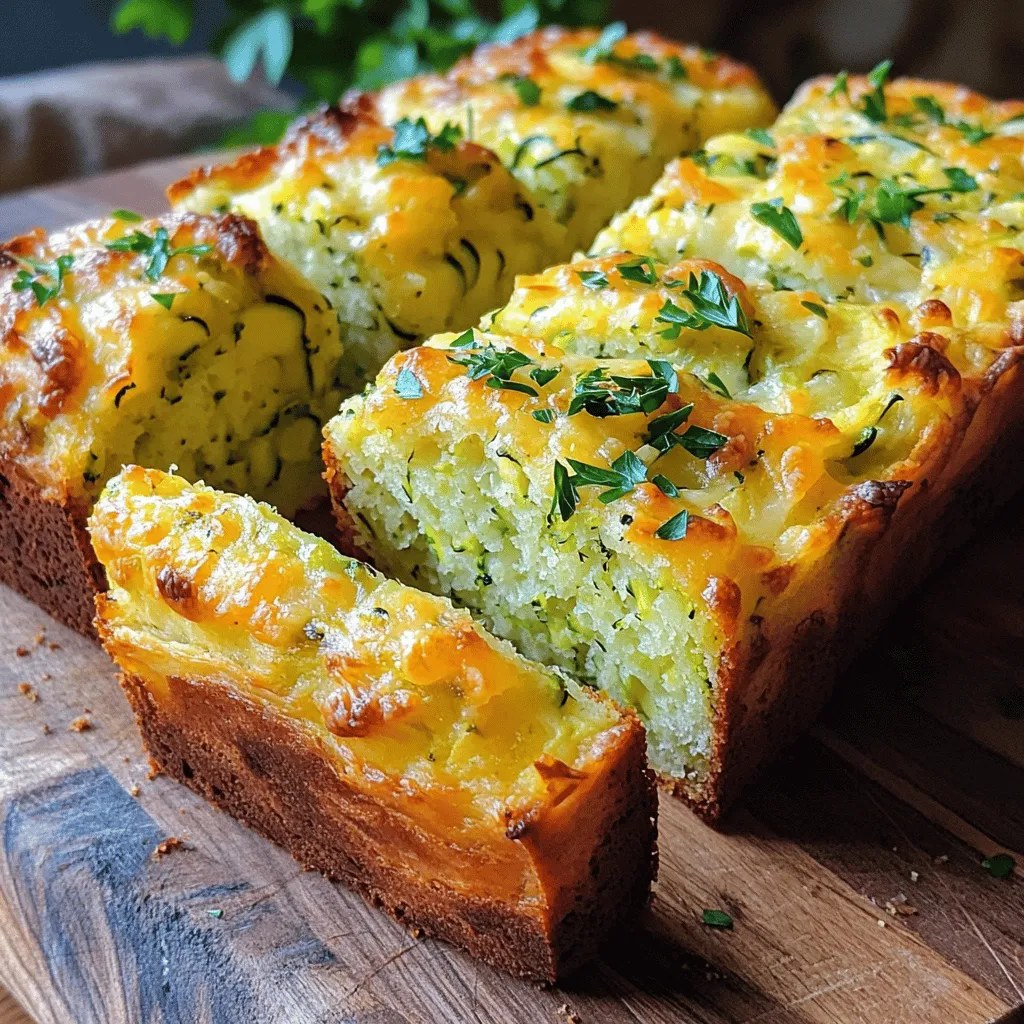
If you love warm, savory bread, you’ll adore this Zucchini Cheese Bread! This flavorful and moist delicacy blends the goodness
