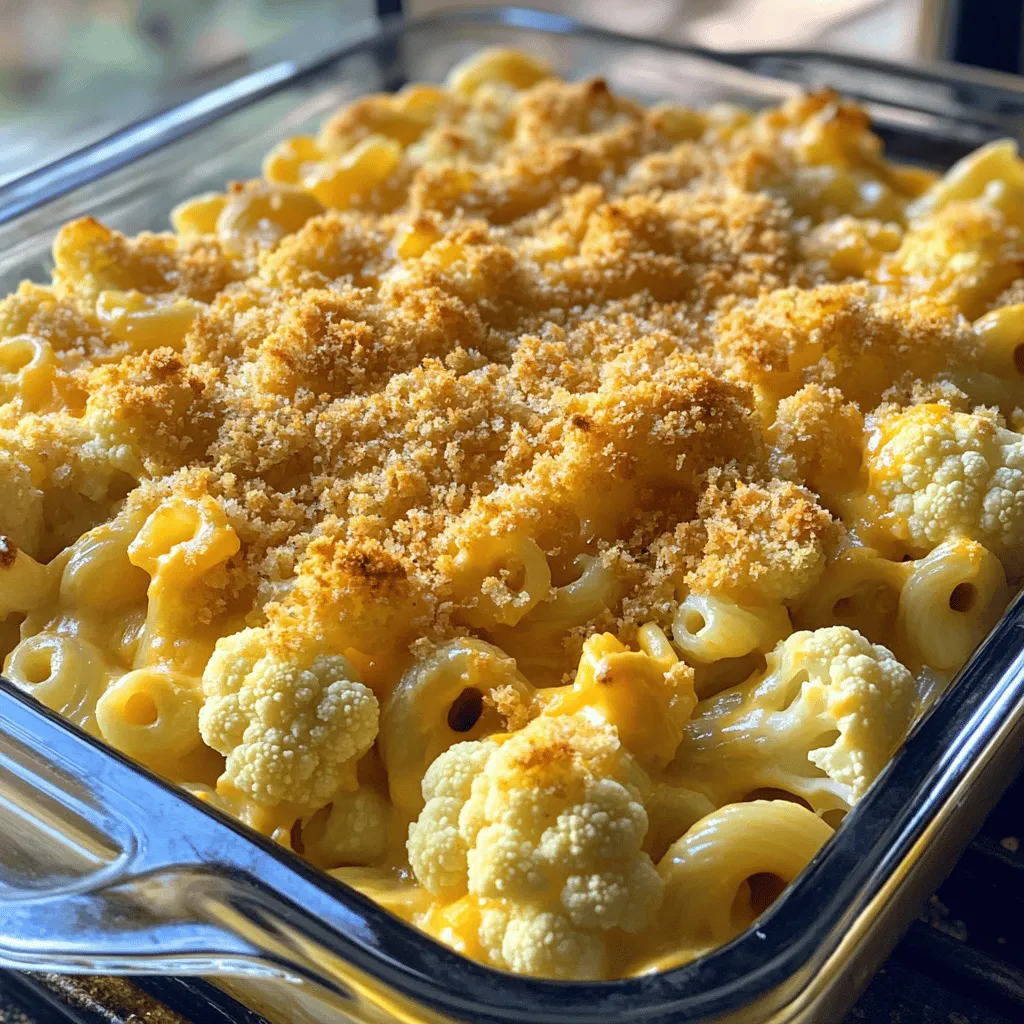
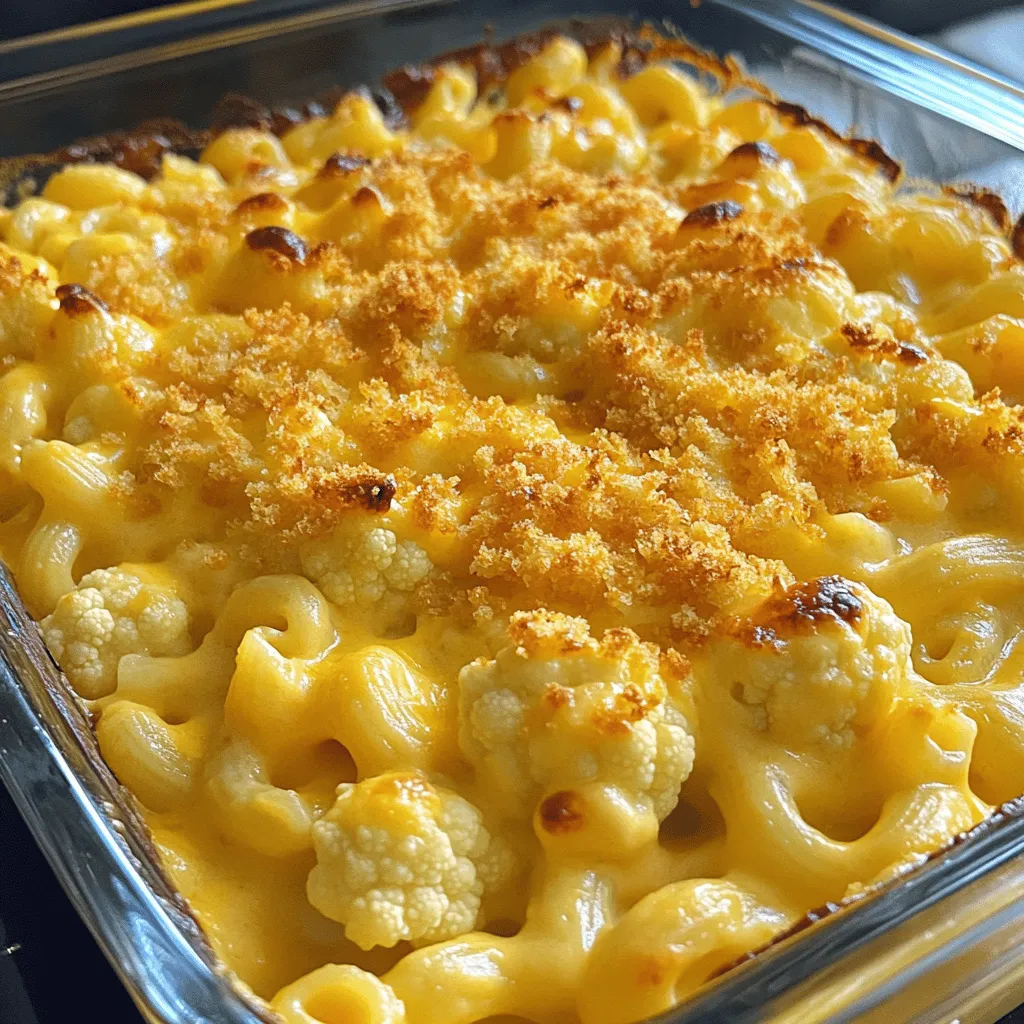
Cauliflower Mac and Cheese is a healthy twist on the classic comfort dish. This creamy recipe combines tender cauliflower and cheesy goodness, making it a perfect meal or side. Whether you need a quick dinner fix or a cozy dish for everyone, this recipe fits the bill. Join me as I guide you through easy steps and ingredients to create your own satisfying bowl of cauliflower mac and cheese! Let’s dive in!
Ingredients
Main Ingredients
– 1 medium head of cauliflower, chopped into bite-sized florets
– 8 ounces elbow macaroni (or gluten-free pasta)
– 2 cups shredded sharp cheddar cheese, divided
Additional Ingredients
– 1 cup milk (dairy or plant-based)
– 1 tablespoon unsalted butter
– 2 tablespoons all-purpose flour (or gluten-free flour)
Seasonings and Optional Toppings
– 1 teaspoon garlic powder
– 1 teaspoon onion powder
– Salt and freshly ground black pepper, to taste
– 1/2 cup breadcrumbs (optional)
– 1 tablespoon olive oil (for topping)
To create a delicious cauliflower mac and cheese, you need some key ingredients. First, the cauliflower gives a nice texture and adds nutrients. Next, elbow macaroni or gluten-free pasta brings the classic comfort. The sharp cheddar cheese melts into a creamy sauce that ties everything together.
For the sauce, you will need milk, unsalted butter, and flour. These create a rich, creamy base. Adding garlic powder and onion powder brings great flavor. You can also include salt and black pepper to taste.
If you want a crispy topping, breadcrumbs work well. Mixing them with olive oil helps them brown nicely in the oven.
Step-by-Step Instructions
Preparing the Cauliflower
– Boil cauliflower florets in salted water for 5-7 minutes.
– Drain and set aside to remove excess water.
Start by getting a large pot of salted water to boil. This step is crucial. The salt adds flavor to the cauliflower. Once the water is boiling, add your chopped florets. Cook them until they are tender, but not mushy. You want a slight bite to them. After cooking, drain the florets well. This helps avoid a watery dish later.
Cooking the Pasta
– Boil elbow macaroni until al dente.
– Drain and reserve pot for cheese sauce.
In the same pot you used for the cauliflower, bring fresh water to a boil. Add the elbow macaroni next. Follow the package instructions and cook until it’s al dente. This means it should be firm to the bite. Drain the pasta and keep the pot for making the cheese sauce.
Making the Cheese Sauce
– Melt butter, whisk in flour until golden.
– Gradually add milk, incorporating seasonings.
– Stir in cheddar cheese until creamy.
Now, let’s make the cheese sauce. In a medium saucepan, melt your butter over medium heat. Once melted, add the flour all at once. Whisk it for about one to two minutes. This creates a roux. Next, slowly add the milk while whisking. Keep stirring until you see no lumps. Add garlic powder and onion powder. Season with salt and black pepper. Cook until the sauce thickens, about three to five minutes. Finally, stir in 1.5 cups of shredded cheddar cheese. Keep stirring until it’s creamy and smooth.
Combining Ingredients
– Mix pasta, cauliflower, and cheese sauce in a bowl.
– Ensure even coating of all ingredients.
In a large bowl, combine your cooked pasta, steamed cauliflower, and creamy cheese sauce. Use a spatula to gently stir everything together. Make sure every piece gets coated in that glorious cheese sauce.
Preparing Breadcrumb Topping (optional)
– Combine breadcrumbs with olive oil until moistened.
If you want a crunchy topping, grab a small bowl. Mix breadcrumbs with olive oil until they feel moistened. This will give you that nice crispy texture on top.
Baking the Dish
– Preheat oven and transfer mixture to a baking dish.
– Add cheese and breadcrumbs before baking.
Preheat your oven to 350°F (175°C). Transfer the mac and cheese mixture into a greased baking dish. Sprinkle the remaining 0.5 cups of shredded cheddar cheese on top. If using, add your breadcrumb topping now.
Baking Instructions
Place the dish in your preheated oven. Bake for 20-25 minutes. Look for a golden brown top and bubbly edges. This is when it’s ready to come out.Enjoy your creamy cauliflower mac and cheese!
Tips & Tricks
Perfecting the Cheese Sauce
To make a smooth cheese sauce, whisking is key. Whisking helps mix the flour and butter. It also prevents lumps from forming in the sauce. A smooth sauce makes your mac and cheese creamy. If you want a thicker sauce, add more flour. For a thinner sauce, add more milk. Adjust the thickness to what you like best.
Customizing the Flavor
Want to spice things up? Try adding some spices or hot sauce. A dash of paprika or cayenne gives it a nice kick. You can also use different cheese types. Gouda or mozzarella can add unique flavors. Mixing cheeses can create a truly special taste.
Serving Suggestions
This dish pairs well with fresh salads or vegetable sides. A crisp green salad balances the creamy mac and cheese. You can serve it as a main dish or a side dish. It works great for family dinners or gatherings. For a heartier meal, add proteins like chicken or beans.
Variations
Vegan Cauliflower Mac and Cheese
You can easily make vegan cauliflower mac and cheese. Start by swapping out cheese and milk. Use cashew cheese or nutritional yeast for that cheesy flavor. Almond milk or oat milk works well in place of regular milk.
To enhance the flavor, adjust the seasonings. Try adding some smoked paprika or a dash of mustard powder. Both give a nice kick and depth to your dish. You can enjoy a rich and creamy vegan version of this classic comfort food.
Gluten-Free Options
For gluten-free cauliflower mac and cheese, choose gluten-free pasta. Many stores sell options made from rice or chickpeas. Also, replace all-purpose flour with gluten-free flour. This keeps the sauce thick and creamy without the gluten.
Make sure all ingredients are gluten-free. Check labels on cheese and breadcrumbs to avoid any hidden gluten. This way, everyone can enjoy this delicious dish without worry.
Added Proteins
You can add protein to your cauliflower mac and cheese for a hearty meal. Cooked chicken or crispy bacon makes a great addition. These give extra flavor and texture.
If you prefer vegetarian options, consider adding beans or lentils. They provide protein and fiber, making the dish even more filling. You can mix in cooked chickpeas or black beans. This makes it a complete meal that satisfies everyone.
Storage Info
Refrigeration
To store leftover Cauliflower Mac and Cheese, let it cool first. Then, place it in airtight containers. This helps keep it fresh and prevents smells from other foods. I recommend using glass or plastic containers with tight lids. When stored properly, it will last for about 3 to 5 days in the fridge.
Freezing Instructions
If you want to freeze this dish, let it cool completely. Then, place it in freezer-safe containers. You can also use heavy-duty freezer bags. Make sure to remove as much air as possible. For best quality, consume within 2 to 3 months. When you’re ready to eat, thaw it overnight in the fridge. Reheat it in the oven or microwave. If using an oven, cover it to keep it moist.
Shelf Life
In the refrigerator, your Cauliflower Mac and Cheese will stay fresh for 3 to 5 days. Always check for signs of spoilage. Look for changes in color or smell. If you see mold or if it smells off, it’s best to throw it away. Trust your senses when it comes to food safety.
FAQs
Can I make this dish ahead of time?
Yes, you can prepare this dish in advance. Cook the cauliflower and pasta as usual. Make the cheese sauce and mix everything together. Then, store it in the fridge for up to two days. When you’re ready to bake, preheat your oven and add the cheese and breadcrumb topping.This way, you save time on busy days.
How do I make it gluten-free?
To make this dish gluten-free, use gluten-free pasta instead of regular elbow macaroni. For the cheese sauce, swap all-purpose flour with a gluten-free blend or cornstarch. Both options thicken the sauce well. Always check labels to ensure all ingredients are gluten-free. This way, everyone can enjoy this creamy delight.
Why is my cheese sauce grainy?
A grainy cheese sauce often happens when the cheese melts too quickly. To avoid this, use shredded cheese and add it slowly. Always keep the heat low when mixing in the cheese. Whisk well until it melts smoothly. If you add cold milk too fast, it can clump. Taking these steps helps you create a velvety sauce.
Can I use frozen cauliflower?
Yes, you can use frozen cauliflower. However, it’s best to thaw it first. Drain any excess water to prevent a watery dish. Frozen cauliflower may also cook faster. Adjust your cooking time to ensure it remains tender but not mushy. This option makes it easy to enjoy this dish anytime.
What can I serve with Cauliflower Mac and Cheese?
This creamy mac pairs well with fresh salads or steamed veggies. You can serve a simple green salad with a light vinaigrette. Roasted broccoli or carrot sticks make great sides too. These options balance the richness of the dish and add extra nutrients. Enjoy your meal!
You now have a great recipe for Cauliflower Mac and Cheese. We covered all the main ingredients, tips for perfecting your cheese sauce, and easy serving suggestions. Cooking it keeps your family happy and healthy. The options for variations let you customize this dish to your taste. Remember, it’s easy to store and reheat leftovers. Enjoy making this dish your own and impress your friends and family. Happy cooking!