Cheesy Garlic Breadsticks Simple and Savory Snack

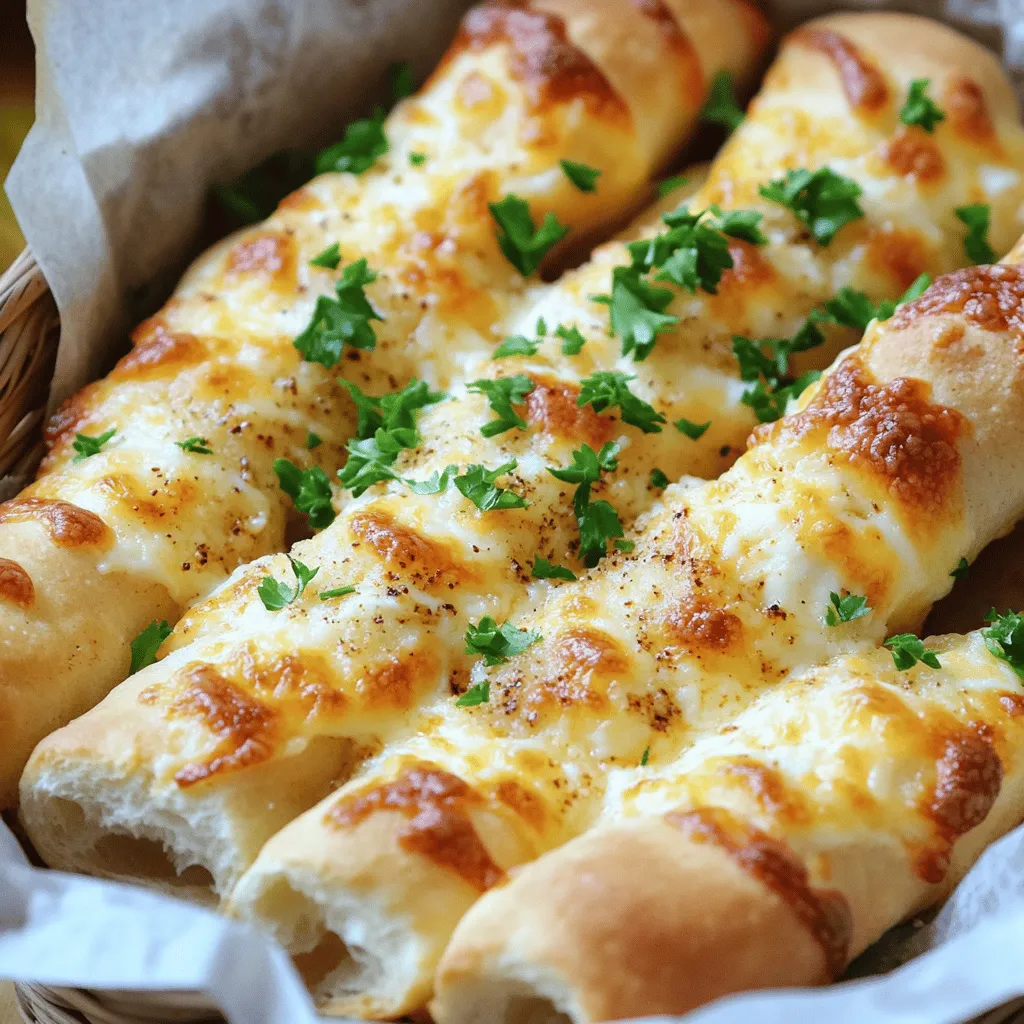
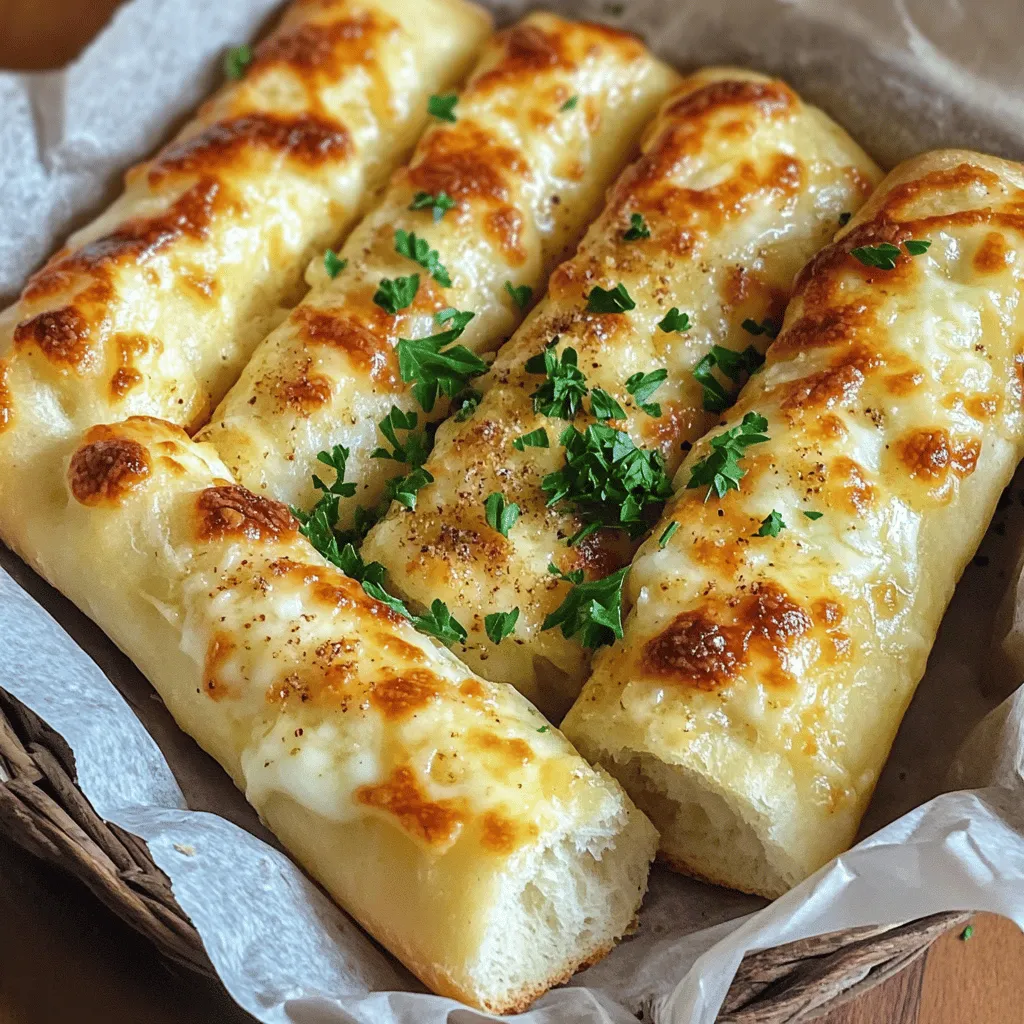
Are you craving a warm, cheesy snack that’s easy to make? Look no further! My Cheesy Garlic Breadsticks are simple, delicious, and perfect for sharing. With just a few key ingredients, I’ll guide you through mixing, kneading, and baking your way to snack heaven. Follow this step-by-step recipe and enjoy crispy, golden breadsticks that pair well with any meal. Let’s dive right in!

Ingredients

Required Ingredients for Cheesy Garlic Breadsticks

To make Cheesy Garlic Breadsticks, you need a few key ingredients. Here’s what you’ll need:

– 1 cup warm water (about 110°F)

– 2 teaspoons active dry yeast

– 1 tablespoon granulated sugar

– 2 ½ cups all-purpose flour

– 1 teaspoon salt

– 3 tablespoons olive oil

– 2 teaspoons garlic powder

– 1 teaspoon Italian seasoning

– 1 cup shredded mozzarella cheese

– ¼ cup grated Parmesan cheese

– Fresh parsley, chopped (for garnish)

These ingredients work together to create a dough that is soft and chewy. The cheese adds a creamy texture, while garlic brings wonderful flavor.

Fresh vs. Dry Ingredients

Choosing between fresh and dry ingredients can impact your breadsticks. Fresh ingredients often give better flavor and texture. For example:

Fresh garlic: If you use fresh garlic, it will add a strong taste. Just mince it finely.

Dried herbs: Italian seasoning works well, but fresh herbs like basil or oregano can brighten the dish.

Using warm water helps activate the yeast, making your breadsticks rise. Make sure the water is warm, not hot, to keep the yeast alive.

Optional Add-Ins

You can add some extra flavors to your breadsticks! Here are some fun ideas:

Chili flakes: For a spicy kick, sprinkle chili flakes on top.

Cheese blends: Mix different cheeses like cheddar or gouda for a unique taste.

Cooked bacon: Adding crispy bacon bits will give a savory twist.

Feel free to experiment with these add-ins to make your breadsticks truly your own. For the full recipe, check out the complete instructions for a delicious snack!

Step-by-Step Instructions

Activating the Yeast

To start, you need warm water. Aim for about 110°F. In a bowl, mix the warm water, active dry yeast, and sugar. Stir gently. Let it sit for about 5 minutes. You’ll see bubbles forming. This means your yeast is active and ready to work.

Mixing and Kneading the Dough

In another bowl, whisk together the all-purpose flour and salt. Make a well in the center and pour in your yeast mixture. Add the olive oil. Mix with a spoon or your hands until it forms a dough. Transfer the dough to a floured surface. Knead it for 5-7 minutes. The dough should feel smooth and elastic. Once done, shape it into a ball. Place it in a greased bowl and cover it. Let it rise in a warm spot for about 1 hour, or until it doubles in size.

Preparing for Baking

Rolling out the Dough

Once the dough has risen, punch it down to release air. Place it on a lightly floured surface and roll it out into a rectangle about ½ inch thick.

Adding Spice and Cheese Toppings

Sprinkle garlic powder and Italian seasoning evenly over the dough. Then, add the shredded mozzarella and grated Parmesan cheese. Be generous! Make sure every bite is cheesy. Cut the dough into strips about 1 inch wide. Place the strips on a parchment-lined baking sheet, leaving space between each one.

Now, you’re ready to bake! For the full recipe, check the instructions above.

Tips & Tricks

How to Make Breadsticks Extra Cheesy

To make your breadsticks extra cheesy, use a blend of cheeses. I love mixing mozzarella with provolone or cheddar. These cheeses melt well and add depth to the flavor. Another fun tip is to sprinkle more cheese on top right before baking. This way, you achieve a gooey, cheesy crust that is hard to resist.

Enhancing Garlic Flavor

For a stronger garlic taste, use fresh garlic. Mince a few cloves and mix them into the dough. You can also brush melted garlic butter over the breadsticks right after they come out of the oven. This adds a rich garlic flavor that pairs perfectly with the cheese.

Key Considerations for Perfect Texture

The texture of breadsticks is key to their success. Use high-protein flour for a chewier bite. Kneading the dough well also helps develop gluten, making them soft yet sturdy. Letting the dough rise properly is crucial, too. A full hour allows the breadsticks to become fluffy. Lastly, bake them until golden brown. This gives a nice contrast to the soft inside.

For the full recipe, check out the details above. Enjoy your cheesy garlic breadsticks!

Variations

Herb-Infused Versions

You can add herbs to your cheesy garlic breadsticks for extra flavor. Try mixing in fresh or dried herbs into the dough. Basil, oregano, or thyme work well. You can also sprinkle fresh herbs on top before baking. This adds a nice pop of color and taste. You can even brush the sticks with herb-infused olive oil after baking for more depth.

Cheese Blends to Try

While mozzarella and Parmesan are classic, you can use other cheeses too. Cheddar adds a sharp flavor. Gouda gives a creamy twist. For a spicy kick, try pepper jack. Mix and match these cheeses to create a blend you love. Just remember to keep the cheese to about a cup to avoid overpowering the breadstick.

Gluten-Free Options

If you need a gluten-free option, you can still enjoy these breadsticks. Use a gluten-free flour blend in place of all-purpose flour. Make sure it has a good balance of starches and proteins for the best texture. You might also need to adjust the liquid. Adding a bit more water can help keep the dough from being too dry.

Storage Info

Best Practices for Storing Leftovers

To keep your cheesy garlic breadsticks fresh, store them in an airtight container. Once they cool, place them in a container lined with a paper towel. This helps absorb moisture and keeps them crispy. If you don’t have a container, wrap them tightly in plastic wrap or aluminum foil. They stay good for up to three days at room temperature or in the fridge.

Reheating Guidelines

When you want to enjoy your leftovers, reheating is key. Preheat your oven to 350°F (175°C). Place the breadsticks on a baking sheet and heat for about 10 minutes. This will restore the crispy texture. If you’re in a hurry, you can use a microwave, but be careful. Heat them for only 15-20 seconds. Microwaving too long makes them chewy.

Freezing for Long-Term Storage

If you want to save some breadsticks for later, freezing is a great option. First, let them cool completely. Next, wrap each breadstick in plastic wrap. Then, place them in a freezer bag or an airtight container. They can last up to three months in the freezer. To enjoy, simply thaw them in the fridge overnight and reheat as mentioned above.

For the full recipe, check out the instructions earlier in the article.

FAQs

Can I make Cheesy Garlic Breadsticks ahead of time?

Yes, you can prepare Cheesy Garlic Breadsticks ahead of time. Make the dough and let it rise. After it rises, you can shape the sticks and store them in the fridge. When you’re ready, just bake them. This helps save time for busy days.

What can I serve with Cheesy Garlic Breadsticks?

Cheesy Garlic Breadsticks pair well with many dishes. They are great with marinara sauce for dipping. You can also serve them with a fresh salad or soup. Their cheesy flavor adds a fun twist to any meal.

How do I achieve a crispy crust?

To get a crispy crust, preheat your oven well. Use a baking stone or a metal pan, as they conduct heat better. When you bake, make sure the breadsticks have enough space. This allows hot air to flow around them. You can also brush the tops with olive oil before baking for extra crunch.

Cheesy garlic breadsticks are simple to make and hard to resist. We covered the key ingredients, from essential items to tasty add-ins. You learned how to activate yeast, mix dough, and create the perfect texture. Tips helped you boost cheese and garlic flavors. We explored fun variations and smart storage methods for leftovers.

Now, you have all the tools to enjoy these amazing breadsticks anytime. Get creative in your kitchen, and share these delicious treats with friends!

To make Cheesy Garlic Breadsticks, you need a few key ingredients. Here’s what you’ll need: - 1 cup warm water (about 110°F) - 2 teaspoons active dry yeast - 1 tablespoon granulated sugar - 2 ½ cups all-purpose flour - 1 teaspoon salt - 3 tablespoons olive oil - 2 teaspoons garlic powder - 1 teaspoon Italian seasoning - 1 cup shredded mozzarella cheese - ¼ cup grated Parmesan cheese - Fresh parsley, chopped (for garnish) These ingredients work together to create a dough that is soft and chewy. The cheese adds a creamy texture, while garlic brings wonderful flavor. Choosing between fresh and dry ingredients can impact your breadsticks. Fresh ingredients often give better flavor and texture. For example: - Fresh garlic: If you use fresh garlic, it will add a strong taste. Just mince it finely. - Dried herbs: Italian seasoning works well, but fresh herbs like basil or oregano can brighten the dish. Using warm water helps activate the yeast, making your breadsticks rise. Make sure the water is warm, not hot, to keep the yeast alive. You can add some extra flavors to your breadsticks! Here are some fun ideas: - Chili flakes: For a spicy kick, sprinkle chili flakes on top. - Cheese blends: Mix different cheeses like cheddar or gouda for a unique taste. - Cooked bacon: Adding crispy bacon bits will give a savory twist. Feel free to experiment with these add-ins to make your breadsticks truly your own. For the full recipe, check out the complete instructions for a delicious snack! To start, you need warm water. Aim for about 110°F. In a bowl, mix the warm water, active dry yeast, and sugar. Stir gently. Let it sit for about 5 minutes. You’ll see bubbles forming. This means your yeast is active and ready to work. In another bowl, whisk together the all-purpose flour and salt. Make a well in the center and pour in your yeast mixture. Add the olive oil. Mix with a spoon or your hands until it forms a dough. Transfer the dough to a floured surface. Knead it for 5-7 minutes. The dough should feel smooth and elastic. Once done, shape it into a ball. Place it in a greased bowl and cover it. Let it rise in a warm spot for about 1 hour, or until it doubles in size. Once the dough has risen, punch it down to release air. Place it on a lightly floured surface and roll it out into a rectangle about ½ inch thick. Sprinkle garlic powder and Italian seasoning evenly over the dough. Then, add the shredded mozzarella and grated Parmesan cheese. Be generous! Make sure every bite is cheesy. Cut the dough into strips about 1 inch wide. Place the strips on a parchment-lined baking sheet, leaving space between each one. Now, you’re ready to bake! For the full recipe, check the instructions above. To make your breadsticks extra cheesy, use a blend of cheeses. I love mixing mozzarella with provolone or cheddar. These cheeses melt well and add depth to the flavor. Another fun tip is to sprinkle more cheese on top right before baking. This way, you achieve a gooey, cheesy crust that is hard to resist. For a stronger garlic taste, use fresh garlic. Mince a few cloves and mix them into the dough. You can also brush melted garlic butter over the breadsticks right after they come out of the oven. This adds a rich garlic flavor that pairs perfectly with the cheese. The texture of breadsticks is key to their success. Use high-protein flour for a chewier bite. Kneading the dough well also helps develop gluten, making them soft yet sturdy. Letting the dough rise properly is crucial, too. A full hour allows the breadsticks to become fluffy. Lastly, bake them until golden brown. This gives a nice contrast to the soft inside. For the full recipe, check out the details above. Enjoy your cheesy garlic breadsticks! {{image_4}} You can add herbs to your cheesy garlic breadsticks for extra flavor. Try mixing in fresh or dried herbs into the dough. Basil, oregano, or thyme work well. You can also sprinkle fresh herbs on top before baking. This adds a nice pop of color and taste. You can even brush the sticks with herb-infused olive oil after baking for more depth. While mozzarella and Parmesan are classic, you can use other cheeses too. Cheddar adds a sharp flavor. Gouda gives a creamy twist. For a spicy kick, try pepper jack. Mix and match these cheeses to create a blend you love. Just remember to keep the cheese to about a cup to avoid overpowering the breadstick. If you need a gluten-free option, you can still enjoy these breadsticks. Use a gluten-free flour blend in place of all-purpose flour. Make sure it has a good balance of starches and proteins for the best texture. You might also need to adjust the liquid. Adding a bit more water can help keep the dough from being too dry. To keep your cheesy garlic breadsticks fresh, store them in an airtight container. Once they cool, place them in a container lined with a paper towel. This helps absorb moisture and keeps them crispy. If you don’t have a container, wrap them tightly in plastic wrap or aluminum foil. They stay good for up to three days at room temperature or in the fridge. When you want to enjoy your leftovers, reheating is key. Preheat your oven to 350°F (175°C). Place the breadsticks on a baking sheet and heat for about 10 minutes. This will restore the crispy texture. If you’re in a hurry, you can use a microwave, but be careful. Heat them for only 15-20 seconds. Microwaving too long makes them chewy. If you want to save some breadsticks for later, freezing is a great option. First, let them cool completely. Next, wrap each breadstick in plastic wrap. Then, place them in a freezer bag or an airtight container. They can last up to three months in the freezer. To enjoy, simply thaw them in the fridge overnight and reheat as mentioned above. For the full recipe, check out the instructions earlier in the article. Yes, you can prepare Cheesy Garlic Breadsticks ahead of time. Make the dough and let it rise. After it rises, you can shape the sticks and store them in the fridge. When you're ready, just bake them. This helps save time for busy days. Cheesy Garlic Breadsticks pair well with many dishes. They are great with marinara sauce for dipping. You can also serve them with a fresh salad or soup. Their cheesy flavor adds a fun twist to any meal. To get a crispy crust, preheat your oven well. Use a baking stone or a metal pan, as they conduct heat better. When you bake, make sure the breadsticks have enough space. This allows hot air to flow around them. You can also brush the tops with olive oil before baking for extra crunch. Cheesy garlic breadsticks are simple to make and hard to resist. We covered the key ingredients, from essential items to tasty add-ins. You learned how to activate yeast, mix dough, and create the perfect texture. Tips helped you boost cheese and garlic flavors. We explored fun variations and smart storage methods for leftovers. Now, you have all the tools to enjoy these amazing breadsticks anytime. Get creative in your kitchen, and share these delicious treats with friends!

Cheesy Garlic Breadsticks

Craving a cheesy snack that's simple to make? Discover how to whip up Cheesy Garlic Breadsticks that are perfect for sharing! This step-by-step recipe guides you through mixing, kneading, and baking golden, delicious breadsticks packed with flavorful cheese and garlic. With optional add-ins to customize your treat, these are sure to delight. Click through to explore the full recipe and indulge in this savory delight today!

Ingredients
  

1 cup warm water (approximately 110°F)

2 teaspoons active dry yeast

1 tablespoon granulated sugar

2 ½ cups all-purpose flour

1 teaspoon salt

3 tablespoons olive oil

2 teaspoons garlic powder

1 teaspoon Italian seasoning

1 cup shredded mozzarella cheese

¼ cup grated Parmesan cheese

Fresh parsley, chopped (for garnish)

Instructions
 

In a medium-sized mixing bowl, combine the warm water, active dry yeast, and sugar. Stir gently and allow it to sit for about 5 minutes until it becomes frothy, indicating the yeast is activated.

    In a large mixing bowl, whisk together the all-purpose flour and salt until well blended. Create a well in the center of the flour mixture and pour in the yeast mixture followed by the olive oil.

      Using a wooden spoon or your hands, mix the ingredients until they come together to form a dough. Transfer the dough to a floured surface and knead it for about 5-7 minutes, or until the dough is smooth and elastic.

        Shape the kneaded dough into a ball and place it in a greased bowl. Cover the bowl with a kitchen towel or plastic wrap, and let it rise in a warm area for approximately 1 hour, or until it has doubled in size.

          While the dough is rising, preheat your oven to 400°F (200°C).

            After the dough has risen, gently punch it down to release the air. Transfer it to a lightly floured surface and roll it out into a rectangle approximately ½ inch thick.

              Evenly sprinkle the garlic powder and Italian seasoning over the rolled-out dough for flavor. Next, generously cover the surface with the shredded mozzarella and grated Parmesan cheese, ensuring every bite is cheesy.

                Using a sharp knife or pizza cutter, slice the dough into strips about 1 inch wide. Transfer the strips to a parchment-lined baking sheet, making sure to space them slightly apart for even baking.

                  Bake in the preheated oven for 15-20 minutes, or until the breadsticks are golden brown and the cheese is bubbling and slightly crispy.

                    Once baked, remove the breadsticks from the oven and allow them to cool for a few minutes. Finish by garnishing with freshly chopped parsley before serving.

                      Prep Time: 15 mins | Total Time: 1 hr 35 mins | Servings: 12 breadsticks

                        - Presentation Tips: For a rustic presentation, arrange the warm breadsticks in a basket lined with parchment paper. Serve alongside a small bowl of marinara sauce or garlic butter for delightful dipping!

                          Leave a Comment

                          Recipe Rating