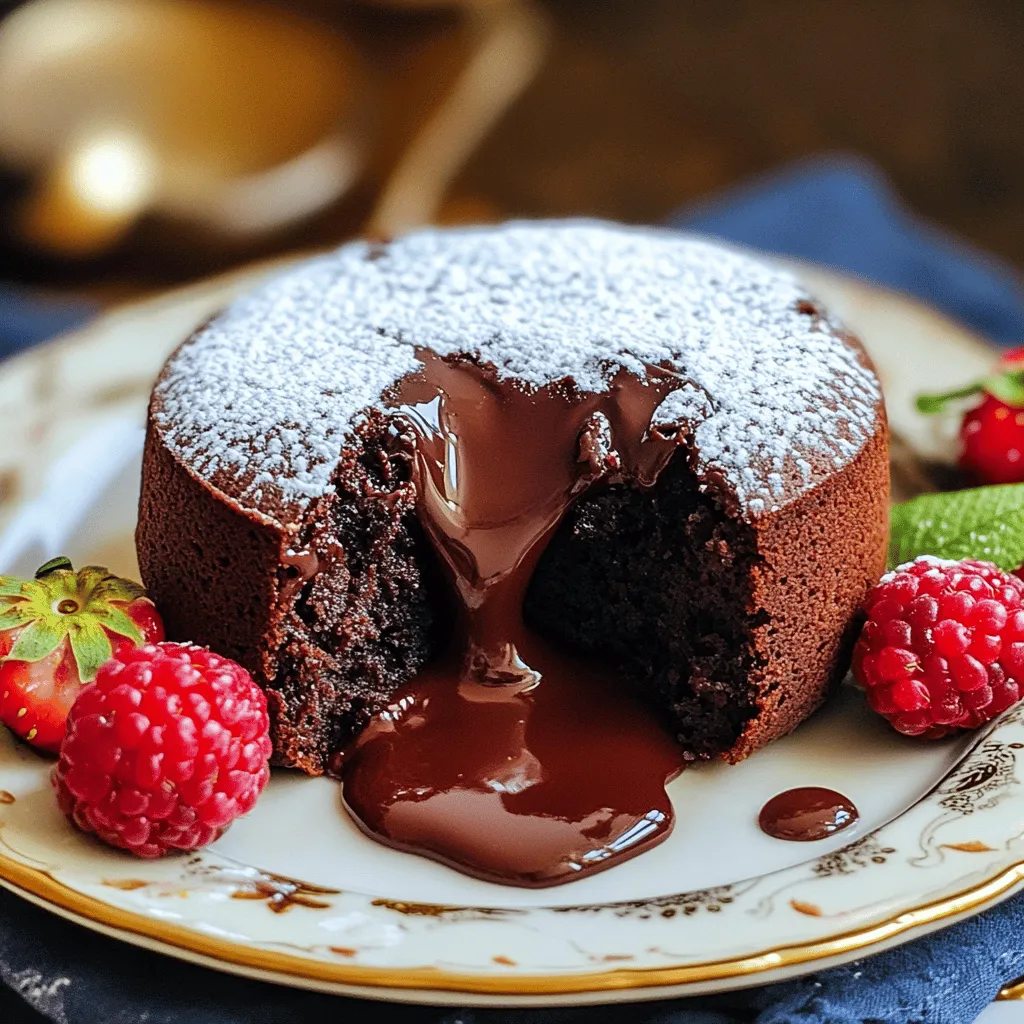
Indulge your senses with a Chocolate Lava Cake that’s rich and decadent! This delightful dessert boasts a warm, gooey center that flows like molten chocolate bliss. Whether you’re a seasoned baker or a novice in the kitchen, I promise you can conquer this recipe. In this guide, I’ll share essential tips, variations, and common mistakes to watch out for. Let’s dive into the delicious world of chocolate!
Ingredients
List of Essential Ingredients
To make a delicious chocolate lava cake, you need just a few key items:
– 1/2 cup unsalted butter (plus extra for greasing)
– 1 cup semi-sweet chocolate chips
– 2 large eggs
– 2 large egg yolks
– 1/4 cup granulated sugar
– 2 tablespoons all-purpose flour
– 1/2 teaspoon pure vanilla extract
– A pinch of salt
These ingredients work together to create a rich and gooey center, making the cake truly special.
Optional Garnishes and Accompaniments
While the cake is rich on its own, some garnishes can elevate it further:
– Powdered sugar for dusting
– Fresh berries for a pop of color
– A scoop of vanilla ice cream that melts into the warm cake
These extras add flavor and make your dessert look stunning, perfect for impressing guests.
Ingredient Substitutions
You can adjust some ingredients if needed:
– Use dark chocolate chips for a more intense flavor.
– Swap granulated sugar with brown sugar for a richer taste.
– For a gluten-free option, use a gluten-free flour blend.
– If you want a dairy-free version, try coconut oil in place of butter.
These substitutions can help you tailor the recipe to your dietary needs while keeping it delicious.
Step-by-Step Instructions
Prepping the ramekins
Start by preheating your oven to 425°F (220°C). Grab four 6-ounce ramekins. Use some unsalted butter to grease the insides well. Then, dust a little flour inside each ramekin. This helps the cakes come out easily after baking.
Melting the chocolate mixture
In a microwave-safe bowl, put your butter and chocolate chips together. Heat it in the microwave for 30 seconds. Stir the mix well. If it’s not melted, keep heating it in 15-second bursts. Stir each time until it becomes smooth. Let it cool for a few minutes. This step is key to avoid cooking the eggs later.
Combining the ingredients
While the chocolate mixture cools, take another bowl. Whisk the eggs, egg yolks, and sugar together. Keep whisking until the mix gets thick and pale, about 3 minutes. Then, gently fold the cooled chocolate mixture into this egg mix. Be careful not to deflate it.
Baking the lava cakes
Next, sift the flour, vanilla, and a pinch of salt over the batter. Fold these dry ingredients in gently. You want to mix until just combined. Now, fill each ramekin about three-quarters full with batter. Place them on a baking sheet for easy handling. Bake them for 12-14 minutes. The edges should be firm while the center stays soft.
Serving suggestions
After baking, let the ramekins sit for 1 minute. Use a butter knife to run around the edges. Carefully flip each ramekin onto a plate and tap gently to release the cake. For serving, dust each cake with powdered sugar. Add some fresh berries on the side for color. If you want to be extra indulgent, top it with vanilla ice cream. It will melt into the warm cake, creating a delightful treat.
Tips & Tricks
Achieving the perfect molten center
To get that ooey-gooey center, timing is key. Bake the cakes for just 12-14 minutes. The edges should be firm, but the center needs to be soft. If you bake too long, the center will set. Use a toothpick to test. Insert it into the edge, not the center. If it comes out mostly clean, it’s time to take them out.
Common mistakes to avoid
One common mistake is overmixing the batter. This will make the cakes dense. Instead, gently fold the chocolate into the egg mixture. Another mistake is not greasing the ramekins well. If they stick, you won’t get that perfect flip. Lastly, don’t skip resting the cakes after baking. This helps the structure before you invert them.
Tips for a beautiful presentation
Presentation makes a big difference. Dust each cake with powdered sugar for a snowy effect. Add fresh berries to the side for color and freshness. You can also serve with a scoop of vanilla ice cream. The warm cake and cold ice cream create a delightful contrast.
Variations
Flavorful twists (e.g., raspberry, espresso)
Adding flavors to chocolate lava cake can make it even more exciting. You can stir in some raspberry puree for a fruity touch. The tartness of raspberries pairs well with rich chocolate. For a coffee kick, mix in espresso powder. This will enhance the chocolate taste and give your cake a bold flavor. You can also try adding orange zest for a citrusy twist. Each of these flavors brings a new life to the classic recipe.
Gluten-free options
If you want a gluten-free version, it’s simple. Replace all-purpose flour with almond flour or gluten-free flour. Both options work well and keep the cake moist. Just make sure your chocolate chips are gluten-free too. This way, you can enjoy a delicious treat without worries. The texture may differ slightly, but the flavor remains rich and delightful.
Vegan alternatives
For a vegan chocolate lava cake, swap eggs with flaxseed meal. Mix one tablespoon of flaxseed meal with three tablespoons of water. Let it sit for five minutes to thicken. You can also use dairy-free chocolate and coconut oil instead of butter. This keeps the cake moist and tasty. Remember that the cooking time might change slightly, so keep an eye on the cakes as they bake. Try these options to enjoy a rich dessert that fits your diet.
Storage Info
How to store leftover lava cakes
After enjoying your chocolate lava cake, you may have some left. To store these treats, let them cool completely. Place them in an airtight container. This keeps them fresh for up to two days in the fridge. If you want to enjoy them later, freezing is a great option.
Reheating suggestions
To reheat your lava cakes, take them out of the fridge. Place them in the microwave for about 10 to 15 seconds. Check if they are warm enough. You want them hot but not overly cooked. If you froze them, let them thaw overnight in the fridge first. Then, follow the same reheating method.
Best practices for freezing
For freezing, wrap each lava cake tightly in plastic wrap. Then, place them in a freezer-safe bag or container. This helps prevent freezer burn. You can freeze them for up to three months. When you’re ready to eat, just thaw and reheat. Enjoy your delicious chocolate lava cake later!
FAQs
Can I make chocolate lava cake ahead of time?
Yes, you can prepare the batter ahead. Mix everything and pour it into greased ramekins. Cover them and store in the fridge for up to a day. When you’re ready, bake them straight from the fridge. This keeps the cakes fresh and ready to bake.
Why did my lava cake not ooze?
If your cake did not ooze, it might have baked too long. Bake it for 12-14 minutes only. The edges should look firm, but the center must stay soft. If the center is set, it won’t ooze. Also, ensure the oven temperature is accurate.
What can I serve with chocolate lava cake?
You can serve chocolate lava cake with a scoop of vanilla ice cream. Fresh berries add a nice touch, too. A drizzle of chocolate sauce or a sprinkle of powdered sugar makes it look fancy. Pairing it with whipped cream can also enhance the dessert.
You now know all about chocolate lava cakes. We covered key ingredients, from must-haves to swaps. You learned step-by-step how to prep, bake, and serve these rich desserts. I shared tips for that perfect molten center and common mistakes to avoid. We also explored fun flavor twists and storage tips.
Enjoy making your lava cakes and delight in every bite! Trust me, they are worth it.