Craving a quick and delicious treat? Look no further! This Chocolate Peanut Butter Mug Cake is your answer. It’s easy to make and perfect for satisfying your sweet tooth in minutes. With just a few simple ingredients and straightforward steps, you’ll whip up a warm, gooey dessert that’s sure to impress. Let’s dive into how you can create this tasty mug cake, even if you're short on time!
Why I Love This Recipe
- Quick and Easy: This mug cake can be made in just 5 minutes, making it a perfect dessert for a busy day or a late-night craving.
- Decadent Flavor: The combination of chocolate and peanut butter creates a rich, indulgent flavor that satisfies any sweet tooth.
- Customizable: You can easily tailor this recipe to your taste by adding nuts, using different types of nut butter, or incorporating extra chocolate chips.
- Single Serving: This recipe is designed for one, so you can enjoy a guilt-free treat without the temptation of leftovers.
Ingredients
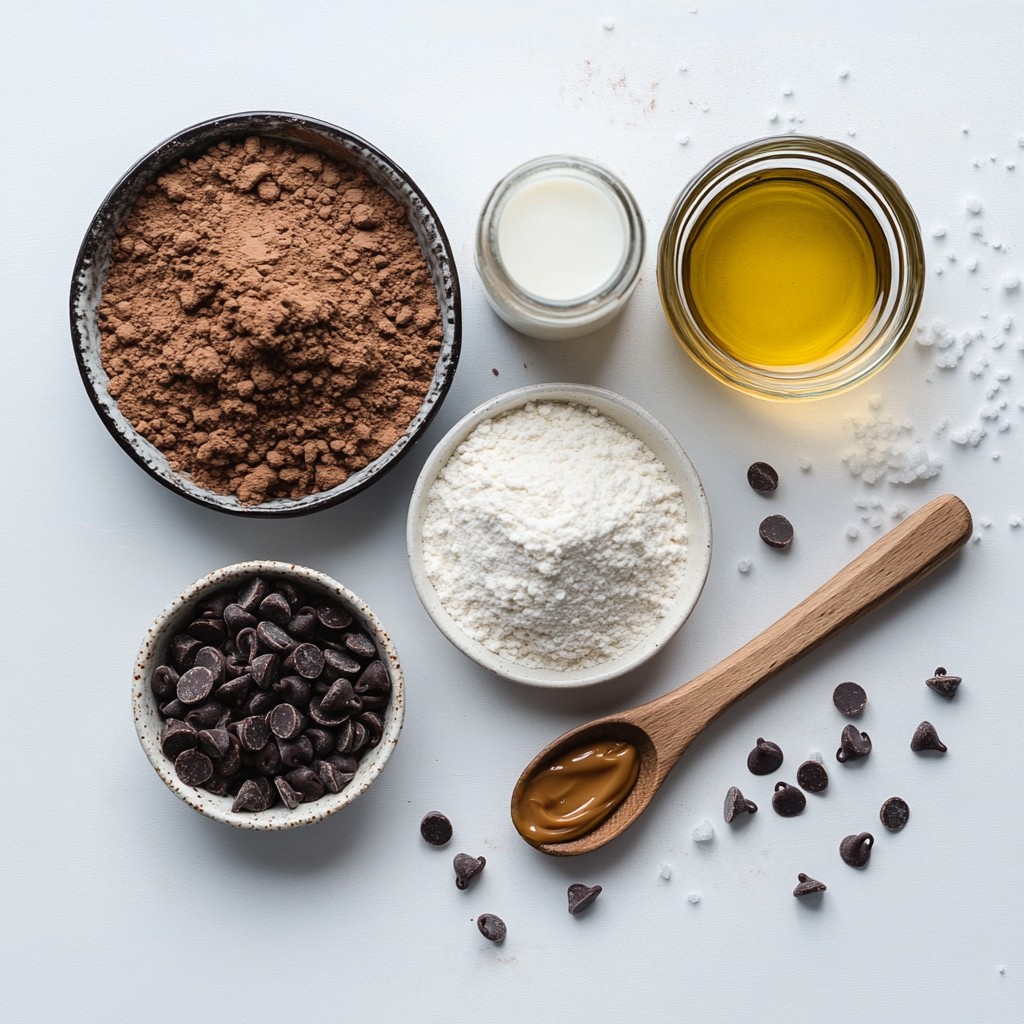
List of Ingredients
To make your chocolate peanut butter mug cake, gather these simple items:
- 4 tablespoons all-purpose flour
- 2 tablespoons unsweetened cocoa powder
- 3 tablespoons granulated sugar
- 1/8 teaspoon baking powder
- A pinch of salt
- 3 tablespoons milk (your choice of dairy or non-dairy)
- 2 tablespoons creamy or crunchy peanut butter
- 1 tablespoon vegetable oil (or melted coconut oil)
- 1/4 teaspoon pure vanilla extract
- Optional: 1 tablespoon chocolate chips
Ingredient Substitutions
You can easily swap some ingredients. If you want gluten-free, use gluten-free flour. For a vegan option, use almond or oat milk instead of dairy milk. If you don’t have cocoa powder, try carob powder for a different taste. Peanut butter can be replaced with almond or sunflower butter if needed. For oil, you can use melted coconut oil for a fun twist.
Sourcing Quality Ingredients
For the best flavor, choose high-quality ingredients. Look for all-purpose flour that is fresh and finely ground. Unsweetened cocoa powder should be rich and dark for deep chocolate flavor. Use pure vanilla extract rather than imitation for a true taste. When it comes to peanut butter, choose one that has no added sugar or oils for a healthier treat. Checking labels helps ensure you get the best quality for your mug cake.
Step-by-Step Instructions
Preparing the Mug
Start by grabbing a microwave-safe mug. Choose one that holds about 12 ounces. This size helps the cake rise without spilling. Make sure it is clean and dry before you begin.
Mixing Dry Ingredients
Add these dry ingredients to the mug:
- 4 tablespoons all-purpose flour
- 2 tablespoons unsweetened cocoa powder
- 3 tablespoons granulated sugar
- 1/8 teaspoon baking powder
- A pinch of salt
Use a small whisk or fork to mix them well. Stir until there are no clumps. This step is key for a smooth cake.
Combining Wet Ingredients
Now it’s time for the wet ingredients. Pour in:
- 3 tablespoons milk (your choice)
- 2 tablespoons creamy or crunchy peanut butter
- 1 tablespoon vegetable oil (or melted coconut oil)
- 1/4 teaspoon pure vanilla extract
Mix these together with your fork. Scrape the sides of the mug to ensure everything is combined. You want a smooth and lump-free batter. If you like, fold in 1 tablespoon of chocolate chips for extra flavor.
Cooking Time and Advice
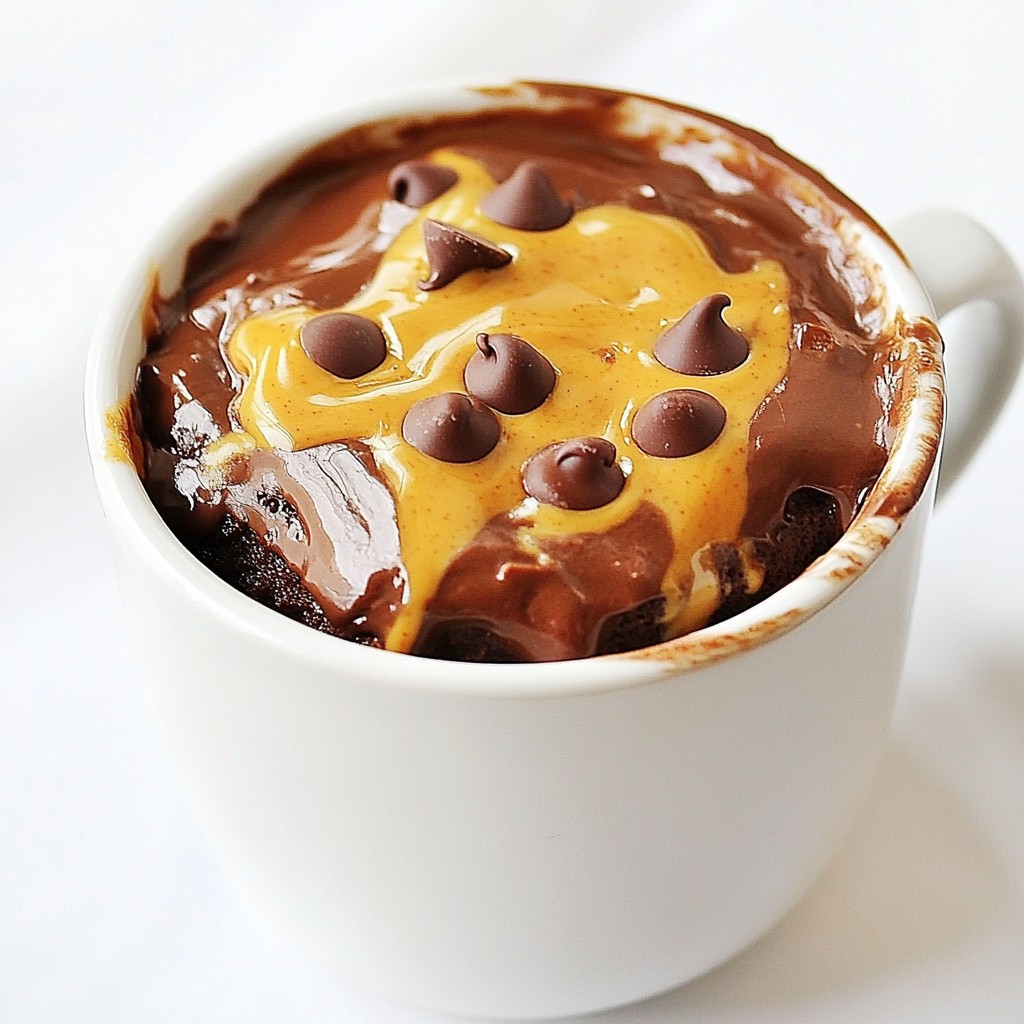
Microwave the mug on high for 30 to 40 seconds. Watch closely while it cooks. The cake should rise and look set in the center. If you cook it too long, it may become dry. Once done, let it cool for about 1-2 minutes. This helps the flavors come together. Top with a dollop of peanut butter or whipped cream for a tasty treat. Enjoy your warm and gooey creation!
Tips & Tricks
Perfecting the Texture
To get the best texture for your mug cake, watch the cooking time closely. Microwaves vary, so start with 30 seconds. If it's not set, add a few more seconds. You want it soft and moist, not dry. Mixing well is key. Make sure there are no lumps in the batter. This helps the cake rise evenly. For a richer taste, use creamy peanut butter. It makes the cake smooth and tasty.
Serving Suggestions
You can serve your mug cake right in the mug. It's fun and cozy! Top it with a dollop of peanut butter or whipped cream. Add chocolate chips for extra sweetness. If you like, sprinkle some cocoa powder on top. This adds a nice touch. You can also pair it with a scoop of ice cream for a treat that feels fancy.
Common Mistakes to Avoid
One common mistake is overcooking the cake. This makes it dry and crumbly. Check it often to prevent this. Another mistake is not mixing well. Lumps can lead to uneven cooking. Lastly, don’t skip the salt! It enhances the chocolate flavor. Remember these tips for a perfect mug cake every time.
Pro Tips
- Use a Larger Mug: A 12 oz mug is ideal to prevent overflow while the cake rises in the microwave.
- Check for Doneness: Microwaves vary, so check your cake at 30 seconds. It should be set but slightly moist in the center.
- Experiment with Nut Butters: Try almond butter or cashew butter for different flavors and textures in your mug cake.
- Customize Your Toppings: Top with whipped cream, crushed peanuts, or a drizzle of chocolate sauce for extra indulgence.
Variations
Alternate Flavor Additions
You can change the flavor of your mug cake easily. Try using almond butter instead of peanut butter for a nutty twist. You can also mix in different extracts. For example, use mint extract for a fresh taste. Add a pinch of cinnamon for warmth or a splash of coffee for a mocha kick. If you love fruit, fold in some mashed bananas or chopped strawberries. These small changes can create new and exciting flavors.
Dietary Adjustments (Gluten-Free, Vegan)
To make this recipe gluten-free, use a gluten-free all-purpose flour. Look for brands that work well in baking. For a vegan option, replace the milk with almond milk or oat milk. Use a plant-based butter instead of regular peanut butter. This way, you can enjoy a delicious treat without any animal products.
Flavor Pairing Suggestions
Pair your chocolate peanut butter mug cake with some great sides. A scoop of vanilla ice cream on top adds creaminess. Fresh berries can give a fruity and tart contrast. You might also try a drizzle of caramel sauce for a sweet touch. Each pairing enhances the cake and makes it even more enjoyable.
Storage Info
Storing Leftovers
If you have extra mug cake, store it in an airtight container. Place it in the fridge. It stays fresh for up to two days. Cover it well to keep moisture in. This helps the cake stay soft and tasty.
Reheating Instructions
To reheat your mug cake, pop it in the microwave. Heat it for about 10 to 15 seconds. Check if it's warm enough. If it’s not, heat it a few more seconds. Be careful not to overheat. This can make the cake dry.
Freezing Options
You can freeze the mug cake if you want to save it for later. Wrap it tightly in plastic wrap. Then, place it in a freezer bag. It can stay in the freezer for up to a month. When you're ready to eat it, let it thaw in the fridge overnight. Then reheat it in the microwave as usual.
FAQs
Can I use a different mug size?
Yes, you can use a different mug size. However, a 12 oz mug works best. If your mug is smaller, the cake might overflow. If larger, the cake may cook unevenly. Just keep an eye on it while it cooks.
What if I don’t have baking powder?
If you don’t have baking powder, you can use baking soda. Use 1/3 of the amount. Add a splash of vinegar or lemon juice to help it rise. This will keep your cake fluffy and light.
How can I make it less sweet?
To make it less sweet, reduce the sugar to 1 tablespoon. You can also skip the chocolate chips. This will balance the flavors without losing the cake's charm.
Can I make multiple servings?
Yes, you can make multiple servings! Just multiply the ingredients by the number of servings you need. Use separate mugs for each serving. Make sure to adjust the cooking time as needed. Each mug may need a few extra seconds to cook well.
This blog covers all you need for a great mug recipe. We discussed ingredients, substitutions, and how to find quality items. Next, we went through step-by-step instructions for preparing and cooking your dish. I shared tips for the perfect texture and serving ideas. We explored fun variations and how to store leftovers. Lastly, I answered common questions to help you.
You now have the tools to create a delicious mug meal. Enjoy experimenting!