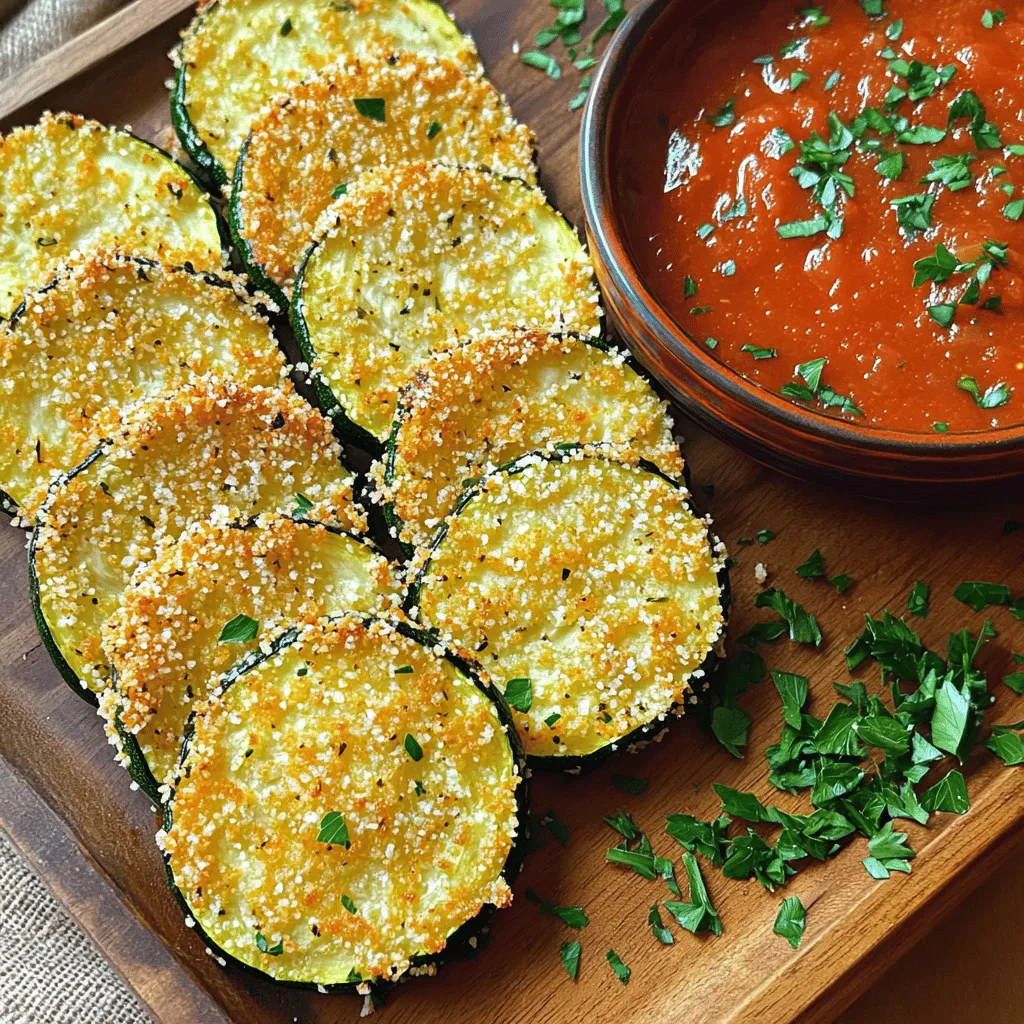
Looking for a quick and healthy snack? Crispy Baked Zucchini Slices are your answer! These tasty treats are easy to make and perfect for any time of day. With just a few simple ingredients, you can have a crunchy, satisfying snack ready in no time. Join me as we dive into this easy recipe, packed with goodness and flavor that will amaze your taste buds! Let’s get started!
Ingredients
Complete Ingredients List
– 2 medium zucchinis
– 1 cup panko breadcrumbs
– 1/2 cup grated Parmesan cheese
– 1 teaspoon garlic powder
– 1 teaspoon onion powder
– 1/2 teaspoon smoked paprika
– 2 large eggs
– Sea salt and freshly cracked black pepper
– Olive oil spray
Zucchini is a great veggie. It is low in calories and high in nutrients. A serving can have about 20 calories. The fiber helps you feel full.
Nutrition Information
– Calories per serving: 20
– Macronutrients breakdown:
– Carbohydrates: 3g
– Protein: 2g
– Fat: 1g
– Health benefits of zucchini:
– Rich in vitamins A and C
– Contains antioxidants for better health
– Good for heart health and digestion
These baked zucchini slices are not just tasty; they pack a healthy punch too! Using fresh, seasonal zucchini boosts your dish’s flavor and nutrition. I often choose organic zucchini, as it tastes better and is better for the earth.Enjoy these crunchy bites guilt-free!
Step-by-Step Instructions
Preparation Steps
1. First, preheat your oven to 425°F (220°C). This step is key to getting crispy slices.
2. Next, prepare your baking sheet. Line it with parchment paper. This helps prevent sticking and makes cleanup easy.
3. Now, in a shallow bowl, mix the panko breadcrumbs, grated Parmesan cheese, garlic powder, onion powder, smoked paprika, sea salt, and freshly cracked black pepper. Make sure everything is well combined.
Coating the Zucchini Slices
1. In another bowl, crack the eggs and beat them until smooth. This mixture will help the crumbs stick.
2. Take a zucchini slice and dip it into the egg mixture. Let any extra egg drip off.
3. Then, coat the slice with the breadcrumb mixture. Press the crumbs onto the zucchini to ensure they stick well.
Baking Instructions
1. Arrange the coated zucchini slices on the prepared baking sheet. Make sure they are in a single layer and don’t touch each other. This helps them crisp up.
2. Lightly spray the tops with olive oil. This step gives you a nice golden finish.
3. Place the baking sheet in the oven and bake for 20-25 minutes. Halfway through, carefully flip the slices. This helps them cook evenly and get golden brown.
4. Once baked, take the zucchini out and let them sit for a few minutes. They will be hot and extra crispy!Enjoy your tasty, crispy baked zucchini slices!
Tips & Tricks
Achieving Maximum Crispiness
To get that perfect crunch, use olive oil spray. This helps the zucchini slices turn golden and crisp. A light coating ensures they don’t get soggy. Without it, your slices may come out soft or chewy.
For even cooking, make sure to spread the slices out. Place them in a single layer. If they touch, they will steam instead of bake. Flip them halfway through cooking for a nice, even brown all over.
Serving Suggestions
These crispy zucchini slices pair well with dips. Try warm marinara sauce or a tangy ranch. You can also serve them with a creamy garlic dip for a tasty twist. Garnish with fresh herbs like parsley or basil for a pop of color. This makes your dish look even more inviting.
Common Mistakes to Avoid
One big mistake is overcrowding the baking sheet. This keeps the zucchini slices from crisping up. Always leave space between each slice.
Another common error is not pressing the breadcrumbs enough. Make sure you press the crumbs onto the slices firmly. This step helps the coating stick and gives you that satisfying crunch.

Variations
Flavor Variations
You can change the taste of your crispy baked zucchini slices easily. Adding herbs makes them more flavorful. Try using:
– Oregano
– Basil
– Thyme
– Rosemary
You can also spice things up. Adding a dash of cayenne pepper or chili powder gives a nice kick. Experiment with different spices to find your favorite mix!
Dietary Adjustments
If you need a gluten-free option, use almond flour or crushed nuts instead of panko breadcrumbs. They still give a nice crunch. For a vegan version, replace the eggs with a flaxseed mixture or unsweetened applesauce. Nutritional yeast can replace Parmesan cheese for a cheesy flavor without dairy.
Using Other Vegetables
You can enjoy this recipe with more than just zucchini. Try these vegetables:
– Eggplant
– Yellow squash
– Sweet potatoes
Slice them like zucchini, and follow the same steps. Each vegetable brings a unique taste and texture, making your snack even more fun.
Storage Info
Storing Leftovers
To store your crispy baked zucchini slices, place them in an airtight container. Keep them in the fridge for up to three days. To keep them crispy, avoid stacking the slices. Instead, lay them flat in a single layer. You can also place a paper towel in the container to absorb moisture and help maintain their crunch.
Reheating Instructions
When you want to enjoy leftover zucchini slices, reheat them in the oven. Preheat your oven to 375°F (190°C). Place the slices on a baking sheet in a single layer. Bake for about 10-12 minutes. This will help them regain some crunch. Avoid using the microwave, as it can make them soggy.
Freezing Guidelines
If you want to save some slices for later, you can freeze them. First, allow the zucchini slices to cool completely. Then, spread them on a baking sheet in a single layer. Freeze them for a few hours until firm. After that, transfer them to a freezer-safe bag. They can stay frozen for up to three months.
To enjoy them later, simply thaw them in the fridge overnight. Reheat them in the oven to bring back their crispy texture.
FAQs
How do I make sure the zucchini stays crispy?
To keep your zucchini slices crispy, follow these tips:
– Choose fresh zucchini: Look for firm, bright green zucchinis. They hold moisture better.
– Slice evenly: Cut your zucchini into 1/4-inch rounds. This size ensures even cooking.
– Use panko breadcrumbs: Panko gives a crunchier texture than regular breadcrumbs. It’s a game changer!
– Dry the slices: Pat the zucchini with a paper towel before coating. Removing moisture helps them crisp up.
– Space them out: When placing on the baking sheet, ensure no slices touch. This allows hot air to circulate.
– Olive oil spray: A light spray of olive oil helps them brown and crisp nicely.
Can I use different types of cheese?
Yes, you can switch up the cheese! Here are some tasty options:
– Mozzarella: For a gooey, cheesy bite.
– Cheddar: Adds a sharp, bold flavor.
– Feta: Crumbled feta gives a tangy twist.
– Parmesan blend: Mixing different aged cheeses can enhance the flavor.
Feel free to experiment and find your favorite!
How can I make this recipe in advance?
Making crispy zucchini slices ahead is easy:
– Prep the zucchini: Cut and coat the slices earlier in the day.
– Chill them: Place the coated slices on a baking sheet. Cover and refrigerate for up to 4 hours.
– Bake before serving: When ready, just pop them in the oven. They’ll taste fresh and crispy!
Can I air fry these zucchini slices instead?
Absolutely! Air frying gives a great crunch. Here’s how:
1. Preheat your air fryer to 400°F (200°C).
2. Follow the coating steps as usual.
3. Place the slices in the air fryer basket in a single layer. Don’t overcrowd!
4. Air fry for about 10-12 minutes, flipping halfway through. Check for a golden color.
You’ll love the quick cooking time and delicious results! Enjoy your crispy baked zucchini slices.
This blog post covered how to make delicious baked zucchini slices. We explored the full list of ingredients, step-by-step instructions, and tips for crispy results. I shared variations, storage tips, and answers to common questions. Making these zucchini slices can be fun and easy. With the right techniques and ideas, you can create a tasty dish. Enjoy experimenting with flavors and serving options to make it your own! Dive in and get cooking!


