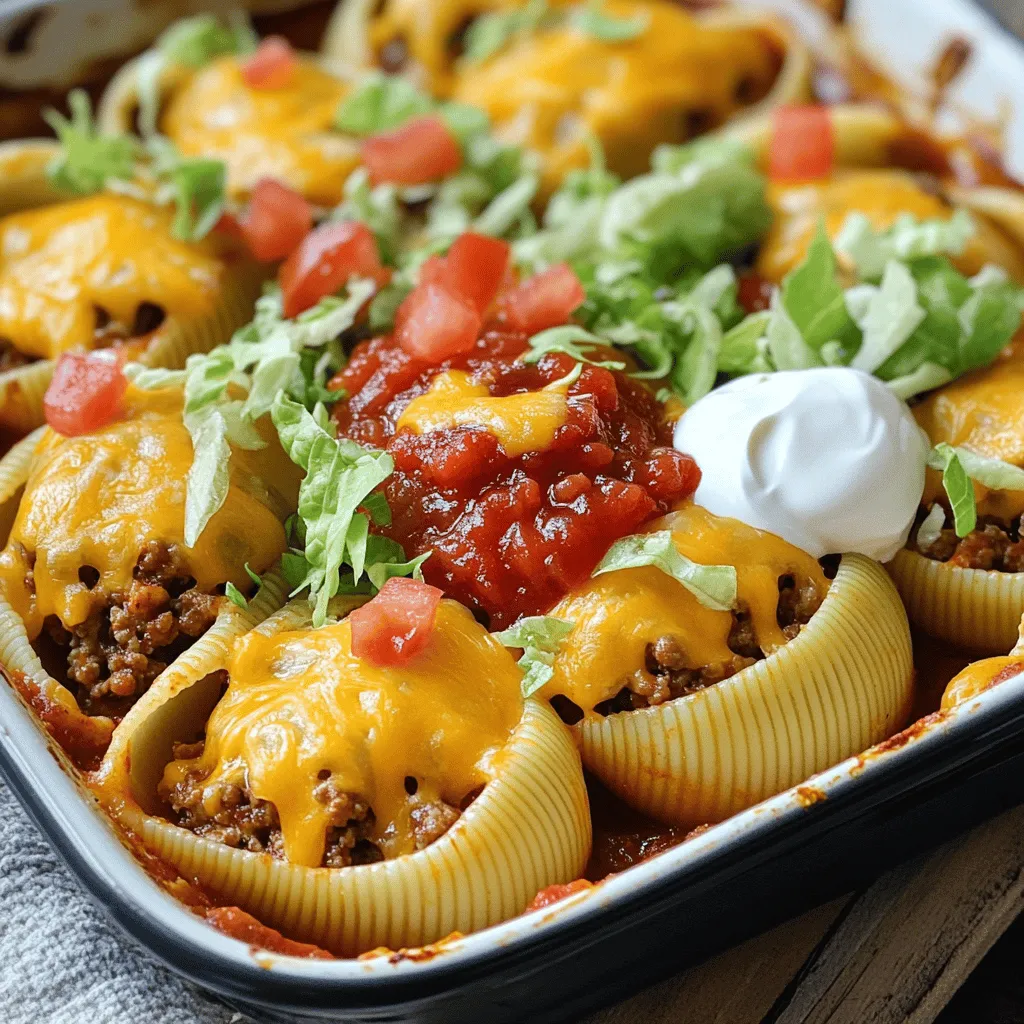
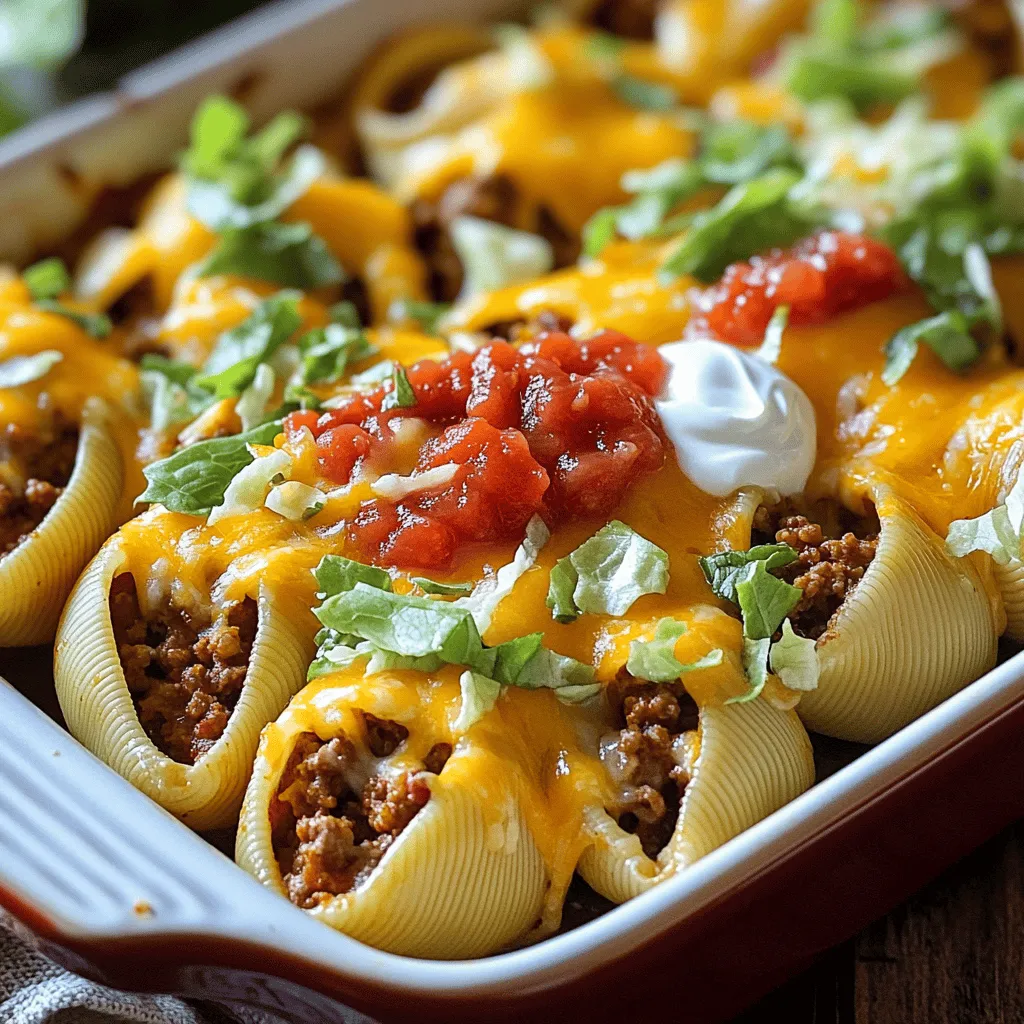
Are you craving a delicious twist on taco night? Crispy Taco Stuffed Shells are the answer! This easy recipe combines bold flavors in a fun pasta shell. You’ll learn how to prepare a tasty filling and achieve that perfect crispy bite. With simple steps and helpful tips, you’ll impress your family and friends. Let’s dive into this fun dish that’s sure to be a hit at your dinner table!
Ingredients
List of Required Ingredients
To make crispy taco stuffed shells, gather these key ingredients:
– 12 jumbo pasta shells
– 1 lb ground beef (or ground turkey)
– 1 tablespoon taco seasoning
– 1 can (15 oz) refried beans
– 1 cup salsa (divided)
– 1 cup shredded cheddar cheese
– 1 cup shredded lettuce
– 1 medium tomato, diced
– 1/2 cup sour cream
– 2 tablespoons olive oil
– Salt and pepper to taste
Optional Ingredients and Substitutions
Feel free to customize your shells with these options:
– Black beans for added fiber
– Corn for sweetness and crunch
– Ground chicken or plant-based meat for protein
– Pepper jack cheese for a spicy kick
– Avocado for creaminess
– Cilantro for freshness
Recommended Tools for Preparation
Having the right tools makes cooking easier. Use these:
– Large pot for boiling pasta
– Skillet for cooking the meat
– Baking dish for assembling the shells
– Spoon for stuffing the shells
– Mixing bowl for combining ingredients
– Foil to cover the baking dish
These ingredients and tools will help you create a dish that is both fun and tasty.
Step-by-Step Instructions
Preparing the Ingredients
First, gather all your ingredients. You will need:
– 12 jumbo pasta shells
– 1 lb ground beef (or ground turkey)
– 1 tablespoon taco seasoning
– 1 can (15 oz) refried beans
– 1 cup salsa (divided)
– 1 cup shredded cheddar cheese
– 1 cup shredded lettuce
– 1 medium tomato, diced
– 1/2 cup sour cream
– 2 tablespoons olive oil
– Salt and pepper to taste
Once you have everything, wash the tomato and lettuce. Dice the tomato into small pieces. Shredding the lettuce makes it easy to top the shells later. This step helps in building layers of flavor.
Cooking the Pasta and Filling
Now, let’s cook. Start by preheating your oven to 375°F (190°C). Fill a large pot with water, add a pinch of salt, and bring it to a boil. Carefully add the jumbo pasta shells. Cook according to package instructions until they are al dente. This usually takes around 8-10 minutes.
Once cooked, drain the shells and set them aside to cool. While the pasta cools, heat a large skillet over medium heat. Add the olive oil and then the ground beef (or turkey). Cook for about 5-7 minutes until the meat is browned and fully cooked.
Next, lower the heat. Stir in the taco seasoning and refried beans. Mix well and let it cook for another 2-3 minutes. This ensures all the flavors blend nicely.
Assembling and Baking the Dish
Now comes the fun part: assembly! In a baking dish, spread half of the salsa on the bottom. This helps prevent sticking and adds flavor.
Take each pasta shell and fill it with the beef mixture using a spoon. Place all the stuffed shells seam-side up in the baking dish. Once they are all in, drizzle the remaining salsa over the top. Finish by sprinkling the shredded cheddar cheese evenly on top.
Cover the dish tightly with foil. Put it in the oven and bake for 20 minutes. After that, remove the foil and bake for another 10 minutes. This will make the cheese melt and get bubbly.
Once done, take it out of the oven and let it cool for a few minutes. Serve the shells topped with fresh shredded lettuce, diced tomatoes, and a dollop of sour cream. Enjoy your crunchy taco stuffed shells!
Tips & Tricks
Perfecting the Filling Flavor
To make the filling tasty, use quality meat. I like ground beef or turkey. Add taco seasoning to boost the flavor. You can also mix in chopped onions or bell peppers for extra crunch. Don’t forget to season well with salt and pepper. For a rich taste, use refried beans. They add creaminess and help bind the filling.
Achieving a Crispy Texture
For a crispy top, bake the shells uncovered for the last 10 minutes. This step lets the cheese get bubbly and slightly golden. If you want even more crunch, broil the shells for 1-2 minutes at the end. Just watch them closely to avoid burning. Using a bit of olive oil on top can help too. It adds flavor and promotes browning.
Serving Suggestions and Presentation Ideas
Serve the crispy taco stuffed shells in colorful bowls. Top them with fresh lettuce, diced tomatoes, and sour cream. Add avocado slices for creaminess or lime zest for a bright flavor. You can also sprinkle chopped cilantro for a fresh finish. For a fun twist, serve with tortilla chips on the side for extra crunch.

Variations
Vegetarian or Vegan Version
To make a vegetarian or vegan version, swap the meat for lentils or black beans. Cook them with taco seasoning for flavor. Use a vegan cheese that melts well. This keeps the taste rich while making it plant-based. You can also add more veggies like bell peppers or corn for extra crunch.
Gluten-Free Alternatives
For a gluten-free option, use gluten-free pasta shells. Check labels on taco seasoning and salsa to ensure they are gluten-free. You can also use quinoa or rice as a filling base instead of pasta. Both add nice texture and absorb flavors well.
Different Cheese and Topping Options
Mix up the cheese by trying pepper jack or Monterey Jack for a spicy kick. You can also use vegan cheese if you prefer. For toppings, consider avocado slices, cilantro, or diced jalapeños for added flavor. A squeeze of lime juice can brighten the dish, too. Customize these crunchy taco stuffed shells to suit your taste!
Storage Info
How to Store Leftovers
Once you finish your crispy taco stuffed shells, let them cool. Place any leftovers in an airtight container. Store them in the fridge for up to three days. For best results, keep the layers separate if you can. This helps keep the shells from getting too soggy.
Reheating Tips
To reheat the stuffed shells, preheat your oven to 350°F (175°C). Place the shells in a baking dish and cover them with foil. Heat for about 15-20 minutes. This keeps them warm and crispy. You can also use the microwave. Simply place a few shells on a microwave-safe plate. Cover with a damp paper towel and heat for 1-2 minutes, checking often.
Freezing Instructions
If you want to freeze the shells, follow these steps. First, let them cool completely. Then, wrap each shell tightly in plastic wrap. Place the wrapped shells in a freezer-safe bag or container. They can last up to three months in the freezer. When ready to eat, thaw them in the fridge overnight. Reheat as mentioned above. Enjoy your meal again with ease!
FAQs
How can I make these shells spicier?
To make your crispy taco stuffed shells spicier, add more taco seasoning. You can also mix in chopped jalapeños or diced green chilies. If you like heat, use spicy salsa instead of mild. You could even add hot sauce to the meat mixture for an extra kick. Adjust the heat to fit your taste!
Can I use different types of meat?
Yes, you can use many types of meat. Ground turkey or chicken works well as a leaner option. If you prefer, try using shredded beef or pork for a different flavor. For a meatless option, consider using black beans or lentils. Each choice will give your dish a unique twist!
What can I serve with crispy taco stuffed shells?
Crispy taco stuffed shells pair well with many sides. A fresh salad with avocado and lime adds a nice touch. You can also serve tortilla chips and salsa for a crunchy snack. For a heartier meal, try cilantro rice or Mexican corn on the cob. These sides will enhance your meal and make it even more enjoyable!
This blog post covered the key ingredients and tools to make crispy taco stuffed shells. I shared step-by-step instructions for cooking and assembling your dish. Tips helped you perfect the flavor and texture, while variations offered ideas for special diets. I also explained how to store leftovers properly.
In conclusion, have fun experimenting with flavors and ingredients. Enjoy your tasty creation with family and friends!


