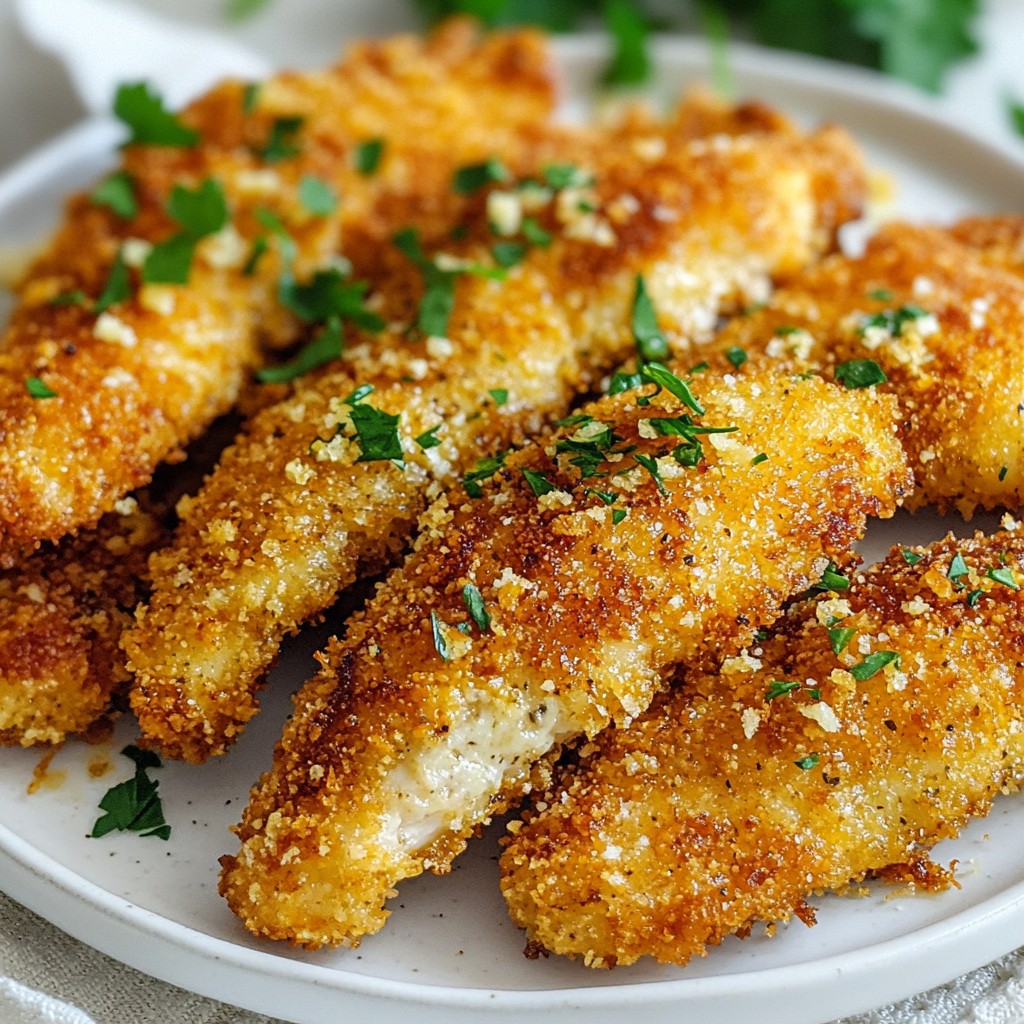
Are you ready to take your weeknight dinners to the next level? Garlic Parmesan Chicken Tenders are the answer! These crispy, golden bites pack a savory punch, making them a favorite for both kids and adults. In this post, I’ll show you how to whip up this easy dish using just a few simple ingredients. Taste the flavor and crunch in every bite—let’s get cooking!
Why I Love This Recipe
- Quick and Easy: This recipe takes only 30 minutes, making it perfect for busy weeknights or last-minute gatherings.
- Crispy and Flavorful: The combination of panko breadcrumbs, Parmesan cheese, and garlic creates a crunchy exterior packed with flavor.
- Customizable: Feel free to switch up the herbs or add your favorite spices to make these tenders truly your own.
- Great for Meal Prep: These chicken tenders can be made in advance and stored in the fridge or freezer for quick meals later.
Ingredients
List of Ingredients
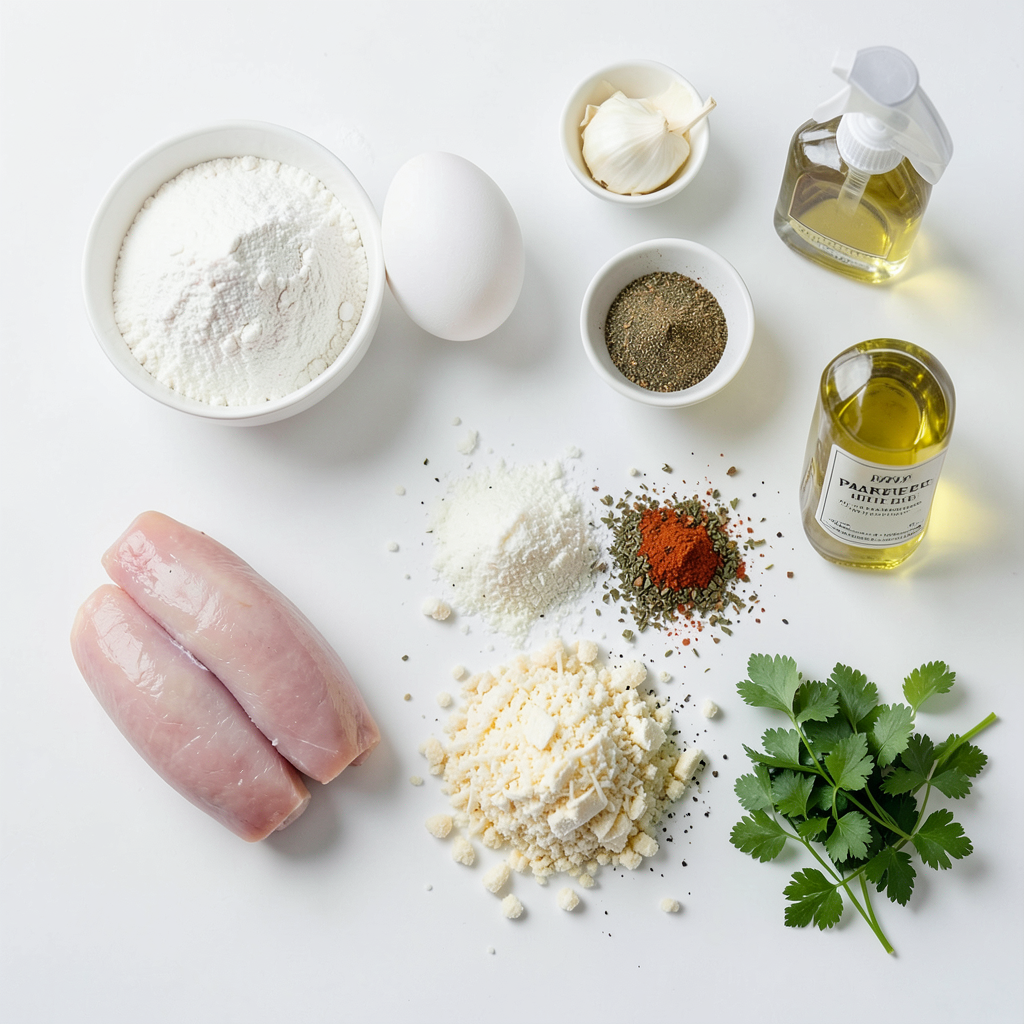
- 1 lb chicken tenderloins
- 1 cup all-purpose flour
- 2 large eggs, beaten
- 1 cup breadcrumbs (preferably panko for extra crunch)
- 1/2 cup finely grated Parmesan cheese
- 4 cloves garlic, minced
- 1 teaspoon dried Italian herbs (a blend of oregano, basil, and thyme works well)
- 1 teaspoon paprika
- Salt and black pepper to taste
- 1/4 cup fresh parsley, chopped (for garnish)
- Olive oil spray or enough vegetable oil for frying
To make Garlic Parmesan Chicken Tenders, gather all your ingredients first. You need chicken tenderloins, which are juicy and perfect for frying. The flour, eggs, and breadcrumbs create a golden crust. I like using panko breadcrumbs for extra crunch.
Garlic gives the tenders a rich flavor. Freshly minced garlic adds a strong taste. Parmesan cheese gives a savory note. You will also need some seasonings like paprika, Italian herbs, salt, and pepper. These spices bring depth to the dish.
Finally, you need oil for frying. Olive oil spray is great for a lighter option. If you prefer frying, use vegetable oil. Having everything ready helps the cooking process flow smoothly. Enjoy the cooking adventure!
Step-by-Step Instructions
Preparing the Chicken
To start, take your chicken tenderloins and place them in a medium bowl. Season them well with salt, black pepper, and paprika. Mix the chicken pieces until each one is coated evenly. This simple step adds a lot of flavor to your tenders.
Next, create your dredging station. Set up three shallow dishes on your countertop. Pour the all-purpose flour into the first dish. In the second dish, beat two large eggs until they are fully mixed and a bit frothy. In the third dish, combine the breadcrumbs, finely grated Parmesan cheese, minced garlic, and dried Italian herbs. Mix this well to spread the flavors evenly.
Coating the Chicken
Now, let’s coat the chicken. Take one seasoned tender and dredge it in the flour. Make sure to shake off any extra flour. Then, dip the tender into the beaten eggs. Allow any excess egg to drip off before moving to the breadcrumb mixture. Press the tender gently into the breadcrumbs, ensuring it’s coated well. Repeat this for all the chicken pieces. Coating them evenly ensures a great crunch when fried.
Cooking Instructions
For the next step, heat your oil. Pour enough vegetable oil into a large skillet to cover the bottom, about 1/4 inch deep. Heat the oil over medium heat until it shimmers. If you want a lighter option, use olive oil spray on the pan's base instead.
Now it’s time to cook the chicken. Carefully add the chicken tenders to the hot oil in batches. Don’t overcrowd the pan; this helps them cook evenly. Fry each piece for about 3-4 minutes on each side. They should turn golden brown and reach an internal temperature of 165°F (75°C).
After frying, use a slotted spatula to transfer the cooked chicken to a plate lined with paper towels. This helps soak up any extra oil.
Tips & Tricks
Perfecting the Coating
Using panko breadcrumbs gives your chicken tenders a great crunch. Panko is lighter and crispier than regular breadcrumbs. It helps create a perfect texture that you’ll love. If you can’t find panko, you can use regular breadcrumbs. Just know they won’t be as crispy.
If you prefer a healthier option, try baking the tenders. To do this, preheat your oven to 400°F (200°C). After coating the chicken, place them on a baking sheet. Spray the tops with olive oil spray. Bake for about 15-20 minutes. Flip halfway through for even cooking.
Serving Suggestions
These chicken tenders go well with many dipping sauces. Marinara sauce adds a nice Italian twist. Ranch dressing is a classic favorite. Garlic aioli gives a creamy, rich taste. Choose your favorite or set up a dipping station for fun!
For sides, consider a fresh salad or some crispy fries. You can also serve them with roasted vegetables. These options add color and flavor to your meal.
Ingredient Substitutions
If you need dairy-free options, use nutritional yeast instead of Parmesan cheese. It adds a cheesy flavor without the dairy. For a gluten-free choice, look for gluten-free breadcrumbs. Many brands offer great options that work well in this recipe. Just make sure to check the labels!
Pro Tips
- Use Panko Breadcrumbs: For an extra crispy texture, opt for panko breadcrumbs instead of regular breadcrumbs. They provide a delightful crunch that enhances the overall eating experience.
- Let Chicken Rest: After frying, allow the chicken to rest for a few minutes before serving. This helps the juices redistribute throughout the meat, making the tenders more flavorful and moist.
- Season the Flour: Elevate the flavor by seasoning the flour with a pinch of salt and pepper. This adds an extra layer of taste to the chicken before it even reaches the frying pan.
- Try Variations: Experiment with different herbs and spices in the breadcrumb mixture to customize the flavor profile. Consider adding a pinch of cayenne for a spicy kick or some lemon zest for brightness.
Variations
Flavor Enhancements
To make your Garlic Parmesan Chicken Tenders even more tasty, you can add spices and herbs. Consider mixing in some cayenne pepper for heat or smoked paprika for a rich flavor. Fresh herbs like thyme or rosemary can also boost the taste.
You can try marinades or brines to infuse more flavor. A simple mix of lemon juice, garlic, and olive oil makes a great marinade. Let the chicken soak for at least an hour. This adds moisture and flavor to each bite.
Cooking Methods
If you want a healthier version, try baking the chicken tenders. Preheat your oven to 400°F (200°C). Place the coated tenders on a baking sheet lined with parchment paper. Spray them lightly with olive oil. Bake for 20-25 minutes, flipping halfway through. This gives you crispy tenders without frying.
You can also use an air fryer. Preheat the air fryer to 400°F (200°C). Place the tenders in the basket in a single layer. Cook for 10-12 minutes, flipping halfway. This method keeps them crispy and juicy while cutting down on oil.
Serving Style Variations
You can enjoy these chicken tenders in many ways. For a fresh twist, chop them up and add them to a salad. Toss with greens, tomatoes, and your favorite dressing for a crunchy topping.
Another fun option is to use them as a filling for wraps or sandwiches. Place the tenders in a tortilla with lettuce, tomatoes, and a sauce like ranch or garlic aioli. This makes a quick and satisfying meal that everyone will love.
Storage Info
Storing Leftovers
To keep your Garlic Parmesan Chicken Tenders fresh, store them in the fridge. Place them in an airtight container. They stay good for about 3 days. Always cool them down before sealing to avoid moisture build-up.
When reheating, the goal is to keep them crispy. Use an oven or air fryer instead of a microwave. Preheat your oven to 375°F (190°C). Place the tenders on a baking sheet and heat for about 10-15 minutes. This method helps to restore their crunch.
Freezing Tips
You can freeze chicken tenders for later use. If you want to freeze them raw, coat them but do not fry. Place them on a baking sheet in a single layer and freeze until solid. Once frozen, transfer them to a freezer bag. This method prevents them from sticking together.
If you want to freeze cooked tenders, let them cool first. Store them in an airtight container or freezer bag. They will keep well for up to 2 months.
To thaw, place them in the fridge overnight. If you’re in a hurry, use the microwave's defrost setting. After thawing, reheat them in the oven or air fryer to regain their crispiness.
FAQs
Common Questions about Garlic Parmesan Chicken Tenders
Can I use chicken breasts instead of tenderloins? Yes, you can use chicken breasts. Just cut them into strips. This way, they will cook evenly like tenderloins. Keep in mind that cooking time may vary. Always check the internal temperature, which should be 165°F (75°C).
How do I make the tenders less oily? To reduce oiliness, use less oil in the pan. You can also use olive oil spray. Fry in batches so the tenders have space. This helps them stay crisp. After frying, place them on paper towels to absorb extra oil.
What is the best way to keep chicken tenders crispy after frying? To keep them crispy, place the cooked tenders on a wire rack. This allows air to circulate around them. Avoid stacking them on a plate, as this traps steam. Serve them right away or keep them warm in a low oven.
You now have all the tools to make delicious Garlic Parmesan Chicken Tenders. We covered the key ingredients, step-by-step instructions, and useful tips. You learned how to store leftovers and explore variations.
Remember, flavor and crispiness are your goals. Don’t be afraid to try new spices or cooking methods. With practice, you can make this dish your own. Enjoy cooking and sharing tasty meals!