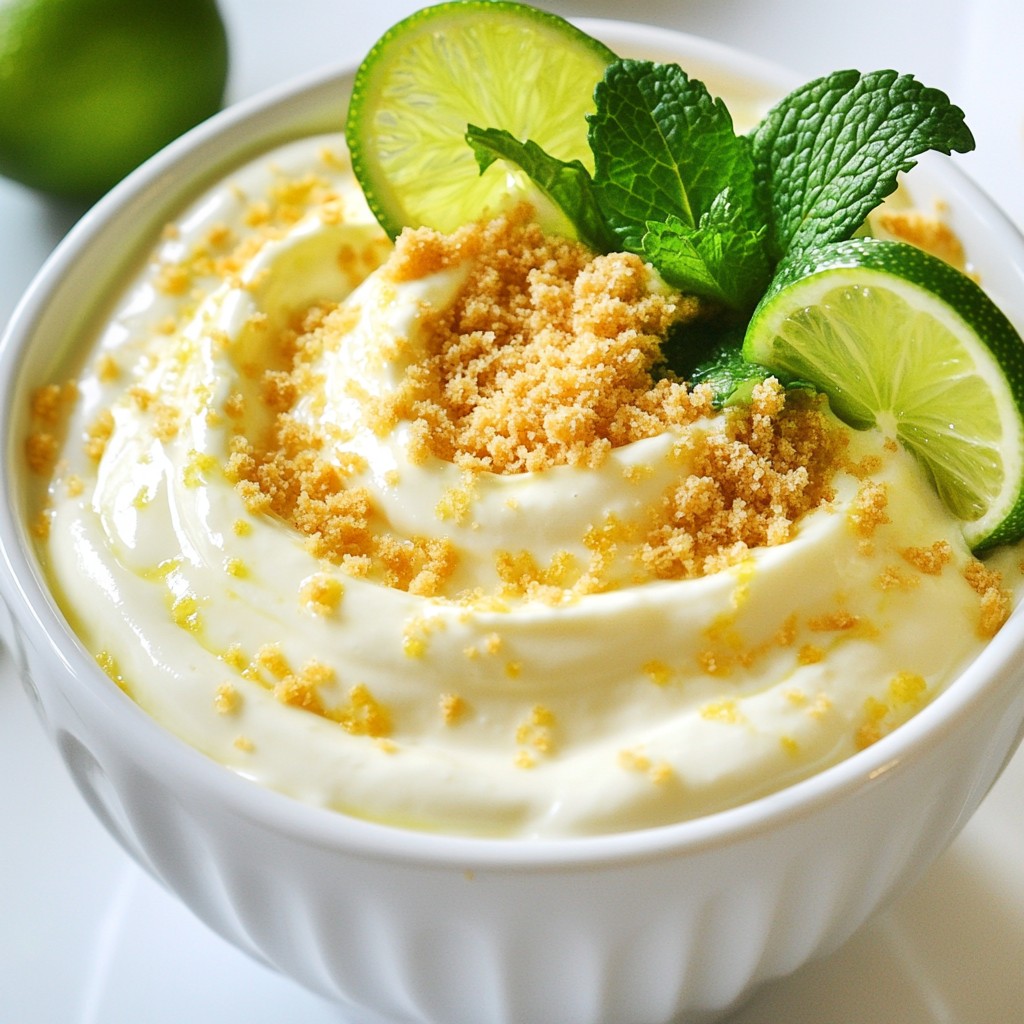
If you crave a sweet treat that's easy to make, then you're in the right place! This Key Lime Cheesecake Dip is creamy, refreshing, and takes minutes to prepare. I'll share step-by-step instructions, essential tips, and ways to make this dip shine at your next gathering. Get ready to impress your friends with a dessert that screams summer, no oven required! Let's dive into this simple delight.
Why I Love This Recipe
- Deliciously Tangy Flavor: This dip perfectly balances the tartness of lime with the creaminess of the cheese, creating a refreshing treat that’s hard to resist.
- Quick and Easy to Make: With only 15 minutes of prep time, this dip is a hassle-free option for last-minute gatherings or cozy nights in.
- Versatile Serving Options: Pair it with a variety of dippers like graham crackers, fresh fruit, or pretzels for a fun and interactive snack experience.
- Beautiful Presentation: The vibrant garnishes of lime slices and mint leaves make this dip an eye-catching addition to any dessert table.
Ingredients
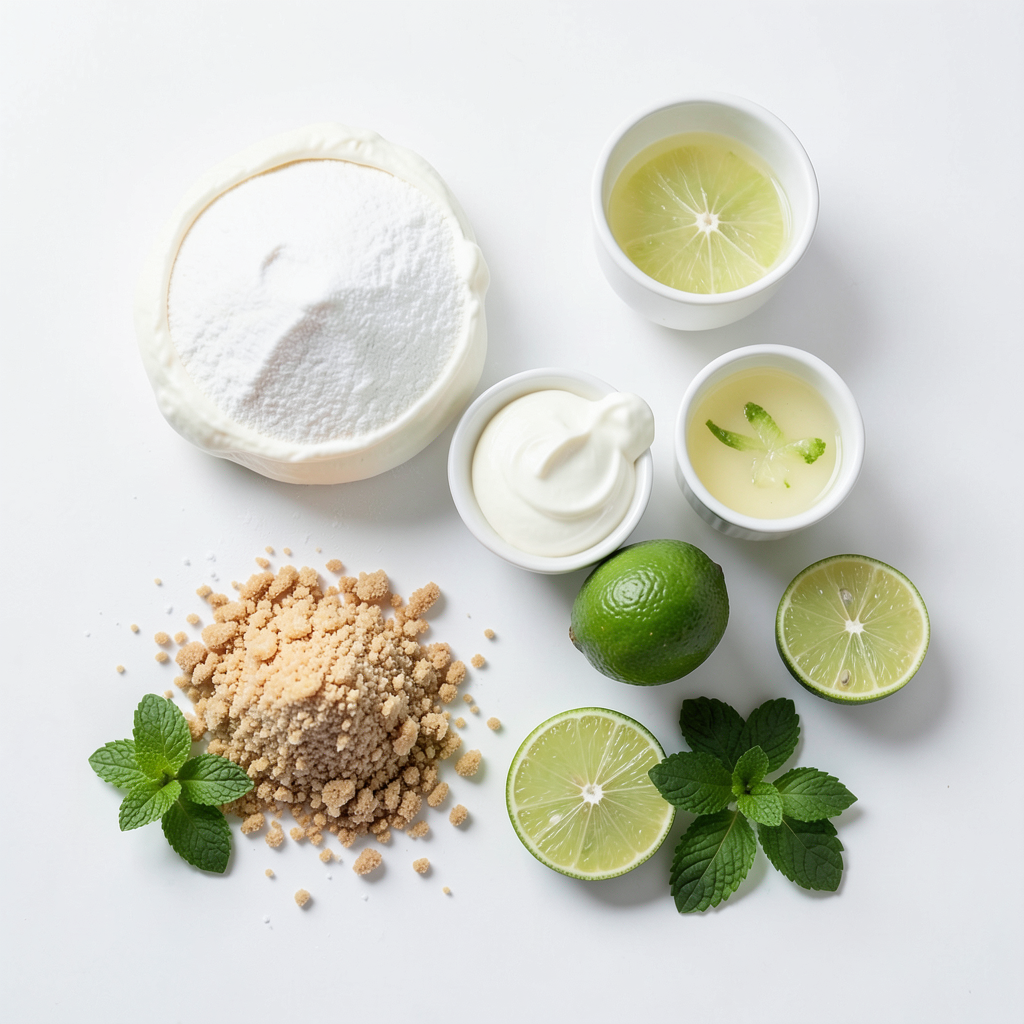
List of Ingredients
- 8 oz cream cheese, softened to room temperature
- 1/2 cup powdered sugar, sifted for smoothness
- 1/4 cup sour cream, preferably full-fat
- 1/4 cup freshly squeezed lime juice
- Zest of 2 limes, finely grated
- 1 tsp pure vanilla extract
- A pinch of salt to enhance flavor
- Extra graham cracker crumbs, for serving and garnishing
- Fresh lime slices and a handful of mint leaves, for a vibrant garnish
Importance of Fresh Ingredients
Using fresh ingredients makes a big difference in flavor. Fresh lime juice gives a bright taste that bottled juice just can’t match. Lime zest adds a burst of aroma that will make your dip pop. Cream cheese should be smooth to create a creamy dip. Fresh ingredients also help the dip taste light and zesty.
Substitutions & Alternatives
You can swap the cream cheese for Greek yogurt if you want a lighter dip. For a dairy-free option, try using coconut cream. Instead of sour cream, you can use a non-dairy yogurt. If you do not have fresh limes, bottled lime juice works in a pinch. Just remember, fresh is always best for that zingy flavor!
Step-by-Step Instructions
Preparation Steps Overview
Start by gathering all your ingredients. You will need cream cheese, powdered sugar, sour cream, lime juice, lime zest, vanilla extract, salt, graham cracker crumbs, fresh lime slices, and mint leaves. This dip comes together quickly, so prep your space for efficiency. Use a medium-sized bowl for mixing.
Mixing Techniques for Creamy Texture
To make this dip creamy, use an electric mixer. Beat the softened cream cheese in the bowl. Mix it on medium speed for about 1-2 minutes until it is smooth. Gradually add the sifted powdered sugar. Mix well after each addition to ensure a lump-free dip. Fold in the sour cream, lime juice, and zest gently. This helps keep the texture light and fluffy. The pinch of salt will enhance the flavor.
Chilling Process for Flavor Development
Transfer the dip into a serving bowl. Cover it tightly with plastic wrap. Chill the dip in the fridge for at least 30 minutes. This step allows the flavors to blend and deepen. You can serve it right after mixing, but chilling makes it even better. When ready to serve, top with graham cracker crumbs for crunch. Garnish with lime slices and mint leaves for a vibrant look.
Tips & Tricks
Adjusting Sweetness and Tanginess
You can easily change the sweetness and tanginess of your dip. If it’s too tangy, add a tablespoon of powdered sugar. Mix well and taste again. For a tangier flavor, squeeze in more lime juice. Just a little can make a big difference. Taste as you go to find your perfect balance.
Serving Suggestions for Optimal Presentation
To make your dip look great, use a colorful platter. Spread out fresh fruit, crunchy graham crackers, and pretzels around the dip. This not only looks nice but also gives your guests options. Garnish the top of the dip with lime slices and mint leaves. This adds color and a fresh touch. You want your dip to be as pretty as it is tasty.
Best Dippers to Pair with the Dip
The best dippers for your Key Lime Cheesecake Dip are varied. Here are some great options:
- Graham crackers: A classic choice that matches the cheesecake flavor.
- Fresh fruit: Try strawberries, apples, or pineapple for a sweet contrast.
- Pretzels: Their crunch and saltiness balance the dip’s sweetness.
- Cookies: Use vanilla wafers or shortbread for a rich taste.
These options not only taste great but also add fun textures. Enjoy experimenting with different dippers!
Pro Tips
- Use Room Temperature Ingredients: Ensure your cream cheese is softened to room temperature for a smoother and creamier dip.
- Adjust Sweetness to Taste: Feel free to modify the amount of powdered sugar or lime juice based on your personal preference for sweetness or tanginess.
- Garnish Creatively: Enhance the presentation with additional garnishes like lime zest or edible flowers for a pop of color.
- Chill for Best Flavor: Allow the dip to chill in the refrigerator for at least 30 minutes to let the flavors meld perfectly.
Variations
Flavor Variations: Adding Fruits or Spices
You can mix in fruits or spices to change your dip. Try adding fresh berries like strawberries or blueberries for a fruity twist. You can also sprinkle in cinnamon or nutmeg for a warm flavor. These additions keep the dip fresh and exciting.
Making It a Key Lime Cheesecake Dip Dessert
Make your dip even more like a dessert by serving it with whipped cream. Layer the dip in a glass with whipped cream and fresh fruit. This makes a great treat for parties or special events. It looks pretty and tastes amazing.
Allergy-Friendly Versions (Dairy-Free, Gluten-Free)
If you need a dairy-free version, use vegan cream cheese. You can also swap sour cream for coconut cream. For gluten-free options, choose gluten-free graham crackers or other dippers. These changes let everyone enjoy this tasty dip without worry.
Storage Info
Best Practices for Refrigeration
To keep your Key Lime Cheesecake Dip fresh, store it in an airtight container. This helps to avoid any odors from your fridge affecting the dip's flavor. Always cover the dip with plastic wrap before sealing it. This extra layer keeps the dip smooth and creamy.
How Long Does It Last?
When stored properly, your dip can last up to five days in the fridge. After this time, it may lose its creamy texture and bright flavor. Always check for any changes in smell or color before serving leftovers.
Freezing Techniques and Thawing Tips
You can freeze this dip if you want to save some for later. Place it in a freezer-safe container, leaving some space for expansion. It’s best to use the dip within three months for the best quality. When you’re ready to enjoy it, move it to the fridge for a slow thaw. Once thawed, stir well to restore its creamy texture.
FAQs
What is Key Lime Cheesecake Dip?
Key Lime Cheesecake Dip is a creamy, sweet treat. It combines cream cheese with lime juice. This dip has a zesty kick from fresh limes. The addition of sour cream gives it a smooth texture. It's perfect for dipping graham crackers, fruit, or pretzels. You can serve it at parties or enjoy it as a snack.
Can I use bottled lime juice instead of fresh?
Yes, you can use bottled lime juice. However, fresh lime juice tastes better. It provides a bright, fresh flavor. Bottled juice can sometimes taste flat. If you use bottled juice, choose one with no added sugars. This will help keep the dip tasting fresh and zesty.
How to make the dip ahead of time?
You can easily make this dip ahead of time. Prepare it as normal, then cover it tightly. Place it in the fridge for up to two days. This allows the flavors to blend well. Just remember to give it a good stir before serving.
Can I add food coloring to the dip?
Yes, you can add food coloring if you want. A few drops can enhance the color. It can make your dip look even more fun. Just be careful not to add too much. You want to keep the taste just right while making it pretty!
In this post, we broke down how to make a tasty Key Lime Cheesecake Dip. We covered the best fresh ingredients, how to mix for a creamy texture, and tips for serving. You learned to adjust flavors and try fun variations, like making it allergy-friendly. Always remember proper storage helps keep the dip fresh longer. This dip is versatile and fun to make. I hope you enjoy creating and sharing it!