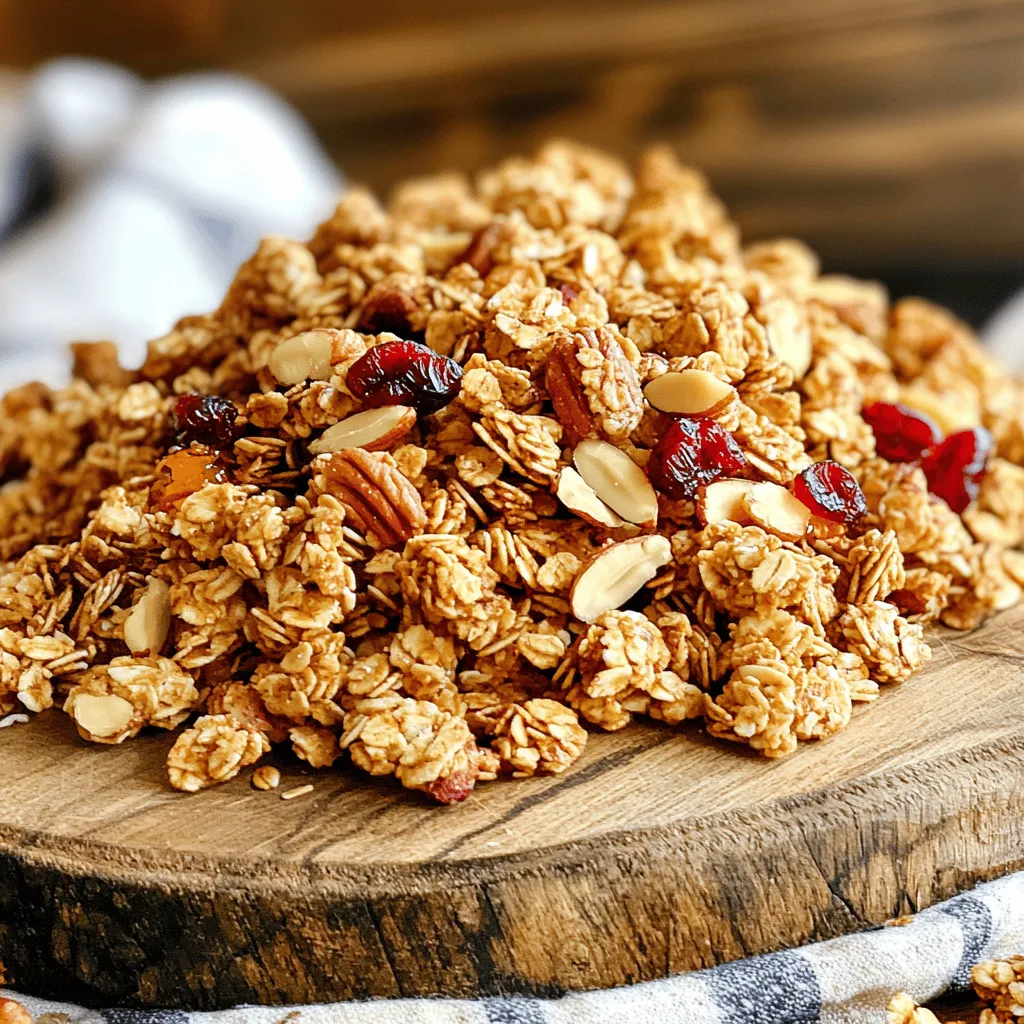
Looking for a tasty and nutritious snack? You’ve found it! Maple Walnut Granola Clusters are easy to make and loaded with flavor. In this article, I’ll share essential ingredients, step-by-step instructions, and valuable tips. Plus, discover fun variations to customize your clusters. Whether you want a quick breakfast or a delightful treat, read on to make the perfect snack today!
Ingredients
Essential Ingredients for Maple Walnut Granola Clusters
To make Maple Walnut Granola Clusters, gather these key ingredients:
– 2 cups rolled oats
– 1 cup walnuts, coarsely chopped
– 1/2 cup almond slices
– 1/4 cup sunflower seeds
– 1/2 cup pure maple syrup
– 1/4 cup coconut oil, melted
– 1/2 teaspoon vanilla extract
– 1/2 teaspoon ground cinnamon
– 1/4 teaspoon sea salt
These ingredients create a delightful mix of flavors and textures. The oats serve as the base, while the nuts add crunch. Maple syrup provides natural sweetness, and coconut oil helps bind everything together.
Optional Ingredients to Enhance Flavor
You can add a few optional ingredients to boost taste:
– 1/2 cup dried cranberries
Dried cranberries bring a sweet and tangy burst to the clusters. They also add a chewy texture, making your snack even more interesting. Feel free to skip them if you prefer a simpler flavor.
Nutritional Benefits of Key Ingredients
Each ingredient in your granola clusters offers great health benefits:
– Rolled oats are high in fiber, helping with digestion.
– Walnuts are rich in omega-3 fatty acids, great for heart health.
– Almond slices provide protein and vitamin E, which is good for skin.
– Sunflower seeds are packed with antioxidants and healthy fats.
– Maple syrup is a natural sweetener with some minerals.
– Coconut oil offers medium-chain triglycerides, which support energy.
Together, these ingredients create a snack that is not only tasty but also nutritious. Enjoy these clusters for breakfast or as a pick-me-up during the day!
Step-by-Step Instructions
Prepping Your Ingredients
Start by gathering all your ingredients. You will need:
– 2 cups rolled oats
– 1 cup walnuts, coarsely chopped
– 1/2 cup almond slices
– 1/4 cup sunflower seeds
– 1/2 cup pure maple syrup
– 1/4 cup coconut oil, melted
– 1/2 teaspoon vanilla extract
– 1/2 teaspoon ground cinnamon
– 1/4 teaspoon sea salt
– 1/2 cup dried cranberries (optional)
Next, preheat your oven to 350°F (175°C). This step is key for even baking. Line a baking sheet with parchment paper to avoid sticking and make cleanup easy.
Mixing the Dry and Wet Components
In a large bowl, mix the rolled oats, walnuts, almond slices, and sunflower seeds. Stir gently to blend. In another bowl, combine the maple syrup, melted coconut oil, vanilla extract, cinnamon, and sea salt. Whisk these wet ingredients until they blend well. This mixture adds flavor and moisture to the granola.
Baking Tips for Perfect Granola Clusters
Pour the wet mixture over the dry ingredients. Use a spatula to fold everything together. Make sure each oat and nut gets coated. Spread the mixture on your baking sheet. Press it down gently to form clusters. Bake for 25-30 minutes. Stir halfway through to ensure even baking. Keep an eye on it to avoid burning. You want a nice golden brown color.
Cooling and Adding Final Touches
Once baked, take the granola out of the oven. Let it cool completely on the baking sheet. It will harden as it cools. After cooling, break it into clusters with your hands. If you want, mix in dried cranberries for added sweetness. Store the clusters in an airtight container for up to two weeks. Enjoy them for breakfast or as a snack!
Tips & Tricks
How to Achieve the Best Texture
To get crunchy granola clusters, press the mixture firmly on the baking sheet. This helps the granola stick together while baking. Use a spatula or your hands to create compact clusters. Stir the granola only halfway through baking. This keeps the clusters intact and crispy.
Storage Tips for Freshness
Keep your granola in an airtight container at room temperature. This helps maintain its crunchiness. If stored properly, it stays fresh for up to two weeks. You can also freeze it for longer storage. Just thaw it on the counter before eating.
Serving Suggestions for Enjoyment
I love serving my granola clusters in a mason jar. This adds a nice touch to your table. You can also top yogurt or smoothie bowls with them. They add a great crunch and flavor. Enjoy them as a quick snack or breakfast on the go!
Variations
Alternative Nut and Seed Options
You can swap out walnuts for other nuts. Try pecans, almonds, or hazelnuts. Each nut gives a unique flavor. You can also change the seeds. Pumpkin seeds or chia seeds work well, too. Mixing different nuts and seeds adds extra crunch and nutrition.
Flavor Variations with Different Sweeteners
While maple syrup is sweet and tasty, you can try other sweeteners. Honey adds a floral note. Agave syrup is another option that is lighter. If you want a sugar-free option, try mashed bananas or applesauce. These alternatives change the taste but keep it sweet.
Customized Add-ins for Extra Flavor
You can enhance your granola with fun add-ins. Dried fruits like raisins or apricots add chewiness. Dark chocolate chips bring a rich taste. For a spicy kick, add a pinch of cayenne or nutmeg. Each mix makes the granola special and unique.
Storage Info
Best Practices for Storing Granola Clusters
To keep your maple walnut granola clusters fresh, use an airtight container. This helps protect them from moisture and air. Store them in a cool, dry place like a pantry. Avoid areas near the stove or oven. For added freshness, you can also layer parchment paper between clusters. This keeps them from sticking together.
Shelf Life of Homemade Granola
Homemade granola clusters can last up to two weeks at room temperature. After that, they may lose their crispiness. If you notice any changes in smell or texture, it’s best to toss them. Always check for signs of spoilage before enjoying your snack.
Freezing Granola Clusters for Longevity
If you want to keep your clusters for longer, freezing is a great option. Place them in an airtight freezer bag. Make sure to squeeze out all the air before sealing. They can stay fresh in the freezer for up to three months. When you’re ready to eat, just take out what you need and let them thaw at room temperature. Enjoy your tasty snack anytime!
FAQs
Can I use other types of oats?
Yes, you can use quick oats or steel-cut oats. Quick oats will cook faster but may not hold clusters as well. Steel-cut oats will give a chewier texture, but they will need longer baking time.
How do I make granola clusters stick together better?
To make granola clusters stick, use more wet ingredients like maple syrup or coconut oil. Press the mixture down firmly on the baking sheet. Bake until golden brown, then cool before breaking into clusters.
What are the health benefits of walnuts and maple syrup?
Walnuts are rich in healthy fats, protein, and fiber. They support heart health and brain function. Maple syrup contains antioxidants and minerals like manganese and zinc, providing a natural sweetener option.
Can I substitute ingredients for allergies or preferences?
Absolutely! You can swap walnuts for almonds or pecans. Use honey or agave syrup instead of maple syrup. For nut allergies, replace nuts with seeds like pumpkin or sunflower seeds.
How do I serve Maple Walnut Granola Clusters?
Serve granola clusters in a bowl or jar. They make a great snack on their own. You can also enjoy them with yogurt, smoothie bowls, or as a topping for oatmeal.
In this post, we explored how to make Maple Walnut Granola Clusters. We covered key ingredients, from essential to optional, and discussed their health benefits. I shared step-by-step instructions to help you create the perfect clusters. We also included tips for storage and ideas for fun variations.
In the end, making your own granola is easy and fun. It allows you to enjoy tasty snacks while knowing exactly what’s inside. Try it out and enjoy the benefits of your homemade granola!