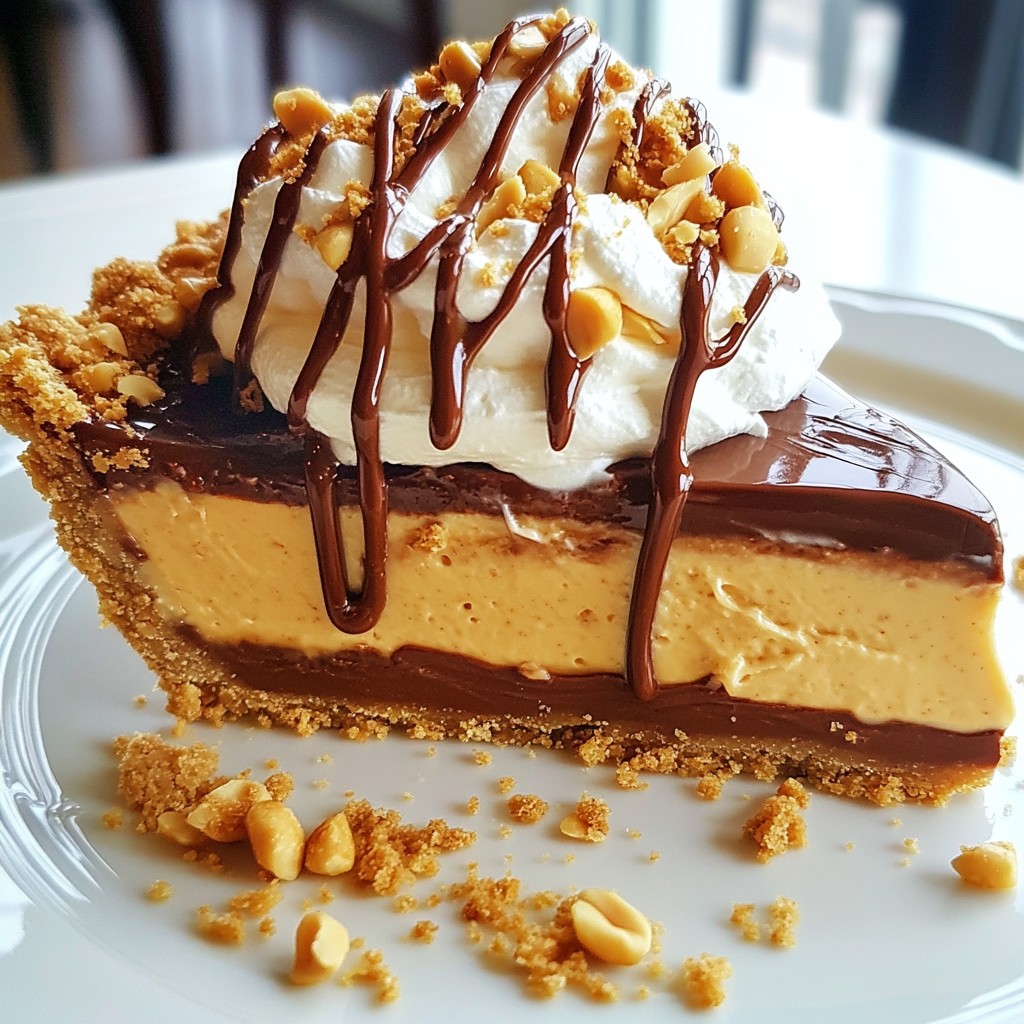
Craving a sweet yet simple dessert? This No-Bake Peanut Butter Cheesecake is the treat for you! With easy steps and delightful flavors, it requires no oven and minimal prep time. Imagine creamy peanut butter mixed with smooth cream cheese, all on a crunchy graham cracker base. Let’s dive into this easy and creamy recipe that will wow your friends and family. You’ll be ready to serve up smiles in no time!
Ingredients
List of Required Ingredients
– 1 ½ cups graham cracker crumbs
– ½ cup unsalted butter, melted
– 1 cup creamy peanut butter
– 8 oz cream cheese, softened
– 1 cup powdered sugar
– 1 teaspoon vanilla extract
– 1 cup heavy whipping cream
– ¼ cup chocolate syrup (for drizzling)
– Chopped peanuts (for garnish)
Optional Ingredients
You can add fun toppings to change up your cheesecake. Some ideas include:
– Sliced bananas or strawberries
– Caramel sauce or chocolate chips
– Crushed cookies or candies
Ingredient Substitutes
If you have dietary needs, don’t worry! Here are some options:
– Use gluten-free graham crackers for a gluten-free crust.
– Swap cream cheese for a vegan cream cheese.
– Use coconut cream instead of heavy whipping cream for a dairy-free option.
These swaps keep the dessert delicious while meeting different needs. You can find everything you need in most grocery stores.
Step-by-Step Instructions
Preparing the Crust
Start by mixing graham cracker crumbs with melted butter. In a medium bowl, pour in 1 ½ cups of crumbs and ½ cup of melted butter. Stir until it looks like wet sand. This step is key for a tasty crust. Next, press this mix firmly into the bottom of a 9-inch springform pan. Make sure to pack it down well. A solid crust keeps it from crumbling later. Place the crust in the fridge while you make the filling.
Making the Peanut Butter Filling
For the filling, beat together 1 cup of creamy peanut butter and 8 oz of softened cream cheese. Use an electric mixer on medium speed. Mix until there are no lumps. Then, add in 1 cup of powdered sugar and 1 teaspoon of vanilla extract. Keep mixing until it’s creamy and smooth. This mixture is rich and delicious, perfect for your cheesecake.
Combining with Whipped Cream
Now it’s time for the whipped cream. In a separate bowl, whip 1 cup of heavy cream until it forms stiff peaks. This will take about 2-3 minutes. Be careful not to overbeat it, or you’ll make butter. Once whipped, gently fold the whipped cream into the peanut butter mix. Use a rubber spatula for this step. Be gentle to keep the light texture of the cream.
Setting the Cheesecake
Pour the creamy filling over your chilled crust. Use a spatula to smooth the top evenly. Next, cover the cheesecake with plastic wrap and refrigerate for at least 4 hours. For best results, chill it overnight. This time helps the cheesecake set perfectly. When ready to serve, drizzle chocolate syrup on top and sprinkle chopped peanuts for a nice touch. Enjoy your easy and creamy treat!
Tips & Tricks
Achieving the Perfect Texture
To get that smooth and creamy texture, start with softened cream cheese. Cold cream cheese clumps together and won’t blend well. Let it sit at room temperature for about 30 minutes. This small step makes a big difference!
When whipping the cream, aim for stiff peaks. Use a chilled bowl and beaters. This helps the cream whip faster. Watch closely; it only takes 2-3 minutes. Stop as soon as peaks form. Overwhipping can turn the cream into butter, and we don’t want that!
Presentation Tips
Serving the cheesecake right can make it look even more delicious. Add a dollop of whipped cream on each slice. Drizzle chocolate syrup on top for a sweet touch. It not only adds flavor but also looks lovely on the plate.
Garnish your cheesecake with chopped peanuts. They add a nice crunch and make the dessert look fancy. Arrange the peanuts neatly for a great visual effect.
Common Mistakes to Avoid
One common mistake is overwhipping the cream. This can ruin the light and fluffy texture. Always beat just until stiff peaks form.
Another mistake is not chilling the cheesecake long enough. It needs at least 4 hours in the fridge to set properly. For the best results, chill overnight. This waiting time makes it easier to slice and enhances the flavors.

Variations
Flavor Variations
You can make your no-bake peanut butter cheesecake even more fun. Add chocolate or caramel swirls for a sweet twist. Simply drizzle your favorite syrup into the filling before mixing. Then, swirl it gently with a knife. This creates a beautiful marbled look.
You can also play with flavored extracts. Try adding almond or coconut extract to change the taste. Just a little can add a new layer of flavor. Adjust the amount based on how strong you want it.
Dietary Variations
If you need gluten-free options, use gluten-free graham crackers. They work just as well and keep the crust tasty. For a low-sugar version, use sugar substitutes like stevia or erythritol. This way, you can enjoy a sweet treat without the extra sugar.
Want a vegan cheesecake? Swap the cream cheese for a dairy-free version. You can also use coconut cream instead of heavy cream. This keeps the cheesecake creamy and rich without any animal products.
Topping Ideas
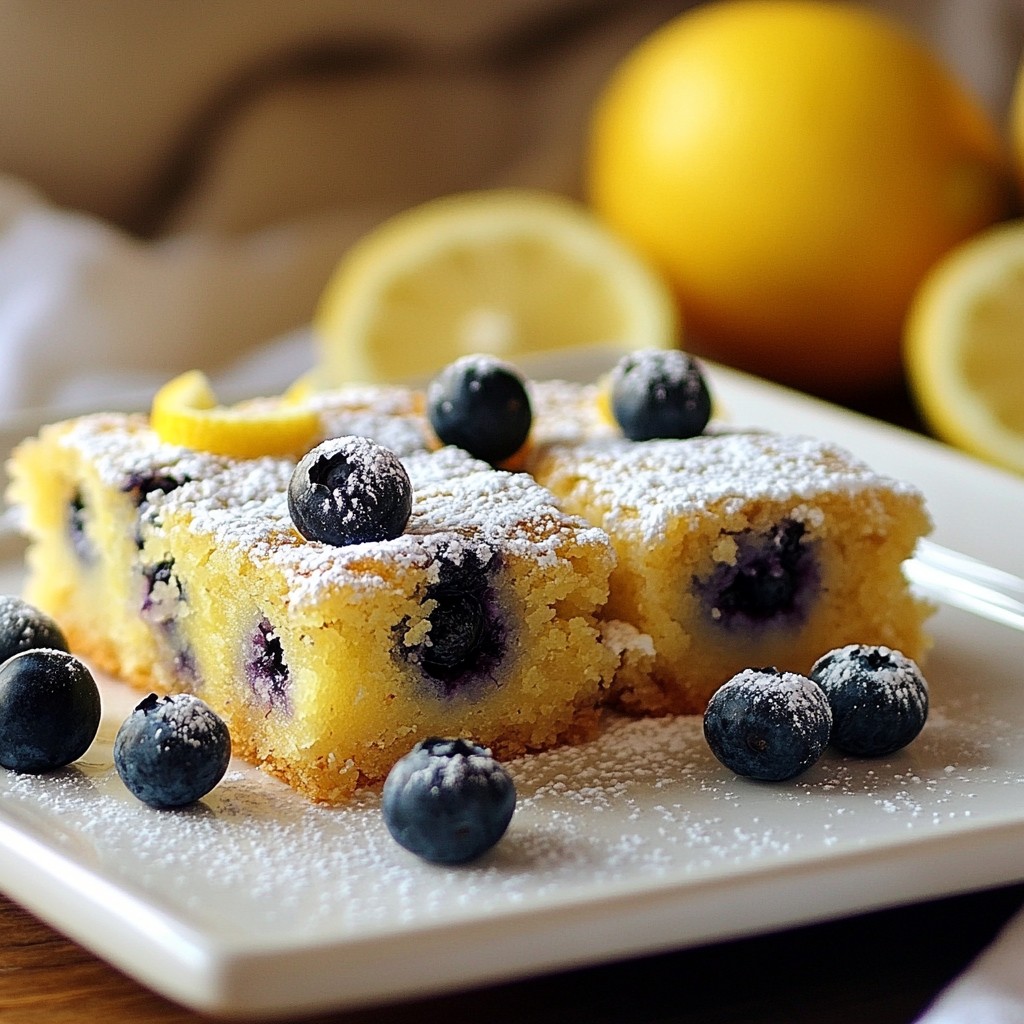
Get creative with your toppings! Add fresh fruits like strawberries or blueberries for a pop of color. You can also sprinkle nuts for a nice crunch. Chopped peanuts work great, but feel free to try almonds or walnuts.
For a fun twist, use different drizzles. Instead of chocolate syrup, try berry sauces or salted caramel. These can really change the flavor and make your cheesecake special. Each topping adds a unique touch to your dessert.
Storage Info
How to Store the Cheesecake
To keep your no-bake peanut butter cheesecake fresh, store it in the fridge. Wrap it tightly with plastic wrap. You can also use an airtight container. This will stop it from drying out and keep it tasty. If you want to save it for longer, you can freeze it. Cut it into slices, wrap each slice in plastic wrap, and place them in a freezer-safe bag. Be sure to label the bag with the date. This way, you won’t forget how long it has been in the freezer.
Shelf Life
When stored properly in the fridge, your cheesecake will stay fresh for about five days. Just check for any changes in smell or texture. If it starts to smell off or get a weird color, it’s time to toss it. For frozen cheesecake, it can last up to two months. However, for the best taste, try to eat it within one month. If it has ice crystals or looks dry, that’s a sign it’s not good anymore. Enjoy your cheesecake while it’s still fresh and delicious!
FAQs
Can I make this dessert ahead of time?
Yes! This cheesecake is great for making ahead. I recommend chilling it for at least 4 hours. However, if you can, let it chill overnight. This helps the flavors blend well. Store it in the fridge, covered. If you have leftovers, keep them in an airtight container. They can last up to 4 days.
What is the best way to slice the cheesecake?
To slice this cheesecake neatly, use a sharp knife. Dip the knife in hot water and wipe it dry before each cut. This helps you get clean edges. I like to cut the cheesecake into wedges for serving. Serve each slice with a dollop of whipped cream for a nice touch.
How can I make this recipe dairy-free?
To make a dairy-free version, swap the cream cheese for a vegan cream cheese. Use coconut cream instead of heavy cream. For the butter, you can use coconut oil or dairy-free margarine. These substitutes will help keep the creamy texture without the dairy.
Is it possible to use crunchy peanut butter?
Absolutely! If you use crunchy peanut butter, the cheesecake will have a fun texture. The bits of peanuts add a nice crunch. However, it may slightly change the creaminess. If you love peanut chunks, go for it! Just remember to mix it well with the cream cheese.
This cheesecake recipe shines with simple ingredients and steps. You learned how to make a delicious peanut butter cheesecake with a graham cracker crust. Don’t forget the tips for texture and presentation to impress everyone. Also, try the variations for unique flavors or dietary needs. Store leftovers properly to maintain freshness. Follow these steps and enjoy a tasty treat that everyone will love! Your baking journey just got a whole lot sweeter!