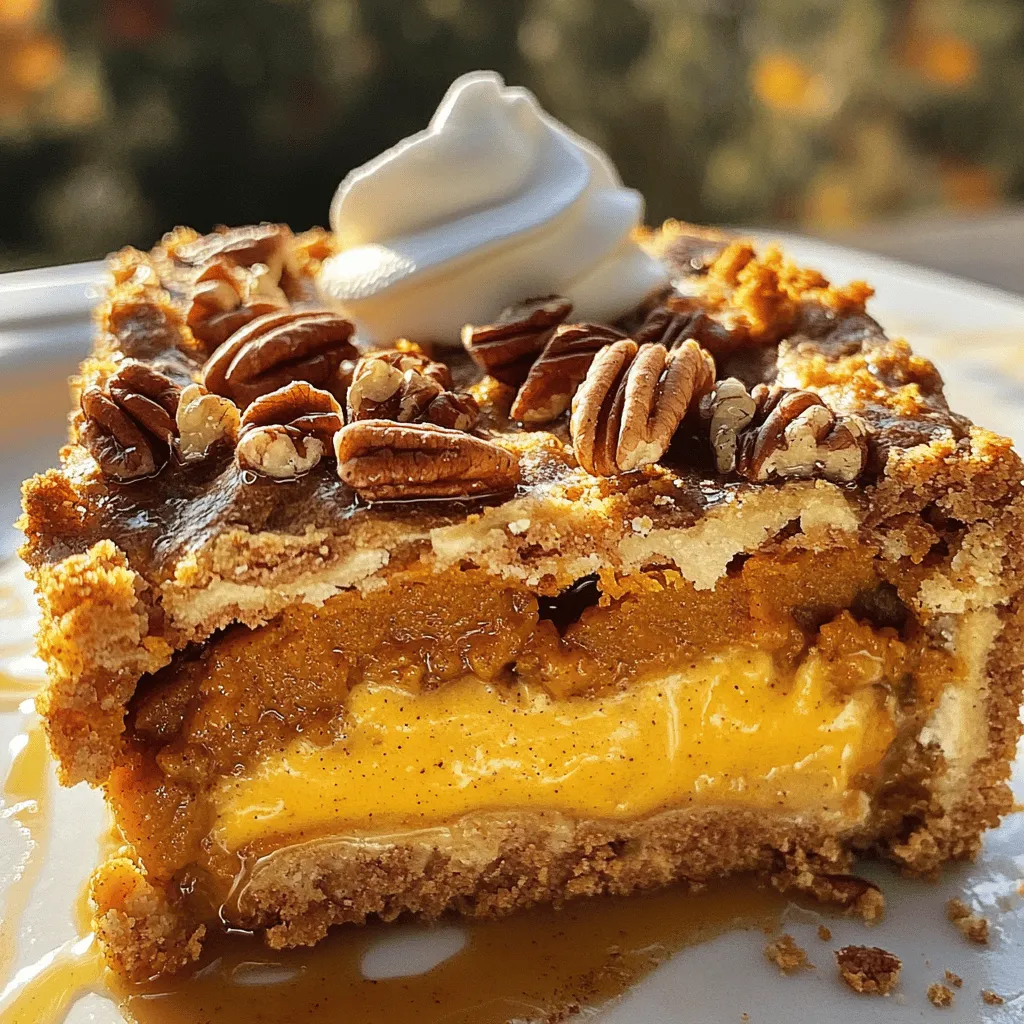
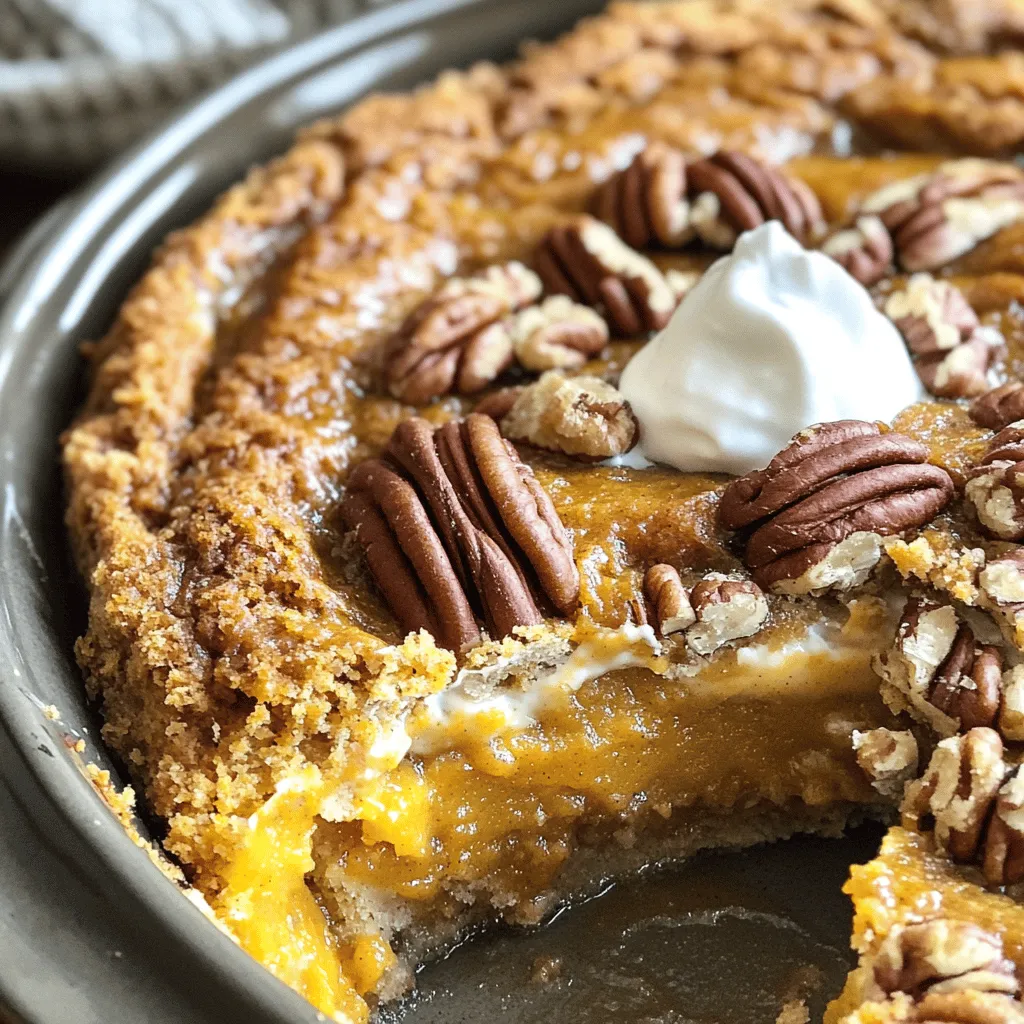
Craving a dessert that’s both simple and delicious? Look no further! This Pumpkin Pie Dump Cake combines the rich flavors of pumpkin pie with the ease of a dump cake. With just a few ingredients, you can create a warm, cozy treat perfect for any occasion. In this guide, I’ll walk you through the steps to whip up your own mouthwatering Pumpkin Pie Dump Cake that will impress friends and family alike!
Ingredients
Essential Ingredients for Pumpkin Pie Dump Cake
To make a great pumpkin pie dump cake, you need some key items:
– 1 can (15 oz) pumpkin puree
– 1 can (12 oz) evaporated milk
– 3 large eggs
– 1 cup granulated sugar
These ingredients create a creamy and rich base. The pumpkin puree gives it that classic flavor. The evaporated milk adds creaminess, while the eggs help bind everything together.
Additional Ingredients
You will also need a few more items to enhance the flavor:
– 1 tablespoon pumpkin pie spice
– 1 teaspoon vanilla extract
– 1 box (15.25 oz) yellow cake mix
– 1 cup unsalted butter, melted
The pumpkin pie spice brings warmth and depth. Vanilla extract adds a sweet note. The yellow cake mix forms the topping, and melted butter ensures a crispy texture.
Optional Ingredients
For some extra flair, consider adding:
– 1 cup chopped pecans
– Whipped cream or vanilla ice cream for serving
Chopped pecans give a nice crunch. Topping your slice with whipped cream or ice cream makes it a true treat!
Step-by-Step Instructions
Preheating and Preparing
– Preheat oven to 350°F (175°C).
– Lightly grease the baking dish.
Mixing the Pumpkin Base
– Combine pumpkin puree, evaporated milk, eggs, sugar, spice, and vanilla.
– Whisk until smooth.
To make the pumpkin base, I use a big bowl. First, I add one can of pumpkin puree. Then, I pour in one can of evaporated milk. Next, I crack in three large eggs. After that, I add one cup of granulated sugar, one tablespoon of pumpkin pie spice, and one teaspoon of vanilla extract. I whisk it all together until the mix is smooth and creamy.
Assembling the Cake
– Pour the pumpkin mixture into the dish.
– Sprinkle cake mix over pumpkin layer.
– Drizzle melted butter and add optional pecans.
Now, I pour the pumpkin mixture into the greased dish. I spread it out evenly. Then, I open the box of yellow cake mix. I sprinkle it over the pumpkin layer. This step is key; I do not stir it. Next, I drizzle one cup of melted butter on top. If I want to add some crunch, I sprinkle one cup of chopped pecans over the butter.
Baking Instructions
– Bake for 50-60 minutes.
– Check for doneness with a toothpick.
I place the baking dish in the oven. I bake it for 50 to 60 minutes. To check if it’s done, I use a toothpick. I stick it in the center. If it comes out with a few moist crumbs, it’s ready.
Cooling and Serving
– Cool for 15-20 minutes before serving.
– Suggested toppings for serving.
Once it is baked, I take it out of the oven. I let it cool for 15 to 20 minutes. This helps it set. When I serve it, I love adding whipped cream or vanilla ice cream on top. For extra flair, I might drizzle some caramel sauce. Enjoy this simple and satisfying treat!
Tips & Tricks
Tips for Perfect Texture
To make a great Pumpkin Pie Dump Cake, do not stir the melted butter. Just drizzle it over the cake mix. This helps form a nice, crunchy topping. Checking doneness is also key. Insert a toothpick in the center; it should come out with a few moist crumbs, but not wet batter. This means your cake is ready!
Baking Tips
Oven temperatures can vary. If your oven runs hot or cold, adjust the bake time. Start checking around 45 minutes. To avoid a soggy bottom, make sure to spread the pumpkin mixture evenly. This way, it cooks through and sets well.
Enhancing Flavor
Want to boost the flavor? You can add more spices. Try a pinch of nutmeg or cloves for extra warmth. When choosing your pumpkin, fresh pumpkin can taste great but is harder to work with. Canned pumpkin puree is easy and gives a nice, smooth texture. Both can work well in this recipe, so choose what fits your needs!
Variations
Flavor Variations
You can make your pumpkin pie dump cake even more fun! Try adding chocolate chips or caramel bits to the mix. These sweet bites melt and add richness to every bite. You can also play with spices. Instead of just pumpkin pie spice, mix in cinnamon or nutmeg for a warm twist.
Dietary Modifications
If you need a gluten-free option, look for a gluten-free cake mix. Many brands offer delicious choices that work well in this recipe. For a dairy-free version, use coconut milk in place of evaporated milk. You can also swap the butter for a dairy-free alternative, like coconut oil or vegan margarine.
Seasonal Twists
For a fun fall twist, try using apple pie spice instead of pumpkin pie spice. This change gives the cake a fresh taste that’s perfect for autumn. You can also create Thanksgiving-themed variations by adding nuts or cranberries. Chopped pecans or walnuts can give a nice crunch, while cranberries add a pop of tartness.
Storage Info
Storing Leftovers
To keep your Pumpkin Pie Dump Cake fresh, store it in the fridge. First, let it cool completely. Then, cover it tightly with plastic wrap or aluminum foil. This keeps it moist and tasty. Try to eat it within three to four days for the best flavor.
Freezing Pumpkin Pie Dump Cake
If you want to save some for later, freezing works well. First, cut the cake into portions. Then, wrap each piece in plastic wrap. Place the wrapped slices in a freezer-safe container or bag. This keeps them safe from freezer burn. When you’re ready to enjoy, just thaw it in the fridge overnight.
Reheating Instructions
To reheat, you have a few options. You can use the microwave or the oven. If using the microwave, heat each piece for about 30 seconds. Check to see if it’s warm. If you want to use the oven, preheat it to 350°F (175°C). Place the cake in a baking dish and cover it with foil. Bake for about 15 minutes. This helps keep the cake moist.
For serving leftovers, try adding a scoop of vanilla ice cream or whipped cream on top. This adds a nice touch and makes it even better!
FAQs
How do I make Pumpkin Pie Dump Cake from scratch?
You can make Pumpkin Pie Dump Cake from scratch. This recipe is simple and fun. You mix all the main ingredients in one bowl. Then, you layer it in a dish. For homemade, you could bake your cake and make your pumpkin filling. This recipe saves time and gives great flavor.
Can I use other cake mixes for this recipe?
Yes, you can use other cake mixes! A spice cake mix works well. You can also try yellow cake or even chocolate. Each mix adds a new twist to the pumpkin flavor. Just make sure the mix is dry, as in the original recipe.
What can I serve with Pumpkin Pie Dump Cake?
You can serve many things with this cake. Here are some tasty ideas:
– Whipped cream
– Vanilla ice cream
– A drizzle of caramel sauce
– Freshly brewed coffee
– Hot apple cider
These pairings enhance the flavors and make it even more special.
How long does Pumpkin Pie Dump Cake last?
Pumpkin Pie Dump Cake lasts well! In the fridge, it stays fresh for about 3 to 4 days. You can freeze it for up to 2 months. Just make sure to wrap it tightly. When you’re ready, thaw it in the fridge overnight before serving.
You now know the key ingredients and steps for making Pumpkin Pie Dump Cake. From mixing the pumpkin base to choosing your toppings, each part matters for a tasty treat. Remember, you can try different flavors or even adjust the recipe to fit your needs. Storing leftovers is easy, so you can enjoy them later. Dive into your baking adventure and make a dessert that brings smiles. Your kitchen will smell amazing, and your taste buds will thank you!