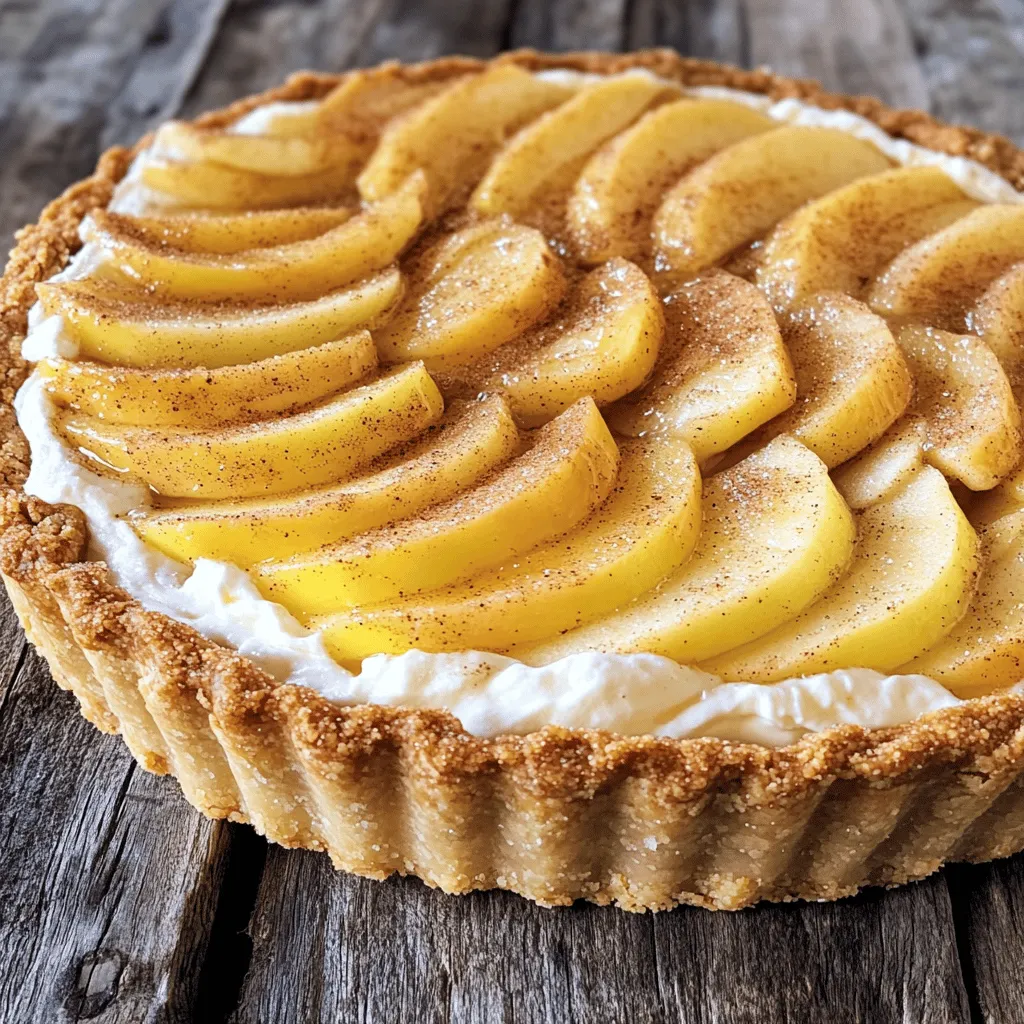
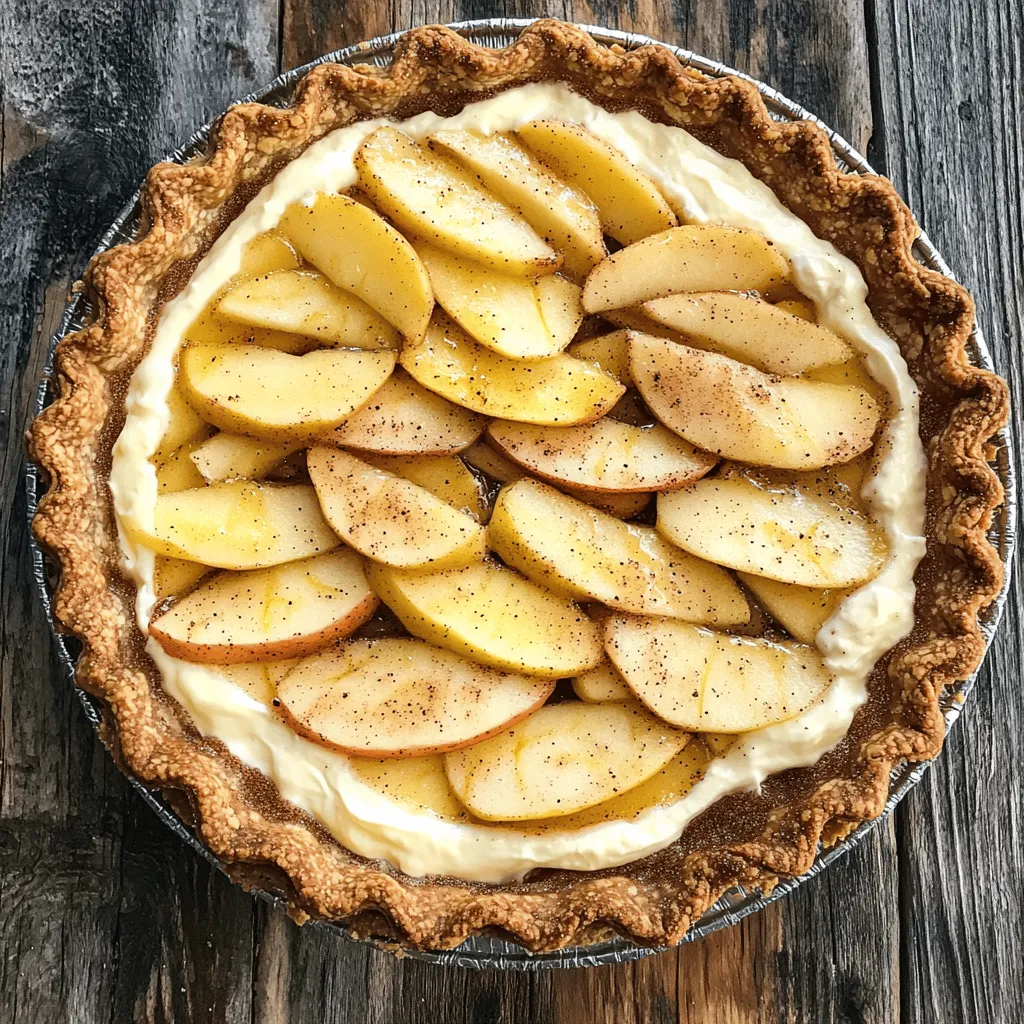
Get ready to impress your friends and family with my Snickerdoodle Cream Cheese Apple Pie! This delightful recipe combines the warm flavors of classic snickerdoodles with creamy cheesecake and tart apples. In just a few simple steps, you’ll have a pie that’s loaded with flavor and a hit at any gathering. Let’s dive into the ingredients and tools you need to create this sweet masterpiece!It’s a fun twist on classic apple pie.
Detailed Ingredient List
– For the Crust:
– 2 ½ cups all-purpose flour
– 1 teaspoon ground cinnamon
– ½ teaspoon baking powder
– 1 teaspoon salt
– 1 cup unsalted butter, cold and cubed
– ½ cup granulated sugar
– 1 large egg
– For the Filling:
– 4 medium apples (preferably Granny Smith or Honeycrisp), peeled, cored, and sliced
– ½ cup packed brown sugar
– 1 teaspoon ground cinnamon
– 1 tablespoon fresh lemon juice
– For the Cream Cheese Layer:
– 8 ounces cream cheese, softened to room temperature
– ½ cup granulated sugar
– 1 teaspoon pure vanilla extract
– 1 large egg
– For the Topping:
– ¼ cup granulated sugar
– 1 tablespoon ground cinnamon
Recommended Tools and Equipment
– Large mixing bowl
– Pastry cutter or fingertips
– Rolling pin
– 9-inch pie pan
– Medium mixing bowl
– Whisk or electric mixer
– Measuring cups and spoons
– Plastic wrap
– Baking sheet
This list makes sure you have all you need to create this delightful pie. Each ingredient plays a big role in making the flavors shine. Happy baking!
Step-by-Step Instructions
Making the Crust
To start, gather your ingredients for the crust. In a big bowl, whisk together 2 ½ cups of all-purpose flour, 1 teaspoon of ground cinnamon, ½ teaspoon of baking powder, and 1 teaspoon of salt. Mix well. Next, add 1 cup of cold, cubed unsalted butter. Use a pastry cutter or your fingers to work the butter into the dry mix until it looks like coarse crumbs. Then, stir in ½ cup of granulated sugar and 1 large egg. Mix until a soft dough forms. Shape this dough into a ball, wrap it in plastic, and chill it for at least 30 minutes.
Preparing the Filling
While the crust chills, prepare the apple filling. In a medium bowl, combine 4 sliced medium apples with ½ cup of brown sugar, 1 teaspoon of ground cinnamon, and 1 tablespoon of fresh lemon juice. Toss gently to coat all the apple slices. Let this mixture sit for 10-15 minutes. This helps the apples release some juices, making your filling juicy and flavorful.
Creating the Cream Cheese Layer
Now, make the cream cheese layer. In a separate bowl, beat 8 ounces of softened cream cheese with ½ cup of granulated sugar, 1 teaspoon of pure vanilla extract, and 1 large egg. Mix until it’s smooth and creamy, with no lumps. This layer adds a rich, tangy flavor to your pie.
Assembling the Pie
Preheat your oven to 350°F (175°C). Roll out about 2/3 of your chilled pie crust on a floured surface until it’s about 1/8-inch thick. Transfer this dough to a 9-inch pie pan, pressing it down to fit. Spread the cream cheese mixture evenly over the bottom of the crust. Then, layer the spiced apple filling on top. Make sure it’s evenly distributed.
Baking the Pie
Roll out the remaining dough. You can cut it into strips for a lattice top or fully cover the filling. If covering, cut slits in the crust for steam to escape. Trim and crimp the edges. In a small bowl, mix ¼ cup of granulated sugar and 1 tablespoon of ground cinnamon. Sprinkle this mixture over the top crust. Bake the pie in the preheated oven for 45-50 minutes. The crust should be golden brown and the filling bubbling. After baking, let the pie cool for at least 30 minutes before slicing and serving.
Tips & Tricks
Baking Tips for Perfect Pie Crust
To make a great pie crust, keep your butter cold. Cold butter helps create a flaky texture. Use your hands or a pastry cutter to mix in the butter. Make sure not to overwork the dough; it should just come together. Chill the dough for at least 30 minutes. This step is key. It relaxes the gluten and prevents shrinkage.
Best Apple Varieties for Filling
For the filling, I suggest using Granny Smith or Honeycrisp apples. Granny Smith gives a nice tartness, while Honeycrisp adds sweetness. You can also mix both for a balanced flavor. Peel, core, and slice the apples evenly for the best texture. This makes sure every bite has a good mix of apple and cream cheese.
Cream Cheese Layer Adjustments
If you want a creamier layer, add an extra ounce of cream cheese. This gives more richness. You can also adjust the sugar based on your taste. If you like it less sweet, cut the sugar by a tablespoon. Mix well until there are no lumps. This ensures a smooth texture that pairs perfectly with the apples.
Variations
Gluten-Free Crust Options
If you need a gluten-free crust, use a mix of gluten-free flour. Look for a blend that includes xanthan gum. You can also try almond flour or coconut flour for a nutty flavor. Just remember, the texture may change a bit.
Flavor Additions
Want to jazz up your pie? Consider adding chopped nuts, like pecans or walnuts, for crunch. You can also drizzle caramel sauce over the apples for a sweet twist. For a richer taste, mix in some butterscotch chips or chocolate chips.
Seasonal Variants
During fall, try making a pumpkin spice version of this pie. Add pumpkin puree to the cream cheese layer. Mix in pumpkin pie spice with the apples for a cozy flavor. You can even toss in some cranberries for a tart kick.
Storage Info
How to Store Leftover Pie
To keep your snickerdoodle cream cheese apple pie fresh, first let it cool. Then, cover it tightly with plastic wrap or aluminum foil. This helps keep moisture in and prevents it from drying out. Store the pie in the fridge for up to 4 days. If you want to enjoy it later, freezing is a great option.
Freezing Instructions
To freeze the pie, let it cool completely. Wrap it in plastic wrap, then in aluminum foil. This double layer helps protect the pie from freezer burn. You can freeze it for up to 3 months. When you’re ready to eat it, just thaw it in the fridge overnight before reheating.
Reheating Guidelines
To reheat your pie, preheat your oven to 350°F (175°C). Remove any plastic wrap and cover the pie loosely with aluminum foil. Bake it for about 15-20 minutes, or until it’s warm throughout. If you like a crisp crust, remove the foil for the last 5 minutes of baking. Enjoy your pie warm for the best taste!
FAQs
Can I use store-bought crust for this recipe?
Yes, you can use store-bought crust. It saves time and effort. Look for a pie crust that is ready to roll out. It should fit a 9-inch pie pan. Just make sure to follow the package instructions for baking.
How do I prevent the crust from burning?
To prevent the crust from burning, cover the edges with foil. This shields them from direct heat. Start checking your pie about 5 to 10 minutes before the end of baking time. If the crust looks golden, remove it from the oven.
What can I substitute for cream cheese?
You can use mascarpone or Greek yogurt as a substitute. Mascarpone gives a rich and creamy texture. Greek yogurt adds a tangy flavor. Both options work well in the cream cheese layer.
How long will the pie last in the fridge?
The pie will last about 3 to 5 days in the fridge. Store it in an airtight container. This keeps the filling fresh and prevents the crust from getting soggy. For longer storage, consider freezing it.
This article covered how to make a delicious pie from scratch. We went through the ingredients, tools, and step-by-step instructions. I shared tips for a perfect crust and filling. You learned about fun variations and proper storage.
Now, you have all you need to create a tasty pie. Enjoy the process and share your results with family and friends. Happy baking!