Skip to content
DisclaimerTerms Of UseGDPR PolicyCookie Policy

tastyhatch

  • Home
  • Drinks
  • Appetizers
  • Dinner
  • Dessert
  • About
  • Contact
  • Privacy Policy
DisclaimerTerms Of UseGDPR PolicyCookie Policy

NO-ING-IMG

- 1 ½ cups all-purpose flour - 1 cup granulated sugar - ½ cup packed brown sugar - 1 teaspoon baking powder - ½ teaspoon baking soda - ½ teaspoon salt - 1 teaspoon ground cinnamon - ½ teaspoon ground nutmeg - ½ teaspoon ground ginger - 1 cup canned pumpkin puree - ½ cup vegetable oil - 2 large eggs - 1 teaspoon vanilla extract - ½ cup all-purpose flour - ¼ cup packed brown sugar - ¼ teaspoon ground cinnamon - ¼ cup cold unsalted butter, cubed Each ingredient plays a key role in making these muffins tasty. The dry ingredients create the base. They give structure and sweetness. The wet ingredients add moisture and flavor. Pumpkin puree makes the muffins soft and rich. The streusel topping adds a crunchy, sweet layer on top, making each bite special. Using fresh spices elevates the taste. They make a big difference. Always measure your ingredients carefully. This ensures the best results. If you have questions about substitutions, ask away! I’m here to help. Start by preheating your oven to 350°F (175°C). This step is key for even baking. Line a muffin tin with paper liners or grease it lightly to stop sticking. In a large bowl, mix these dry ingredients: - 1 ½ cups all-purpose flour - 1 cup granulated sugar - ½ cup packed brown sugar - 1 teaspoon baking powder - ½ teaspoon baking soda - ½ teaspoon salt - 1 teaspoon ground cinnamon - ½ teaspoon ground nutmeg - ½ teaspoon ground ginger Use a whisk to blend them well. This ensures the flavors mix evenly. In another bowl, combine these wet ingredients: - 1 cup canned pumpkin puree - ½ cup vegetable oil - 2 large eggs - 1 teaspoon vanilla extract Whisk until smooth. This mixture adds moisture and flavor to your muffins. Make a well in the center of the dry mix. Pour the wet mixture into this well. Use a spatula to gently fold the two together. Mix until just combined. Don’t overmix; this keeps muffins light and fluffy. In a small bowl, mix together these for the streusel: - ½ cup all-purpose flour - ¼ cup packed brown sugar - ¼ teaspoon ground cinnamon Add ¼ cup of cold, cubed unsalted butter. Use your fingers or a pastry cutter to blend until it looks like coarse crumbs. This topping will add crunch and sweetness. Scoop the batter into the muffin tin. Fill each cup about two-thirds full. This leaves room for rising. Top each muffin with the streusel mix, spreading it evenly. Put the muffin tin in the oven. Bake for 20-25 minutes. Check if they are done by inserting a toothpick into the center. If it comes out clean, the muffins are ready. Take the muffin tin out of the oven. Let them cool for about 5 minutes. After that, move the muffins to a wire rack to cool completely. This helps flavors settle and keeps the muffins from getting soggy. To keep your muffins moist, use canned pumpkin puree. It adds moisture and flavor. Another tip is to not bake them too long. Overbaking leads to dry muffins. Check them at 20 minutes. If a toothpick comes out clean, they are ready. Mix the batter gently. When you combine wet and dry ingredients, do it slowly. Use a spatula to fold them together. Stop mixing when you see no dry flour. This keeps muffins fluffy and light. For a great streusel, start with cold butter. Cut it into small cubes and mix it with flour and sugar. Use your fingers to blend until it looks like coarse crumbs. This gives a nice crunch on top. If it's too wet, add a little more flour. {{image_4}} You can easily make these muffins dairy-free. Swap the unsalted butter in the streusel for coconut oil or a vegan butter. Use almond milk or oat milk instead of regular milk in the recipe. This way, you still enjoy the same great taste without dairy. For a gluten-free version, replace all-purpose flour with a gluten-free flour blend. Look for one that includes xanthan gum for better texture. You might want to add a bit more liquid to the batter. This helps keep the muffins moist and fluffy, just like the bakery-style ones. Want to get creative? Add some fun mix-ins! Chocolate chips bring a sweet touch. Nuts add a nice crunch. You can even toss in dried cranberries for a fruity burst. Just remember to fold these into the batter gently to keep the muffins light. To keep your Bakery-Style Pumpkin Streusel Muffins fresh, store them in an airtight container. Place them at room temperature for 2 to 3 days. If you have any muffins left after that, move them to the fridge. This helps keep them moist. Make sure they are wrapped well to prevent drying out. Reheating your muffins is easy. You can use the microwave or the oven. For the microwave, place a muffin on a plate and heat it for about 10-15 seconds. Check if it’s warm enough. If you prefer the oven, preheat it to 350°F (175°C). Wrap the muffins in foil and heat them for about 10 minutes. This will make them warm and soft again. Freezing these muffins is a great way to save them for later. Let the muffins cool completely first. Then, wrap each muffin tightly in plastic wrap. Place them in a freezer bag and remove as much air as you can. They can last up to 3 months in the freezer. When you're ready to enjoy, just thaw them overnight in the fridge or at room temperature. Yes, you can use fresh pumpkin. Start by roasting or steaming the pumpkin until soft. Then, blend it into a smooth puree. Use the same amount as the canned pumpkin. Fresh pumpkin adds a bright flavor. It may also need more moisture, so keep an eye on the muffin texture. To check if the muffins are done, insert a toothpick into the center. If it comes out clean or with a few crumbs, the muffins are ready. They should also be firm to the touch and slightly golden on top. Trust your senses; a lovely smell means they are close! Yes, you can make these muffins ahead of time. They stay fresh for two days at room temperature. Store them in an airtight container. For longer storage, freeze them. Just thaw them at room temperature before serving. This makes them great for meal prep! Pumpkin muffins pair well with many treats. Try serving them with a dollop of whipped cream for a sweet touch. A scoop of vanilla ice cream adds a fun twist. You can also serve them with a warm cup of coffee or tea. Enjoy them however you like! In this post, we explored the key ingredients for pumpkin muffins, along with step-by-step instructions. I shared tips to keep your muffins moist and prevent overmixing. We also covered fun variations, storage tips, and answered common questions. With these insights, you can create delicious pumpkin muffins that everyone loves. Happy baking!

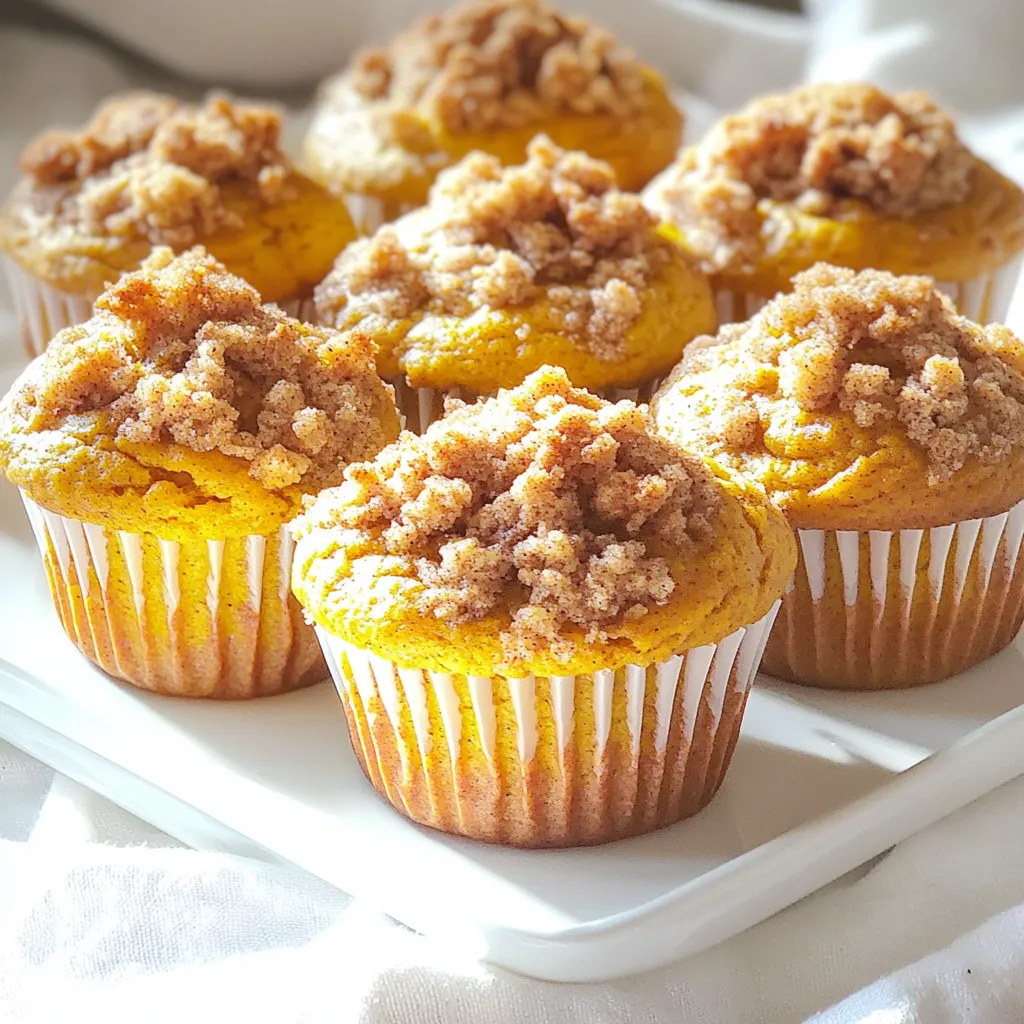
Bakery-Style Pumpkin Streusel Muffins Delight

If you crave warm, fluffy muffins with a crunchy topping, you’re in for a treat! These Bakery-Style Pumpkin Streusel Muffins

- 8 oz linguine or fettuccine - 1 lb large shrimp, peeled and deveined - 4 tablespoons unsalted butter - 4 cloves garlic, finely minced - 1 teaspoon red pepper flakes (optional for a kick) - 1 cup chicken or vegetable broth - 1 cup heavy cream - Zest and juice of 1 lemon - 1 cup freshly grated Parmesan cheese - Salt and freshly cracked black pepper, to taste - Fresh parsley, chopped, for garnish This dish is all about fresh and simple ingredients that create a burst of flavor. You start with linguine or fettuccine, which are perfect for soaking up the creamy sauce. Large shrimp adds a sweet and tender bite. Unsalted butter brings richness, while garlic gives that essential aromatic boost. If you like a bit of heat, sprinkle in red pepper flakes. The broth, whether chicken or vegetable, serves as the base for cooking the pasta. Heavy cream makes the sauce rich and smooth. Lemon zest and juice add brightness and a zesty pop. Freshly grated Parmesan cheese adds depth and umami. Finally, salt and black pepper enhance all the flavors. Don't forget the fresh parsley for a lovely finish. With these ingredients, you are set for a delightful meal that is both creamy and full of lemony goodness. Start by melting the unsalted butter in a large pot. Use medium heat until it starts to bubble. This creates a rich base for your dish. Next, add finely minced garlic to the pot. If you like a bit of heat, sprinkle in red pepper flakes. Sauté for 1-2 minutes. Stir often until the garlic is fragrant and turns a light golden color. Once the garlic is ready, stir in the peeled and deveined shrimp. Season with salt and pepper. Cook for about 3-4 minutes. The shrimp should turn pink and opaque. Remove them from the pot and set aside. In the same pot, pour in your choice of chicken or vegetable broth. Bring it to a gentle simmer. This will help to flavor the broth with the leftover garlic and shrimp goodness. Now it’s time to add the linguine or fettuccine. Make sure the pasta is fully submerged in the simmering broth. Cook according to the package instructions, usually about 8-10 minutes. Stir occasionally to stop it from sticking. When the pasta is al dente, lower the heat. Stir in the lemon zest, fresh lemon juice, heavy cream, and grated Parmesan cheese. Mix everything well until the sauce is creamy and luscious. Add the cooked shrimp back into the pot. Gently mix everything together. Allow it to heat for another minute. Taste and adjust the seasoning with more salt and pepper if you like. Serve the pasta right away in bowls. Garnish with freshly chopped parsley and extra grated Parmesan cheese if desired. Enjoy your creamy pasta with bright lemon flavor! To get the best shrimp, start with fresh, large shrimp. They should look shiny and feel firm. If you use frozen shrimp, thaw them in cold water before cooking. Cook the shrimp until they turn pink and opaque. This takes about 3-4 minutes. Overcooking makes shrimp tough. Remove them from the pot as soon as they are done. This keeps them juicy and tender. I love using linguine or fettuccine for this dish. Both types have a nice surface for the sauce to cling to. Make sure to cook the pasta until it is al dente. This means it should be firm to the bite. Stir the pasta often while it cooks. This helps prevent it from sticking together. The creaminess of the sauce can be changed to suit your taste. If you want it richer, add more heavy cream. For a lighter version, use less cream and add extra broth instead. You can also add more lemon juice for a zesty kick. Taste as you go to find the right balance for you. Spices can elevate this dish. I often use red pepper flakes for some heat. If you prefer a milder dish, skip them. You can also try adding fresh herbs like basil or dill. These add fresh flavor to the pasta. A sprinkle of paprika can add color and warmth. Experiment to find what you love best! {{image_4}} You can boost this dish with colorful veggies. Think about adding spinach or cherry tomatoes. They add both flavor and nutrition. Just toss them in when you add the shrimp. Cook them until they soften. Broccoli or asparagus also work well. They give a nice crunch and pair great with the creamy sauce. If you need a gluten-free version, use gluten-free pasta. Many brands make tasty options that hold up well. You can also swap the broth for a gluten-free type. Always check the label to ensure it fits your needs. This way, everyone can enjoy this dish without worry. Shrimp is delicious, but you can try other proteins too. Chicken breast is a great choice. Cook it in the same way as the shrimp. For a plant-based option, use chickpeas or tofu. Just ensure they are cooked through before mixing in with the pasta. Each protein brings its own flavor to this creamy dish. You can keep your One-Pot Creamy Lemon Garlic Shrimp Pasta in the fridge. Store it in an airtight container. It will stay fresh for up to three days. Make sure to let it cool down before sealing. This helps prevent soggy pasta. If you want to freeze your pasta, it’s best to do it without the shrimp. The shrimp can become rubbery when thawed. Cool the pasta and sauce completely. Then, place it in a freezer-safe container or bag. It can last for about one month in the freezer. When you’re ready to eat, thaw it in the fridge overnight. To reheat, you can use a stovetop or microwave. For stovetop, add a splash of water or broth to a pan. Heat gently over low heat, stirring often. For microwave, place the pasta in a bowl and cover it. Heat in 30-second bursts, stirring in between. Make sure it’s heated all the way through before serving. Enjoy your creamy pasta once again! Yes, you can use frozen shrimp. Just make sure to thaw them first. You can place them in cold water for about 15–20 minutes. This helps them cook evenly. Frozen shrimp may take a minute longer to cook than fresh shrimp. To make this dish lighter, you can use less cream. You can replace half of the heavy cream with low-fat milk. You can also add more broth to keep the sauce flavorful. Using less butter will cut down on fat as well. If you want to avoid heavy cream, you can use half-and-half or coconut milk. Both give a nice creaminess. Another option is to blend silken tofu and some broth for a dairy-free version. Shrimp are cooked when they turn pink and opaque. They should curl into a "C" shape. If they curl into an "O," they are overcooked. This usually takes about 3-4 minutes on medium heat. This blog post covered a simple and tasty recipe for shrimp pasta. You learned about key ingredients and each step to make it perfectly. I shared tips to enhance flavor and variations to suit your needs. Plus, I gave storage info to help keep leftovers fresh. In the kitchen, fun and creativity go hand in hand. Enjoy making this shrimp pasta your own. Experiment, share it with friends, and savor every bite. Happy cooking!

One-Pot Creamy Lemon Garlic Shrimp Pasta Delight

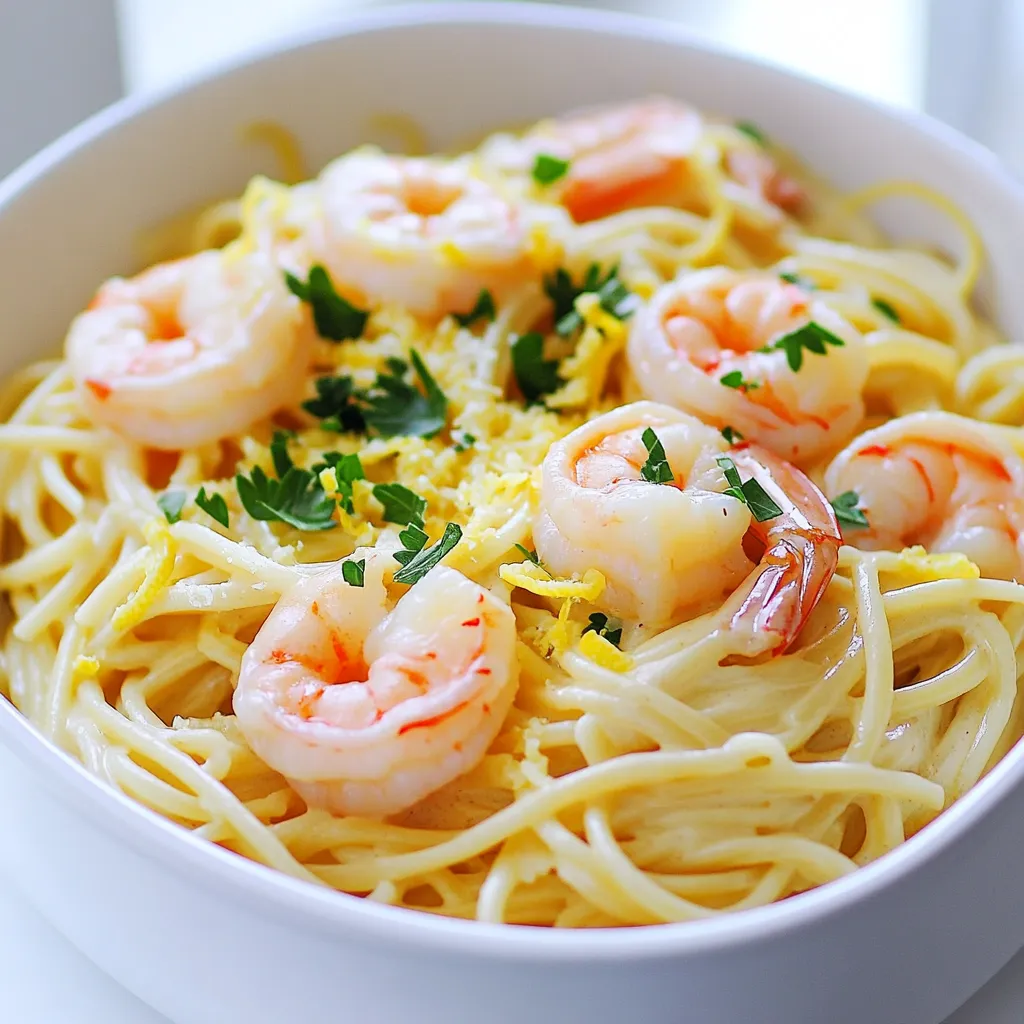
Craving a quick and tasty meal? You’re in the right place! This One-Pot Creamy Lemon Garlic Shrimp Pasta is simple

- 14 oz firm tofu, pressed and cut into even cubes - 1 cup bell peppers (any mix of red, yellow, or green), sliced into thin strips - 1 cup fresh broccoli florets, cut into bite-sized pieces - 1 tablespoon cornstarch (to create a crispy coating) - 1 tablespoon vegetable oil (for sautéing) - 3 tablespoons sweet chili sauce - 1 tablespoon soy sauce (to enhance flavor) - 1 tablespoon sesame oil (for a nutty aroma) - 2 green onions, sliced thinly (for garnish) - Sesame seeds, for garnishing - Salt and pepper to taste When making Better Than Takeout Sweet Chili Tofu, start with firm tofu. It holds its shape well and absorbs flavors nicely. Press the tofu to remove moisture. This step is key for a crispy finish. Next, pick colorful bell peppers. They add crunch and vibrancy to the dish. Fresh broccoli florets bring great texture and nutrients. For cooking, cornstarch is your best friend. It coats the tofu and helps it get crispy. Use vegetable oil for sautéing. It has a high smoke point and won’t burn easily. Sweet chili sauce gives that perfect balance of sweet and spicy. Soy sauce adds depth, while sesame oil provides a lovely nutty aroma. Don’t forget the garnishes! Green onions add a fresh bite. Sesame seeds bring a nice crunch and visual appeal. Use salt and pepper to enhance all the flavors in your dish. Each ingredient plays a role in making this meal delicious and satisfying. Enjoy every bite! - Preheat your oven to 400°F (200°C). - Prepare a baking sheet by lining it with parchment paper. - In a bowl, coat the cubed tofu with cornstarch. - Heat vegetable oil in a large skillet over medium-high heat. - Add the coated tofu and sauté until golden brown, about 10 minutes. - Transfer the crispy tofu to the lined baking sheet. - Bake the tofu for 15-20 minutes, flipping halfway through. - In the same skillet, add sliced bell peppers and broccoli florets. - Sauté the vegetables for about 5 minutes until tender but crunchy. - In a small bowl, mix sweet chili sauce, soy sauce, and sesame oil. - Add the baked tofu to the skillet with the vegetables. - Pour the sauce mixture over everything and toss gently. - Cook on low heat for 2-3 minutes to meld flavors. - Season with salt and pepper to taste. - Garnish with sliced green onions and sesame seeds before serving. To get the best crispy tofu, start by pressing it. Pressing removes extra water. This helps the tofu absorb flavor and crisp up nicely. Use a clean kitchen towel or paper towel to press the tofu. Place something heavy on top for about 15-30 minutes. Next, cornstarch is key. Use about one tablespoon for every 14 ounces of tofu. Coat each cube evenly. This creates a nice crunchy layer. The cornstarch helps give you that ideal texture. When you sauté veggies, keep their crunch. Cut bell peppers and broccoli into even pieces. This way, they cook at the same rate. Heat your skillet on medium-high. Use vegetable oil for best results. It has a high smoke point and won’t burn easily. Add the veggies to the pan once the oil is hot. Sauté for about five minutes. You want them tender but not mushy. You can also add a splash of soy sauce for extra flavor. Sweet chili tofu pairs perfectly with rice or noodles. A fluffy bed of jasmine rice makes a great base. It soaks up all the delicious sauce. You can also serve it over noodles for a different twist. For garnishing, add sliced green onions and sesame seeds. They add color and a nice crunch. Drizzle any extra sauce over the top for added flavor. This makes your dish look inviting and taste even better. {{image_4}} You can change the protein in this dish for more fun. Tempeh or seitan work great. Both give a nice bite and flavor. Tempeh has a nutty taste, while seitan is chewy. Both are rich in protein. Adding chickpeas also brings a new twist. They are soft and soak up flavors well. Plus, they add fiber and protein. You can mix them right in with the tofu for a hearty meal. You can switch up the veggies to keep it fresh. Other crunchy vegetables like carrots or snap peas add color and crunch. You can also consider zucchini or asparagus. Each will change the taste and texture. Think about using seasonal vegetables too. As seasons change, so do the best veggies. In spring, use fresh peas. In fall, try squash. This keeps your dish exciting all year round. Want to spice things up? Add chili flakes to the sauce. It gives a nice kick without overpowering. Just a pinch can change the whole flavor. You can also make a homemade sweet chili sauce. It’s simple and lets you control the taste. Just mix sugar, vinegar, and red pepper flakes. Cook it gently until it thickens. This adds a personal touch to your dish. To keep your sweet chili tofu fresh, store leftovers in the fridge. Use an airtight container to prevent moisture loss. Make sure the tofu cools completely before sealing. This helps keep the flavors intact. For best taste, try to eat leftovers within three days. You can freeze sweet chili tofu if you have extra. Place the cooled tofu in a freezer-safe bag. Remove as much air as possible to avoid freezer burn. When you want to eat it, thaw the tofu in the fridge overnight. For the best texture, reheat in a skillet on low heat until warm. This keeps it crispy instead of mushy. In the fridge, sweet chili tofu lasts about three to four days. After that, the quality may drop. Look for signs of spoilage, like an off smell or slimy texture. If you see any changes, it’s best to toss it. Always trust your senses; they guide you well when it comes to food safety. For this recipe, firm tofu works best. Firm tofu holds its shape well when cooked. It provides a nice texture that contrasts with the soft veggies. Soft tofu can break apart easily and won't give you the same crunchy bite. Yes, you can make this dish vegan. Just check the sauces you use. Some sweet chili sauces contain fish sauce or other animal products. Choose a brand that is labeled vegan, and you will enjoy a tasty meal. Yes, you can make this dish gluten-free. Use tamari instead of soy sauce. Tamari is a gluten-free alternative that tastes great. Make sure to check the labels for any added gluten in sauces. You can easily adjust the spice level. If you like it spicy, add more chili sauce. For less heat, reduce the amount of chili sauce you use. Taste the sauce as you mix it in to find your perfect balance. This blog post shared an easy way to make sweet chili tofu. We covered essential ingredients like firm tofu, bell peppers, and sweet chili sauce. Next, I outlined step-by-step cooking methods for crispy tofu and tender veggies. I also gave tips for storing leftovers and adding variations. Sweet chili tofu is fun and simple to make. You can customize it for your taste. Try new veggies or proteins to keep it fresh. Enjoy this dish hot or cold!

Better Than Takeout Sweet Chili Tofu Delight

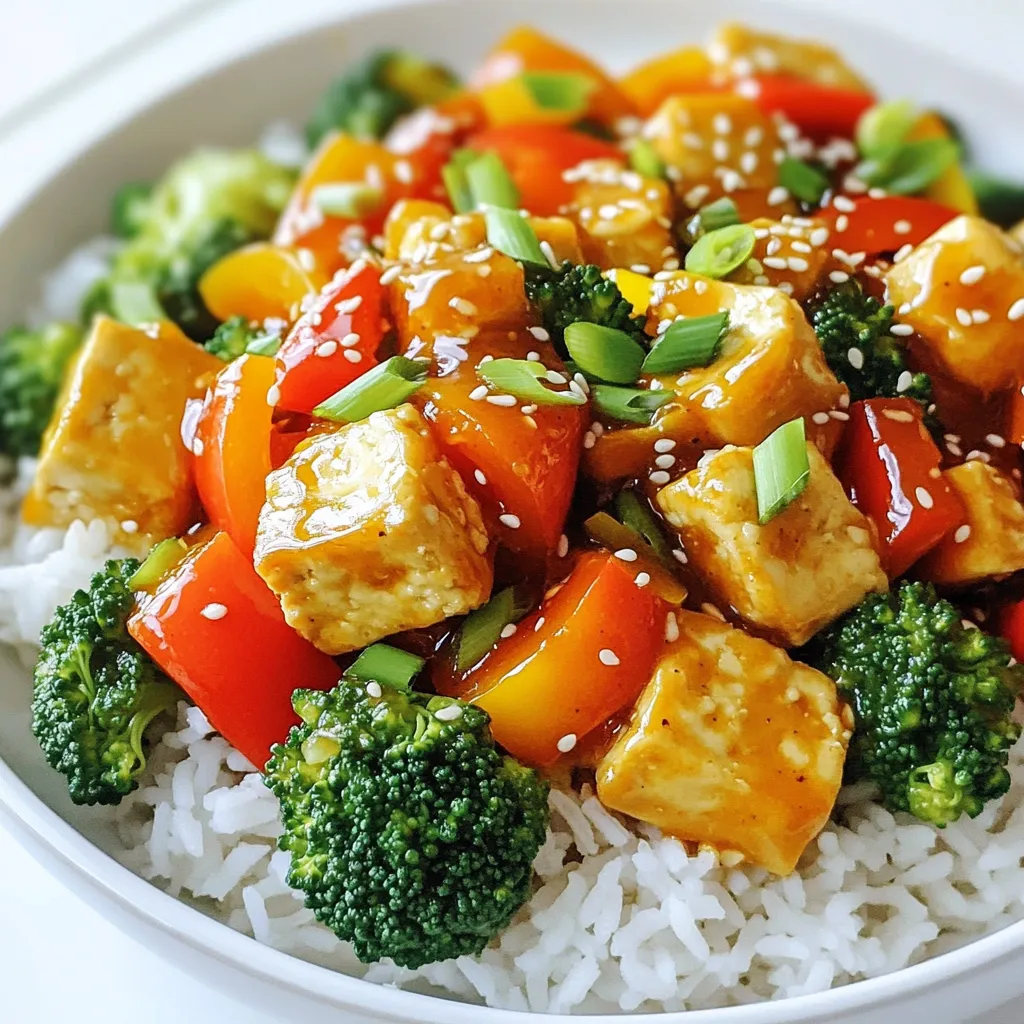
Looking for a delicious dish that beats takeout? You’ve come to the right place! My Better Than Takeout Sweet Chili

For my Slow Cooker Creamy Corn Chowder, you will need: - 4 cups of fresh or frozen corn (about 4 to 5 ears when fresh) - 2 medium-sized potatoes, peeled and diced - 1 small onion, finely chopped - 2 cloves of garlic, minced - 2 cups vegetable broth - 1 cup heavy cream or coconut milk (for a dairy-free option) - 1 teaspoon dried thyme - 1 teaspoon paprika - Salt and black pepper to taste - 1 tablespoon olive oil - Fresh chives or parsley, chopped, for garnish You can easily swap some ingredients. If you want to skip dairy, use coconut milk. It gives a nice creaminess. For a thicker chowder, add more potatoes. Instead of vegetable broth, chicken broth works well if you prefer. If you don’t have thyme, dried oregano or basil can work too. Just keep the spices balanced to keep the flavors bright. Fresh corn is sweet and juicy. It adds a great texture and flavor to the chowder. If you can get it, use fresh corn. But, frozen corn is also a great choice. It is picked at peak ripeness and is easy to store. Both types will give you a tasty chowder, so use what you have on hand! First, grab a large skillet. Set it over medium heat and add one tablespoon of olive oil. Once the oil is warm, add the finely chopped onion. Cook the onion for about five minutes until it becomes soft and clear. Next, add the two cloves of minced garlic. Cook for one more minute. You will smell a lovely aroma fill your kitchen. Now, take the cooked onion and garlic and move them to your slow cooker. Add in two diced potatoes and four cups of corn. You can use fresh or frozen corn here. Make sure everything is spread out evenly in the slow cooker. Pour in two cups of vegetable broth. Then, sprinkle in one teaspoon of dried thyme and one teaspoon of paprika. Add salt and black pepper to taste. Stir everything well to mix it up. Cover the slow cooker and set it to cook. You can choose the low setting for six hours or the high setting for three hours. Check the chowder after cooking. The potatoes should be soft and easy to pierce. To get the best texture in your chowder, blend it just right. I like to use an immersion blender. This tool lets you blend while keeping some corn and potatoes in chunks. If you want a creamier texture, blend more. For a chunkier chowder, blend less. Play with it until you find what you like! To boost the flavor, think about adding fresh herbs. Chopped chives or parsley add a nice touch. You can also try a squeeze of lemon juice. This adds brightness to the chowder. If you like heat, a pinch of cayenne pepper can bring some spice. Taste as you go, and adjust to fit your palate. When blending hot chowder, be careful! If you use a standard blender, fill it only halfway. This lets the steam escape. Cover the lid with a towel to catch splashes. Blend in short bursts. If you have an immersion blender, you can blend right in the pot. Just be sure to keep the blender submerged to avoid splatter. {{image_4}} You can easily make this chowder dairy-free by using coconut milk instead of heavy cream. Coconut milk gives a rich flavor and creamy texture. It blends well with the corn and spices. If you prefer nut-based options, try cashew cream. Just soak cashews in water, blend, and add. This keeps the chowder rich and smooth without dairy. For a heartier meal, add protein like cooked chicken or bacon. If you choose chicken, shred it and stir it in after blending. Bacon adds a nice smoky taste. Cook it until crispy, then crumble it on top as a garnish. This adds crunch and flavor, making the dish more filling. You can personalize your chowder by adding seasonal veggies. In spring, use fresh peas or asparagus for a bright touch. In fall, try diced butternut squash or sweet potatoes for sweetness. Adding vegetables boosts nutrition and flavor. Just chop them small and throw them in the slow cooker with other ingredients. This way, you create a chowder that fits the season and your taste. To store leftovers, let the chowder cool down first. Then, transfer it to an airtight container. This helps keep it fresh. You can keep it in the fridge for up to four days. If you want to enjoy it later, freezing is a great option. When you're ready to eat, grab your chowder from the fridge. Pour it into a pot over medium heat. Stir often to avoid sticking. You can add a splash of broth or water if it’s too thick. Heat until it’s warm all the way through. If using a microwave, heat in short bursts, stirring in between. To freeze chowder, use freezer-safe containers. Leave some space at the top, as it expands when frozen. It can last up to three months in the freezer. When you’re ready to eat, thaw it in the fridge overnight. Reheat it gently as stated above. This way, your creamy corn chowder stays tasty! Yes, you can use canned corn. It saves time and is still tasty. Make sure to drain and rinse it first. This step helps remove excess sodium. Canned corn works well, but fresh or frozen corn gives a brighter flavor. You can store leftover corn chowder in the fridge for up to three days. Just put it in an airtight container. If you want to keep it longer, freeze it. Frozen chowder lasts for about three months. Yes, you can make corn chowder on the stove. Just sauté the onions and garlic in a pot. Then, add the other ingredients. Simmer until the potatoes are soft. It takes about 30-40 minutes on the stove. Corn chowder pairs well with crusty bread or a fresh salad. You can also serve it with grilled cheese for a classic combo. For a fun twist, try adding some croutons on top for crunch. You learned about key ingredients and substitutions for a great corn chowder. Fresh corn enhances flavor, while tips show how to blend and store the dish. You can make it creamy or add protein as you like. Experiment with seasonal vegetables for new tastes. Now, you’re ready to create your own delicious corn chowder. Enjoy cooking and savoring this warm, comforting meal!

Slow Cooker Creamy Corn Chowder Simple and Delicious

Are you ready to create a warm and hearty meal that will brighten your day? My Slow Cooker Creamy Corn

For this cozy soup, gather these ingredients: - 1 tablespoon olive oil - 1 medium onion, finely diced - 4 cloves garlic, minced - 1 pound ground beef or Italian sausage (optional) - 1 can (28 ounces) crushed tomatoes - 4 cups chicken or vegetable broth - 2 teaspoons Italian seasoning blend - 1 teaspoon red pepper flakes (optional) - 10 lasagna noodles, broken into bite-sized pieces - 1 cup heavy cream - 1 cup grated Parmesan cheese, plus more for serving - 1 cup shredded mozzarella cheese - Salt and freshly ground black pepper to taste - Fresh basil leaves, torn, for garnish You can swap some ingredients if needed. Some options include: - Use turkey or chicken instead of beef or sausage. - Replace heavy cream with half-and-half or coconut cream for a lighter soup. - Use vegetable broth for a vegetarian version. - Substitute Parmesan with Pecorino Romano for a sharper taste. Fresh herbs and spices can really boost flavor. Here are my favorites: - Fresh basil adds a sweet touch. - Oregano gives a warm, earthy flavor. - Thyme can add a nice depth to the soup. - For heat, fresh chili peppers can spice it up. Using these tips, you can make a delicious One-Pot Creamy Garlic Parmesan Lasagna Soup that fits your tastes! To make this soup, start by heating 1 tablespoon of olive oil in a large pot over medium heat. Add 1 medium onion, finely diced. Cook it for about 3-4 minutes until it turns clear. If you like, add 1 pound of ground beef or Italian sausage. Cook it for 5-6 minutes until it browns. Make sure to break it apart with a spoon. Drain any extra fat so your soup stays light. Next, stir in 4 cloves of minced garlic. Cook for another 1-2 minutes until the garlic smells great. Then, pour in 1 can of crushed tomatoes and 4 cups of chicken or vegetable broth. Add 2 teaspoons of Italian seasoning and 1 teaspoon of red pepper flakes if you want some heat. Mix it all well and bring to a gentle boil. Once boiling, add 10 broken lasagna noodles. Lower the heat and let it simmer for 10-12 minutes until the noodles are soft. After that, stir in 1 cup of heavy cream, 1 cup of grated Parmesan cheese, and 1 cup of shredded mozzarella cheese. Mix until the cheeses melt and the soup is creamy. Finally, season with salt and black pepper to taste. Let it cook for an extra 2-3 minutes until everything is hot. Serve it hot with fresh basil leaves on top and more Parmesan if you like. This soup takes about 30 minutes to make. Start by chopping your onion and garlic while the oil heats. This helps save time. You can also break the lasagna noodles while the meat cooks. Since everything cooks in one pot, you won’t spend a lot of time washing dishes. When the soup starts bubbling, that’s your cue to add the noodles. Look for the noodles to be a bit soft but not mushy. The soup should look creamy and thick once you add the cheeses. If it seems too thick, add a splash of broth to adjust the texture. If you see the cheese melting nicely, you know you’re on the right track! To make your soup extra creamy, use heavy cream. It gives a rich taste that blends well with the cheese. You can also add cream cheese for even more texture. Just mix it in after you add the heavy cream, so it melts smoothly. Lastly, stir in a bit of sour cream before serving. This will add a nice tangy flavor. To keep your noodles from getting mushy, add them at the right time. Wait until the soup is boiling before adding the broken lasagna pieces. Cook them for 10 to 12 minutes. If you cook them too long, they will turn soft and break apart. If you want to prepare the soup early, cook the noodles separately. Add them just before serving to keep them firm. Pair your lasagna soup with crispy garlic bread. The crunch of the bread complements the creamy soup. You can also serve a light salad on the side. A simple mix of greens with a lemon vinaigrette works well. This gives a fresh balance to the meal. If you want a drink, a glass of red wine pairs perfectly with the flavors. {{image_4}} You can make this soup meatless. Simply skip the ground beef or sausage. Use extra vegetables for more flavor and texture. Try adding mushrooms, bell peppers, or zucchini. These veggies bring a lovely taste and keep the soup hearty. For a keto-friendly version, swap the lasagna noodles for zucchini noodles or cauliflower rice. This change cuts carbs but keeps that creamy taste. Use full-fat cheese to enhance richness without adding carbs. If you love heat, add more red pepper flakes or a dash of hot sauce. You can also stir in diced jalapeños for a fresh kick. For extra flavor, consider adding sun-dried tomatoes or a splash of balsamic vinegar. These small tweaks create exciting new layers in your soup. To keep your One-Pot Creamy Garlic Parmesan Lasagna Soup fresh, store it in an airtight container. Make sure it cools to room temperature before sealing it. This helps avoid condensation, which can make the soup watery. The soup will last up to four days in the fridge. Always check for any off smells or changes in color before eating. When you’re ready to enjoy the leftovers, reheating is key. Place the soup in a pot over low heat. Stir it often to help it heat evenly. You can add a splash of broth or cream to restore creaminess. This method keeps the flavors fresh and rich. Avoid using the microwave, as it may alter the texture and taste. If you want to save some for later, this soup freezes well. Let the soup cool completely, then transfer it to a freezer-safe container. It can last for up to three months in the freezer. When you’re ready to eat it, move the soup to the fridge overnight to thaw. Reheat it on the stove, adding a bit of broth to help with consistency. Yes, you can make this soup ahead of time. Just store it in an airtight container. Let it cool before putting it in the fridge. The flavors will blend together nicely. When you’re ready to eat, just reheat it on the stove. Lasagna soup pairs well with several sides. I recommend crispy garlic bread for a warm, crunchy contrast. A fresh salad with a light vinaigrette also works great. You can even add some garlic knots for a fun twist. To make this soup gluten-free, swap regular lasagna noodles for gluten-free ones. Many brands offer tasty options. Check the label to ensure they cook well in soup. Also, make sure your broth is gluten-free. Absolutely! You can mix and match your favorite cheeses. Try using ricotta for a creamier texture. You can also use sharp cheddar for a bolder flavor. Just keep in mind, each cheese will change the taste a bit. We explored the key ingredients for your soup, from substitutions to fresh herbs. I shared step-by-step cooking methods and tips to perfect your dish. You learned how to enhance creaminess and avoid overcooked noodles. Experiment with variations to fit your diet and taste preferences. Store your soup well, ensuring it stays flavorful. Keep these insights handy. Your lasagna soup journey can be both fun and delicious. Enjoy every bite and impress those around you!

One-Pot Creamy Garlic Parmesan Lasagna Soup Delight

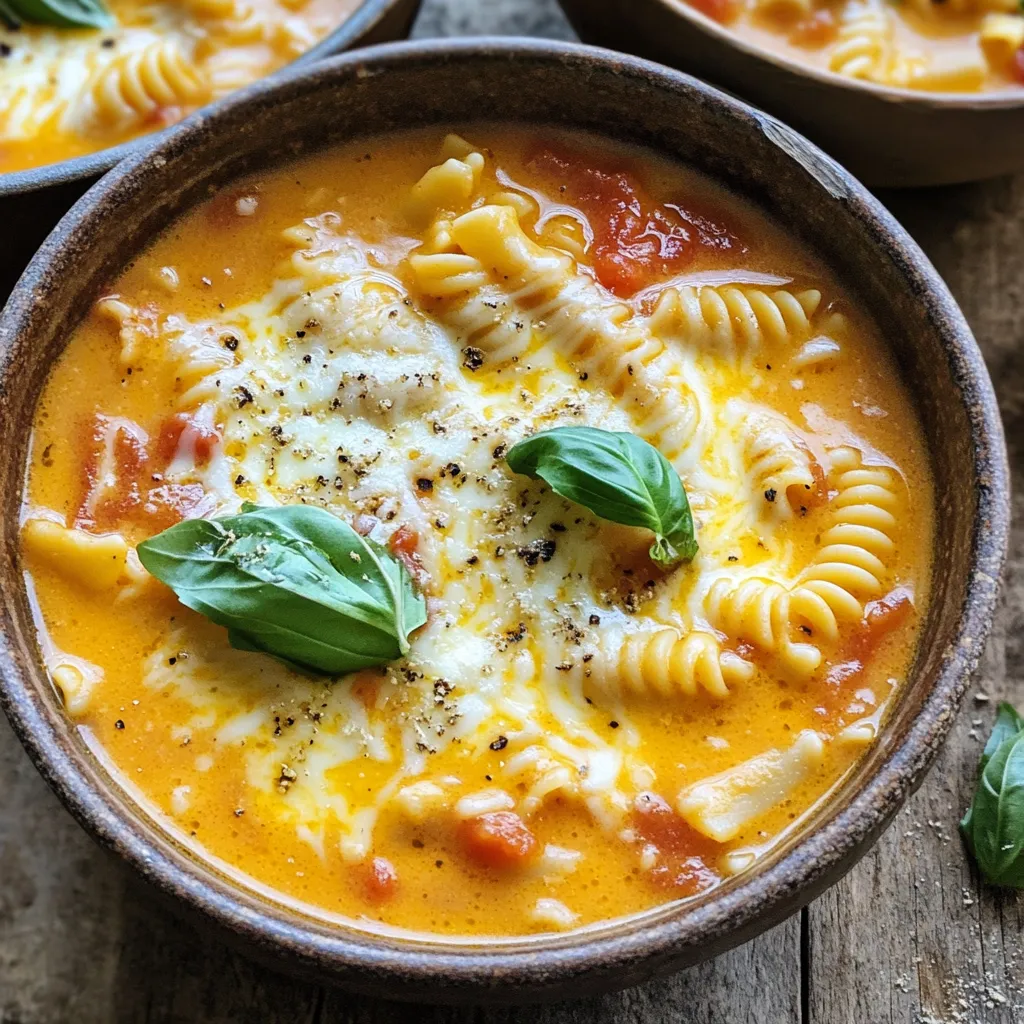
Craving a warm, hearty meal? You’re in for a treat with this One-Pot Creamy Garlic Parmesan Lasagna Soup Delight. This

- 1 cup rolled oats - 2 cups almond milk (or your preferred milk) - 2 ripe pears, peeled and diced - 1 teaspoon ground cinnamon - 1/2 teaspoon ground nutmeg - 2 tablespoons brown sugar (or maple syrup) - 1/4 cup walnuts or pecans, roughly chopped - 2 tablespoons unsweetened coconut flakes - Maple syrup or honey for drizzling To make Cozy Spiced Pear Crumble Oatmeal, you need simple ingredients. The main ingredients are rolled oats, almond milk, and ripe pears. Rolled oats form the base, while almond milk adds creaminess. Ripe pears give a sweet and juicy flavor. Then, we have the spices and sweeteners. Ground cinnamon and nutmeg bring warmth and comfort. Brown sugar or maple syrup sweetens the dish nicely. You can choose either one based on your taste. For the toppings, walnuts or pecans add a great crunch. Toasting them with coconut flakes makes them extra special. Finally, drizzle some maple syrup or honey on top for a sweet finish. These ingredients come together to create a cozy, delightful meal perfect for chilly mornings. Start by gathering your ingredients. In a medium saucepan, combine the rolled oats, almond milk, diced pears, ground cinnamon, ground nutmeg, brown sugar, and a pinch of salt. Stir everything well until mixed. Next, heat the mixture over medium heat. Once it gently boils, reduce the heat to a simmer. Let the oatmeal simmer for about 5 to 7 minutes. Stir occasionally to cook evenly. You want the oats to soften, and the mixture to thicken. If you prefer a creamier oatmeal, add more almond milk. For a thicker texture, simmer longer. While the oatmeal cooks, prepare the topping. In a small skillet, add the chopped walnuts or pecans and coconut flakes. Toast them over medium heat for about 3 to 4 minutes. Stir frequently until they turn golden brown and fragrant. Be careful not to burn them! This adds a delightful crunch to your oatmeal. You can easily change this recipe to fit your taste. Here are some great ideas: - Substitute different nuts or seeds for varied flavors. Try almonds, sunflower seeds, or pecans. - Use alternative sweeteners like agave or honey based on your preference. Each will give a unique taste. You may want your oatmeal thicker or creamier. Here’s how to adjust: - Add more liquid for creamier oatmeal. This can be almond milk or water. - Reduce the liquid for a thicker texture. Just let it cook longer if you prefer it thick. Serving this oatmeal can be fun and creative. Here are some tasty ideas: - Serve with fresh fruit slices like bananas, apples, or extra pears for added flavor. - Add more spices, such as a sprinkle of cinnamon or nutmeg, for an extra kick. These tips will help you make the most of your Cozy Spiced Pear Crumble Oatmeal. Enjoy your cooking adventure! {{image_4}} You can make this cozy spiced pear crumble oatmeal your own. Try adding extra spices like cardamom or cloves to create new flavors. You may also add dried fruits, such as raisins or cranberries. This will give your dish more texture and sweetness. If you need vegan or gluten-free options, you can easily adjust this recipe. Use plant-based milk, like oat or soy milk, instead of almond milk. Make sure to choose certified gluten-free oats to keep it safe for gluten sensitivities. To turn your oatmeal into a full meal, add some protein. Yogurt is a great choice. You can also stir in nut butter, like almond or peanut, for a creamy boost. This makes your breakfast balanced and keeps you full longer. Store your leftover cozy spiced pear crumble oatmeal in an airtight container. It will stay fresh in the fridge for up to 3 days. Keeping it sealed helps maintain its flavor and texture. When you’re ready to enjoy your oatmeal again, reheat it on the stove or in the microwave. If it looks thick, add extra milk to bring back its creamy consistency. Stir well while reheating to ensure even warming. For longer storage, freeze the oatmeal in single servings. This method makes it easy to grab a quick meal later. When you want to eat it, just thaw before reheating. This way, you can enjoy your cozy oatmeal whenever you like! Look for soft oats and desired thickness; it should not be runny. The cooking time is key here. I usually check around the 5-minute mark. Stir gently as it cooks. If it looks too thick, add a splash of milk to reach the right texture. Yes, prepare the base and store it in the fridge, reheating when needed. I love making a big batch for busy mornings. Just cool it down before placing it in a container. When you're ready to eat, warm it up in a pot or microwave. You might want to add a bit of milk for creaminess. Any dairy or non-dairy milk can be substituted based on preference. If you like cow's milk, go for it! Coconut milk adds a nice tropical twist too. For a low-calorie option, try unsweetened oat milk. The choice is yours! This blog post shared how to make a tasty oatmeal dish using simple ingredients. We discussed the main components, spices, and toppings. You learned clear steps for cooking and ways to customize your meal. Remember, you can adjust flavors or add new ingredients to match your taste. Whether you eat it fresh or store leftovers, oatmeal can be a quick and healthy choice. Enjoy experimenting with different variations. Your breakfast can always be delicious and nutritious!

Cozy Spiced Pear Crumble Oatmeal Delightful Recipe

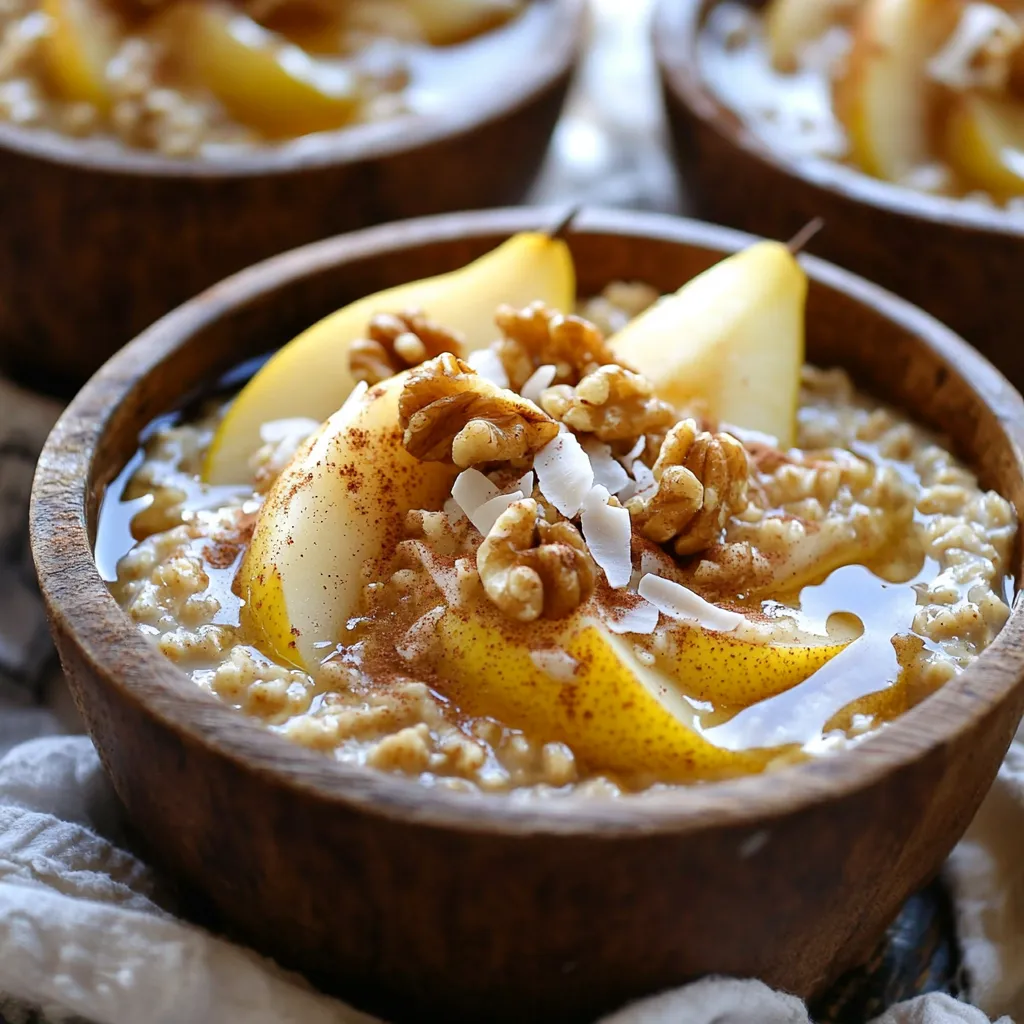
Discover the warm, comforting taste of Cozy Spiced Pear Crumble Oatmeal! This delightful recipe combines rolled oats, ripe pears, and

- 1 ½ cups pumpkin puree - 1 cup granulated sugar - ½ cup brown sugar - ½ cup vegetable oil - 2 large eggs - 2 teaspoons pure vanilla extract - 2 cups all-purpose flour - 1 teaspoon baking soda - ½ teaspoon baking powder - 1 teaspoon ground cinnamon - ½ teaspoon ground nutmeg - ½ teaspoon ground ginger - ¼ teaspoon salt - 1 cup semi-sweet chocolate chips - ½ cup chopped walnuts (optional) In this recipe, pumpkin puree is key. It adds moisture and flavor. You can use canned or homemade puree. Both work well. The sugars give the bread sweetness. Granulated sugar is fine, but brown sugar adds a nice depth. Oil keeps the bread soft. I use vegetable oil, but you can try melted coconut oil too. Eggs help bind everything. They also add richness. Vanilla extract boosts the flavor. The dry ingredients include flour, baking soda, and baking powder. These help the bread rise. The spices—cinnamon, nutmeg, and ginger—add warmth and comfort. Salt makes all the flavors pop. Finally, the chocolate chips are the best part! They melt and create gooey pockets of joy. If you want extra crunch, add walnuts. They give a nice texture contrast. Gather these ingredients, and you are ready to bake! 1. Preheat your oven to 350°F (175°C). 2. Grease and flour a 9x5 inch loaf pan. You can also use parchment paper. 3. In a large bowl, mix together: - 1 ½ cups pumpkin puree - 1 cup granulated sugar - ½ cup brown sugar - ½ cup vegetable oil - 2 large eggs - 2 teaspoons pure vanilla extract 4. Whisk until the mixture is smooth. Make sure everything blends well. 5. In another bowl, combine: - 2 cups all-purpose flour - 1 teaspoon baking soda - ½ teaspoon baking powder - 1 teaspoon ground cinnamon - ½ teaspoon ground nutmeg - ½ teaspoon ground ginger - ¼ teaspoon salt 6. Gradually add the dry mix to the pumpkin mix. Stir gently with a spatula. 7. Be careful not to overmix. This keeps the bread light. 8. Fold in: - 1 cup semi-sweet chocolate chips - ½ cup chopped walnuts (optional) 9. Pour the batter into the prepared loaf pan. Smooth the top with a spatula. 10. Bake for 55-65 minutes. Check if it’s done with a toothpick. 11. Insert a toothpick into the center. It should come out clean or with a few crumbs. 12. Once baked, let the loaf cool in the pan for 10 minutes. 13. Carefully transfer it to a wire rack to cool completely. To bake the best chocolate chip pumpkin bread, avoid overmixing. When you mix the wet and dry ingredients, do it gently. This keeps your bread light and fluffy. If you mix too much, the bread can become dense. Choose the right baking pan for even cooking. A 9x5 inch loaf pan works great. This size helps the bread bake evenly, giving you a nice rise. Make sure to grease and flour the pan or line it with parchment paper. This step helps your bread come out easily after baking. To make your pumpkin bread even tastier, you can add spices. Ground cinnamon, nutmeg, and ginger are my favorites. These spices add warmth and depth to the flavor. When serving, think about toppings. A dusting of powdered sugar looks nice. You can also serve the bread with cream cheese frosting. This adds a sweet and creamy layer that pairs well with the pumpkin flavor. {{image_4}} You can play with the sweeteners in this recipe. Try using honey or maple syrup instead of granulated sugar. They both add a nice flavor. You may need to adjust the liquid in the recipe since these sweeteners are wetter. If you want to switch up the chocolate chips, consider using dried fruits like raisins or cranberries. They add a sweet and chewy texture. Or, try nuts like pecans or almonds for a crunchy twist. This can give your bread a new flavor profile while keeping it tasty. For a gluten-free option, use gluten-free flour instead of all-purpose flour. Many brands work well and keep the bread moist and delicious. Just make sure to check the packing for measurements. If you prefer a vegan bread, swap the eggs for flax eggs. To make a flax egg, mix one tablespoon of ground flaxseed with two and a half tablespoons of water. Let it sit for a few minutes until it thickens. You can also replace the vegetable oil with unsweetened applesauce. This keeps the bread moist and adds a natural sweetness. To keep your chocolate chip pumpkin bread fresh, store it properly. You can wrap it in plastic wrap or aluminum foil. This method helps keep moisture in. You can also place it in an airtight container. This way, it stays soft and tasty. You can store the bread at room temperature for up to three days. Just make sure it is in a cool, dry place. If you live in a humid area, refrigeration is better. It will last about a week in the fridge. However, be aware that the fridge can dry out the bread a bit. Freezing is a great option if you want to save your bread for later. Here’s how you do it: 1. Allow the bread to cool completely. 2. Wrap it tightly in plastic wrap. 3. Then, wrap it in aluminum foil for extra protection. 4. Label the package with the date. You can freeze the bread for up to three months. When you're ready to eat it, take it out of the freezer. Let it thaw in the fridge overnight for the best results. For a quicker method, you can let it sit at room temperature for a few hours. Just avoid using the microwave, as it can make the texture rubbery. Enjoy your delicious chocolate chip pumpkin bread whenever you like! Can I use fresh pumpkin instead of canned? Yes, you can use fresh pumpkin. Just make sure to cook and puree it first. Fresh pumpkin adds a nice flavor. However, canned pumpkin is quick and easy. Both options work well in this recipe. How do I know when my bread is fully baked? Check the bread with a toothpick. Insert it in the center. If it comes out clean or with a few crumbs, your bread is done. The edges should look golden brown. This usually takes about 55-65 minutes. What can I serve with chocolate chip pumpkin bread? You can serve it warm or at room temperature. A spread of cream cheese frosting makes it extra special. It pairs well with coffee or tea too. You could also dust it with powdered sugar for a sweet touch. Caloric content per slice Each slice has about 200 calories. This can vary based on added ingredients. If you add walnuts, it may change slightly. Health benefits of ingredients Pumpkin is full of vitamins. It has vitamin A, which is good for your eyes. The spices like cinnamon have anti-inflammatory properties. Chocolate chips can boost your mood too! Using less sugar can make it a bit healthier. Now you have all you need to make delicious chocolate chip pumpkin bread. We discussed the ingredients, step-by-step instructions, and tips for success. You can even explore variations and storage advice. With simple swaps, you can customize this recipe to fit your tastes or dietary needs. Enjoy the process and share your delicious creations. This warm, tasty bread brings fall flavors to your kitchen. Happy baking!

Irresistible Chocolate Chip Pumpkin Bread Recipe

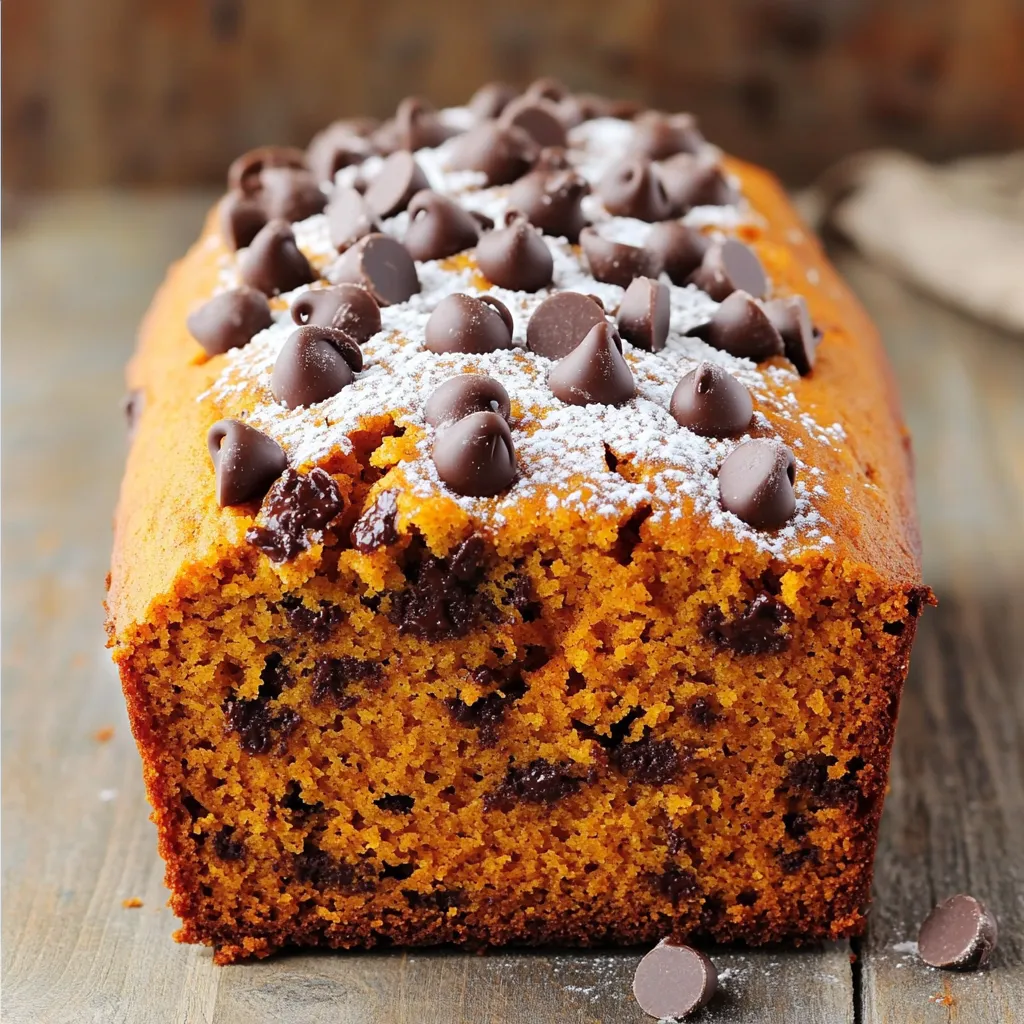
Get ready to savor the season with my Irresistible Chocolate Chip Pumpkin Bread Recipe! This delicious treat blends warm spices

- 2 boneless, skinless chicken breasts, thinly sliced - 1 red bell pepper, thinly sliced - 1 yellow bell pepper, thinly sliced - 1 medium onion, thinly sliced - 1 bag (12 oz) tortilla chips The main ingredients create a base full of flavor. The chicken gives protein, while the bell peppers and onion add color and crunch. Tortilla chips serve as the perfect crunchy base for our nachos. - 1 tablespoon taco seasoning - 2 cups shredded cheddar cheese - 1 cup black beans, drained and rinsed - 1/2 cup pico de gallo Seasonings are key to great taste. Taco seasoning fills the dish with southwest flair. Shredded cheese melts beautifully, making every bite cheesy. Black beans add heartiness, while pico de gallo brings freshness. - 1/4 cup fresh cilantro, finely chopped - Sour cream - Guacamole Garnishes finish the dish. Fresh cilantro brightens the nachos with color and flavor. Sour cream and guacamole add creaminess. They balance the spice and melt-in-your-mouth cheese. - Preheat your oven to 400°F (200°C). This heat cooks the food evenly. - In a large bowl, add the sliced chicken, red bell pepper, yellow bell pepper, and onion. - Pour in two tablespoons of olive oil and add one tablespoon of taco seasoning. - Sprinkle in salt and black pepper to taste. Toss everything until mixed well. - Spread the mixture on a large sheet pan. Make sure it is in a single layer. - Place the pan in the oven and bake for 20 minutes. The chicken should be cooked through. - Once done, remove the pan from the oven. Layer tortilla chips evenly over the chicken and veggies. - Top the chips with two cups of shredded cheddar cheese and one cup of black beans. - Return the pan to the oven for another 10 minutes. The cheese should be melted and bubbly. - After baking, add half a cup of pico de gallo and a quarter cup of chopped cilantro on top. - Serve hot with sour cream and guacamole on the side. Enjoy your nachos! - Use fresh ingredients for the best taste. Fresh veggies and chicken make a big difference. - Experiment with additional spices. Try cumin or chili powder to add depth. - Ensure an even layer for cooking. Spread your chicken and veggies flat on the pan. This helps everything cook well. - Monitor cheese melting closely. You want it gooey but not burnt. Keep an eye on it in the oven. - Serve nachos straight from the sheet pan. It makes for a fun, casual meal. You can also use a big platter for parties. - Pair with drinks like iced tea or a light beer. A side of fresh guacamole adds creaminess and flavor. {{image_4}} You can switch the chicken for other proteins. Beef works great for a heartier bite. Use ground beef or sliced flank steak. Shrimp is also a tasty choice. Just adjust the cooking time for shrimp, as it cooks faster. For a vegetarian twist, use black beans or roasted veggies. You can mix in mushrooms or zucchini for flavor. Cheese makes nachos special. Cheddar is classic, but you can try Monterey Jack or pepper jack for a kick. For a richer flavor, consider using gouda or fontina. If you need a dairy-free option, use plant-based cheese. There are many brands that melt well for nachos, so look for a good one. Toppings can change your nacho game. Try adding jalapeños for heat or corn for sweetness. Avocado slices bring creaminess, while olives add a salty bite. You can also customize with fresh salsas or sauces. Drizzle some hot sauce for extra zing. The choices are endless, so get creative! To store your nachos, let them cool first. Place them in an airtight container. This keeps them fresh and tasty. Use glass or plastic containers with tight lids. Avoid metal containers as they can affect flavor. You can reheat nachos in the oven or microwave. For the oven, preheat it to 350°F (175°C). Spread the nachos on a baking sheet. Bake for about 10 minutes, until hot. This helps keep them crispy. If using a microwave, heat in short bursts of 30 seconds. Check often to avoid sogginess. You can freeze the chicken and veggie mix, but not the assembled nachos. To freeze, place the mix in a freezer bag. Remove as much air as possible to prevent freezer burn. For thawing, put it in the fridge overnight. Reheat in the oven or on the stove. Avoid refreezing nachos once they have been thawed. Yes, you can prepare the chicken and veggies in advance. Store them in the fridge for up to two days. When ready to bake, spread them on the sheet pan and add the chips and cheese. This method saves time and keeps flavors fresh. You can make your own taco seasoning if needed. Combine chili powder, cumin, garlic powder, and paprika. This mix gives a great flavor. You can adjust the spices to match your taste. If you love heat, add some cayenne pepper. Yes! You can use corn chips, tortilla strips, or even pita chips. Each chip adds a unique taste. Try different types to see what you like best. Just ensure the chips can hold the toppings well. This blog post covered how to make delicious Sheet Pan Chicken Fajita Nachos. You learned about essential ingredients, step-by-step baking instructions, and useful tips. I shared ideas for variations, storage, and reheating nachos too. Use fresh ingredients and customize flavors for the best results. Whether you enjoy chicken or switch proteins, these nachos can fit your taste. Now, gather your ingredients and get cooking for a fun meal!

Sheet Pan Chicken Fajita Nachos Flavorful and Easy

Get ready for a fun and tasty meal with my Sheet Pan Chicken Fajita Nachos! This dish is simple to

- 1 cup almond flour - 1/2 cup rolled oats - 1/3 cup pure maple syrup - 1/4 cup nut butter (peanut or almond) - 1 teaspoon high-quality vanilla extract - 1/4 teaspoon fine sea salt - 1/2 cup mini chocolate chips - Optional: 1/4 cup unsweetened shredded coconut - Optional: 1/4 cup chopped nuts (walnuts or pecans) To make these no-bake chocolate chip cookie dough bars, gather your ingredients first. Start with almond flour and rolled oats. They give a nice base for the bars. Use pure maple syrup for sweetness and nut butter for creaminess. You can pick peanut or almond butter, depending on your taste. Next, add high-quality vanilla extract. This will give the bars a rich flavor. A pinch of fine sea salt balances the sweetness. Then, toss in mini chocolate chips. They melt in your mouth and add a delightful crunch. If you want more texture, add unsweetened shredded coconut or chopped nuts. Make sure to measure everything correctly. This will help your bars turn out just right. Enjoy mixing these simple, wholesome ingredients for a tasty treat! 1. Mix Dry Ingredients: In a large bowl, blend 1 cup almond flour, 1/2 cup rolled oats, and 1/4 teaspoon fine sea salt. Use a whisk or spoon. Make sure to mix well until everything is even. 2. Combine Wet Ingredients: In another bowl, whisk together 1/3 cup pure maple syrup, 1/4 cup nut butter, and 1 teaspoon vanilla extract. This mixture should be smooth. 3. Combine Mixtures: Gradually pour the wet mix into the dry mix. Stir with a spatula until it forms a dough. It should be crumbly but hold together when pressed. 4. Fold in Extras: Gently fold in 1/2 cup mini chocolate chips, 1/4 cup shredded coconut, and 1/4 cup chopped nuts if you want some crunch. Make sure they are evenly spread throughout the dough. 5. Prepare the Pan: Line an 8x8-inch baking pan with parchment paper. Leave some paper hanging over the edges. This will help you lift the bars out later. 6. Press the Dough: Firmly press the dough into the pan. Make sure it is spread evenly. Use the back of a spatula or your hands to smooth the top. 1. Chill the Bars: Place the pan in the refrigerator. Let it chill for about 30 minutes. This helps the bars set and become firm. 2. Cutting the Bars: After chilling, lift the bars out using the parchment paper edges. Place them on a cutting board. Cut into equal squares or rectangles based on how big you want them. Keep an eye on the texture as you cut. You want them to hold together well, but still be soft enough to enjoy. To ensure the right texture for your dough, focus on the ingredient ratios. Use a scale for precision. The almond flour should be fine, while the rolled oats add texture and should not be too coarse. Mix your dry ingredients well before adding the wet ones. This keeps everything even. To prevent sticking in the pan, line it with parchment paper. Let the paper hang over the edges. This makes it easy to lift the bars out later. Press the dough firmly into the pan. A smooth surface helps the bars hold their shape better. For garnishing the bars, sprinkle some shredded coconut on top. It adds a lovely touch and enhances the flavor. You can also drizzle some melted chocolate for a rich finish. For pairing options with beverages, consider serving these bars with a glass of almond milk. The nutty flavor complements the bars well. You could also enjoy them with a cup of coffee or tea for a delightful snack. {{image_4}} You can easily change the flavor of these bars. Adding different nut butters can create unique tastes. If you love peanut butter, try it instead of almond. For a richer flavor, use cashew butter. Spices like cinnamon or nutmeg can elevate the bars, too. Just a pinch can add warmth and depth. Try adding 1/2 teaspoon of cinnamon for a cozy touch. Nutmeg has a sweet and nutty flavor. A little goes a long way, so start with 1/4 teaspoon. If you need gluten-free options, oats are a great start. Use certified gluten-free oats to ensure safety. They work well in this recipe without changing the taste. For sweeteners, maple syrup is not the only choice. Honey or agave syrup can be great alternatives. Both add sweetness and moisture. Just use the same amount to keep the texture right. To keep your no-bake chocolate chip cookie dough bars fresh, store them in an airtight container. Place a sheet of parchment paper between layers if you stack them. This helps prevent sticking. You can store these bars in the fridge for up to one week. They taste even better after chilling. If you want to save some bars for later, freezing is a great option. Wrap each bar tightly in plastic wrap or foil. Then, place them in a freezer-safe bag. This way, they will stay fresh for up to three months. When you're ready to enjoy a bar, simply take it out. Let it thaw in the fridge for a few hours or on the counter for about 30 minutes. This method keeps the texture nice and chewy. Yes, you can use other flours. Almond flour is great, but oat flour works too. Just keep in mind that each flour has a different texture. Experiment to find your favorite! The bars should feel firm to the touch after chilling. If they hold their shape when you press them, they are ready. Chill them for about 30 minutes to set properly. Absolutely! To make these bars vegan, use a plant-based nut butter. Ensure your chocolate chips are dairy-free as well. You can enjoy this treat while keeping it plant-friendly! You can add many toppings for fun! Try a drizzle of melted chocolate or a sprinkle of sea salt. Chopped nuts or extra chocolate chips also add great texture and flavor. Enjoy getting creative! In this post, we covered a simple and tasty recipe for energy bars. You learned about the key ingredients, preparation steps, and how to store them. I also shared tips for making your bars perfect and variations to keep things exciting. These bars are easy to customize, healthy, and delicious. Try them today and enjoy a great snack packed with nutrients. You'll find they fit perfectly into your busy life.

No-Bake Chocolate Chip Cookie Dough Bars Delight

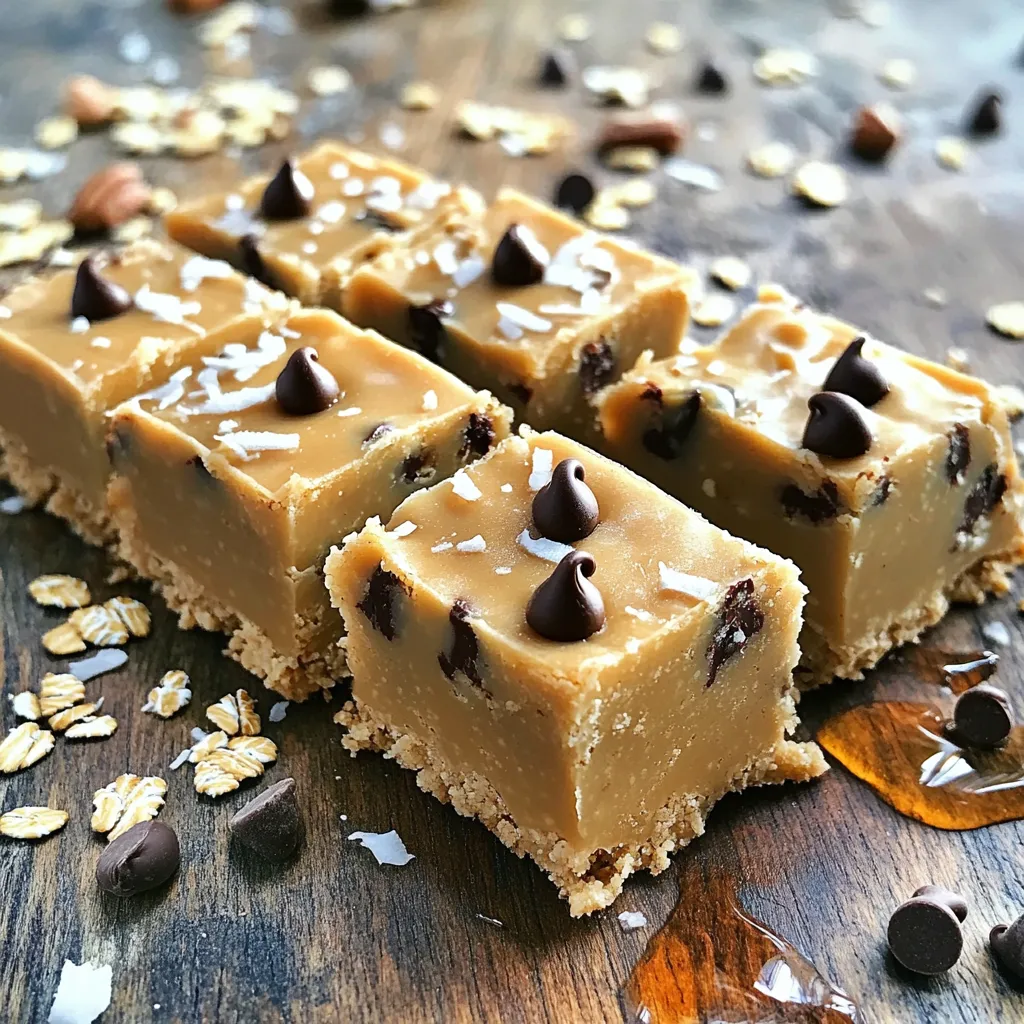
Are you craving a sweet treat that’s easy to make and delicious? You’re in the right place! These No-Bake Chocolate

- 4 ripe bananas - 1/2 cup natural peanut butter - 1/2 cup Greek yogurt - 2 tablespoons honey or maple syrup (optional) - 1 teaspoon vanilla extract - Pinch of sea salt - Optional garnishes: chopped peanuts or chocolate chips Gathering the right ingredients is key for this ice cream. Start with ripe bananas. They should be yellow with brown spots. This means they are sweet and ready to freeze. Next, choose natural peanut butter. It should have no added sugars or oils. This keeps the flavor pure and healthy. Greek yogurt adds creaminess and protein. You can use plain or vanilla yogurt, depending on your taste. Honey or maple syrup is optional. They add sweetness, but you can skip them if you want. A dash of vanilla extract brings warmth and depth. Lastly, a pinch of sea salt balances the flavors. Feel free to get creative with garnishes. Chopped peanuts add crunch. Chocolate chips add a sweet touch. You can mix and match based on your liking. Each ingredient plays a role in making this ice cream creamy and tasty. Enjoy making this delightful treat! - Freezing the bananas: Start with ripe bananas. They should have brown spots. Slice them into thick rounds. Arrange the slices on a baking sheet. Freeze the banana slices for about 2 hours. They need to be completely solid. - Slicing the bananas: Use a sharp knife to cut the bananas. Aim for half-inch thick slices. This size helps them freeze faster and blend well. - Steps to blend bananas to a creamy consistency: After freezing, take the bananas out. Put the solid slices in a food processor. Blend on high speed for 2-3 minutes. Stop to scrape down the sides as needed. You want a smooth and creamy texture. - Adding other ingredients: Once creamy, add the peanut butter and Greek yogurt. Then, pour in the honey, vanilla extract, and a pinch of sea salt. Blend again until everything mixes well. - Tasting and adjusting the sweetness level: After blending, taste your ice cream mix. If it needs more sweetness, add honey or maple syrup. Blend again to mix it in. Remember, you can always add more, but you can't take it out. - Soft-serve alternative: You can serve the ice cream right away. It will have a soft-serve texture. Just scoop it into bowls and enjoy! - Firm ice cream storage: If you want firmer ice cream, put the mixture in an airtight container. Freeze it for 1-2 hours. This way, it will scoop easily and hold its shape. Ripe bananas are key in this recipe. They give the ice cream a rich flavor. Look for bananas that have a few brown spots. This means they are sweet and soft. You want them to be just right for blending. If they are too green, they won’t taste as good. To get that perfect creamy consistency, use a good food processor. Start with frozen banana slices. Blend them on high speed. Scrape down the sides when needed. This helps mix everything evenly. It usually takes about 2-3 minutes to get smooth ice cream. If it feels too thick, add a bit of Greek yogurt. This will help make it creamier. If you want to cut sugar, try stevia or agave. They are great options for sweetness. Just add a little at first and taste the mixture. You can always add more if needed. This way, you can make a healthier ice cream without losing flavor. {{image_4}} You can make this ice cream even better. Try adding different nuts or seeds. Chopped almonds or sunflower seeds add a nice crunch. You can also mix in flavor variations. Dark chocolate chips bring a rich taste. A sprinkle of cinnamon adds warmth and depth. Mix it up based on your mood! If you want a dairy-free treat, you can use plant-based yogurt. Almond or coconut yogurt works well. You can also swap peanut butter for nut butters like cashew or almond. Both options keep it creamy while changing the flavor. Seasonal fruits can change your ice cream game. In summer, add fresh strawberries or peaches. In fall, try pumpkin puree with spices for a cozy twist. This keeps your ice cream exciting and fresh all year long! To keep your ice cream fresh, store it in an airtight container. This helps prevent ice crystals from forming. A glass or plastic container with a tight lid works well. You can also press plastic wrap directly onto the surface before sealing the lid. This extra step helps keep moisture out. When you want to enjoy your ice cream, take it out of the freezer. Let it sit at room temperature for about 5 to 10 minutes. This will help it soften a bit. For the best texture, avoid using a microwave to thaw. Microwaves can make the ice cream too soft or watery. Your high-protein peanut butter banana ice cream stays fresh in the freezer for about 1 to 2 months. After that, it may lose flavor or texture. To enjoy it at its best, try to eat it within this time frame. Always check for any off smells or changes in texture before serving. You can use fresh bananas, but the texture will change. Fresh bananas are soft, so they won't give you that creamy ice cream feel. If you do use fresh bananas, you can add ice to the mix. This helps make it cold and thick. Just remember to blend longer to get it smooth. To make this ice cream vegan, swap Greek yogurt with a plant-based yogurt. You can use almond or coconut yogurt. Also, choose maple syrup instead of honey. These swaps keep your ice cream creamy and tasty without any animal products. Yes, you can! If you don’t have a food processor, try using a high-speed blender. You can also mash the bananas by hand and mix in the other ingredients. It will take more effort, but it still works. Just make sure everything is mixed well. Absolutely! You can make this ice cream ahead of time. Just freeze it in an airtight container. It stays fresh for about a week. When you want to eat it, let it thaw for a few minutes before serving. This makes it easier to scoop. This blog post showed you how to make creamy banana ice cream. You learned about the simple ingredients needed, like ripe bananas and peanut butter. I explained step-by-step how to prepare, blend, and serve this treat. We also explored tips for sweetness and variations to make it your own. Remember to store it well and enjoy it fresh. Now, you can impress friends and family with a tasty, healthy dessert!

High-Protein Peanut Butter Banana Ice Cream Delight

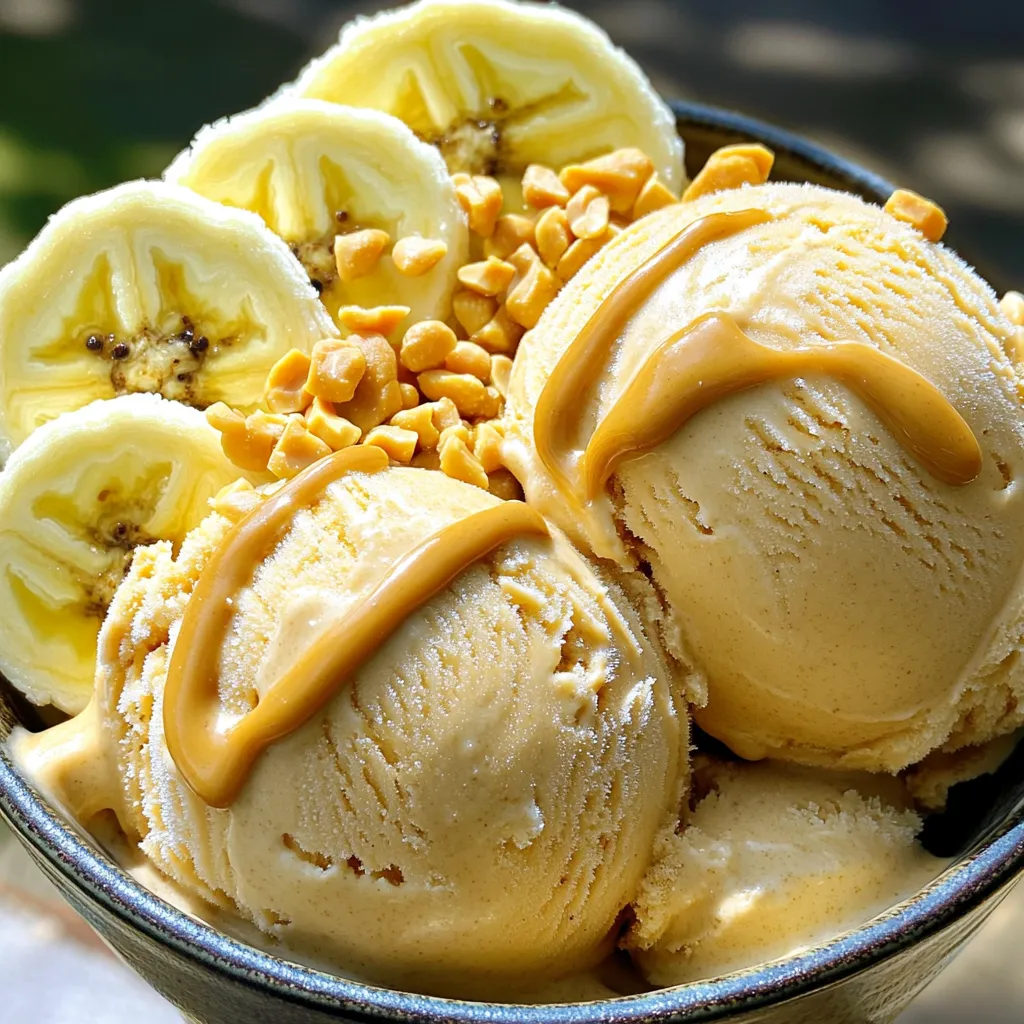
Craving a tasty treat that’s both healthy and satisfying? Look no further! My High-Protein Peanut Butter Banana Ice Cream Delight

Older posts
Newer posts
← Previous Page1 Page2 Page3 Page4 … Page85 Next →

dsad

© 2026 tastyhatch • Built with GeneratePress

Our Policies

  • Copyright Policy
  • Cookie Policy
  • GDPR Policy
  • Privacy Policy
  • Disclaimer
  • Terms Of Use

More Information

  • Home
  • About
  • Contact
  • Appetizers
  • Dessert
  • Dinner
  • Drinks
©2026, tastyhatch About Back To Top