Skip to content
DisclaimerTerms Of UseGDPR PolicyCookie Policy

tastyhatch

  • Home
  • Drinks
  • Appetizers
  • Dinner
  • Dessert
  • About
  • Contact
  • Privacy Policy
DisclaimerTerms Of UseGDPR PolicyCookie Policy

NO-ING-IMG

The main items you need for this dish are simple yet flavorful. Here’s the list: - 2 lbs boneless, skinless chicken thighs, cut into bite-sized chunks - 1 large onion, finely chopped - 4 cloves garlic, minced - 1-inch piece fresh ginger, grated - 1 can (14 oz) diced tomatoes - 1 can (13.5 oz) coconut milk - 2 tablespoons tomato paste - 2 tablespoons garam masala - 1 tablespoon ground cumin - 1 tablespoon ground coriander - 1 teaspoon turmeric powder - 1 teaspoon chili powder (adjust to taste) - 1 teaspoon salt (adjust to taste) - 1 tablespoon olive oil - Fresh cilantro leaves, for garnishing These ingredients work together to create a rich, creamy sauce. The spices add depth and warmth, while the chicken stays tender. You can customize your Chicken Tikka Masala. Here are some ideas to mix it up: - Add a splash of lemon juice for brightness. - Include bell peppers or peas for added veggies. - Swap in yogurt for a tangy twist. - Use different spices like cinnamon for a unique flavor. Feel free to experiment with these options. Each addition can change the taste and make your dish special. When serving Chicken Tikka Masala, consider these sides: - Cooked basmati rice for a fluffy base. - Warm naan for dipping into the sauce. - A simple cucumber salad for a refreshing crunch. - Steamed vegetables to balance the meal. These sides enhance the dish and offer a complete dining experience. Enjoy the flavors of your slow cooker creation! To start, gather all your ingredients. You will need: - 2 lbs boneless, skinless chicken thighs, cut into bite-sized chunks - 1 large onion, finely chopped - 4 cloves garlic, minced - 1-inch piece fresh ginger, grated - 1 can (14 oz) diced tomatoes - 1 can (13.5 oz) coconut milk - 2 tablespoons tomato paste - 2 tablespoons garam masala - 1 tablespoon ground cumin - 1 tablespoon ground coriander - 1 teaspoon turmeric powder - 1 teaspoon chili powder (adjust to taste) - 1 teaspoon salt (adjust to taste) - 1 tablespoon olive oil - Fresh cilantro leaves, for garnishing - Cooked basmati rice or warm naan, for serving Chop the onion, mince the garlic, and grate the ginger. This step builds the flavor base for your dish. Now, heat the olive oil in a skillet. Once hot, add the chopped onion. Sauté it for about 5-7 minutes. You want it to turn translucent and slightly golden. Next, add the minced garlic and grated ginger. Cook for one more minute. Stir often to avoid burning. Transfer this onion mix to your slow cooker. Add the diced tomatoes, coconut milk, and tomato paste. Then, sprinkle in the garam masala, cumin, coriander, turmeric, chili powder, and salt. Mix everything well. Carefully place the chicken chunks into the slow cooker. Make sure each piece is coated in the sauce. Cover it with a lid. Cook on low for 6-7 hours or on high for 3-4 hours. The chicken should be tender and reach 165°F inside. Once it's done cooking, stir the chicken tikka masala. Taste the sauce and adjust the seasoning if needed. Serve it over fluffy basmati rice or with warm naan. Don’t forget to garnish with fresh cilantro leaves for a bright finish. For a beautiful presentation, layer the rice and top it with the rich chicken tikka masala. Enjoy your flavorful delight! For the complete recipe, refer to the Full Recipe. To make your chicken tikka masala shine, start with a great marinade. Use yogurt mixed with spices like garam masala and turmeric. Marinate for at least one hour. For best results, let it sit overnight. This helps the chicken soak up all the flavors. If you like spice, add more chili powder or fresh chili peppers. If you prefer mild, cut back on the chili powder. Always taste the sauce before serving. It’s easier to add spice than to take it away. Remember, the heat can build as it cooks. Serve your chicken tikka masala over fluffy basmati rice. You can also pair it with warm naan for dipping. Garnish with fresh cilantro for a pop of color and taste. For an authentic feel, add a side of cooling cucumber raita. This balance of flavors will delight your taste buds! {{image_4}} You can easily make this dish vegetarian or vegan. Swap the chicken for chickpeas or tofu. Chickpeas add protein and texture. Tofu soaks up the sauce well. Use the same cooking method. This keeps the flavors rich and satisfying. Use coconut milk to keep it creamy. You can use other proteins too. Try shrimp or lamb for a twist. Cook shrimp for less time to keep it tender. Lamb adds a unique flavor. It cooks well in the slow cooker. Just make sure to adjust the cooking time for each protein. You can change the spices to your taste. Try curry powder for a different flavor. You can also mix in some smoked paprika for a hint of smokiness. If you like heat, add more chili powder. Don’t be afraid to experiment with spices. Each blend will give you a new taste experience. For more ideas, check the Full Recipe. After you enjoy your slow cooker chicken tikka masala, store leftovers safely. Place leftovers in an airtight container. Refrigerate within two hours of cooking. This keeps the dish fresh and safe to eat. You can store it for about three to four days. When you're ready to enjoy the leftovers, reheat them gently. Use a microwave or a stove. If using a microwave, heat on medium power. Stir halfway to avoid cold spots. On the stove, warm it over low heat. Add a splash of water or coconut milk if it seems thick. This helps bring back the creamy texture. You can freeze chicken tikka masala for later. Use a freezer-safe container or bag. Leave some space at the top for expansion. This dish can last up to three months in the freezer. When you want to eat it, thaw it overnight in the fridge. Then, reheat as mentioned above for the best flavor. Enjoy your tasty meal anytime! To make your Chicken Tikka Masala spicier, you can add more chili powder. Start with an extra half teaspoon. You can also add fresh green chilies or a pinch of cayenne pepper. If you enjoy heat, try using spicy garam masala. Taste the sauce before serving. Adjust until it suits your spice level. Yes, you can use chicken breasts. They may cook faster than thighs, so check for doneness sooner. Breasts can be drier than thighs, so add a little extra coconut milk. This keeps the meat moist and tender. The flavors will still shine through, making it delicious! I love serving Chicken Tikka Masala with fluffy basmati rice. It soaks up the tasty sauce well. You can also pair it with warm naan. Naan is great for dipping! Don’t forget to add a side of fresh cucumber salad or raita. This balance cools the heat and adds freshness. You can make Chicken Tikka Masala ahead of time! Cook it as directed and let it cool. Store in an airtight container in the fridge. It will stay fresh for up to three days. When ready, just reheat on the stove. It tastes even better the next day! For the full recipe, check the earlier section. This blog post covered how to make slow cooker chicken tikka masala. We explored essential ingredients and how to prepare them. I shared tips for perfecting the flavors and serving ideas that suit everyone. You can also customize the dish with varied proteins or spice levels to fit your taste. Remember to store leftovers properly for later enjoyment. Enjoy your cooking and savor the delicious results!

Slow Cooker Chicken Tikka Masala Flavorful Delight

Are you ready to dive into the world of Slow Cooker Chicken Tikka Masala? This dish is a true flavorful

To make tasty spicy shrimp tacos, you need: - 1 pound large shrimp, peeled and deveined - 8 small corn tortillas - 1 cup red cabbage, finely shredded - 1 ripe avocado, thinly sliced - 1/4 cup fresh cilantro, roughly chopped - 1/2 cup sour cream or Greek yogurt The marinade gives the shrimp great flavor. You will need: - 2 tablespoons olive oil - 1 tablespoon chili powder - 1 teaspoon ground cumin - 1/2 teaspoon smoked paprika - 1/2 teaspoon garlic powder - 1/4 teaspoon cayenne pepper (adjust for heat) - Salt and freshly ground black pepper to taste - Juice of 1 lime Add fun toppings and garnishes to your tacos. Here are some ideas: - Fresh lime wedges for squeezing - Extra chopped cilantro for freshness - Your favorite hot sauce for more heat - Diced tomatoes or jalapeños for crunch For the full recipe, check the detailed instructions above. Enjoy crafting these flavorful tacos! To start, grab a medium bowl. Add 2 tablespoons of olive oil. Then, add 1 tablespoon of chili powder. Next, mix in 1 teaspoon of ground cumin. Toss in 1/2 teaspoon of smoked paprika. Add 1/2 teaspoon of garlic powder. For a kick, add 1/4 teaspoon of cayenne pepper. Adjust the heat to your taste. Season with salt and pepper. Squeeze the juice of 1 lime into the mix. Whisk all the ingredients together until smooth. This marinade gives the shrimp a bold flavor. Once your marinade is ready, gently add 1 pound of peeled and deveined shrimp. Toss them in the marinade for an even coat. Let them sit at room temperature for 15-20 minutes. This step lets the flavors soak in. While the shrimp marinate, heat a skillet over medium-high heat. When it's hot, add the shrimp in a single layer. Cook for 2-3 minutes on each side. Look for the shrimp to turn pink and opaque. Once cooked, remove them from the skillet and set aside. Now it’s taco time! Warm 8 small corn tortillas in a separate skillet over low heat. Heat them for about 30 seconds on each side until soft. Place a few cooked shrimp on each tortilla. Top with 1 cup of finely shredded red cabbage. Add slices of 1 ripe avocado. Sprinkle with 1/4 cup of fresh cilantro. Drizzle with 1/2 cup of sour cream or Greek yogurt. If you like it spicy, add your favorite hot sauce. Your tacos are now ready to enjoy! For the full recipe, check the instructions above. For perfect shrimp, keep it simple. Use high heat for a quick cook. Start with a hot skillet. Add the marinated shrimp and spread them out. This helps them cook evenly. Cook for just 2-3 minutes on each side. Look for a bright pink color. When they turn opaque, they are ready. Overcooking makes shrimp rubbery, so watch closely! Warm your corn tortillas before serving. Heat them in a dry skillet for a few seconds. This adds a nice texture. You can also brush them lightly with olive oil before warming. For a twist, sprinkle some lime juice on them while cooking. This adds a kick of flavor. You can even mix in a pinch of salt or chili powder for extra taste. Serve your spicy shrimp tacos with colorful toppings. Shredded cabbage adds crunch and color. Slices of ripe avocado bring creaminess. Fresh cilantro gives a burst of flavor. Don't forget the sour cream or Greek yogurt for a cool touch. For more heat, add your favorite hot sauce. Arrange the tacos on a platter with lime wedges. This makes for a fun and inviting presentation. {{image_4}} You can change the heat in your shrimp marinade easily. Start with less cayenne pepper if you prefer milder flavors. Use just a pinch to test the spice. If you want more heat, add more cayenne. This way, you control the fire in your tacos. You can also try adding a dash of hot sauce to your marinade for an extra kick. Tacos are fun because you can mix and match toppings. Instead of red cabbage, try shredded lettuce or diced tomatoes. For a creamy touch, use guacamole or mango salsa. You might also like adding pickled onions for a tangy bite. If you want crunch, consider adding radishes or jalapeños. The options are endless, so get creative! Serve your spicy shrimp tacos with tasty sides. A fresh corn salad pairs well and adds sweetness. You could make a simple black bean salad for protein. Another great choice is a zesty lime rice, which complements the flavors. For a refreshing drink, serve iced tea or a fruity agua fresca. Each side adds to the fun and flavor of your meal. For the full details on making these tacos, check the Full Recipe. To store leftover tacos, place them in an airtight container. Keep the shrimp, tortillas, and toppings separate. This prevents sogginess and keeps everything fresh. Use the tacos within two days for the best taste. If you mix everything, the flavors can change. Reheat shrimp in a skillet. Add a little oil to avoid sticking. Heat on medium until warm, about 2-3 minutes. Avoid cooking too long; otherwise, the shrimp will turn rubbery. You can also use the microwave; just cover the shrimp with a damp paper towel. You can freeze shrimp before cooking. Place them in a freezer bag, removing as much air as possible. For cooked shrimp, freeze in a single layer on a baking sheet. Once frozen, transfer to a bag. Use within three months for best quality. You can also freeze toppings like shredded cabbage, but it's best to freshen them up when serving. The best way to season shrimp is with a bold marinade. I mix olive oil, chili powder, cumin, smoked paprika, garlic powder, cayenne pepper, salt, and black pepper. This mix gives shrimp a tasty kick. You can adjust the cayenne for more or less heat. Letting the shrimp sit in the marinade for 15-20 minutes helps the flavors soak in. Yes, you can use frozen shrimp for this recipe. Just make sure to thaw them first. To thaw, place them in a bowl of cold water for about 15-20 minutes. Once they are thawed, peel and devein them if needed. Using frozen shrimp is handy and cuts down prep time. They will still taste great when cooked. To make these tacos gluten-free, use corn tortillas instead of flour tortillas. Corn tortillas add a nice flavor and are naturally gluten-free. Always check the label to ensure they are certified gluten-free. You can also use gluten-free sauces or toppings. Enjoy your meal without worry! Spicy shrimp tacos are fun to make. You learned about key ingredients, step-by-step cooking, and tips for serving. There are many ways to customize these tacos to fit your taste. You can change the spice level or try new toppings. Plus, I shared how to store leftovers and make them last. Enjoy your delicious tacos, share them with friends, and make every meal special. Dive in and savor each bite!

Spicy Shrimp Tacos Quick and Flavorful Recipe

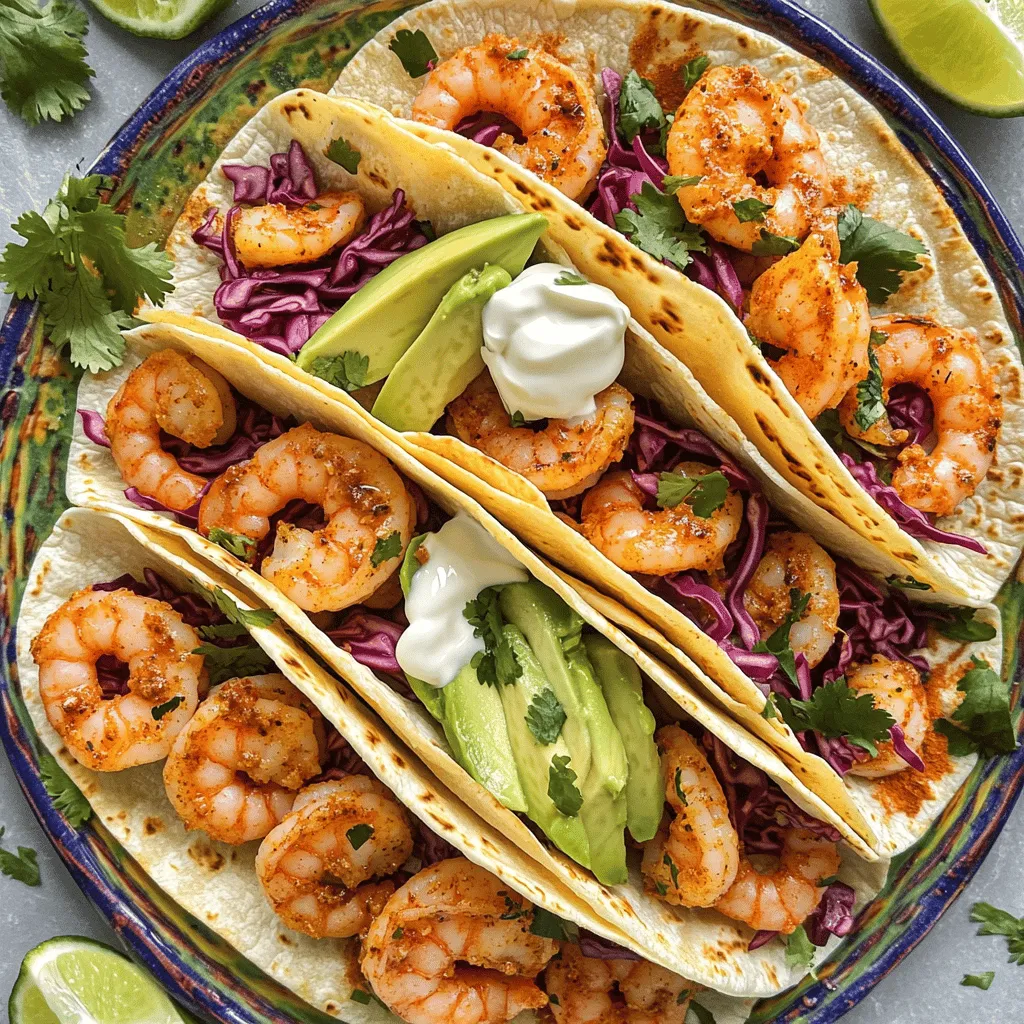
Get ready for a flavor explosion with my Spicy Shrimp Tacos! This quick and easy recipe packs a punch and

Here is what you need for the Mediterranean Chickpea Salad: - 2 cups canned chickpeas, thoroughly rinsed and drained - 1 cup cherry tomatoes, halved - 1 cucumber, diced into bite-sized pieces - 1/2 red onion, finely chopped - 1/2 bell pepper (choose between red or yellow), diced - 1/4 cup kalamata olives, pitted and sliced - 1/4 cup feta cheese, crumbled - 1/4 cup fresh parsley, roughly chopped - 3 tablespoons extra virgin olive oil - 2 tablespoons freshly squeezed lemon juice - 1 teaspoon dried oregano - Salt and freshly ground black pepper to taste Not all ingredients may be on hand. Here are some easy swaps: - Use canned white beans instead of chickpeas for a different taste. - Try grape tomatoes if cherry tomatoes are hard to find. - Swap the cucumber with zucchini for a fresh twist. - If you don’t have feta, use goat cheese for a tangy flavor. - For a vegan option, skip the cheese or use a plant-based version. This salad is not just tasty; it’s good for you too. Here are some benefits: - Chickpeas: High in protein and fiber, they keep you full longer. - Tomatoes: Rich in vitamins A and C, great for skin health. - Cucumbers: Low in calories, they hydrate and refresh. - Olives: Provide healthy fats that support heart health. - Feta Cheese: Offers calcium for strong bones and teeth. - Parsley: Packed with vitamins, it helps boost your immune system. Enjoy making this Mediterranean Chickpea Salad! For the full recipe, check the complete guide above. Start by gathering all your fresh ingredients. First, rinse and drain 2 cups of canned chickpeas. This step gets rid of excess salt and makes them taste fresh. Next, halve 1 cup of cherry tomatoes. Their sweetness adds a nice touch to the salad. Then, take a cucumber and dice it into bite-sized pieces. This adds crunch and freshness. After that, finely chop 1/2 red onion. Use it sparingly if you want less bite. Dice 1/2 a bell pepper, either red or yellow, for color and sweetness. Finally, slice 1/4 cup of kalamata olives and roughly chop 1/4 cup of fresh parsley. Put all these ingredients in a large mixing bowl. In a small bowl, whisk together 3 tablespoons of extra virgin olive oil and 2 tablespoons of freshly squeezed lemon juice. This dressing is simple but bright. Add 1 teaspoon of dried oregano for an earthy flavor. Don’t forget to sprinkle in some salt and pepper to taste. Mix until everything blends well. This dressing will tie all the flavors together. Now, drizzle the dressing over the chickpea mixture in the large bowl. Toss gently to coat every ingredient evenly. You want every bite to be flavorful. Next, crumble in 1/4 cup of feta cheese. Toss it lightly so it keeps its shape. Taste the salad and adjust any flavors with extra salt, pepper, or lemon juice. Cover the salad and chill it in the fridge for 30 minutes. This waiting time lets the flavors meld beautifully. Before serving, give the salad one last gentle toss. Now it’s ready to enjoy! For the full recipe, refer to the provided details above. To boost flavor in your Mediterranean Chickpea Salad, use fresh herbs. Fresh parsley adds a bright touch. You can also try mint for a refreshing taste. Try adding a dash of red pepper flakes for heat. A sprinkle of lemon zest gives it a nice zing. Finally, let the salad sit after mixing. This helps the flavors blend well. Serve your salad in a large bowl or on individual plates. You can add slices of lemon for a pop of color. Garnish with more parsley for freshness. Pair the salad with pita bread or grilled chicken. It also works well as a side dish for any meal. You can make this salad a day ahead. Just keep it in the fridge until you are ready to serve. The flavors will deepen and taste even better. If you plan to store it, add feta cheese right before serving. This keeps the cheese fresh and intact. For the best taste, enjoy it within two days. {{image_4}} You can easily boost the protein in your Mediterranean Chickpea Salad. Adding grilled chicken or shrimp gives a tasty twist. If you prefer a plant-based protein, consider adding marinated tofu or tempeh. These options not only enhance the dish but also keep it filling. You could even mix in some cooked quinoa or farro for a hearty addition. This salad is already vegetarian, but you can easily make it vegan. Simply leave out the feta cheese or swap it for a vegan cheese alternative. You can also add more ingredients, like avocado, for creaminess. This keeps the salad fresh and satisfying while fitting a vegan diet. You can change this salad with the seasons. In summer, try adding ripe peaches or berries for sweetness. In fall, diced apples or roasted sweet potatoes create warmth. In winter, consider adding citrus fruits like oranges or grapefruits for zest. These seasonal tweaks keep the salad exciting all year round. For the complete recipe, check out the Full Recipe. To store your Mediterranean chickpea salad, place it in an airtight container. This keeps the salad fresh and prevents spills. Make sure to cover it tightly. You can keep it in the fridge for up to three days. If you notice any changes in smell or color, throw it away. Most ingredients in this salad have a good shelf life. Canned chickpeas last for several years if unopened. Once opened, use them within a week. Cherry tomatoes stay fresh for about five days in the fridge. Cucumbers usually last about a week. Feta cheese can last up to two weeks. Always check for any signs of spoilage before using. Freezing Mediterranean chickpea salad is not recommended. Fresh veggies lose their crunch and flavor when frozen. If you want to freeze some of the ingredients, you can freeze chickpeas separately. To do this, rinse and drain the chickpeas, then place them in a freezer-safe bag. When you're ready to use them, thaw in the fridge overnight. Add them to fresh veggies and dressing, and enjoy your salad! For more details, check the Full Recipe. You can add many tasty ingredients to make this salad your own. Try adding diced avocado for creaminess. You can also mix in roasted red peppers for a sweet kick. Artichoke hearts add a nice texture, too. For a spicy touch, include jalapeños or chili flakes. Fresh herbs like mint or basil can brighten the flavors further. Feel free to experiment with your favorites! Yes, you can make this salad ahead of time. It tastes even better after the flavors meld. Just prepare it and store it in the fridge for up to two days. Keep the feta cheese separate until you’re ready to serve. This way, it stays fresh and doesn’t crumble too much. If you want to serve it later, give it a quick toss before enjoying! Absolutely! Mediterranean Chickpea Salad is naturally gluten-free. The main ingredients, like chickpeas and veggies, do not contain gluten. This makes it a great option for those with gluten sensitivities. Just double-check any packaged ingredients, like olives or feta, to ensure they are gluten-free. Enjoy this fresh, healthy dish without worry! This post covered Mediterranean Chickpea Salad in detail. We discussed key ingredients, substitutions, and health benefits. You learned how to prepare fresh ingredients and make the dressing. I shared tips on enhancing flavor and serving suggestions. We explored protein options and seasonal variations. Finally, I provided storage info and answered common questions. This salad is versatile and healthy, making it a great choice. Enjoy it any time for a tasty meal!

Mediterranean Chickpea Salad Fresh and Flavorful Mix

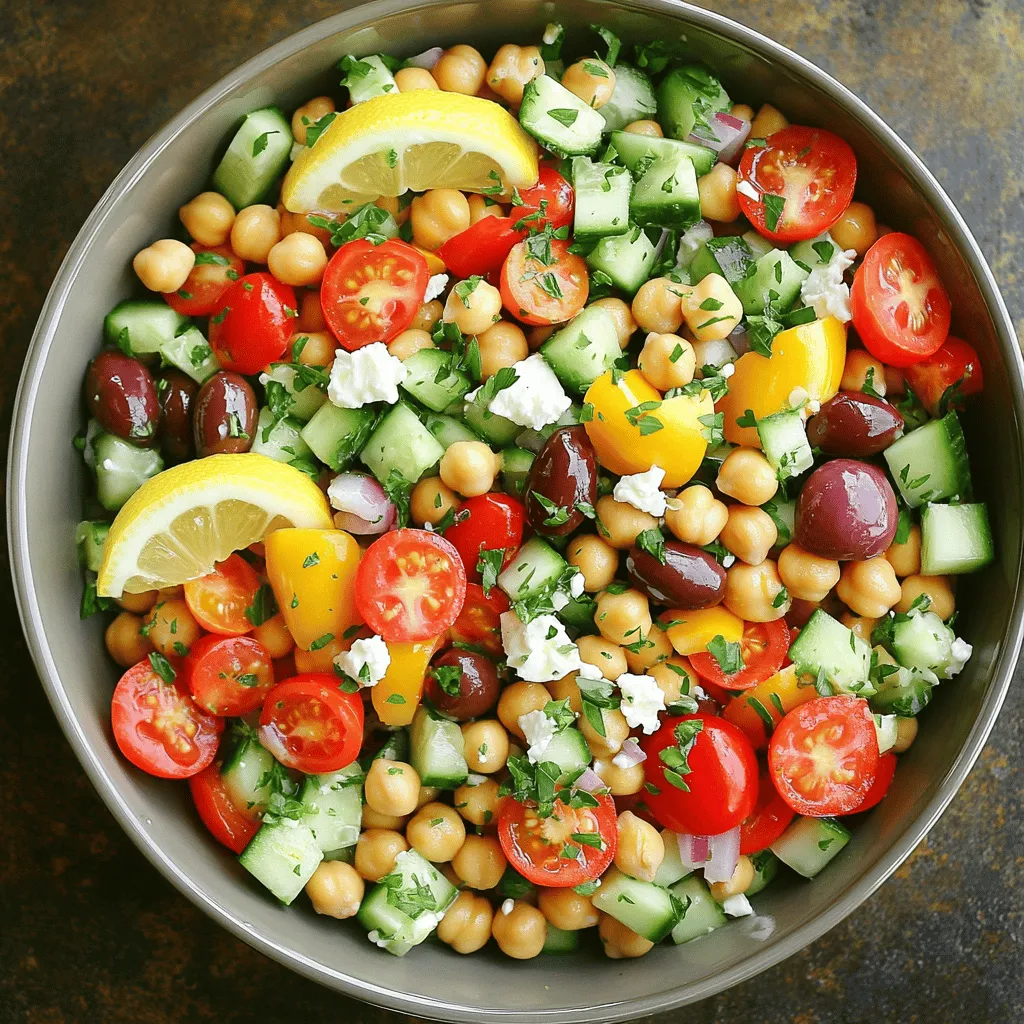
Are you ready to dive into a world of fresh and vibrant flavors? My Mediterranean Chickpea Salad is a tasty

- 1 medium head of cauliflower, cut into small florets - 1 tablespoon olive oil - 1 teaspoon chili powder - 1 teaspoon ground cumin - 1 teaspoon smoked paprika - Salt and pepper to taste - 8 small corn tortillas - 1 cup red cabbage, finely shredded - 1 ripe avocado, sliced - 1/2 cup fresh cilantro, chopped - 1 lime, cut into wedges - Optional: Vegan sour cream or yogurt for topping Cauliflower is the star of these tacos. This veggie shines with its crunchy texture and great taste. You will want to season it well. Olive oil helps the spices stick. Chili powder adds heat, while cumin and smoked paprika bring deep flavor. Don't forget salt and pepper to balance everything. Red cabbage gives a nice crunch. Its bright color makes the dish pop. The avocado adds creaminess, while cilantro brings freshness. Lime is a must. It brightens every bite. For extra creaminess, you can add vegan sour cream or yogurt. Cauliflower is low in calories and high in fiber. This makes it a great choice for your meals. It is also rich in vitamins and antioxidants. Eating cauliflower can help boost your health and keep you feeling full. You can swap spices if you like. Try adding garlic powder or onion powder for more flavor. If you want a kick, use cayenne pepper instead of chili powder. For toppings, you can use diced tomatoes, radishes, or even a salsa. Feel free to get creative! Add what you enjoy to make your tacos your own. For the full recipe, check out the details above. - Preheat the oven to 425°F (220°C). - Prepare the baking sheet with parchment paper. Start by heating your oven. This helps the cauliflower roast evenly. Use parchment paper on your baking sheet. This makes cleanup quick and easy. - Seasoning the cauliflower florets - Roasting process: time and stirring instructions In a large bowl, mix the small cauliflower florets with olive oil, chili powder, ground cumin, smoked paprika, salt, and pepper. Toss them well to coat each floret. Spread the seasoned florets on the baking sheet. Roast them for 25-30 minutes. Stir them halfway through to ensure even cooking. You want them tender and golden. - Warming tortillas in a skillet - Tips for keeping tortillas pliable While the cauliflower roasts, warm corn tortillas in a skillet over medium heat. Heat them for about 30 seconds on each side. This softens them and makes them easy to fold. To keep them pliable, stack them and cover with a clean kitchen towel. - Step-by-step assembly guide - Topping suggestions for a flavorful finish Once the cauliflower is done, it’s time to assemble! Place a generous amount of roasted cauliflower in the center of each tortilla. Top with shredded red cabbage for crunch. Add creamy avocado slices and sprinkle fresh chopped cilantro on top. To finish, serve with lime wedges. A drizzle of vegan sour cream can add extra flavor. For more details, check out the Full Recipe. To get the best texture and flavor from your cauliflower, follow these steps: - Cut the cauliflower evenly: This helps it roast at the same rate. Aim for small, uniform florets for even cooking. - Use enough oil: A tablespoon of olive oil helps the spices stick and adds great flavor. Don’t skimp on it! - Season well: The key is to coat the cauliflower fully with spices. Use chili powder, cumin, and paprika for a tasty kick. Common roasting mistakes can ruin your dish: - Don’t overcrowd the pan: If florets touch, they will steam instead of roast. Give them space. - Skip the stirring: Stir halfway through cooking to ensure even browning. This step is key for texture. Prepping ingredients in advance saves time. Here’s how: - Chop the cauliflower ahead: Store it in the fridge in a sealed bag. It stays fresh for a few days. - Mix spices early: Combine the chili powder, cumin, and paprika in a small jar. This makes it easy to season later. Storing roasted cauliflower is simple. Let it cool, then place it in an airtight container. It lasts about 3-4 days in the fridge. Reheating roasted cauliflower is quick: - Oven method: Heat at 350°F (175°C) for about 10 minutes. - Microwave method: Use a microwave-safe dish and cover it. Heat in short bursts to avoid sogginess. Pair your vegan cauliflower tacos with fun sides or drinks: - Try a fresh salad: A simple green salad adds crunch and color. - Serve with a drink: Fresh limeade or a light beer complements the tacos well. For a gathering, presentation matters. Here are some ideas: - Use a colorful platter: Arrange the tacos in a circle, and add lime wedges around them. - Garnish with herbs: Extra cilantro on top makes the dish pop visually and adds flavor. For the full recipe, check out the [Full Recipe]. {{image_4}} You can easily change the flavor of your tacos. Try adding different spices or herbs. For example, cumin and coriander can bring a new taste. You can also use fresh herbs like oregano or basil for a fresh kick. Incorporate other veggies for added crunch and flavor. Roasted peppers or zucchini work well. You can also add corn for sweetness. Mixing in black beans boosts texture and protein, making your tacos even better. Want to add more protein? You can include chickpeas or lentils. These beans are great for a hearty filling. You can also mix in tempeh or tofu. Simply sauté them with spices for extra flavor. For homemade vegan taco filling, try mashed beans with spices. You can even make a quinoa mix with veggies. This gives a healthy, tasty option that packs a punch. If you need gluten-free options, use corn tortillas. They are naturally gluten-free and work perfectly. You can also find gluten-free flour tortillas at stores. For low-carb alternatives, consider lettuce wraps. They are fresh and crunchy, making a fun taco base. You can also try cauliflower tortillas for a great low-carb choice. They keep the flavor while cutting back on carbs. To keep your cauliflower tacos fresh, store them in the fridge. Place the tacos in an airtight container. If you have leftover components, store them separately. This helps maintain their taste and texture. Leftovers last for about 3 to 4 days in the fridge. Always check for any signs of spoilage before eating. You can freeze these tacos for later. If you freeze assembled tacos, wrap each in plastic wrap. Place them in a freezer-safe bag. For unassembled tacos, store the roasted cauliflower and toppings separately. Thaw the tacos overnight in the fridge before reheating. To reheat, place them in the oven at 350°F (175°C) for about 15 minutes. For optimal freshness, use glass or BPA-free plastic containers. These types keep the flavor and texture intact. Label each container with the date you stored it. Organize your fridge so you can see your delicious leftovers easily. This way, you won't forget to enjoy your tasty vegan cauliflower tacos! Yes, you can use frozen cauliflower! It saves time and is easy to find. However, there are pros and cons. Pros: - Frozen cauliflower is often pre-cut and ready to cook. - It can be cheaper than fresh cauliflower. Cons: - Frozen cauliflower may not get as crispy when roasted. - It can release more water, which may affect texture. If you use frozen cauliflower, make sure to thaw and drain it well. This helps keep the tacos tasty and not soggy. These tacos pair well with various side dishes. Here are some tasty ideas: - Mexican rice: Fluffy rice with spices adds a nice touch. - Black beans: Rich and hearty, they complement the tacos well. - Guacamole: Creamy avocado dip brings extra flavor. - Corn salad: A fresh salad adds crunch and sweetness. Feel free to mix and match sides for a colorful plate! Want some heat? Here are ways to spice up your tacos: - Add jalapeños: Fresh jalapeños give a nice kick. - Use hot sauce: A drizzle of your favorite hot sauce can enhance flavor. - Spicy salsa: Top your tacos with a spicy salsa for extra zest. - Chili powder: You can increase the amount of chili powder in your seasoning mix. Adjust the spice level to fit your taste! Yes, these tacos can be gluten-free! You just need to choose the right tortillas. Look for corn tortillas, as they are usually gluten-free. Always check the packaging to be sure. If you want more options, try using lettuce leaves. They make a great low-carb, gluten-free wrap. Enjoy your tacos without worry! You’ve learned how to make tasty vegan cauliflower tacos from scratch. We discussed the key ingredients and their health benefits, plus tips for perfecting the roast. You now know various ways to customize toppings and enhance flavor. Remember, these tacos not only satisfy cravings but also fit many dietary needs. Try making them ahead for easy meals later. Enjoy experimenting with different spices and flavors to find your perfect combination. With each bite, you’ll appreciate the balance of taste and nutrition these tacos offer.

Vegan Cauliflower Tacos Delightful and Simple Recipe

Looking for a tasty and easy vegan meal? Try my Vegan Cauliflower Tacos! This recipe combines roasted cauliflower with fresh

For a great Beef Stroganoff, you need quality meat. You can choose between tenderloin or sirloin. Tenderloin is very soft, while sirloin is more flavorful. Both work well, so pick what you like best. The key ingredients are: - Beef: 1 lb (450g) beef tenderloin or sirloin, thinly sliced - Mushrooms: 8 oz (225g) sliced mushrooms, like button or cremini - Onions: 1 medium onion, finely chopped - Garlic: 3 cloves garlic, minced These ingredients give the dish its rich taste and texture. You will need some cooking oils and sauces to bring everything together. I recommend using: - Olive oil: 2 tablespoons, divided for cooking - Beef broth: 2 cups to create the sauce - Worcestershire sauce: 1 tablespoon for that umami kick - Dijon mustard: 1 teaspoon to add depth For seasoning, you should have: - Salt and pepper to taste - Smoked paprika: 1 teaspoon adds a nice smoky flavor These staples are easy to find and essential for a tasty stroganoff. You can make your Beef Stroganoff unique by swapping noodles or adding some extras. Instead of egg noodles, try other pasta types like fettuccine or even rice. For flavor enhancement, consider adding: - Fresh herbs: like parsley or thyme for brightness - Spices: such as oregano or bay leaves for a different twist These options let you customize the dish to your taste. For the full recipe, check out the detailed instructions above! Start by boiling a large pot of water. Add a good amount of salt; this helps flavor the pasta. Wait until the water is bubbling before adding the egg noodles. Cook them according to the package. This usually takes about 7-9 minutes. You want them to be al dente, which means cooked but still firm. After cooking, drain the noodles and set them aside. To stop them from sticking together, drizzle a little oil over them. Toss gently to coat each noodle. This simple step makes a big difference! Next, it’s time to sear the beef. Heat one tablespoon of olive oil in a large skillet over medium-high heat. Add the sliced beef in batches. This is key to getting a nice brown color. If you add too much at once, the beef will steam instead of sear. Season the beef with salt and pepper. Let it cook for 2-3 minutes without moving it. When it’s well-browned, remove the beef and keep it warm on a plate. This step locks in the beef's flavor! In the same skillet, add the remaining tablespoon of olive oil. Start by adding the chopped onion and minced garlic. Cook them until the onion is soft and clear, about 3-4 minutes. Then, add the sliced mushrooms. Stir and let them cook for another 4-5 minutes, so they become tender. Now, it’s time to make the sauce. Sprinkle the flour over the mushroom mixture. Stir for about one minute to cook the flour. Slowly pour in the beef broth while stirring. This helps to avoid lumps. Add Worcestershire sauce, Dijon mustard, and smoked paprika if you want extra flavor. Let this simmer for 5-7 minutes until it thickens. Once thick, lower the heat and mix in the sour cream. This adds creaminess to your sauce. Finally, return the beef to the skillet and stir gently to combine. This step makes sure the beef gets nice and warm again. For more details on the full process, check out the Full Recipe. To get the best texture for beef stroganoff, slice the meat thinly. Thin slices cook faster and stay tender. Searing is key. Cook the beef in batches and do not overcrowd the skillet. This ensures even browning. Cooking too long can make meat tough. Aim for just 2-3 minutes per batch. For a creamy sauce, add sour cream at the end. Stir it in gently once the heat is low. This keeps the sour cream smooth and avoids curdling. Taste your sauce before serving. Adjust it with salt, pepper, or a hint of smoked paprika to balance flavors. This small change can elevate the dish. Presentation makes a big difference. Serve beef stroganoff in shallow bowls to show off the sauce. A bed of noodles is a great base. For color, sprinkle fresh parsley on top. You can also add a slice of crusty bread on the side. This adds texture and makes the meal feel complete. For a lovely touch, consider a side salad to freshen up the plate. Enjoy the rich flavors with a pop of color! {{image_4}} You can swap beef for chicken or mushrooms. Chicken provides a lighter taste. Mushrooms add a rich, earthy flavor. If you choose chicken, use boneless pieces for quick cooking. Sear the chicken just like the beef, but cook it a bit longer, about 5-6 minutes. For mushrooms, use a mix of cremini and shiitake. Sauté them until brown for the best flavor. If you need a dairy-free option, consider using cashew cream or coconut yogurt. These options keep the dish creamy without dairy. You can also use Greek yogurt for a healthier twist. If you prefer a thicker sauce, add a little more flour. For a lighter sauce, mix in some broth before adding your cream alternative. Changing herbs or spices can give you new flavors. Try adding thyme or rosemary for a fresh twist. Some regions use paprika or dill to enhance the dish. In Russia, they often add mustard for an extra kick. You can adjust these flavors to fit your taste and create your own version of Beef Stroganoff. For the Full Recipe, be sure to check the details for making this classic dish perfect every time! After enjoying your beef stroganoff, store leftovers in a tight container. Use glass or plastic that seals well. Let the dish cool down before sealing. This helps keep it fresh. Beef stroganoff lasts in the fridge for 3-4 days. When you reheat, use low heat on the stove or microwave. Add a splash of beef broth or water if it seems thick. This keeps your meal creamy. If you want to save it for later, freezing is a good option. First, cool the beef stroganoff completely. Then, place it in a freezer-safe container. Leave some space at the top for expansion. Beef stroganoff can stay in the freezer for up to 3 months. To reheat from frozen, let it thaw in the fridge overnight. Then, warm it slowly on the stove. Stir often to avoid any hot spots. Transforming leftovers can be fun! Use beef stroganoff as a filling for baked potatoes. You can also mix it into a creamy pasta bake. Another idea is to turn it into a savory beef quesadilla. For a quick meal, make a beef stroganoff soup. Just add some broth and veggies. This creates a new dish with little work. Enjoy your leftovers in fresh and exciting ways! Beef Stroganoff comes from Russia. It dates back to the 19th century. The dish is named after a count, Pavel Stroganov. It started as a simple recipe with beef, onions, and sour cream. Over time, it gained popularity and spread around the world. Today, many countries have their own take on it. Each version adds local flavors and ingredients. Yes, you can make Beef Stroganoff ahead of time. First, cook the beef and sauce as usual. Let it cool before storing it in the fridge. You can keep it for up to three days. To reheat, warm it on the stove over low heat. You may need to add a splash of beef broth or water for moisture. Beef Stroganoff pairs well with many sides. Here are some great options: - Egg noodles or pasta - Rice or quinoa - Mashed potatoes - Green beans or steamed vegetables - A simple salad To thicken your Beef Stroganoff sauce, you have a few options: - Cook it longer to reduce liquid. - Add more flour mixed with water to create a slurry. - Stir in cornstarch mixed with water for a quick fix. Yes, traditional Beef Stroganoff uses sour cream. The sour cream adds creaminess and tang. Some modern recipes swap it for Greek yogurt or cream. These changes can give a different taste, but they still taste great. To create a vegetarian Beef Stroganoff, swap out the beef and sour cream. Use mushrooms for the meat. They give a nice texture. For the sauce, replace sour cream with cashew cream or coconut yogurt. You can also add extra vegetables like bell peppers or spinach. These choices keep the dish delicious and satisfying. For the full recipe, check out the details above! We explored the key ingredients needed for Beef Stroganoff, from choosing the right beef to using pantry staples. Cooking techniques ensure perfect pasta and tender meat. We shared tips to enhance flavor and presentation, along with variations to suit your taste. Remember, this dish can be stored and transformed into new meals. Beef Stroganoff is versatile, easy to adapt, and perfect for any occasion. Enjoy making it your own, and don't be afraid to experiment!

Classic Beef Stroganoff Tasty Comfort Food Dish

Are you ready to dive into the world of Classic Beef Stroganoff? This dish is a warm hug on a

To make a tasty veggie stir-fry, gather these simple ingredients: - 1 cup fresh broccoli florets - 1 bell pepper (your choice of color), sliced into strips - 1 medium carrot, cut into thin julienne strips - 1 cup snap peas, trimmed - 1 medium zucchini, sliced into half-moons - 1 cup baby corn, halved - 2 tablespoons olive oil - 3 cloves garlic, finely minced - 1 tablespoon fresh ginger, grated - 2 tablespoons low-sodium soy sauce - 1 tablespoon sesame oil - Salt and freshly ground black pepper, to taste For an extra touch, you can add these garnishes: - 2 green onions, sliced thinly - Sesame seeds Here’s what you’ll need to cook this meal: - A large skillet or wok - A sharp knife - A cutting board - Measuring spoons - A spatula or wooden spoon These tools help you create a vibrant dish. You will love how easy it is to make this stir-fry with the Full Recipe. Start by washing all the vegetables. I like to use a colander for this task. After washing, cut each vegetable as listed in the ingredients. For even cooking, make sure all pieces are similar in size. Chop the broccoli into florets, slice the bell pepper, and julienne the carrot. Trim the snap peas and slice the zucchini into half-moons. Halve the baby corn, and you are ready to go! Heat two tablespoons of olive oil in a large skillet or wok over medium-high heat. Wait until the oil shimmers, then add minced garlic and grated ginger. Stir-fry these for about 30 seconds. This step builds flavor! Next, add the broccoli and julienned carrots. Cook them for about 2-3 minutes. This softens them while keeping a bit of crunch. After that, toss in the sliced bell pepper, snap peas, zucchini, and baby corn. Stir-fry for another 4-5 minutes. The goal is to keep the vegetables bright and crunchy. Once the vegetables are cooked to your liking, drizzle in soy sauce and sesame oil. Mix well so every piece gets coated. Season with salt and black pepper to taste. Remove the skillet from heat and add sliced green onions for freshness. Gently stir them in. Now, it's time to serve! Transfer your vibrant stir-fry to plates. For a nice touch, sprinkle sesame seeds on top. This adds a nutty flavor and a bit of crunch. For a complete meal, serve the stir-fry in a colorful bowl alongside steamed rice or noodles. Enjoy your tasty, healthy dish! For the complete recipe, check the Full Recipe section. Select fresh veggies for your stir-fry. Look for bright colors and firm textures. Choose broccoli with tight florets. Pick bell peppers that are shiny and smooth. Carrots should feel hard and crisp. Snap peas should be bright green and snap easily. Zucchini should be firm and free of blemishes. Fresh veggies give better taste and texture. To keep your veggies crisp, cook them over high heat. Use a large skillet or wok to allow space for even cooking. Cut veggies into uniform sizes for equal cooking. Avoid overcrowding the pan; cook in batches if needed. Stir them quickly and don’t let them sit too long. This way, they stay vibrant and crunchy. Season your stir-fry at the right time. Add soy sauce and sesame oil near the end of cooking. This adds flavor without making veggies soggy. Taste as you go, adjusting salt and pepper to your liking. A sprinkle of sesame seeds adds nice flavor and crunch. For a twist, try adding chili flakes or fresh herbs. Check out the Full Recipe for more ideas! {{image_4}} You can easily add protein to your veggie stir-fry. Popular choices are chicken, shrimp, or tofu. If you pick chicken or shrimp, slice them thinly for quick cooking. Marinate them lightly with soy sauce for extra flavor. For tofu, press it to remove water, then cut it into cubes. Cook it until golden before adding the veggies. This way, you get a hearty meal packed with nutrients. If you want a gluten-free dish, use tamari instead of soy sauce. Tamari has a similar taste but is safe for gluten-free diets. You can also swap out soy sauce for coconut aminos. It adds a sweet, savory touch. Make sure to check all labels when buying sauces or pre-made ingredients. These small changes help keep your meal healthy and gluten-free. To boost flavor, think about adding a splash of rice vinegar or lime juice. These ingredients brighten the dish and add zing. You can also toss in some red pepper flakes for heat. Fresh herbs like basil or cilantro can give it a fresh twist. Consider adding a sprinkle of crushed peanuts for crunch. These tweaks take your stir-fry from good to great! For more details on how to create this stir-fry, check out the full recipe. After enjoying your veggie stir-fry, cool it down quickly. Place the leftovers in an airtight container. This keeps the flavors fresh and prevents spoilage. Store it in the fridge for up to three days. For best taste, eat it within this time. To reheat your stir-fry, use a skillet over medium heat. Add a splash of water or oil to keep the veggies moist. Stir frequently until warm. You can also use a microwave. Heat in short bursts, stirring in between, until hot. This helps maintain the crunch. You can freeze your veggie stir-fry for later. Let it cool completely, then transfer it to freezer-safe bags. Remove as much air as you can before sealing. It can stay fresh for up to three months. When ready to eat, thaw in the fridge overnight. Reheat as described above. For a detailed guide on making this dish, check the Full Recipe. Yes, you can use frozen vegetables for stir-fry. They are easy to find and save time. Frozen veggies are often picked at peak ripeness. This keeps their flavor and nutrients. Just remember to thaw them first. Drain any excess water to avoid sogginess. Stir-fry goes well with many side dishes. Here are a few great options: - Steamed white or brown rice - Noodles, like soba or rice noodles - Quinoa for a protein boost - A simple side salad for freshness - Spring rolls for a crunchy bite These side dishes balance the meal and add variety. You can easily spice up your stir-fry. Here are some ideas: - Add sliced fresh chili peppers, like jalapeños. - Use chili paste or sauce for heat. - Sprinkle red pepper flakes before serving. - Include a dash of hot sauce while cooking. Adjust the spice to your taste. Enjoy the heat! For the full recipe, check the details above. This blog post covered everything you need for a great stir-fry. We discussed essential ingredients, from required items to optional garnishes and necessary equipment. You learned step-by-step instructions, tips for crispiness, and ways to choose the best vegetables. We explored variations, storage tips, and answered common questions. In closing, a stir-fry is flexible and fun. Use what you have and make it your own! Enjoy each bite.

Easy Veggie Stir-Fry Flavorful and Healthy Meal Option

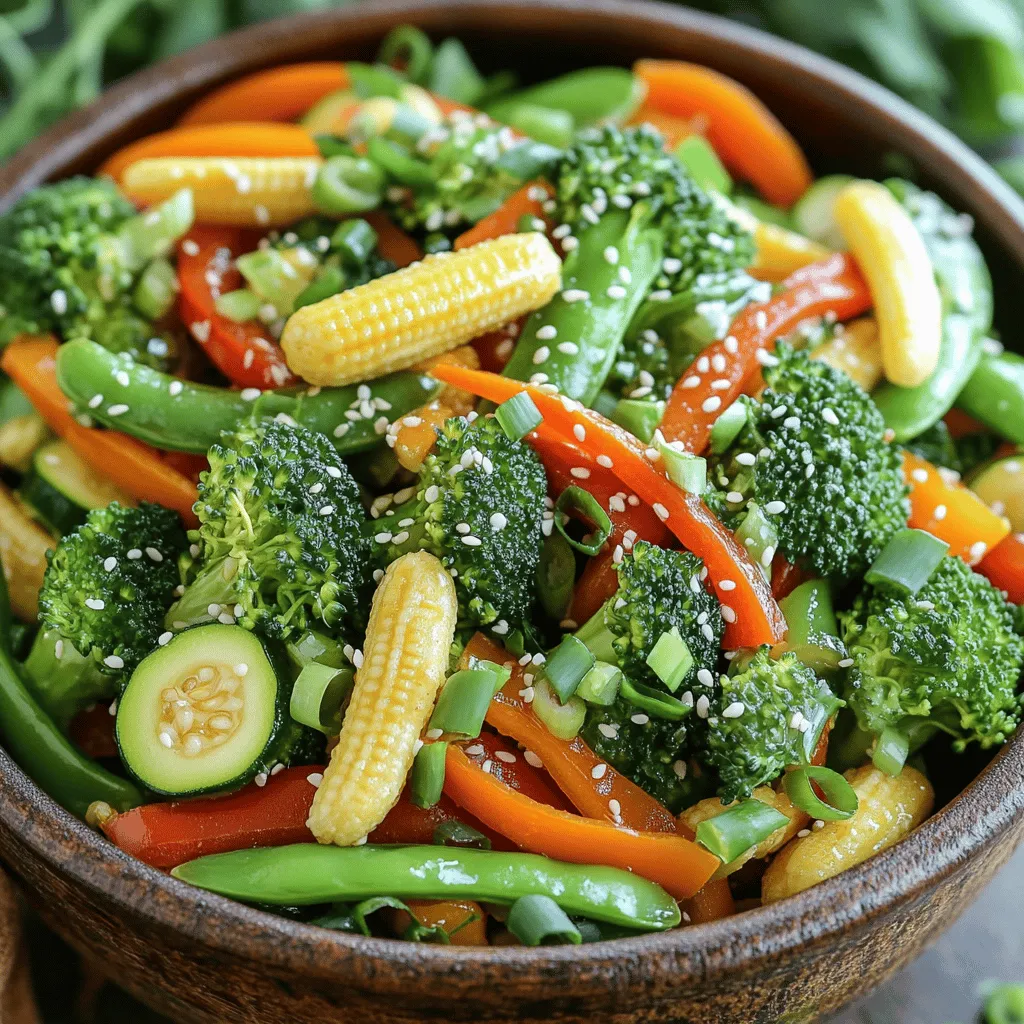
Looking for a quick and tasty meal that’s also good for you? This Easy Veggie Stir-Fry recipe brings together colorful

- 4 boneless, skinless chicken breasts - 1/4 cup freshly squeezed lemon juice - 1 tablespoon lemon zest - 3 tablespoons extra virgin olive oil - 4 cloves garlic, minced - 1 tablespoon honey - 1 teaspoon dried oregano - 1 teaspoon dried thyme - 1 teaspoon smoked paprika - Salt and black pepper to taste - 2 tablespoons fresh parsley, chopped When I make Zesty Lemon Herb Chicken, I love how fresh and bright the flavors are. The main ingredients are simple but pack a punch. The chicken breasts soak up the tangy lemon juice and fragrant herbs. Each bite is juicy and full of zest. The seasonings add depth to the dish. Garlic brings an aromatic kick, while honey balances the tartness. Oregano and thyme add earthy notes, and smoked paprika gives a hint of warmth. Don't forget the salt and pepper! They enhance every flavor in this dish. I like to finish with fresh parsley. It adds a pop of color and freshness. You can find the full recipe above to guide you through each step. Trust me, this dish will be a favorite at your table! - In a bowl, mix the lemon juice, lemon zest, olive oil, minced garlic, honey, oregano, thyme, smoked paprika, salt, and pepper. - Place the chicken breasts in a resealable bag or shallow dish. - Pour the marinade over the chicken. Make sure every piece is coated well. - Preheat your grill or grill pan to medium-high heat. - If using a grill pan, lightly spray it with cooking spray or drizzle olive oil. - Take the chicken out of the marinade and let the excess drip off. - Place the chicken on the hot grill. Do not overcrowd it. - Cook each side for 6-7 minutes. - Use a meat thermometer to check if the internal temperature is 165°F (75°C). - After cooking, take the chicken off the grill. Let it rest for about 5 minutes. - This helps the juices stay in the meat. - Slice the chicken and serve it with the cooked marinade for added flavor. To boost flavor, marinate the chicken overnight. This allows the spices and lemon to soak in. You can also try fresh herbs like rosemary or basil. Fresh herbs add a bright taste that dried ones might miss. If you don’t want to grill, try baking or sautéing the chicken. Baking gives a nice, even cook. Sautéing adds a delicious crust. To get perfect grill marks, make sure your grill is hot. Place the chicken on the grill and don’t move it for a few minutes. This zesty lemon herb chicken pairs well with roasted vegetables or fresh salads. Think about adding a side of rice or quinoa. For drinks, a light white wine or lemonade works great. Enjoy your meal with a refreshing beverage. For the full recipe, check the details above! {{image_4}} You can change the flavor of your zesty lemon herb chicken by mixing in different herbs. Try adding fresh basil or cilantro. Basil gives a sweet flavor, while cilantro adds a bright, fresh taste. Both herbs pair well with lemon. You can also use different citrus fruits. Try lime or orange juice for a new twist. Each fruit brings a unique zing, making your chicken even more exciting. If you need gluten-free options, this dish is perfect for you. All the ingredients are naturally gluten-free. Just make sure to use a gluten-free honey or marinade if you choose to add any. For low-carb alternatives, you can skip the honey. Instead, use a touch of stevia or erythritol to keep it sweet without the carbs. This way, you can enjoy your meal without worry. You can cook your zesty lemon herb chicken in different ways. If you prefer oven-baked chicken, preheat your oven to 400°F (200°C). Place the marinated chicken on a baking sheet lined with parchment paper. Bake for 25-30 minutes or until the internal temperature reaches 165°F (75°C). For a pan-seared version, heat a skillet over medium-high heat and add olive oil. Sear the chicken for 6-7 minutes on each side. This method gives a nice, crispy crust. Each cooking method adds a different texture and flavor to your dish. For the full recipe, check out the complete guide. To store leftovers properly, let the chicken cool first. Place it in an airtight container. This keeps it fresh and safe. You can keep it in the fridge for 3-4 days. Glass or plastic containers work well. Make sure they seal tightly to avoid spills. If you want to freeze marinated chicken, do it before cooking. Use a freezer-safe bag or container. Remove as much air as possible to prevent freezer burn. You can freeze it for up to three months. To cook, thaw it in the fridge overnight or use the microwave. This way, it stays juicy and tender. For safe reheating, use the oven or microwave. If using the oven, set it to 350°F (175°C). Heat until the chicken reaches 165°F (75°C) again. This keeps it safe to eat. If you want to keep the flavor and texture, avoid overcooking. You can also add some fresh herbs or olive oil to boost the taste. Yes, and cooking times may vary. Chicken thighs will take a bit longer to cook than breasts. They can stay juicy and tender, making them a great choice. Just check the internal temperature. It should still reach 165°F (75°C). You can pair this chicken with many side dishes. Roasted vegetables like carrots and broccoli work well. You might enjoy a fresh salad with mixed greens or a light pasta. Rice or quinoa is also great for soaking up any juices. You can keep leftovers for up to 3-4 days in an airtight container. Make sure it is sealed tightly to keep the chicken fresh. Label the container with the date to remember. Yes, it’s great for batch cooking. You can cook several pieces at once and store them. This makes lunch or dinner easy during a busy week. Just reheat when you are ready to eat. Yes, marinate the chicken ahead of time for convenience. Marinating for a few hours or overnight helps the flavors blend well. This step can save time on a busy day. Adjust salt and seasoning as needed. Taste the marinade before adding the chicken. If you prefer it more flavorful, add a pinch of salt or extra herbs. This will help you find the right balance for your taste. This blog covers a simple and tasty lemon herb chicken recipe. You learned about key ingredients, cooking steps, and useful tips. Marinating chicken gives it a strong taste. You can even change the herbs to suit your style. Store leftovers for next time, and use them in meal prep. This dish is easy to cook and perfect for any meal. Enjoy your cooking and share this recipe with friends and family!

Zesty Lemon Herb Chicken Flavorful and Simple Recipe

Looking for a tasty chicken dish that’s simple to make? Try my Zesty Lemon Herb Chicken! With juicy chicken breasts

To make the most delicious oven-fried green tomatoes, gather the following ingredients: - 4 large green tomatoes - 1 cup all-purpose flour - 2 large eggs - 1 cup cornmeal - 1 teaspoon garlic powder - 1 teaspoon onion powder - ½ teaspoon paprika - Salt and pepper to taste - Cooking spray or olive oil Using fresh, firm green tomatoes makes a big difference in taste and texture. The flour, eggs, and cornmeal create a crispy crust. The spices add extra flavor, making every bite a delight. I love using garlic and onion powder for that savory kick. Paprika gives a hint of smokiness that rounds out the taste. Make sure to have everything ready before you start. This will help you work quickly and keep the process smooth. Remember, the quality of your ingredients matters. Using fresh items will enhance the flavor of your crispy snack. You can find the full recipe with detailed steps to follow along. Enjoy the fun of making this classic dish! Start by preheating your oven to 425°F (220°C). This step ensures even cooking. While the oven heats, line a large baking sheet with parchment paper. The paper helps with easy cleanup and prevents sticking. Next, set up your breading station. In a shallow bowl, place the all-purpose flour. Add salt, pepper, garlic powder, and onion powder to the flour. Mix well. In another shallow bowl, beat the eggs until smooth. Finally, in a third bowl, mix the cornmeal with paprika and a pinch of salt. Now it's time to coat the tomato slices. Take each slice and dredge it in the seasoned flour. Make sure each slice is well-coated. Gently shake off any excess flour. Then, dip the floured slice into the beaten eggs. Let any extra egg drip back into the bowl. This helps the cornmeal stick better. After that, transfer the egg-coated slice to the cornmeal mixture. Press gently to ensure a good coating. Repeat this for all the slices. Lay the coated tomato slices flat on the prepared baking sheet. Make sure they are not too crowded. Once all slices are arranged, lightly spray the tops with cooking spray or drizzle with olive oil. This helps them get crispy while baking. Place the baking sheet in the preheated oven and bake for 25-30 minutes. Flip the tomatoes halfway through. This ensures they turn golden brown and crispy on both sides. After baking, let the crispy green tomatoes cool for a couple of minutes on the baking sheet. This resting time helps keep them crispy. Enjoy your oven-fried green tomatoes as a tasty snack or appetizer. For the complete process, refer to the Full Recipe. To get that perfect crunch, start with dry tomatoes. Pat them with a paper towel to remove moisture. This step helps the breading stick well. Use a mix of cornmeal and flour for a great texture. Also, spray the tops with cooking spray or drizzle olive oil before baking. This adds crunch and flavor. Flip the tomatoes halfway for even crisping. These crispy green tomatoes work well as a snack or side dish. Serve them hot right from the oven. They pair perfectly with a creamy dip like ranch or spicy remoulade. You can also use them in a sandwich for a tasty twist. Try serving them alongside grilled meats or fresh salads for a balanced meal. Make your dish look bright and fresh. Sprinkle chopped parsley or chives on top before serving. You can add a squeeze of lemon juice for a zesty kick. For extra flair, try crumbled feta or shaved Parmesan. These toppings boost flavor and make your dish more appealing. For full details, check out the Full Recipe. {{image_4}} To add some heat, make spicy oven-fried green tomatoes. You can mix cayenne pepper into the cornmeal. Start with 1/4 teaspoon, then adjust to your taste. You can also use spicy paprika for a milder kick. This little change makes a big difference in flavor! If you need a gluten-free version, swap out regular flour and cornmeal for gluten-free alternatives. Use a gluten-free all-purpose flour and a gluten-free cornmeal blend. These simple swaps keep the crunch you love while making the dish safe for everyone. For a rich twist, try cheese-stuffed green tomatoes. Slice the tomatoes as usual but scoop out a bit of the center. Fill this space with a blend of cream cheese and your favorite herbs. Then coat and bake as usual. The melted cheese will add a delicious, gooey surprise inside each bite. You can find the full recipe at the beginning of this article. Enjoy trying these tasty variations! After enjoying your oven-fried green tomatoes, store the leftovers in an airtight container. Place a paper towel at the bottom to absorb moisture. This helps keep them crisp. Store the container in the fridge for up to three days. To reheat your green tomatoes, preheat your oven to 375°F (190°C). Place the leftover tomatoes on a baking sheet. Bake for about 10-15 minutes until they are hot and crispy again. Avoid using the microwave, as it can make them soggy. If you want to freeze your oven-fried green tomatoes, allow them to cool completely. Place them in a single layer on a baking sheet and freeze for about an hour. After they are firm, transfer them to a freezer-safe bag. They can last up to three months in the freezer. When ready to eat, bake them directly from frozen without thawing. Enjoy them as a tasty snack later! For oven-frying, green tomatoes work best. They are firm and tart. Look for firm, unripe tomatoes. Varieties like Cherokee Green or Green Zebra are great choices. Their unique taste adds a special flavor to the dish. You can use ripe tomatoes, but the texture changes. Ripe tomatoes are softer and may not hold up well while cooking. They can get mushy and lose crispness. If you choose ripe ones, pick slightly firmer varieties. This will help maintain some structure when baking. This recipe is already vegetarian-friendly! It uses eggs for coating, which is fine for most diets. If you want a vegan option, replace the eggs with a mixture of flour and water or a plant-based egg substitute. This will help the cornmeal stick well. Oven-fried green tomatoes are done when they turn golden brown and crispy. Bake them for 25-30 minutes, flipping halfway. You can check by gently pressing a slice. If it feels firm and has a crispy crust, it’s ready. Enjoy them while warm for the best taste! This article shared a simple recipe for crispy oven-fried green tomatoes. We covered ingredients, step-by-step directions, and tips for extra crunch. You now know how to store leftovers and even explore variations like spicy or gluten-free options. Remember, cooking is all about fun and trying new things. Enjoy making this dish and impressing your friends with your skills. Happy cooking!

Oven-Fried Green Tomatoes Crispy and Flavorful Snack

If you’re craving a crunchy, tasty snack, oven-fried green tomatoes are a must-try! These little gems are easy to make

- 2 cups cooked jasmine rice - 1 cup creamy coconut milk - 1/2 cup diced fresh or canned pineapple - 1/2 cup peas - 1/2 cup diced bell pepper - 2 green onions - 2 cloves garlic - 2 tablespoons soy sauce - 1 tablespoon vegetable oil - 1 teaspoon toasted sesame oil - Salt and black pepper - Fresh cilantro for garnish For this fried rice, you want to use cooked jasmine rice. Chilled day-old rice works best. It gives the dish great texture. Freshly cooked rice can become mushy. Coconut milk adds a creamy twist. You can use canned or fresh pineapple. The sweetness of the pineapple balances the dish. Fresh peas bring color and sweetness, too. Bell peppers add crunch and flavor. Green onions give a nice finish. Garlic enhances the overall taste. - For jasmine rice, you can use basmati or brown rice. Both will work well. - If you need a substitute for coconut milk, try almond milk or soy milk. - For pineapple, you can swap it with mango or diced peaches. - This dish can be made gluten-free by using tamari instead of soy sauce. - For a vegan option, ensure all ingredients are plant-based. - Heat a large skillet over medium heat. - Pour in the vegetable oil and let it warm for about a minute. - Add the minced garlic and sauté for 30 seconds. Stir to keep it from burning. This step brings out a wonderful aroma. - Add the diced bell pepper to the skillet. - Cook for 2-3 minutes. You want the pepper to be tender but still crisp. - Now, gently mix in the cooked jasmine rice. - Use a spatula to break up any clumps. - Pour the coconut milk and soy sauce over the rice. Stir well to combine. Let it simmer for 3-4 minutes. This helps the rice soak up the flavors. - Add the diced pineapple and peas to the skillet. Stir gently to keep the pineapple intact. - Cook for another 2-3 minutes until everything is heated through. - Drizzle the toasted sesame oil over the rice. Mix well to spread the nutty taste. Season with salt and black pepper as you like. - Remove the skillet from heat. Fold in the sliced green onions. Do this gently for even distribution. - Serve the Tropical Coconut Fried Rice hot. Garnish with fresh cilantro leaves. Serve in bowls or on a platter. A lime wedge on the side adds a nice touch before eating. Using day-old rice makes the best fried rice. The grains dry out a bit in the fridge. This helps them fry better and not clump together. When you cook the rice, let it cool and store it in the fridge. If you forget, spread fresh rice on a tray to cool it down. Heat your pan before adding oil. A hot skillet or wok helps get that nice browning. Use medium-high heat, as it keeps everything moving. Stir-fry quickly, tossing the rice often. This helps each grain get that golden color and flavor. Soy sauce is a must, but you can adjust it. Add more for a saltier taste or less if you want it lighter. Try adding spices like ginger or herbs like cilantro for extra flavor. A squeeze of lime juice right before serving can brighten it up. {{image_4}} To make your fried rice even more fun, try adding some tropical fruits. You can use mango, kiwi, or even diced papaya. These fruits add a sweet touch and a splash of color. For extra crunch, toss in some shredded carrots or snap peas. They bring great texture and flavor to the dish. Want to make your fried rice heartier? You can add protein like chicken, shrimp, or tofu. If you use chicken, cut it into small pieces. Cook it for about 5 minutes before adding the rice. Shrimp cooks quickly, just 2-3 minutes on medium heat is enough. For tofu, make sure it's firm. Sauté it for about 5 minutes until it’s golden. You can give your fried rice a fun twist by changing flavors. For an Asian-style version, add some soy sauce and sesame seeds. A splash of rice vinegar can brighten it up. To try a Caribbean twist, mix in jerk seasoning and black beans. These changes will give your dish a whole new vibe. To keep your fried rice fresh, store it in an airtight container. Place it in the fridge within two hours of cooking. This helps prevent bacteria growth. When you’re ready to eat, reheat the rice in a pan over medium heat. Stir often to warm it evenly. You can also use the microwave, but cover it to keep moisture in. Freezing fried rice is a smart way to save extra servings. First, let the rice cool completely. Then, pack it into freezer-safe bags. Try to remove as much air as you can. This helps prevent freezer burn. When you want some, take it out and thaw it overnight in the fridge. For quick meals, you can cook it straight from frozen, adding a bit of water as you heat it. Fried rice can last about 3 to 4 days in the fridge. Always check for signs of spoilage before eating. Look for off smells or a change in texture. If it smells sour or looks slimy, it’s best to toss it. Keeping track of how long it's been in the fridge can help you enjoy it safely. For more details, check the Full Recipe for Tropical Coconut Fried Rice 🥥. Yes, you can use frozen rice. Make sure to thaw it first. Frozen rice may need a few extra minutes to cook, so keep an eye on it. The texture might be a bit softer, but it still works well. You can skip soy sauce and use other flavors. Try coconut aminos or tamari for a gluten-free option. Adding lime juice or extra spices can also enhance the taste. You can even use broth for a savory kick. A wok is ideal for frying rice. Its shape allows for even heat and easy stirring. A large skillet can also work if you don’t have a wok. Just make sure it has enough space for all the rice. To add spice, include chopped chili peppers or sriracha. You can also use red pepper flakes or hot sauce. Start with a small amount and adjust to your taste. Spice blends like curry powder can also give it a kick. Yes, you can prepare fried rice ahead of time. Just cool it down and store it in the fridge. It can last for up to three days. Reheat it in a skillet or microwave before serving. - Link to Full Recipe: Tropical Coconut Fried Rice 🥥 This article covered how to make a tasty tropical coconut fried rice dish. We explored the key ingredients, and I shared step-by-step instructions. You learned useful tips for texture and flavor. I also outlined variations and storage methods to keep your dish fresh. In conclusion, this recipe is flexible and fun. You can mix and match ingredients to fit your tastes. Enjoy this easy meal any time, and share it with friends!

Favorite Fried Rice Recipe Simple and Flavorful Dish

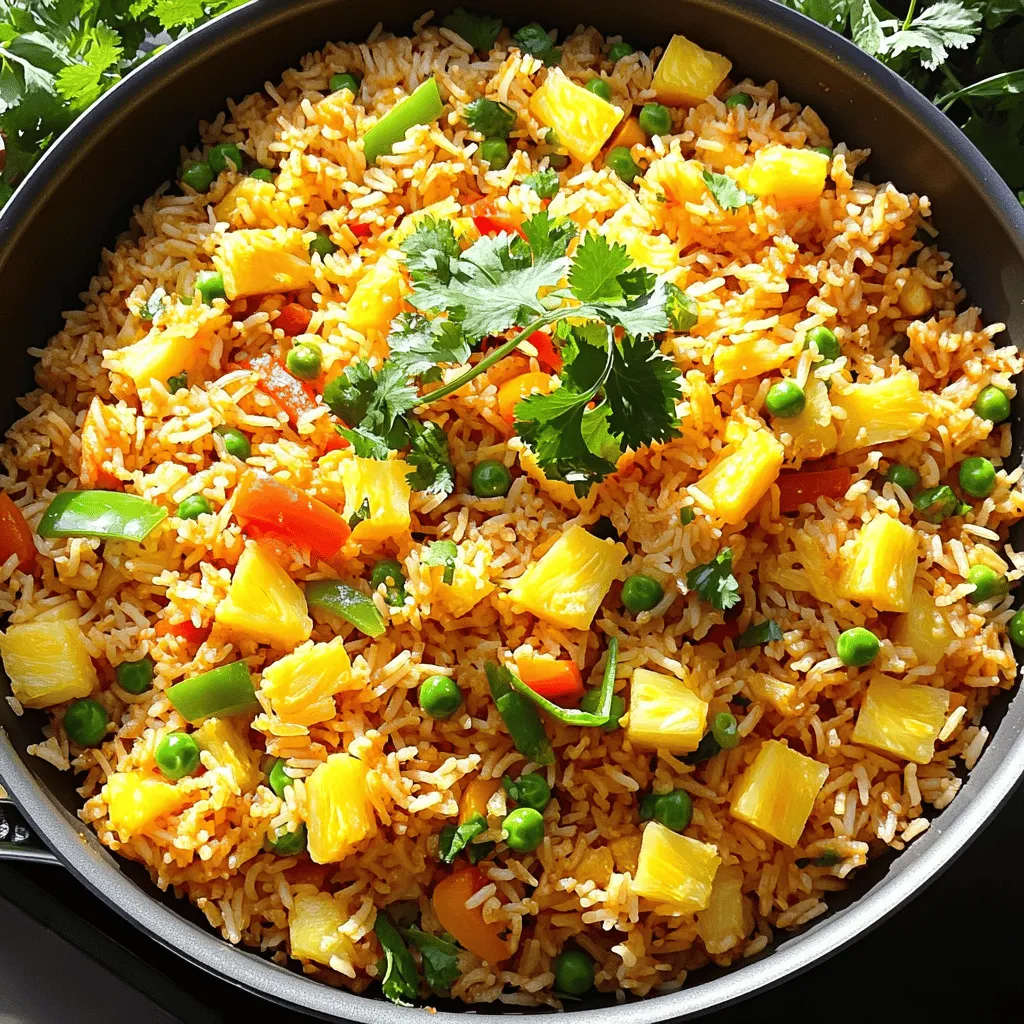
Fried rice is a go-to dish for a quick meal, and my favorite recipe is both simple and packed with

- 1 cup cream cheese, softened - 1/2 cup creamy peanut butter - 1/4 cup powdered sugar - 1 teaspoon pure vanilla extract - 1/2 cup mini chocolate chips - 1/2 cup whipped topping, thawed - Fresh fruit slices (apples, bananas, strawberries) - Graham crackers for dipping To make this Peanut Butter Chocolate Chip Cheesecake Dip, gather all your ingredients first. Start with cream cheese. It should be soft. This makes mixing easy. Use a full cup for a rich base. Next, grab half a cup of creamy peanut butter. This is the star of the dip. You will also need a quarter cup of powdered sugar. This adds a nice sweetness. A teaspoon of pure vanilla extract gives it warmth and flavor. Don't forget the mini chocolate chips! Half a cup adds fun and sweetness. You will also need half a cup of thawed whipped topping. This makes the dip light and fluffy. For dipping, use fresh fruit slices. Apples, bananas, and strawberries work well. Graham crackers are also great for scooping up the dip. Enjoy this mix of flavors and textures! {{ingredient_image_2}} Start by taking 1 cup of softened cream cheese. Use an electric mixer to beat it. Mix until it is smooth and creamy. This step takes about 1-2 minutes. Cream cheese must be at room temperature. This helps it blend well. Next, add the peanut butter, powdered sugar, and vanilla extract into the bowl. You will use 1/2 cup of creamy peanut butter and 1/4 cup of powdered sugar. Also, add 1 teaspoon of pure vanilla extract. Mix these ingredients on low speed until everything is smooth. This should take another 1-2 minutes. Now, gently fold in 1/2 cup of mini chocolate chips. Use a rubber spatula for this. Be careful not to break the chips while mixing. Then, fold in 1/2 cup of thawed whipped topping. Stir just until everything is mixed. This gives your dip a light and airy feel. Once your dip is mixed, spoon it into a serving bowl. Smooth the top with a spatula for a nice finish. Place the bowl in the refrigerator. Let it chill for at least 30 minutes. This time helps the flavors blend and the dip to firm up a bit. When you are ready to serve, take it out and enjoy! Softened cream cheese is key for a creamy dip. If it is too cold, your dip will be lumpy. Beat the cream cheese until it is smooth. This takes about 1-2 minutes. When you add the other ingredients, mix on low speed. This helps keep the dip light. When you fold in the chocolate chips, use a rubber spatula. Gently mix so you don’t break the chips. This keeps the texture nice. Then, fold in the whipped topping. Be careful not to overmix. This gives the dip a fluffy feel. This dip pairs well with many dippers. Fresh fruit slices add a nice crunch. You can use apples, bananas, or strawberries. They bring a sweet and juicy contrast. Graham crackers are also great for dipping. Their crispness balances the creaminess of the dip. To make your dip look fancy, drizzle peanut butter on top. This adds a touch of elegance. You can also sprinkle extra mini chocolate chips. They create a fun and inviting look. Arrange colorful fruit and graham crackers around the dip. This makes your platter pop. A beautiful presentation will make everyone want to dive in! Pro Tips Use Room Temperature Ingredients: Ensure your cream cheese and whipped topping are at room temperature for a smoother blend and creamier texture. Choose Quality Peanut Butter: Opt for a high-quality, creamy peanut butter for the best flavor and consistency in your dip. Chill for Best Flavor: Allowing the dip to chill for at least 30 minutes enhances the flavors, making it more delicious when served. Customize Your Dippers: Experiment with different fruits like pears or kiwi, or try cookies like chocolate wafers for a fun twist on dippers. {{image_4}} You can give your dip a twist with flavor add-ins. Consider swapping the powdered sugar for a natural sweetener like honey or maple syrup. These options add a unique taste. You can also explore different flavored extracts. Instead of vanilla, try almond or hazelnut extract. Each choice adds a new layer of flavor to your dip. Seasonal fruits make your dip festive. In spring, use fresh strawberries and orange segments. In summer, add juicy peaches or cherries. Fall brings apples and pears, while winter allows for citrus fruits like mandarins. You can even use seasonal treats like gingerbread or sugar cookies for a holiday vibe. This keeps your dip fun and fresh all year round. Looking for lighter alternatives? You can use Greek yogurt instead of cream cheese. This swap lowers fat and adds protein. For the peanut butter, try natural or powdered peanut butter. These options reduce calories while keeping the flavor. If you want a lower sugar dip, cut back on powdered sugar. You can also use a sugar substitute like stevia. These changes make the dip healthier without losing taste. To keep your Peanut Butter Chocolate Chip Cheesecake Dip fresh, store it in the fridge. Use an airtight container for best results. This helps the dip stay creamy and tasty. Make sure to cover it well with a lid or plastic wrap. It’s best to enjoy this dip within a few days after making it. You can freeze this dip if you want to save some for later. First, place it in a freezer-safe container. Leave some space at the top, as the dip may expand when frozen. When you’re ready to eat it, take it out of the freezer. Thaw it in the fridge overnight. After thawing, stir it gently to restore the texture. In the refrigerator, the dip lasts about 3 to 5 days. After that, the flavors may fade. Always check for any changes in smell or texture before eating. If you notice anything off, it’s best to discard it. Enjoy this dip while it’s fresh for the best taste! Yes, you can make this dip ahead of time. This dip stores well in the fridge. Just prepare it and place it in a sealed container. It will stay fresh for up to three days. This allows the flavors to blend nicely. Just remember to chill it for at least 30 minutes before serving. If you need a cream cheese alternative, use Greek yogurt or silken tofu. Both options give a creamy texture. Greek yogurt adds a tangy taste, while silken tofu is mild. Choose based on your diet needs. These swaps keep the dip tasty and satisfying. To change the sweetness, adjust the powdered sugar. Start with less than the recipe calls for. You can always add more if needed. Taste the dip as you mix. This way, you can find the perfect balance for your palate. Enjoy your dip just the way you like it! This blog post covered how to make a tasty cream cheese dip. We explored the ingredients needed and the simple steps to mix and chill. I also shared tips for perfect texture and fun serving ideas. You can customize the dip with different flavors and seasonal fruits. For storage, I provided ways to keep it fresh. With this guide, you can enjoy a fun snack that's easy to make. Try it out for your next gathering or snack time!

Peanut Butter Chocolate Chip Cheesecake Dip Delight

Get ready to indulge in a sweet treat you won’t forget! My Peanut Butter Chocolate Chip Cheesecake Dip is creamy,

Older posts
Newer posts
← Previous Page1 … Page82 Page83 Page84 Page85 Next →

dsad

© 2026 tastyhatch • Built with GeneratePress

Our Policies

  • Copyright Policy
  • Cookie Policy
  • GDPR Policy
  • Privacy Policy
  • Disclaimer
  • Terms Of Use

More Information

  • Home
  • About
  • Contact
  • Appetizers
  • Dessert
  • Dinner
  • Drinks
©2026, tastyhatch About Back To Top