Skip to content
DisclaimerTerms Of UseGDPR PolicyCookie Policy

tastyhatch

  • Home
  • Drinks
  • Appetizers
  • Dinner
  • Dessert
  • About
  • Contact
  • Privacy Policy
DisclaimerTerms Of UseGDPR PolicyCookie Policy

NO-ING-IMG

- 1 ½ cups all-purpose flour - 1 cup canned pumpkin puree - ½ cup granulated sugar - ½ cup brown sugar, packed - ½ cup vegetable oil - 2 large eggs To make my chocolate chip pumpkin bread, you need some key ingredients. The all-purpose flour gives the bread structure. Canned pumpkin puree adds moisture and flavor. Use granulated sugar and brown sugar to sweeten the bread. The vegetable oil keeps it soft and moist, while the eggs bind everything together. - 1 cup semi-sweet chocolate chips - ½ cup chopped walnuts or pecans For a special touch, add chocolate chips. They melt and make each slice rich and sweet. If you like nuts, toss in walnuts or pecans. They add a nice crunch. - ½ teaspoon baking soda - ½ teaspoon baking powder - 1 teaspoon ground cinnamon - ½ teaspoon ground nutmeg - ½ teaspoon salt Now, for the spices! Baking soda and baking powder help the bread rise. Cinnamon and nutmeg bring warmth and fall flavors. Don't forget the salt; it balances the sweetness. For the full recipe, check out the details above. Each ingredient plays a big role in creating a rich and flavorful delight. - Preheat the oven to 350°F (175°C). - Prepare a 9x5-inch loaf pan by greasing it lightly or lining it with parchment paper. - In a medium bowl, whisk together: - 1 ½ cups all-purpose flour - ½ teaspoon baking soda - ½ teaspoon baking powder - 1 teaspoon ground cinnamon - ½ teaspoon ground nutmeg - ½ teaspoon salt - Set this dry mix aside for later use. - In a large bowl, combine: - 1 cup canned pumpkin puree - ½ cup granulated sugar - ½ cup brown sugar - ½ cup vegetable oil - 2 large eggs - 1 teaspoon vanilla extract - Blend these wet ingredients until smooth and well mixed. - Gradually add the dry mixture to the wet ingredients. - Stir gently with a spatula until just combined. A few lumps are fine; don’t over-mix. - Carefully fold in: - 1 cup semi-sweet chocolate chips - Optional: ½ cup chopped walnuts or pecans - Ensure chips are evenly distributed in the batter. - Pour the batter into your prepared loaf pan, spreading it evenly. - Bake in the preheated oven for 60-70 minutes. A toothpick should come out clean when inserted into the center. - After baking, let it cool in the pan for about 10 minutes. Then, transfer the loaf to a wire rack to cool completely before slicing. For the full recipe, refer to the main article. - Avoid over-mixing for a tender loaf. - Baking time may vary based on your oven. Check for doneness with a toothpick. If it comes out clean, the bread is ready. - To make this recipe gluten-free, swap all-purpose flour with a gluten-free blend. Look for one that contains xanthan gum for the best texture. - For vegan options, replace the eggs with flax eggs. Mix one tablespoon of ground flaxseed with two and a half tablespoons of water and let it sit for a few minutes. Use a neutral oil or applesauce instead of vegetable oil. - Dust the top of the bread with powdered sugar for a sweet touch. - Serve warm slices with butter for a comforting experience. You can also add a sprinkle of cinnamon on top for extra flavor. {{image_4}} You can play with flavors in your chocolate chip pumpkin bread. I love adding seasonal spices, like cloves, to warm it up. Just mix in about 1/4 teaspoon of ground cloves with your dry ingredients. It adds a lovely depth and makes the bread feel cozy. If you want a twist, try substituting the chocolate chips with dried fruit. Dried cranberries or raisins work well. They add a nice chew and natural sweetness. You can even mix both chocolate and dried fruit for a fun combo! If you're looking for keto-friendly options, swap out the sugar. Use a sugar substitute like erythritol or stevia. This keeps the bread low in carbs while still being tasty. You can also replace the flour with almond flour for a gluten-free option. For those needing dairy-free choices, just use a dairy-free oil, like coconut or avocado oil. You can skip the chocolate chips or use dairy-free chocolate. This way, everyone can enjoy the bread without worry. Experimenting with unique ingredients can elevate your bread! Try incorporating other nut butters, such as almond or cashew butter. They add rich flavors and healthy fats. Just replace part of the oil with your chosen nut butter. Using alternative sweeteners can also make this bread special. You might try honey or maple syrup instead of granulated sugar. These options can bring a unique sweetness that pairs well with pumpkin. For the full recipe, check out Chocolate Chip Pumpkin Bread to get started! Store Chocolate Chip Pumpkin Bread in the pantry for up to four days. Keep it in an airtight container to maintain its soft texture. - Best practices for maintaining freshness: - Wrap the bread in plastic wrap. - Place it in a zip-top bag. - Avoid direct sunlight or heat. You can freeze Chocolate Chip Pumpkin Bread for up to three months. Freezing preserves its rich flavor and moistness. - How to thaw and reheat: - To thaw, move the bread to the fridge overnight. - For quicker thawing, leave it at room temperature for a few hours. - Reheat slices in the toaster or microwave for a warm treat. Chocolate Chip Pumpkin Bread lasts about a week at room temperature. If stored properly in the fridge, it can last up to two weeks. - Signs of spoilage: - Look for mold on the surface. - Check for an off smell or dry texture. - If it feels hard or crumbly, it’s time to toss it out. This bread is delicious, and knowing how to store it helps you enjoy it longer. For the full recipe, check out the details above! Yes, you can make this bread ahead of time. It stores well for a few days. To keep it fresh, wrap it tightly in plastic wrap or foil. You can also freeze it for up to three months. Just let it cool before wrapping it. You can check if your bread is done by inserting a toothpick into the center. If it comes out clean or with a few crumbs, your bread is ready. If the toothpick has wet batter on it, bake for a few more minutes. This bread is great on its own, but you can serve it with butter or cream cheese for extra flavor. You might also enjoy it with a cup of coffee or tea. For a fun twist, try it with a scoop of vanilla ice cream. To make this bread sugar-free, replace the granulated sugar and brown sugar with suitable sugar substitutes. You can use monk fruit sweetener or erythritol. Be sure to follow the conversion instructions on the package to get the right amount. Yes! You can enhance the pumpkin flavor by adding pumpkin spice. A teaspoon of pumpkin spice can boost the taste. You can also add a bit more pumpkin puree if you want a richer flavor. Just keep the total liquid balance in mind. For the Full Recipe, refer back to the ingredients and instructions to bake this delightful bread! In this recipe, you’ll make a moist and tasty chocolate chip pumpkin bread. The warm spices mix with the sweet chocolate and pumpkin. This bread is perfect for breakfast or a snack. - 1 ½ cups all-purpose flour - ½ teaspoon baking soda - ½ teaspoon baking powder - 1 teaspoon ground cinnamon - ½ teaspoon ground nutmeg - ½ teaspoon salt - 1 cup canned pumpkin puree - ½ cup granulated sugar - ½ cup brown sugar, packed - ½ cup vegetable oil - 2 large eggs - 1 teaspoon vanilla extract - 1 cup semi-sweet chocolate chips - Optional: ½ cup chopped walnuts or pecans This mix of ingredients creates a rich flavor. The pumpkin adds moisture, while the chocolate chips give a sweet touch. Pumpkin puree is key for this bread. It keeps the bread moist and flavorful. Always choose pure pumpkin, not pie filling. The spices blend well with the pumpkin taste. Start by preheating your oven to 350°F (175°C). Then, prepare a 9x5-inch loaf pan. Mix the dry ingredients in one bowl. In another bowl, combine the wet ingredients. Then, gently mix the dry and wet ingredients together. Be careful not to over-mix; small lumps are fine. Fold in the chocolate chips last. This way, they stay whole and melt slightly during baking. If you want, you can also add nuts for extra crunch. Pour the batter into the prepared pan and bake for 60-70 minutes. A toothpick inserted into the center should come out clean when it’s ready. Let it cool before slicing. For a lovely presentation, serve it on a nice platter. A dusting of powdered sugar adds sweetness. This treat is best enjoyed warm or with some butter. You now have a delicious Chocolate Chip Pumpkin Bread recipe. This bread combines simple ingredients like flour, pumpkin puree, and spices. Follow easy steps to make, bake, and enjoy it. Don’t forget my tips for storage and variations. You can adjust this recipe to fit your needs, whether you want it gluten-free or vegan. So grab some pumpkin and chocolate chips. You’re ready to create a tasty treat that everyone will love. Enjoy each bite of your warm, sweet bread!

Chocolate Chip Pumpkin Bread Rich and Flavorful Delight

Are you ready to bake a treat that combines the rich flavors of fall? Chocolate Chip Pumpkin Bread is a

- Fresh peaches and their preparation You need six ripe peaches. Peel them and slice them into thin pieces. Fresh peaches give the best flavor and sweetness. - Sweeteners and spices Add one tablespoon of fresh lemon juice to brighten the flavor. Use one-third cup of packed brown sugar for sweetness. A teaspoon of ground cinnamon and a quarter teaspoon of ground nutmeg will add warmth and spice. Finally, include a quarter cup of all-purpose flour to help bind the peach filling. - Topping ingredients For the topping, you will need one cup of rolled oats. These give a nice crunch. Add half a cup of melted unsalted butter to hold everything together. Use one-third cup of almond flour for extra flavor. Lastly, a quarter teaspoon of sea salt rounds out the topping’s taste. This simple list makes it easy to gather what you need for this delicious Peach Paradise Crisp. For the full recipe, refer to the instructions provided. 1. Preheat the oven to 350°F (175°C). This will ensure even cooking. 2. Combine the peaches. In a large bowl, add the sliced peaches. Drizzle fresh lemon juice over them. This helps keep the peaches bright and adds a zesty flavor. Next, add brown sugar, ground cinnamon, ground nutmeg, and all-purpose flour. Mix gently until the peaches are coated well. 3. Assemble the dessert. Transfer the peach mixture into a greased 9x13 inch baking dish. Spread it evenly so it cooks nicely. 4. Create the oat topping. In another bowl, combine rolled oats, almond flour, melted butter, and sea salt. Stir until it clumps together. The mixture should look like coarse crumbs. 5. Top the peaches. Sprinkle the oat mixture evenly over the peach layer. Make sure all the peaches are covered well. This will give a nice crunch. 1. Bake in the oven. Place the baking dish in your preheated oven. Bake for 30-35 minutes. 2. Check for doneness. The peach crisp is ready when the topping is golden brown and the peach filling bubbles around the edges. For the full recipe, follow the steps carefully, and enjoy the deliciousness! To get the best flavors in your peach crisp, focus on spices. Ground cinnamon brings warmth, while nutmeg adds depth. Together, they enhance the sweetness of the peaches. Use just enough to balance the dish. You want the spices to highlight the fruit, not overpower it. When it comes to storing leftover peach crisp, keep it simple. Allow it to cool completely first. Then, cover it tightly with plastic wrap or transfer it to an airtight container. Store it in the fridge. It will stay fresh for about three days. Reheat it in the oven or microwave when you're ready to enjoy it again. Peach crisp shines when served warm. I love adding a scoop of vanilla ice cream on top. The cold ice cream melts slightly, creating a creamy sauce. Whipped cream is another great choice. It adds a light and fluffy texture that pairs well with the crisp. Feel free to customize your dessert. Want a nutty flavor? Toss in some chopped walnuts or pecans. You can also mix in other fruits like berries or apples. This way, you can create a delightful twist on the classic recipe. Check out the Full Recipe for even more ideas. {{image_4}} You can make this peach crisp better for you. Try using natural sweeteners like honey or maple syrup instead of sugar. These options add flavor and sweetness without the extra refined sugar. You can also switch out the all-purpose flour. Use almond flour or oat flour for a gluten-free topping. This change keeps the crisp just as tasty while catering to gluten-free diets. Peach crisp is great, but you can mix it up! Use seasonal fruits like apples or berries with your peaches. This adds a new twist and flavor. You can even try tropical fruits like mango or pineapple. They add a fun, fresh taste. Combining different fruits makes your crisp unique and delightful, so feel free to experiment and find your favorite mix. For the full recipe, check out the complete guide. To keep your peach crisp fresh, store it in the fridge. First, let it cool completely. Then, cover your dish with plastic wrap or foil. This helps keep the moisture in. It will stay fresh for about three to four days. If you want to save it for later, freezing is a great option. Cut the crisp into portions. Wrap each piece tightly in plastic wrap. Then, place them in a freezer-safe bag. This way, you can enjoy it for up to three months. Just remember to label the bag with the date! When it's time to enjoy your stored peach crisp, reheating it is easy. Preheat your oven to 350°F (175°C). Place the crisp in an oven-safe dish. Cover it with foil to keep it moist. Heat for about 15 to 20 minutes. You can also use a microwave for quicker reheating. Place a piece on a microwave-safe plate. Heat it for about 30 seconds to a minute, checking to avoid overheating. This method works well, but the texture might not be the same. For the best taste, I recommend the oven method. Enjoy your peach crisp warm and delicious, just like when it first came out of the oven! Yes, you can use frozen peaches. Just thaw them first. Drain excess liquid to avoid a soggy crisp. This way, you'll still get that sweet peach flavor. You will know it is done when the topping turns a golden brown. The peach filling should bubble around the edges. Use a timer to keep track of the baking time. If you need a substitute for almond flour, try using oat flour or regular all-purpose flour. Both work well in the topping. Just keep in mind that this may change the flavor slightly. For more details and a full recipe, check out the Peach Paradise Crisp recipe. This blog post covered how to make a delicious peach crisp. We looked at the key ingredients, including fresh peaches, sweeteners, and toppings. I shared step-by-step instructions for preparation and baking, plus tips for perfecting the recipe. You learned variations like healthier options and different fruit combinations. In the end, peach crisp is a versatile and fun dessert. Feel free to experiment with flavors and make it your own. Enjoy this tasty treat any time of year!

Peach Crisp with Oat Topping Easy and Delicious Recipe

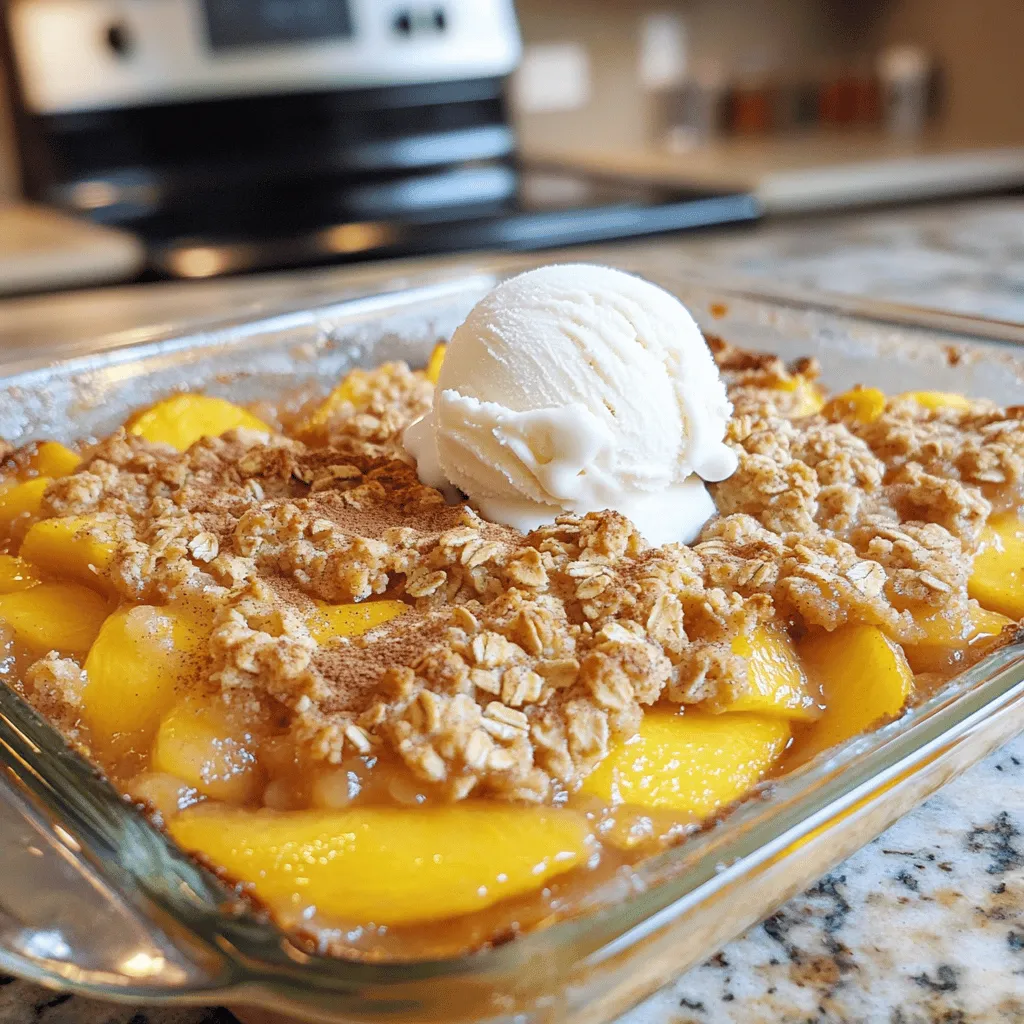
Are you ready to enjoy a warm, juicy dessert that’s super easy to make? My Peach Crisp with Oat Topping

When making Vegan Sweet Potato Chili, the right ingredients make all the difference. Each one adds flavor and nutrition. Here’s what you need: - 2 medium sweet potatoes, peeled and diced into bite-sized pieces - 1 can (15 oz) black beans, drained and rinsed - 1 can (15 oz) kidney beans, drained and rinsed - 1 can (15 oz) diced tomatoes with green chilies - 1 red bell pepper, diced - 1 yellow onion, finely chopped - 3 cloves garlic, minced - 1 cup corn kernels (fresh or frozen) - 2 cups vegetable broth - 2 tablespoons chili powder - 1 tablespoon ground cumin - 1 teaspoon smoked paprika - Salt and pepper to taste - 2 tablespoons olive oil - Fresh cilantro and diced avocado for garnish (optional) This mix of ingredients brings out rich, hearty flavors. Sweet potatoes give a slight sweetness. The beans add protein and fiber, making this dish filling. The spices provide warmth and depth. You can find the Full Recipe included in this article to guide you through making this delicious meal. Sautéing the onion and garlic Begin by warming olive oil in a large pot over medium heat. When the oil shimmers, add chopped onion and minced garlic. Sauté them for about 3-4 minutes. You want the onion to become soft and see-through. This step builds a great base for flavor. Adding sweet potatoes and red bell pepper Next, toss in the diced sweet potatoes and red bell pepper. Stir well to mix with the onion and garlic. Cook for an additional 5 minutes. This helps soften the veggies and lets their flavors blend. Incorporating spices and seasoning Now, sprinkle in the chili powder, ground cumin, smoked paprika, salt, and pepper. Stir often for about a minute until the spices release their aroma. This step adds depth and warmth to your chili. Pouring in broth and blending ingredients Carefully pour the vegetable broth into the pot. Add the diced tomatoes with their juices, black beans, kidney beans, and corn. Stir everything until well mixed. This combines all the delicious ingredients. Simmering the chili Bring the chili to a gentle boil. Once it starts boiling, lower the heat and cover the pot. Let it simmer for 25-30 minutes. Stir occasionally to prevent sticking. Your sweet potatoes should become tender during this time. Adjusting consistency and flavor After simmering, taste your chili. Adjust the seasonings if needed. If you want a thicker chili, mash a few sweet potato pieces against the pot's side. This releases starch and thickens the mix. You can find the full recipe [here](Full Recipe). To make the best vegan sweet potato chili, start with sautéing. Heat olive oil in your pot before adding onion and garlic. This step builds a strong base of flavor. Cook them until the onion is soft and clear. This usually takes about 3-4 minutes. When it comes to seasoning, taste is key. After adding spices, let them cook for a minute. This helps release their flavors. If you find your chili too bland, add more chili powder or cumin. A pinch of salt can also enhance the taste. For consistency, you want a nice balance. If your chili is too thin, mash some sweet potato against the pot's side. This releases starch and thickens your dish. If it's too thick, add a splash of vegetable broth to loosen it up. Garnishing can take your chili to the next level. Fresh cilantro adds a burst of flavor. Diced avocado gives a creamy texture. Both are excellent choices to sprinkle on top. Pair your chili with sides to make it a full meal. Crusty bread is perfect for dipping. Homemade cornbread works well too, adding a touch of sweetness. For a light option, serve with a simple salad on the side. Enjoy experimenting with these ideas! {{image_4}} You can change the beans and legumes in this recipe. For instance, try using pinto beans or chickpeas. Each bean brings a unique flavor and texture. You can also mix them for a fun twist. Seasonal vegetables add great taste. In fall, add butternut squash or carrots. In spring, try zucchini or green beans. These swaps can brighten your chili and make it feel fresh. Fresh herbs or spices can lift your chili. Consider adding chopped cilantro or parsley right before serving. This adds a burst of flavor and color. If you like heat, add more chili powder or hot sauce. Start with a little, then taste. This way, you can find the right spice level for your taste. For the full recipe, check out the details above. Enjoy making your chili! To keep your vegan sweet potato chili fresh, follow these tips: - Refrigeration: Let the chili cool down before storing. Place it in an airtight container. It stays good in the fridge for up to 4 days. - Freezing: If you want to store it longer, freeze the chili. Use freezer-safe containers or bags. It can last up to 3 months in the freezer. Remember to leave some room for expansion. When you're ready to enjoy your leftover chili, here’s how to reheat it: - Methods for reheating: You can reheat it on the stove over low heat. Stir it often to heat evenly. If you prefer, use a microwave. Heat in short bursts, stirring in between. - Preventing loss of flavor and texture: Add a splash of vegetable broth or water to the pot if it’s too thick. This helps keep the chili moist and tasty. Stir well and enjoy your warm, hearty meal again! For the full recipe, check out the Vegan Sweet Potato Chili recipe above. To add heat to your Vegan Sweet Potato Chili, you can try a few methods. First, add more chili powder or smoked paprika to the mix. You can also include fresh jalapeños or red pepper flakes. If you love heat, drizzle in some hot sauce while cooking or just before serving. Adjust the spice level to fit your taste. Yes, you can use fresh sweet potatoes! Peel and dice them into small pieces. Fresh sweet potatoes will cook well in this recipe. You can also swap canned beans for dried beans. Just soak and cook them ahead of time. This gives you more control over the flavor and texture. Vegan Sweet Potato Chili pairs well with many sides. Try serving it with crusty bread or warm cornbread. You can also add a side salad for a fresh crunch. For a fun twist, top your chili with diced avocado and fresh cilantro. These toppings enhance the flavor and add a nice texture. Check out the Full Recipe for more ideas! You now have all the tools to make a delicious Vegan Sweet Potato Chili. We covered the key ingredients, including sweet potatoes, beans, and spices, to create wonderful flavor. I shared tips to perfect your chili, from sautéing techniques to serving ideas. You can even try different variations to make it your own. Now, get cooking! Enjoy this hearty dish as a warming meal. It’s healthy, tasty, and easy to share. Try it out and adjust the flavors to suit your taste!

Vegan Sweet Potato Chili Healthy and Hearty Meal

Looking for a delicious and filling meal? Try my Vegan Sweet Potato Chili! This dish pairs sweet potatoes with hearty

To make a rich and creamy dairy-free chocolate mousse, gather these key items: - 1 cup full-fat coconut milk (chilled overnight) - 1 cup dark dairy-free chocolate chips (or finely chopped dairy-free chocolate) - 2 tablespoons maple syrup (adjust according to your desired sweetness) - 1 teaspoon pure vanilla extract - A pinch of fine sea salt - Fresh berries (such as raspberries, strawberries, or blueberries) for garnish - Fresh mint leaves for garnish You can swap some ingredients if needed. For coconut milk, you might use almond milk for a lighter mousse. Almond milk gives a different flavor but still works well. If you want a sweeter mousse, use agave syrup instead of maple syrup. You can also try different dairy-free chocolate brands. Just ensure they are high-quality to keep the taste rich. This mousse is vegan and gluten-free. It fits well in many diets. However, check the chocolate for any hidden dairy. If you have nut allergies, be careful with almond milk. You can always choose oat milk or soy milk as alternatives. This dessert allows everyone to enjoy a creamy treat without dairy. Open the chilled can of coconut milk. Use a spoon to scoop the thick cream into a mixing bowl. Discard the watery liquid left in the can. This cream gives the mousse its rich texture. Make sure to use full-fat coconut milk for the best results. In a microwave-safe bowl, add the dark dairy-free chocolate chips. Heat in the microwave for 20 seconds at a time. Stir the chocolate between intervals. This helps it melt evenly and avoids burning. You want the chocolate to be silky and smooth. Once the chocolate melts, remove it from heat. Mix in the maple syrup, vanilla extract, and a pinch of sea salt. Stir until everything is well combined. Next, gently fold in the coconut cream using a rubber spatula. Be careful not to deflate the cream. Keep folding until the mixture is smooth and creamy. Spoon the mousse into individual serving dishes. Distribute it evenly among the cups. Cover each dish with plastic wrap. Place the dishes in the refrigerator to chill. Let the mousse set for at least two hours to develop its flavors. When ready to serve, remove the mousse from the fridge. Garnish it with fresh berries and mint leaves. This adds a pop of color and freshness. For a fun twist, use clear dessert cups to show off the mousse’s rich texture. Enjoy your delicious dairy-free chocolate mousse! Remember, you can find the Full Recipe for more details. To get the perfect mousse texture, start with chilled coconut milk. This makes the cream thick and fluffy. When you scoop out the cream, avoid the watery part. Fold the coconut cream into the chocolate gently. This helps keep air in the mix. If you stir too hard, the mousse will lose its lightness. You can boost the flavor of your mousse easily. Add a splash of espresso for a rich taste. A little orange zest gives it a fresh twist. If you want a sweeter mousse, adjust the maple syrup. Remember, the chocolate type matters too. Dark chocolate brings a deep flavor. Presentation adds fun to your dessert. Use clear cups to show off the mousse's rich color. Consider drizzling melted chocolate on top. Fresh berries like strawberries or raspberries make it look bright. A mint leaf on top adds a pop of green. These small touches make your mousse shine. For the detailed recipe, check out the Full Recipe. {{image_4}} You can change the taste of your mousse easily. Adding orange zest gives it a fresh, bright kick. A dash of espresso brings out the richness of the chocolate. You could also mix in a pinch of cinnamon for warmth. Each of these options adds fun layers of flavor. To make this mousse even more fun, you can swap out the coconut milk. Almond milk or oat milk can work well too. Each milk gives a different taste and texture. Almond milk adds a nutty twist, while oat milk makes it creamier. Choose what you like best for your dessert. You can serve the mousse in many ways. Try layering it in parfait glasses with berries for a fancy touch. You can also spread it between layers of chocolate cake for a rich dessert. Each serving method makes this mousse unique and exciting to enjoy. Don't forget to check out the Full Recipe for more tips! To keep your mousse fresh, cover it tightly with plastic wrap. You can also use airtight containers. Make sure to place the mousse in the fridge right away. This helps maintain its rich texture and flavor. When stored properly, the mousse lasts about three to four days in the fridge. After this time, it may lose its creamy texture. If you notice any change in color or smell, it’s best to toss it out. You can freeze leftover mousse if needed. Use an airtight container and leave a bit of space at the top for expansion. It will keep well for about one month. When you're ready to enjoy it, let it thaw in the fridge overnight. This keeps it smooth and creamy. Yes, this chocolate mousse is vegan-friendly. It uses coconut milk and dairy-free chocolate. Both ingredients are plant-based and safe for those following a vegan diet. Absolutely! You can use other sweeteners, like agave nectar or coconut sugar. Each sweetener will change the flavor slightly, so choose what you like best. To make this mousse sugar-free, use a sugar-free sweetener, like stevia or erythritol. Adjust the amount to taste since these sweeteners can be much sweeter than sugar. Dark chocolate works best for this mousse. Look for brands that are labeled dairy-free and have a high cocoa content. This ensures a rich and deep chocolate flavor. For the full recipe, please refer to the section above. This blog post covered how to make a vegan chocolate mousse. We explored key ingredients, including substitutions for different diets. I shared step-by-step instructions to combine and chill your mousse. You learned tips for texture and flavor, and how to present your dish beautifully. Variations like adding orange zest offer unique twists. Lastly, I provided storage info, so your leftovers stay fresh. Enjoy your delicious mousse and impress your friends!

Dairy-Free Chocolate Mousse Rich and Creamy Dessert

Indulging in a rich, creamy dessert doesn’t have to mean dairy! In my guide to Dairy-Free Chocolate Mousse, I’ll show

- 12 jumbo pasta shells - 2 cups fresh spinach, finely chopped - 1 cup ricotta cheese - 1 cup shredded mozzarella cheese - 1/2 cup grated parmesan cheese - 1 teaspoon garlic powder - 1 teaspoon onion powder - Salt and pepper to taste - Fresh basil leaves - Use dairy-free cheese alternatives for a vegan option. - Frozen spinach works well if fresh is not available. - Whole grain or gluten-free pasta shells can be used for dietary needs. In this recipe, I focus on fresh ingredients. Jumbo pasta shells are perfect for holding the filling. The spinach brings a nice, vibrant color and a boost of nutrients. Ricotta cheese adds creaminess, while mozzarella and parmesan provide a delicious cheesy flavor. For flavor, I use garlic powder and onion powder. They enhance the taste without overpowering the dish. Salt and pepper help balance the flavors too. Fresh basil leaves are a great garnish. They add freshness and a pop of color to the plate. If you want to switch things up, consider dairy-free cheese. It works well for those who are lactose intolerant. Frozen spinach is a good alternative to fresh spinach. It saves time and still tastes great. For a healthier option, try whole grain or gluten-free pasta shells. They can make this dish fit your diet while keeping it tasty. For the full recipe, refer back to the beginning of the article. 1. Preheating the Oven: Start by preheating your oven to 350°F (175°C). This gets your oven ready for baking the stuffed shells. 2. Cooking the Pasta Shells: In a large pot, bring salted water to a boil. Add the jumbo pasta shells. Cook them until they are al dente, which takes about 10-12 minutes. Once done, drain the shells and let them cool for a bit. 1. Combining Spinach and Cheeses: In a mixing bowl, add the finely chopped spinach, ricotta cheese, 1/2 cup of shredded mozzarella cheese, and grated parmesan cheese. 2. Adding Seasonings and Egg: Mix in a lightly beaten egg, garlic powder, onion powder, and a pinch of salt and pepper. Stir until it becomes a creamy filling. 1. Stuffing the Shells: Take each cooled pasta shell and fill it with the spinach and cheese mixture. Place the filled shells seam-side up in a 9x13 inch baking dish. 2. Layering with Marinara Sauce: Pour marinara sauce evenly over the stuffed shells. Make sure each shell is well-covered in sauce. 3. Topping with Mozzarella: Sprinkle the remaining 1/2 cup of shredded mozzarella cheese over the marinara sauce. 1. Covering with Foil: Cover the baking dish with aluminum foil. This helps to avoid excess browning while baking. 2. Timing for Perfect Cheese Melt: Bake in the preheated oven for 20 minutes. Afterward, remove the foil and bake for another 10-15 minutes. You want the cheese to be fully melted and bubbly. Enjoy these cheesy spinach stuffed shells with a side salad or garlic bread! For the full recipe, check the main article. To keep your shells intact, cook them just until al dente. This means they should still have a slight bite. Overcooking leads to breakage. When you drain them, let them cool slightly. This way, you can handle them without burns. For cooking spinach, steaming is best. This keeps the color and nutrients. You can also sauté it in a little olive oil. Just a few minutes will wilt it perfectly. To boost flavor, add fresh herbs like basil or parsley. Oregano and thyme also work well. These herbs can make your dish taste fresh and vibrant. Don’t forget to season with salt and pepper. A touch of red pepper flakes can add some heat. When choosing marinara, homemade is great if you have time. It gives a rich flavor. But if you’re busy, store-bought works too. Look for brands with simple ingredients. This ensures quality and taste. For a complete meal, serve your stuffed shells with a fresh salad. A simple green salad with vinaigrette is lovely. Garlic bread pairs well, too. It adds crunch and flavor. If you have leftovers, get creative. Turn them into a pasta bake by adding more sauce and cheese. You can also mix them into a stir-fry with veggies. This keeps things interesting and tasty. For the full recipe, check out the details above! {{image_4}} For those who enjoy meat, adding ground turkey or beef works well. Just brown the meat before mixing it into the filling. This adds flavor and protein to the dish. You can also use sausage for a spicier kick. These options make the meal heartier and satisfying for meat lovers. If you want to keep it vegetarian, consider adding vegetables like mushrooms or bell peppers. Chopped artichokes also add a nice touch. Mix these veggies into the filling for extra flavor and texture. You can also explore different cheeses. Try goat cheese or feta for a tangy twist. For vegan options, use dairy-free cheese and skip the egg. You can replace the ricotta with blended tofu mixed with nutritional yeast. This keeps the filling creamy and tasty. For low-carb or keto diets, swap the pasta for zucchini noodles. This keeps the dish light but still delicious. These variations allow you to customize Cheesy Spinach Stuffed Shells to your taste and dietary needs. Each option ensures you enjoy a flavorful dinner delight. For the full recipe, visit the link provided. To keep your cheesy spinach stuffed shells fresh, follow these tips: - Refrigeration guidelines: Place leftovers in an airtight container. They will stay good for about 3 to 4 days in the fridge. Make sure to let them cool before sealing the container. - Freezing stuffed shells properly: If you want to freeze them, wrap each shell in plastic wrap. Then, place them in a freezer-safe bag or container. These can last for up to 3 months in the freezer. When ready to eat, thaw them in the fridge overnight. To enjoy your leftovers, reheating is key. Here’s how to do it right: - Best methods to maintain texture: The oven is the best choice. Preheat to 350°F (175°C). Place the shells in a baking dish and cover with foil. Bake for about 20 minutes or until heated through. - Avoiding sogginess: If you use the microwave, place a damp paper towel over the shells. This helps keep them from drying out while heating. Heat in short bursts, checking often. Knowing how long your stuffed shells last helps you avoid waste: - How long can it last in the fridge: As mentioned, they are good for 3 to 4 days when stored properly. - Signs of spoilage: Look for changes in smell, color, or texture. If the shells smell off or if mold appears, it’s best to throw them out. For the full details on making these delicious stuffed shells, check out the Full Recipe. To stop the shells from cracking, cook them just right. Boil them for 10-12 minutes until they are al dente. This means they should be firm but not hard. After cooking, drain the shells gently. Rinse them in cold water to cool them down. Handle the shells carefully to avoid breaks. Also, use a large pot with plenty of water. This gives the shells space to move and cook evenly. Yes, you can make the filling a day ahead. Mix the chopped spinach, ricotta, mozzarella, parmesan, egg, and spices. Store it in an airtight container in the fridge. This saves time when you are ready to cook. Just remember to stuff the shells before baking. Fresh filling tastes best, so avoid storing it too long. You can serve a fresh salad with mixed greens. A light Caesar salad pairs well too. Garlic bread makes a tasty side as well. If you want something warm, try roasted vegetables. They add color and flavor to your meal. You can also serve a bowl of marinara sauce on the side for dipping. This recipe yields about four servings. Each serving has three stuffed shells. You can easily double the recipe if you need more. Just adjust the baking time and use a larger dish. Enjoy sharing with family and friends! For the full recipe, check the details above. In this blog post, we explored how to make cheesy spinach stuffed shells. You learned about the key ingredients, from jumbo pasta shells to tasty cheeses. I walked you through preparing, filling, and baking the dish step by step. Tips for storing leftovers and serving ideas were included too. Stuffed shells are versatile and fun to make. With simple swaps, you can cater to all diets. Enjoy creating this dish for family and friends, and don't forget to experiment with flavors!

Cheesy Spinach Stuffed Shells Flavorful Dinner Delight

Looking for a delicious way to enjoy dinner? Cheesy spinach stuffed shells are the answer! With soft pasta filled with

- 1 lb boneless, skinless chicken breasts - 1/4 cup honey - 1/4 cup Dijon mustard - 2 tablespoons low-sodium soy sauce - 1 tablespoon olive oil The main ingredients create a sweet and tangy flavor in your skewers. The honey brings a rich sweetness, while Dijon mustard adds a sharp kick. The soy sauce gives depth, and olive oil keeps everything moist. - 1 cup cherry tomatoes - 1 bell pepper (any color) You can boost the flavor and color by adding cherry tomatoes and bell peppers. They grill nicely and add a pop of freshness to your skewers. - Garlic powder - Onion powder - Smoked paprika - Salt and freshly ground black pepper The seasoning is key to making these skewers shine. Garlic powder and onion powder give great depth. Smoked paprika adds a warm, smoky flavor. Don’t forget to add salt and pepper to enhance all the tastes. For the full recipe, check out the details above. To start, grab a medium mixing bowl. In it, whisk together the following ingredients: - 1/4 cup honey - 1/4 cup Dijon mustard - 2 tablespoons low-sodium soy sauce - 1 tablespoon olive oil Mix these until they blend well. Next, add: - 1 teaspoon garlic powder - 1 teaspoon onion powder - 1/2 teaspoon smoked paprika - Salt and freshly ground black pepper to taste Make sure the mixture is smooth. This honey mustard marinade adds flavor to the chicken. Next, take 1 lb of cubed boneless, skinless chicken breasts. Place them in a large resealable plastic bag or a glass dish. Pour the marinade over the chicken. Ensure each piece gets a good coat. Seal the bag tightly or cover the dish. For the best flavor, refrigerate for at least 1 hour, or overnight if you can wait. This helps the chicken soak up the flavors. When you are ready to grill, preheat your grill or grill pan to medium-high heat. If you use wooden skewers, soak them in water for 30 minutes. This prevents them from burning while grilling. Now, you’re set to assemble and grill your skewers. Enjoy the process, as this is when the magic happens! To make a great marinade, mix honey and Dijon mustard well. Add soy sauce, olive oil, garlic powder, onion powder, and smoked paprika. This blend gives your chicken a sweet and tangy flavor. For the best taste, let the chicken marinate overnight in the fridge. If short on time, one hour will work too, but overnight is better. When grilling, heat your grill to medium-high. This heat cooks the chicken evenly. Place the skewers on the grill and turn them every few minutes. This helps them cook without burning. Use a meat thermometer to check if the chicken is done. It should reach 165°F (75°C) inside. For serving, arrange your skewers on a big platter. Drizzle extra honey mustard sauce on top to make it look pretty. You can add fresh parsley for color. Serve with a salad or grilled veggies for a full meal. This makes the dish inviting and tasty! {{image_4}} You can change the chicken type for your skewers. Chicken thighs have more flavor and stay juicy. They are great if you like tender meat. Chicken breasts are lean and cook faster. Both options work well in this recipe. For sweeteners, honey is classic, but try maple syrup for a twist. Agave syrup is another option. It adds a mild sweetness that complements the mustard flavor. You can bake these skewers in the oven. Preheat the oven to 400°F. Place the skewers on a baking sheet. Bake for 15-20 minutes until cooked through. This method is easy and works well year-round. For stovetop grilling, use a grill pan. This is great in colder months. Heat the pan over medium-high heat and add the skewers. Cook until they are golden brown and reach the right temperature. Want to spice things up? Add cayenne pepper for heat. A little goes a long way. You can also mix in herbs like rosemary or thyme. Fresh herbs elevate the dish and add aroma. These variations let you make honey mustard chicken skewers your own. Each change can create a new experience. Enjoy experimenting and find your favorite combination. Check out the Full Recipe for more details. To keep your cooked honey mustard chicken skewers fresh, store them in the fridge. Place the skewers in an airtight container. Use a glass or plastic container with a tight lid. This keeps moisture in and prevents odors from other foods. When reheating leftover skewers, the oven works best. Preheat it to 350°F (175°C). Place the skewers on a baking sheet lined with foil. Cover them with foil to keep the chicken moist. Heat for about 10-15 minutes or until warm. You can also use the microwave. Heat on medium for 1-2 minutes, checking often. This keeps the chicken juicy. To freeze leftover skewers, let them cool completely first. Wrap them tightly in plastic wrap, then in aluminum foil. This helps avoid freezer burn. Place the wrapped skewers in a freezer bag for added protection. When ready to eat, thaw them in the fridge overnight. For best texture, reheat them in the oven. This way, they taste just as good as when you first made them. You can find the full recipe for honey mustard chicken skewers above. For the best flavor, marinate the chicken for at least 1 hour. However, letting it sit overnight gives you the best taste. During marination, the honey and mustard soak into the chicken. This creates tender, juicy bites full of flavor. Yes, you can use other proteins! Shrimp works great and cooks fast. Tofu is a wonderful option for a vegetarian choice. Just make sure to adjust the marination time based on the protein. For shrimp, 30 minutes is enough. Tofu can marinate for 1 hour or more. These skewers pair well with many sides. Fresh salads add a nice crunch. Grilled vegetables like zucchini and bell peppers enhance the meal. Rice or quinoa can also round out your plate. The options are endless, so feel free to get creative! To check if the chicken is done, use a meat thermometer. The internal temperature should reach 165°F (75°C). You can also look for clear juices when you cut into the chicken. No pink should remain. Golden grill marks and a nice char are good signs, too. Honey mustard chicken skewers are easy to make and tasty. We covered essential ingredients, marinade steps, and grilling tips. I shared how to store leftovers and suggested variations, too. Remember, marinate for flavor and check the chicken's temperature. With these tips, your skewers will impress. Get ready to enjoy your delicious meal!

Honey Mustard Chicken Skewers Delicious Grilled Meal

Honey Mustard Chicken Skewers are a delicious and easy grilled meal everyone will love. With just a few simple ingredients,

- 1 pound boneless, skinless chicken breasts, sliced into thin strips - 1 red bell pepper, sliced - 1 yellow bell pepper, sliced - 1 green bell pepper, sliced - 1 medium red onion, sliced - 3 cloves garlic, minced - 2 tablespoons olive oil - 1 teaspoon ground cumin - 1 teaspoon chili powder - 1 teaspoon smoked paprika - Salt and black pepper to taste - Juice of 1 lime - Fresh cilantro, chopped (for garnish) - Soft tortillas (for serving) For a bright and tasty meal, gather these ingredients. You start with boneless, skinless chicken breasts. Slice them into thin strips. Next, pick three bell peppers: red, yellow, and green. Their colors make the dish pop. Slice a medium red onion and mince three cloves of garlic for extra flavor. For seasonings, use ground cumin, chili powder, and smoked paprika. These spices bring warmth and depth. Don't forget salt and black pepper to taste. Finally, squeeze in the juice of one lime for a zesty kick. When serving, fresh cilantro adds beauty and taste. Use soft tortillas to wrap the filling, making each bite a delight. This simple setup makes One-Pan Chicken Fajitas a winner. You can find the Full Recipe for more details. Start by mixing the chicken and spices. In a large mixing bowl, add the sliced chicken, olive oil, minced garlic, ground cumin, chili powder, smoked paprika, salt, black pepper, and lime juice. Use your hands or a spatula to toss everything together until the chicken is well coated. Let the chicken marinate for at least 15 minutes. This allows the flavors to blend and the chicken to soak in the spice mix. While you wait, slice your vegetables. Heat a large skillet over medium-high heat. Once it’s hot, add the marinated chicken in an even layer. Don't move it for about 4 to 5 minutes. This helps the chicken brown nicely. After that, stir the chicken carefully to cook it evenly. This step is key to getting juicy and tender chicken. Keep an eye on it to ensure it cooks through without burning. When the chicken starts to brown, add the sliced bell peppers and red onion to the pan. Stir everything together so the veggies mix with the chicken. This will create a wonderful aroma in your kitchen! Cook for another 7 to 10 minutes. Stir occasionally until the vegetables are tender-crisp and the chicken is fully cooked. Once done, taste the mix. Adjust the seasoning if needed. If you like some heat, add cayenne pepper or fresh jalapeños. Finally, stir in fresh cilantro for a burst of flavor. Serve the mixture hot with soft tortillas for a fun and tasty meal. You can find the Full Recipe for detailed steps and tips. To make one-pan chicken fajitas work well, follow these best practices: - Use a large pan to avoid crowding the chicken. - Preheat the pan before adding the chicken for a nice sear. - Cook the chicken in a single layer for even browning. - Stir only when needed to keep the chicken juicy. For optimal flavor and texture: - Marinate the chicken for at least 15 minutes. - Use fresh spices for a strong flavor boost. - Add the vegetables when the chicken is almost cooked. If you want to switch things up, consider these chicken alternatives: - Tofu for a plant-based option. - Shrimp for a seafood twist. You can also swap out vegetables based on your taste: - Zucchini for a unique crunch. - Mushrooms for a hearty feel. Presentation can make your meal pop. Here are some creative serving methods: - Use a colorful platter to show off the fajitas. - Serve the tortillas wrapped in a clean towel to keep them warm. To enhance visual appeal: - Garnish with lime wedges and chopped cilantro. - Add a splash of color with sliced radishes or avocado. For the full recipe, check out the details above! {{image_4}} To add some heat, consider using jalapeños or cayenne pepper. Slice the jalapeños and mix them in with the chicken. If you like cayenne, just sprinkle a little into the spices. You can also swap in different spice blends. A taco seasoning mix can give a fun twist to the flavor. You can easily make a vegetarian version. Substitute the chicken with plant-based proteins like tofu or tempeh. Use a firm type of tofu for the best texture. For veggies, try adding zucchini, mushrooms, or corn. This mix gives you a hearty and colorful dish. If you need a gluten-free option, choose gluten-free tortillas. Many brands offer tasty wraps that hold up well. Make sure the seasonings you use are also gluten-free. Check the labels on your spice mixes to ensure they meet your needs. To keep your One-Pan Chicken Fajitas fresh, refrigerate them right away. Place leftovers in airtight containers. This helps keep the flavors intact and prevents spoilage. Use glass or plastic containers that seal well. You can reheat fajitas in a microwave or on the stove. For the microwave, place the fajitas on a plate and cover them with a damp paper towel. Heat for one to two minutes until warm. On the stove, add a little oil to a pan, heat it on medium, and add the fajitas. Stir them gently for even warming. This keeps the texture nice and avoids drying out the chicken. If you want to save some for later, fajitas freeze well. Place them in freezer-safe bags or containers. Squeeze out as much air as possible to avoid freezer burn. For thawing, leave them in the fridge overnight. When ready to eat, reheat as described above. This way, you enjoy tasty fajitas anytime! You can find the full recipe to make these delicious fajitas again. You can tell the chicken is done when it is no longer pink. The juices should run clear. The best way to be sure is to use a meat thermometer. The chicken should reach an internal temperature of 165°F (75°C). This ensures it is safe to eat. Yes, you can make the chicken and veggies ahead of time. Just marinate the chicken and cut the veggies. Store them in your fridge for up to 24 hours. This makes cooking faster when you are ready to eat. Serve the fajitas hot on a colorful platter. Warm soft tortillas are a must. You can also pair them with rice or beans for a full meal. For toppings, consider fresh avocado, sour cream, or salsa. They add extra flavor and fun to your meal. This blog post covered how to make delicious One-Pan Chicken Fajitas. We explored key ingredients like chicken, peppers, and spices. I shared tips for cooking the chicken and adding veggies. You learned about ingredient swaps and creative ways to serve. In conclusion, you can enjoy tasty, easy fajitas any night. Feel free to customize the recipe for your taste. With these tips, you'll impress yourself and others at the dinner table. Enjoy!

One-Pan Chicken Fajitas Quick and Flavorful Meal

Craving a quick and tasty dinner? One-Pan Chicken Fajitas are your answer! This meal packs vibrant flavors into one easy

- 1 whole chicken (approximately 4-5 lbs) - 4 tablespoons olive oil - 4 cloves garlic, finely minced - 2 large lemons (one for zesting and juicing, the other sliced) - 1 tablespoon fresh thyme leaves (or 1 teaspoon dried thyme) - 1 tablespoon fresh rosemary, finely chopped (or 1 teaspoon dried rosemary) - Salt and pepper, to taste - 1 teaspoon smoked paprika - 1 medium onion, cut into quarters - Fresh parsley, for garnish When you pick your chicken, go for organic if you can. It often tastes better and is healthier. Organic chickens are raised without harmful chemicals. If you cannot find organic, choose a good quality conventional chicken. Fresh herbs add more flavor to your dish than dried ones. Always try to use fresh thyme and rosemary. Fresh garlic and lemons are also key. They make the dish bright and lively. Using old or dried versions can dull the taste. This recipe uses garlic and lemon to create a tasty balance. Fresh garlic brings out a strong, rich flavor. Fresh lemons add a zesty kick. Together, they make this dish stand out. You can find the full recipe above. 1. Preheat the oven: First, set your oven to 425°F (220°C). This hot temperature will help the skin of the chicken get crispy. 2. Prepare the marinade: In a small bowl, mix olive oil, minced garlic, lemon zest, and lemon juice. Add thyme, rosemary, smoked paprika, salt, and pepper. Whisk all these ingredients well to create a smooth marinade. 3. Dry the chicken: Pat the whole chicken dry with paper towels. This step is key to getting that crispy skin. 4. Marinate the chicken: Gently loosen the skin over the breast and thighs. Spoon half the marinade under the skin and inside the cavity. Rub the rest of the marinade all over the chicken skin. 5. Stuff the cavity: Place the quartered onion and lemon slices inside the chicken. This adds moisture and flavor while it roasts. 1. Truss the chicken (optional): If you want, tie the legs together with kitchen twine. Tuck the wing tips under the body to help it cook evenly. 2. Roast the chicken: Put the chicken breast-side up in a roasting pan. Roast it for about 1 hour and 15 minutes. To check if it’s done, use a meat thermometer. The internal temperature should reach 165°F (75°C). Baste the chicken with its juices halfway through cooking. 3. Rest the chicken: After roasting, let the chicken rest on a cutting board for about 15 minutes. This step is crucial. It helps keep the meat juicy and packed with flavor. Follow these steps, and you'll create a flavorful Lemon Garlic Roasted Chicken that will impress everyone at your dinner table. For the complete recipe, check out the [Full Recipe]. To get that perfect crispy skin on your chicken, start by drying the skin well. Pat it with paper towels until it feels dry. This step makes a huge difference in how the skin crisps up when roasted. Next, for even browning, place the chicken breast-side up in the roasting pan. This allows the heat to circulate properly. Basting the chicken with its own juices halfway through cooking also helps achieve that golden color. You can boost the flavors of your Lemon Garlic Roasted Chicken by adding more herbs and spices. Try mixing in some oregano or basil to the marinade for a fresh twist. If you want to switch things up, consider alternative marinades. A mix of honey and mustard can add a sweet kick. Or use orange juice instead of lemon for a different citrus flavor. Check out the Full Recipe for more ideas! {{image_4}} You can cook lemon garlic roasted chicken in many ways. If you want a quick option, try using an Instant Pot. It cooks the chicken fast and keeps it juicy. Just follow the same marinade method. Place the chicken in the pot with a cup of broth and cook for about 25 minutes. A slow cooker is another great choice. It gives a tender and flavorful result. Coat the chicken with the marinade, place it in the slow cooker, and cook on low for about 6-8 hours. This method makes the chicken fall-off-the-bone tender. Grilling is a fun way to add smoky flavor. Marinate the chicken as usual, then place it on a hot grill. Cook it for about 45 minutes, turning it often. This gives the chicken a crispy skin and a nice char. You can also mix up the flavors in this dish. For a touch of sweetness, add honey or mustard to the marinade. This adds a nice balance to the lemon's tartness. You can use about one tablespoon of honey or mustard for great results. Try combining other citrus fruits with the lemon. Oranges and limes work well. They add a unique twist. Use the zest and juice from these fruits for the marinade. This can brighten the dish and enhance the flavor in an exciting way. For more cooking tips, check out the Full Recipe. It has all the details needed to create your perfect lemon garlic roasted chicken. After you enjoy your Lemon Garlic Roasted Chicken, store leftovers properly to keep them fresh. - Refrigeration: Place any leftover chicken in an airtight container. It stays good for up to 3 days in the fridge. Make sure to cool it before sealing. - Freezing: If you want to keep the chicken longer, freeze it. Wrap it tightly in plastic wrap, then place it in a freezer bag. It can last for up to 3 months. Label the bag with the date for easy tracking. Reheating your roasted chicken should keep it tasty and moist. - Best methods: Use the oven for the best results. Preheat it to 350°F (175°C). Place the chicken in a baking dish and cover it with foil. Heat for about 20-30 minutes or until warm. - Maintaining moisture: To keep the chicken juicy, add a splash of broth or water to the dish before reheating. This adds steam, helping to retain moisture. Enjoy your flavorful meal again! Roasting time depends on the chicken's weight. Here are the general guidelines: - For a 3 to 4 lb chicken, roast for 1 hour to 1 hour 15 minutes. - For a 4 to 5 lb chicken, aim for 1 hour 15 minutes to 1 hour 30 minutes. - Always check for an internal temperature of 165°F (75°C) to ensure it's done. Yes, you can use boneless chicken. Here’s how to adapt the recipe: - Use chicken breasts or thighs for a quicker cook time. - Marinate the chicken just like the whole chicken. - Roast the boneless parts for about 30 to 40 minutes. Side dishes can elevate your meal. Here are some great options: - Roasted vegetables, like carrots and potatoes. - A fresh green salad with lemon vinaigrette. - Creamy mashed potatoes or rice pilaf. - Garlic bread or crusty rolls to soak up the juices. Feel free to explore more with the Full Recipe for Lemon Garlic Roasted Chicken! Roasting a whole chicken is simple and rewarding. We covered the key ingredients, from fresh herbs to quality chicken. You learned essential steps for prepping and roasting, plus tips for crispy skin. Variations like grilling or using spices add fun twists. Finally, proper storage keeps leftovers fresh. With this knowledge, you can make delicious lemon garlic roasted chicken. Enjoy trying different methods and flavors. Happy cooking!

Lemon Garlic Roasted Chicken Flavorful Dinner Recipe

Looking for a standout dinner that impresses without overwhelming? This Lemon Garlic Roasted Chicken recipe hits the spot. With bright

- Zucchini - Bell pepper - Snap peas - Carrot - Garlic - Ginger - Green onions - Soy sauce - Sesame oil - Olive oil - Red pepper flakes - Sesame seeds (for garnish) - Fresh cilantro (optional) To make this dish pop, zucchini is your star. It becomes the noodles that soak up flavors. Add bright bell peppers, sweet snap peas, and crunchy carrots for a colorful mix. Garlic and ginger bring warmth and zest. For the sauce, soy sauce adds saltiness while sesame oil gives a nutty finish. Olive oil helps cook everything evenly. If you like a kick, sprinkle in red pepper flakes. Don’t forget the garnishes! Sesame seeds and fresh cilantro add a nice touch to your plate. This combination is not only tasty, but it's also packed with nutrients. You can find the full recipe in the earlier section. Enjoy every bite of this quick, healthy meal! To start, grab your spiralizer and colander. Using the spiralizer, turn the zucchini into long noodles. Place these in the colander and sprinkle them lightly with salt. Let the noodles sit for 15-20 minutes. This step is key because it removes excess moisture. Moisture can make your dish soggy. You want crisp noodles that hold up well. Next, heat olive oil in a large skillet or wok over medium-high heat. Add the white parts of the sliced green onions first. After a minute, toss in the minced garlic and grated ginger. Stir-fry these for about 1-2 minutes. This will help develop great flavors that form the base of your dish. Now, it's time to add the bell pepper, snap peas, and julienned carrot. Stir-fry these veggies for about 4-5 minutes. You want them to be tender but still crisp. Keep stirring so they cook evenly. This technique keeps your veggies bright and fresh. After the veggies are ready, gently add your zucchini noodles to the skillet. Drizzle sesame oil and soy sauce over everything. Sprinkle in red pepper flakes for some heat. Gently toss the ingredients to combine. Cook for another 3-4 minutes. Make sure the noodles heat through but do not overcook them. You want them to stay nice and firm. Once the stir fry is complete, remove it from the heat. Transfer it to a serving platter. For a beautiful finish, garnish with the green tops of the sliced green onions. Add a sprinkle of sesame seeds and fresh cilantro if you like. This adds a nice pop of color and flavor. Enjoy your delicious and healthy creation! - Heat Control: Keep your skillet hot. A high heat helps cook the veggies fast. This keeps them crisp and colorful. Adjust the heat as needed to avoid burning. - Stirring Frequency: Stir often but not too much. Let the veggies cook while keeping their shape. This balance helps to lock in flavor and texture. - Gluten-Free Options: Use tamari instead of soy sauce. Tamari has a similar taste but is gluten-free. You can also try coconut aminos for a sweet twist. - Seasonal Vegetables: Swap in veggies that are fresh and in season. Use asparagus in spring or squash in fall. This keeps your dish interesting year-round. - Best Skillet or Wok for Stir-Frying: A large non-stick skillet works well. Woks are great too; they let heat spread evenly. Choose one that feels good in your hand. - Using a Good Spiralizer: Look for a sturdy spiralizer. It should create even noodles. This tool makes your prep quick and fun, adding to the dish's appeal. Try these tips and tricks to make your Zucchini Noodle Stir Fry even better! For the full recipe, check out the Zesty Zucchini Noodle Stir Fry 🥦. {{image_4}} You can easily add protein to your zucchini noodle stir fry. Chicken, tofu, or shrimp works well. Each protein brings unique flavors and textures. For chicken, cut it into small pieces. Cook it until golden brown first, then set it aside. Add it back when the veggies are nearly done. Tofu can be cubed and sautéed until crispy. This gives it a great texture. For shrimp, simply toss them in for the last few minutes of cooking. They cook fast and soak up all the flavors. To make your dish even more exciting, try different regional flavors. For a Thai twist, add some peanut butter and lime juice. This combo gives it a rich, nutty taste. If you want a teriyaki vibe, use teriyaki sauce instead of soy sauce. You can also add sesame seeds for crunch. Adjust spices based on what you like. A little chili paste can add heat, while a splash of vinegar can brighten the dish. Zucchini noodle stir fry is great for many diets. If you want vegan options, skip the chicken or shrimp. You can use more veggies or add beans for protein. If you follow a low-carb diet, this dish is already a great fit! Zucchini noodles are a perfect substitute for pasta. You can also add more leafy greens for extra nutrients. Enjoy this dish without worrying about carbs! For the full recipe, check here. To keep your Zucchini Noodle Stir Fry fresh, use airtight containers. Glass or plastic containers work well. Store your leftovers in the fridge. They will stay good for up to three days. When reheating, I recommend using a skillet over medium heat. This method keeps the texture intact. Avoid using a microwave, as it can make the noodles soggy. To prevent soggy noodles, add a splash of water while reheating. This adds moisture without overcooking. Stir gently and watch for steam. Your stir fry will taste just as fresh as when you first made it. You can make zucchini noodles without a spiralizer using a few simple tools. A vegetable peeler works well for flat noodles. Just peel long strips until you reach the seeds. A box grater also helps; use the large holes to create thin strips. Both methods give you a fun texture. Yes, you can prep your Zucchini Noodle Stir Fry ahead of time. Chop your veggies and store them in the fridge. You can spiralize the zucchini and keep it in a colander to drain moisture. This way, your meal comes together quickly on a busy day. This dish pairs well with many sides. Try serving it with grilled chicken or tofu for protein. You can also add a side of brown rice or quinoa for more fiber. A fresh salad adds a nice crunch and balances the meal. Yes, this recipe is great for meal prepping. Store leftovers in airtight containers in the fridge. They will keep well for 3-4 days. To reheat, use a skillet on low heat to maintain texture. Avoid microwaving, as it can make the noodles soggy. For the full recipe, check out the Zesty Zucchini Noodle Stir Fry. In this blog post, I covered how to make a delicious Zucchini Noodle Stir Fry. We explored essential ingredients, step-by-step cooking methods, and tips to master stir fry. I also shared variations for proteins and unique flavors. Think of this dish as your canvas. Customize it with your favorite ingredients or adjust it for dietary needs. Enjoy experimenting and savoring each bite. Your tasty stir fry awaits!

Zucchini Noodle Stir Fry Flavorful and Quick Meal

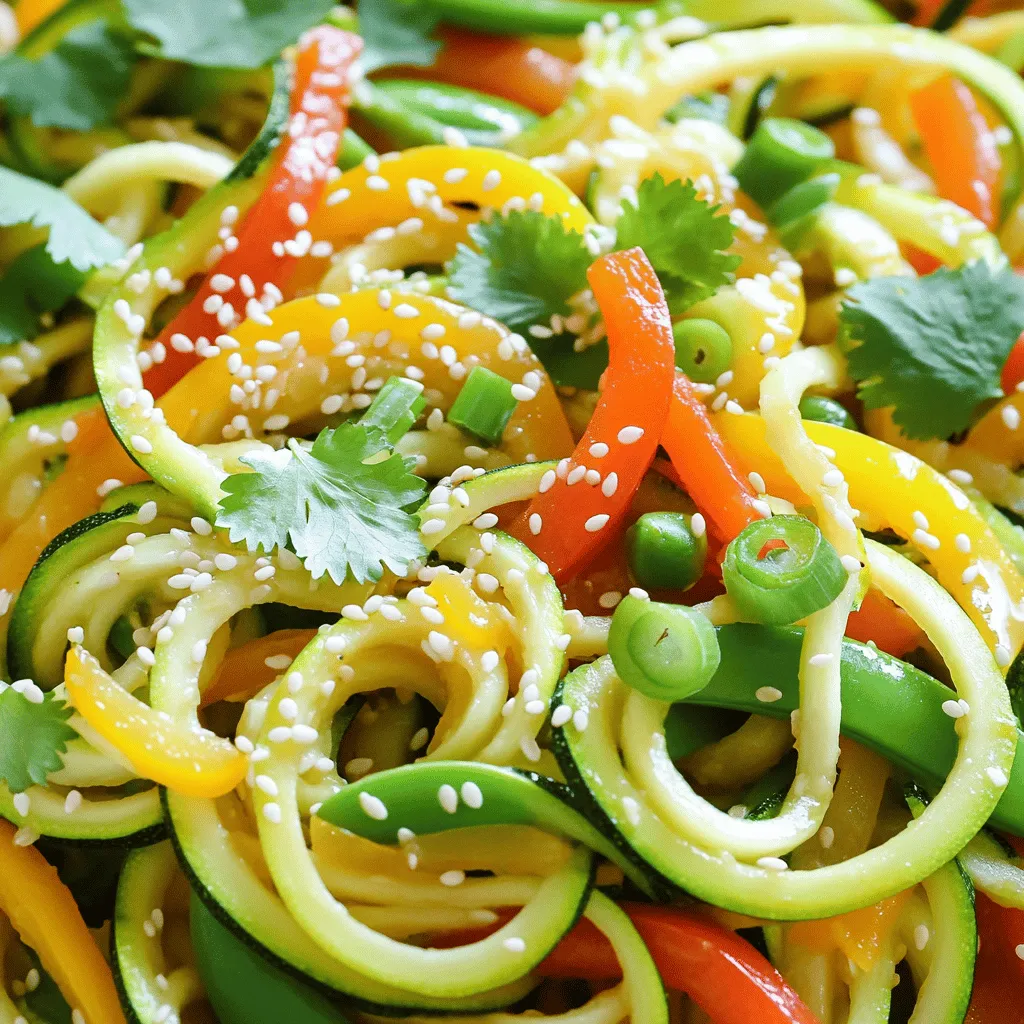
Looking for a quick, tasty meal that’s full of flavor? My Zucchini Noodle Stir Fry is the answer! With fresh

To make a delicious creamy tomato basil pasta, you need the following main ingredients: - 300g penne pasta - 1 tablespoon olive oil - 3 cloves garlic, minced - 1 can (400g) crushed tomatoes - 1 teaspoon dried oregano - ½ teaspoon red pepper flakes (optional) - 200ml heavy cream - 100g grated Parmesan cheese - Salt and freshly ground black pepper to taste - 1 cup fresh basil leaves, chopped - Extra grated Parmesan cheese for serving These ingredients work together to create a rich and tasty dish. The penne pasta holds the sauce well, while the garlic adds aroma. Crushed tomatoes form the base of the sauce, and oregano gives it a nice herbal note. The heavy cream makes it smooth and rich, and Parmesan cheese adds depth. Feel free to get creative! Here are some optional ingredients you can add: - Cooked chicken or shrimp for protein - Spinach or kale for extra greens - A splash of balsamic vinegar for tanginess - Mushrooms for an earthy flavor Adding these ingredients can enhance your dish and make it more filling. Each option brings its unique taste, so you can mix and match based on your preferences. If you need to swap ingredients, here are some ideas: - Use gluten-free pasta if avoiding gluten. - Coconut cream can replace heavy cream for a dairy-free version. - Use fresh tomatoes instead of canned for a fresh taste. - Nutritional yeast can stand in for Parmesan cheese for a vegan option. These substitutions keep the dish tasty while fitting different dietary needs. Always feel free to make it your own! For the full recipe, check out the details above. To cook the pasta, start by boiling a large pot of salted water. Add 300g of penne pasta. Cook it according to the package instructions until it is al dente. This typically takes around 8 to 10 minutes. Once done, drain the pasta in a colander. Remember to save about a cup of the pasta water for later. Set the pasta aside while you prepare the sauce. Now, let’s make the sauce. In a large skillet, heat 1 tablespoon of olive oil over medium heat. Once the oil is hot, add 3 cloves of minced garlic. Sauté the garlic for about 1 minute. Stir it often to avoid burning. You want the garlic to smell great but not turn brown. Next, pour in 1 can of crushed tomatoes. Add 1 teaspoon of dried oregano and ½ teaspoon of red pepper flakes if you like some spice. Stir well and let it simmer for 5 to 7 minutes. This lets all the flavors combine nicely. After the sauce has simmered, lower the heat. Slowly pour in 200ml of heavy cream while stirring. Let the sauce simmer for another 3 to 4 minutes until it thickens. Now, add the drained penne pasta to the skillet. If the sauce seems too thick, mix in some of the reserved pasta water until you like the texture. Stir in 100g of grated Parmesan cheese until it melts into the sauce. Taste the pasta and adjust the salt and black pepper as needed. Finally, gently fold in 1 cup of chopped fresh basil, saving a few leaves for garnish. Serve the pasta hot, topped with extra Parmesan and basil. Enjoy this creamy tomato basil pasta delight! To boost flavors, fresh herbs work wonders. Basil adds a sweet, fresh taste. Oregano brings a warm, earthy note. You can also try thyme or parsley for variety. A pinch of red pepper flakes adds a nice kick, too. Remember, fresh herbs shine when added at the end. This keeps their bright flavor and color intact. Cooking pasta well is key. Always use plenty of salted water. This helps flavor the noodles. Cook until al dente, so the pasta has a slight bite. Reserve some pasta water to adjust the sauce later. This starchy water helps the sauce cling to the pasta. Stir the pasta into the sauce gently but thoroughly for an even coat. Avoid overcooking the garlic. If it burns, your sauce will taste bitter. Don't skip the reserved pasta water; it’s vital for creaminess. If the sauce is too thick, a splash of this water can help. Lastly, be careful with salt. Taste your dish before adding more, as the cheese will also add saltiness. Following these tips will help you create a delicious creamy tomato basil pasta every time. For the complete recipe, check out the Full Recipe. {{image_4}} If you want a vegetarian version, simply skip the Parmesan cheese. You can use nutritional yeast to add a cheesy flavor. For a vegan option, replace the heavy cream with coconut cream or cashew cream. These swaps keep the dish rich and creamy without dairy. You’ll still enjoy the lovely taste of the tomatoes and basil. To make this dish gluten-free, choose gluten-free penne pasta. Many brands offer options made from rice, corn, or lentils. Cook the pasta as directed on the package. The creamy sauce pairs well with these alternatives. You won’t miss the regular pasta at all! Boost the nutrition by adding proteins like grilled chicken, shrimp, or chickpeas. For a veggie-packed meal, toss in spinach, zucchini, or bell peppers. You can add these during the last few minutes of cooking. It’s an easy way to make the dish heartier and more colorful. Explore these variations to fit your taste and dietary needs while enjoying this creamy tomato basil pasta delight! For the complete recipe, check out the Full Recipe. To store leftover creamy tomato basil pasta, first let it cool. Place it in an airtight container. You can store it in the fridge for up to three days. Make sure to keep it sealed well to avoid drying out. When you reheat the pasta, use a skillet for best results. Add a splash of water or cream to keep it moist. Heat over low to medium heat, stirring often. This helps bring back the creamy texture. Avoid using a microwave, as it can dry out the pasta. You can freeze creamy tomato basil pasta too! Place the cooled pasta in freezer-safe containers. It can last up to three months in the freezer. When ready to eat, thaw it overnight in the fridge before reheating. For the best flavor, add fresh basil and cheese after reheating. Enjoy every bite, even if it's from the freezer! For the full recipe, check out the Full Recipe section. For creamy tomato basil pasta, I recommend penne. Its tube shape holds the sauce well. Other good choices are fusilli or farfalle. They also trap sauce in their curls and folds. If you prefer a gluten-free option, try brown rice penne or chickpea pasta. Both can give great flavor and texture. Yes, you can make this dish ahead of time. Cook the pasta and sauce separately. This way, they stay fresh and tasty. Store them in airtight containers in the fridge for up to three days. When ready to eat, warm the sauce and mix in the pasta. Add a splash of reserved pasta water to bring back creaminess. To create a dairy-free version, swap heavy cream for coconut cream or cashew cream. Both add richness without dairy. Use nutritional yeast instead of Parmesan cheese for a cheesy flavor. Lastly, check that your pasta is dairy-free as well. Enjoy a delicious, creamy dish without dairy! For the complete creamy tomato basil pasta recipe, check the Full Recipe. In this blog post, we explored the key ingredients for creamy tomato basil pasta. You learned how to cook and combine pasta with a flavorful sauce. We discussed tips to enhance your dish and avoid common mistakes. You also discovered variations for different diets and how to store leftovers. Overall, with these strategies, you can create a delicious meal. Enjoy making this dish your own and impressing family and friends!

Creamy Tomato Basil Pasta Delightful Weeknight Meal

Are you ready to whip up a simple yet delicious dish? My Creamy Tomato Basil Pasta is the perfect weeknight

Older posts
Newer posts
← Previous Page1 … Page83 Page84 Page85 Next →

dsad

© 2026 tastyhatch • Built with GeneratePress

Our Policies

  • Copyright Policy
  • Cookie Policy
  • GDPR Policy
  • Privacy Policy
  • Disclaimer
  • Terms Of Use

More Information

  • Home
  • About
  • Contact
  • Appetizers
  • Dessert
  • Dinner
  • Drinks
©2026, tastyhatch About Back To Top