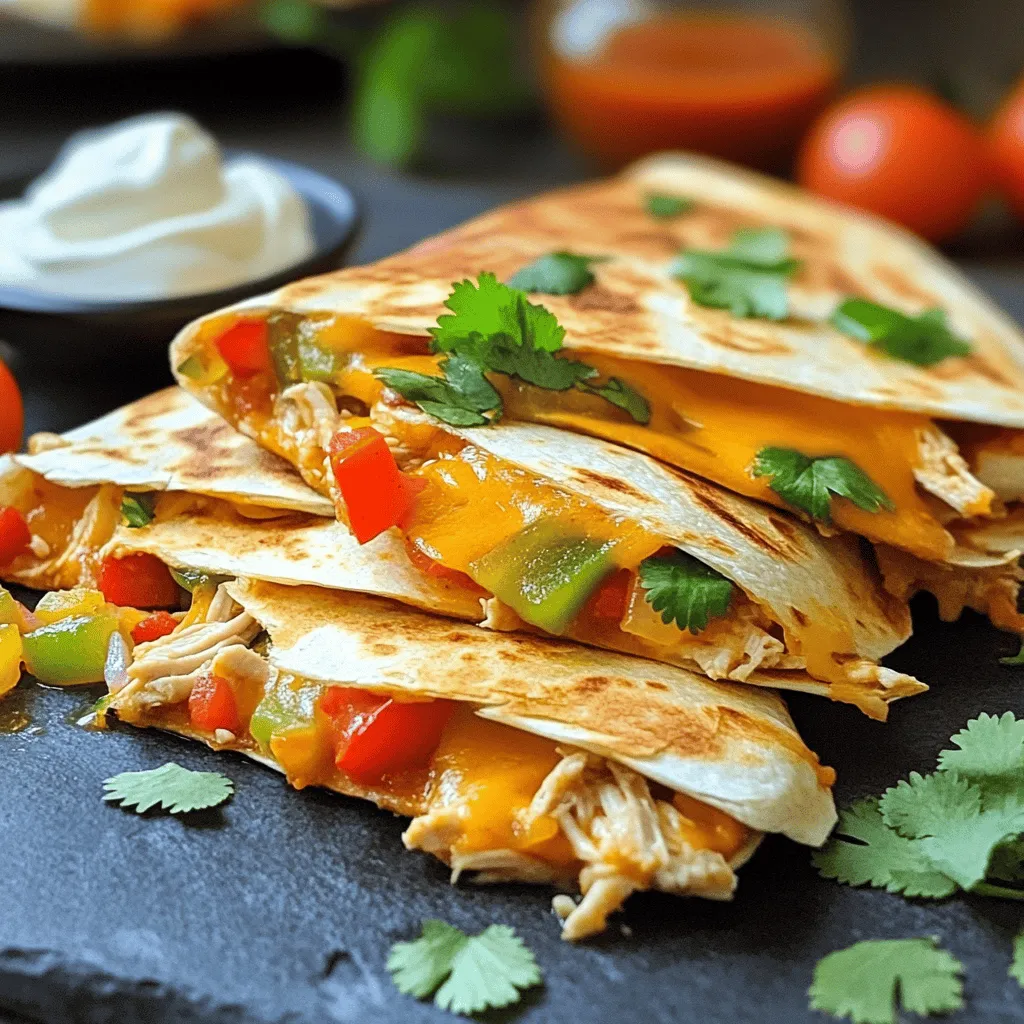
Are you craving a delicious twist on a classic favorite? This Tasty Chicken and Cheese Enchiladas Quesadilla Recipe will satisfy your hunger and impress your family. With easy steps and simple ingredients, you’ll whip up cheesy, flavorful goodness in no time. Whether you enjoy them for a quick dinner or a fun snack, these quesadillas will become your new go-to. Ready to dive in? Let’s get cooking!
Ingredients
List of Ingredients
– 2 cups cooked chicken, shredded
– 1 cup enchilada sauce
– 1 cup shredded cheese
– 4 large flour tortillas
Additional Ingredients
– 1 small onion, finely chopped
– 1 bell pepper, diced
– 1 teaspoon garlic powder
– 1 teaspoon ground cumin
– 1 tablespoon olive oil
– Fresh cilantro (for garnish)
– Sour cream and salsa (for serving)
To make tasty chicken and cheese enchiladas quesadilla, you need some key ingredients. Start with cooked chicken. I love using rotisserie chicken for easy prep. You will also want enchilada sauce. You can choose red or green sauce, based on your taste.
Next, use shredded cheese. Cheddar or Monterey Jack works great. Flour tortillas are perfect to hold everything together.
Then, for added flavor, you’ll chop a small onion and a bell pepper. They add great taste and texture. Don’t forget garlic powder and ground cumin for spice. Olive oil helps in cooking.
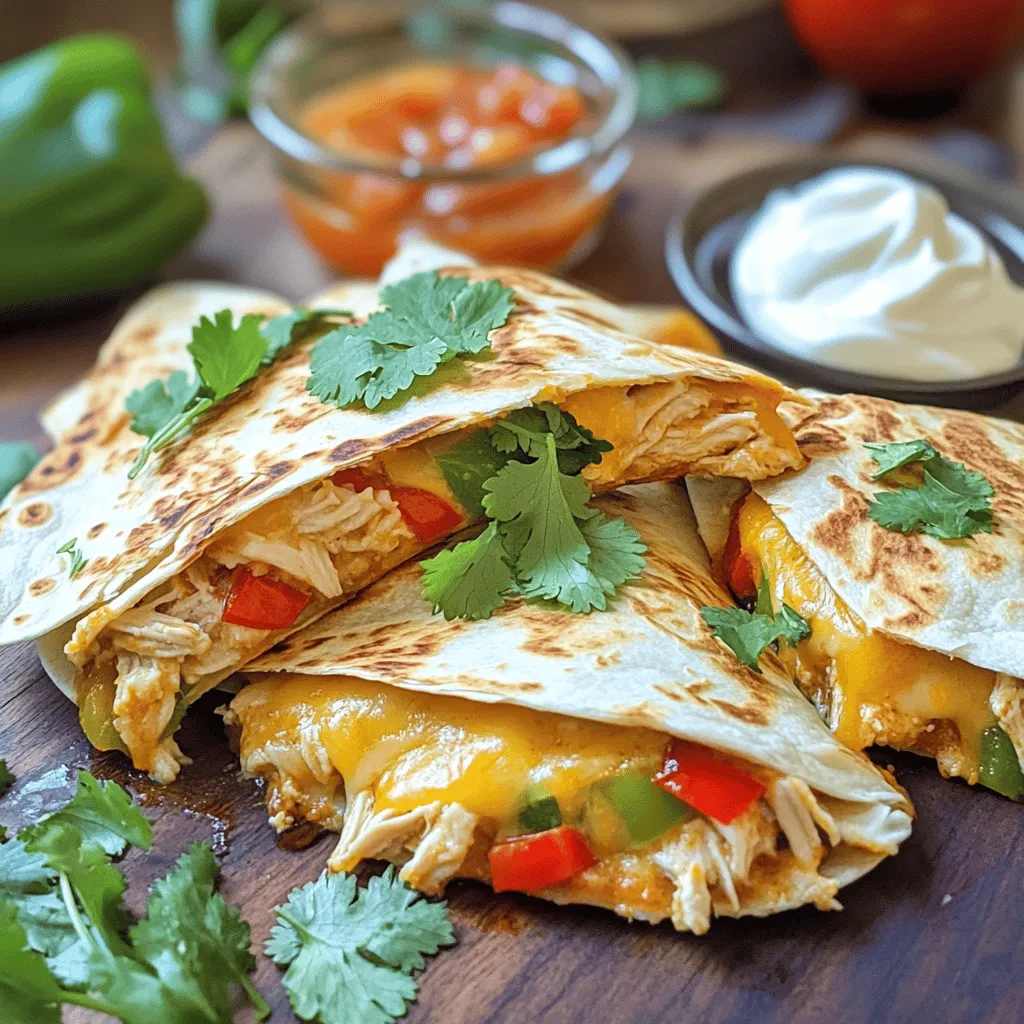
For garnish, use fresh cilantro. It adds color and taste. Serve with sour cream and salsa for a tasty finish. This recipe is simple, fun, and full of flavor.
Step-by-Step Instructions
Preparation of Filling
1. Sautéing onion and bell pepper: Start by heating one tablespoon of olive oil in a large skillet over medium heat. Add the finely chopped onion and diced bell pepper. Cook them for about 3 to 4 minutes. You want them soft and fragrant.
2. Mixing chicken with enchilada sauce: In a mixing bowl, combine 2 cups of shredded chicken with 1 cup of enchilada sauce. Add 1 teaspoon of garlic powder and 1 teaspoon of ground cumin. Mix well. Don’t forget to add half of the shredded cheese. This step ensures the chicken is flavorful and creamy.
Assembling the Quesadillas
1. Filling tortillas with chicken mixture: Take one large flour tortilla and lay it flat. Spoon a generous amount of your chicken mixture onto one half of the tortilla.
2. Folding and preparing for cooking: Sprinkle the remaining shredded cheese on top of the chicken. Fold the tortilla over to form a half-moon shape. Repeat this process for the other tortillas. Get ready for some cheesy goodness!
Cooking the Quesadillas
1. Cooking techniques for perfect texture: Place the folded quesadilla back in the same skillet over medium heat. Cook each side for about 3 to 4 minutes. You want a crispy, golden brown outside.
2. Timing for golden brown quesadillas: Keep an eye on the quesadillas. Flip them carefully to avoid spills. If the cheese isn’t melting, you can add a bit more oil for the second side. This helps create that perfect crunch.
Tips & Tricks
Achieving the Best Flavor
– Choosing the right cheese: I love using a mix of cheddar and Monterey Jack. Cheddar gives a sharp taste, while Monterey Jack melts perfectly. This combo makes the quesadilla extra tasty.
– Correct seasoning with spices: Use garlic powder and ground cumin for depth. These spices add warmth and flavor. Don’t be shy; they elevate the chicken and cheese mixture.
Cooking Tips
– Oil or no oil?: I recommend using a little olive oil for cooking. It helps create a crispy outside. If you prefer less oil, just make sure to watch the heat.
– Ensuring even cooking throughout: Cook each quesadilla over medium heat. This ensures the filling heats up nicely, and the cheese melts. Flip them gently and keep an eye on the color.
Serving Suggestions
– Ideal garnishes and sides: Fresh cilantro brightens the dish. Serve with sour cream and salsa for dipping. These add creaminess and zest to every bite.
– Pairing options for complementary flavors: Try a fresh salad or black beans on the side. They balance the richness of the quesadilla. You could also serve rice for a heartier meal.
Variations
Ingredient Swaps
You can switch up proteins in your quesadillas. Try using ground beef, turkey, or even tofu. Each option brings its own flavor. If you want a lighter dish, shredded rotisserie chicken works great, too.
For cheese, cheddar is classic, but don’t stop there. You can use Monterey Jack, pepper jack, or even a creamy queso fresco. Each cheese melts differently and adds unique taste.
Flavor Enhancements
Want more heat? Add spices! A pinch of cayenne or chili powder can spice things up. You can also mix in fresh jalapeños for a kick. Just use them according to your heat level.
Adding veggies can enhance the filling, too. Diced tomatoes, corn, or black beans work well. Spinach or zucchini can also add more nutrition. These ingredients make the dish colorful and tasty.
Creative Serving Ideas
Get creative with your presentation. You can layer the quesadillas in a baking dish. Top with extra enchilada sauce and cheese, then bake until bubbly. This makes a fun, shareable dish for gatherings.
Another idea is to serve them in a taco-style way. Cut the quesadillas into wedges and stand them up in a taco holder. Serve with dips like guacamole or salsa on the side. This makes it fun and interactive for everyone!
Storage Info
Storing Leftovers
To keep your Chicken and Cheese Enchiladas Quesadilla fresh, store them properly. First, let the quesadillas cool down. Once they are at room temperature, wrap them tightly in plastic wrap or foil. This helps keep them from drying out. You can also place them in an airtight container. This will keep your quesadillas fresh for up to three days in the fridge.
For long-term storage, you can freeze them. Wrap each quesadilla in plastic wrap, then place them in a freezer-safe bag. This way, they can last for up to two months. When you’re ready to eat, just thaw them in the fridge overnight.
Reheating Tips
When it’s time to enjoy your leftovers, reheating is key. The best way to reheat crispy quesadillas is on the stovetop. Heat a non-stick skillet over medium heat. Place the quesadilla in the skillet and cover it with a lid. Heat for about 3-4 minutes on each side. This method keeps the outside crispy and warms the inside nicely.
If you prefer using a microwave, place the quesadilla on a microwave-safe plate. Heat it for about 30 seconds to 1 minute. However, the microwave can make them a bit soft. For the best taste, I recommend using the stovetop method.
FAQs
How can I make Chicken and Cheese Enchiladas Quesadilla ahead of time?
You can prep the filling in advance. Cook and cool the chicken mixture. Store it in an airtight container in the fridge. You can also chop the onion and bell pepper ahead of time. When you’re ready to cook, just warm the filling and assemble the quesadillas. This saves time on busy days and makes cooking easier.
Can I freeze Chicken and Cheese Enchiladas Quesadilla?
Yes, you can freeze these quesadillas. After cooking, let them cool completely. Wrap each quesadilla in plastic wrap. Place them in a freezer bag or container. This keeps them fresh for up to three months. To enjoy, just thaw in the fridge overnight before reheating.
What is the best way to reheat quesadillas?
Reheat quesadillas in a skillet for the best texture. Heat the skillet over medium heat. Place the quesadilla in and cook for about 2-3 minutes on each side. This way, the outside stays crispy while the cheese melts again. You can also use the oven. Just preheat it to 350°F and bake for about 10 minutes.
In this blog post, I shared a simple recipe for tasty chicken and cheese quesadillas. We discussed the key ingredients and detailed steps for preparation and cooking. I also included essential tips for great flavor and texture, along with creative variations and storage methods.
Whether you enjoy a classic or want to experiment, these quesadillas are sure to please. Try them out and make mealtime special!