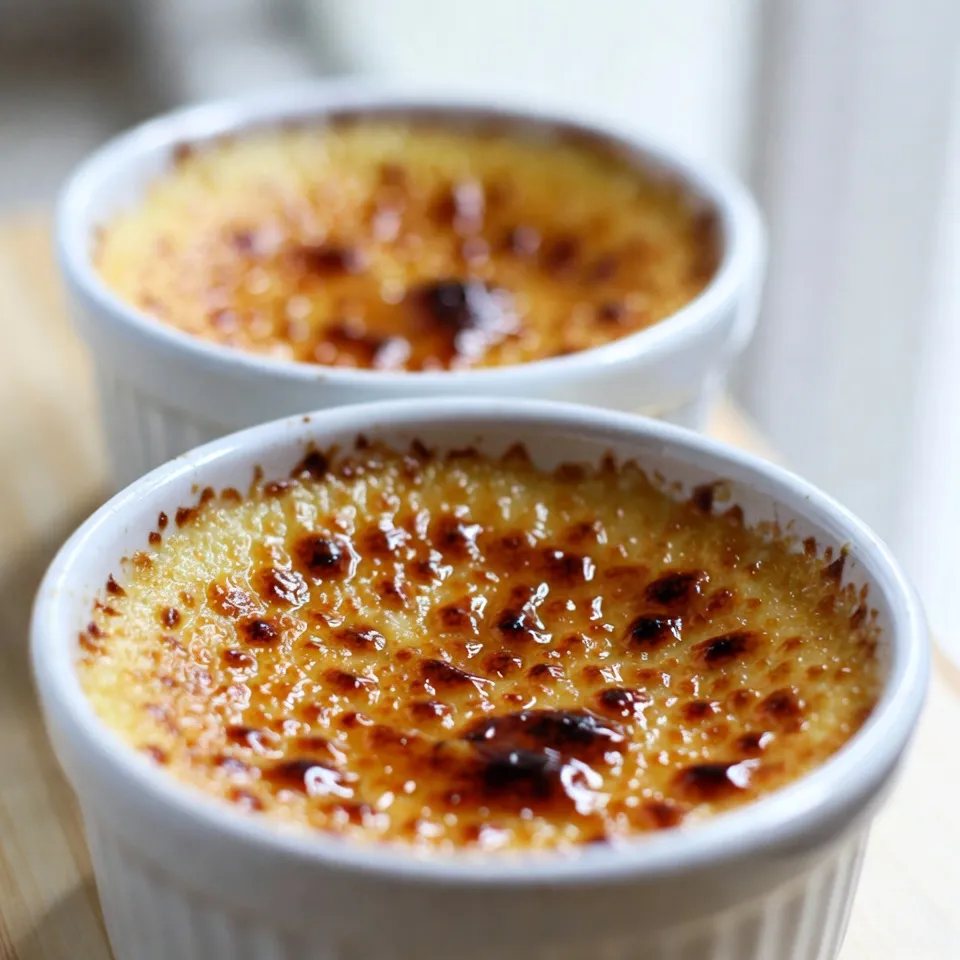
If you’re ready to impress your friends and family, Vanilla Bean Crème Brûlée is the way to go! This creamy, indulgent dessert combines rich vanilla flavor with a satisfying crunchy top. In this article, I’ll walk you through each step, sharing tips to achieve the perfect texture. Whether you’re a beginner or a pro, you’ll find it easy to create this delightful treat. Let’s dive into the sweet world of crème brûlée!
Why I Love This Recipe
- Decadent Flavor: This crème brûlée boasts a rich, creamy texture and a deep vanilla flavor that makes it an indulgent treat for any occasion.
- Elegant Presentation: The golden caramel crust on top adds a stunning visual appeal, making it perfect for dinner parties or special events.
- Versatile Dessert: You can easily customize the flavorings, adding citrus zest or liqueurs to suit your taste or the season.
- Impressive Yet Simple: This recipe may impress your guests, but it requires minimal ingredients and effort, making it accessible for home bakers.
Ingredients
List of Ingredients
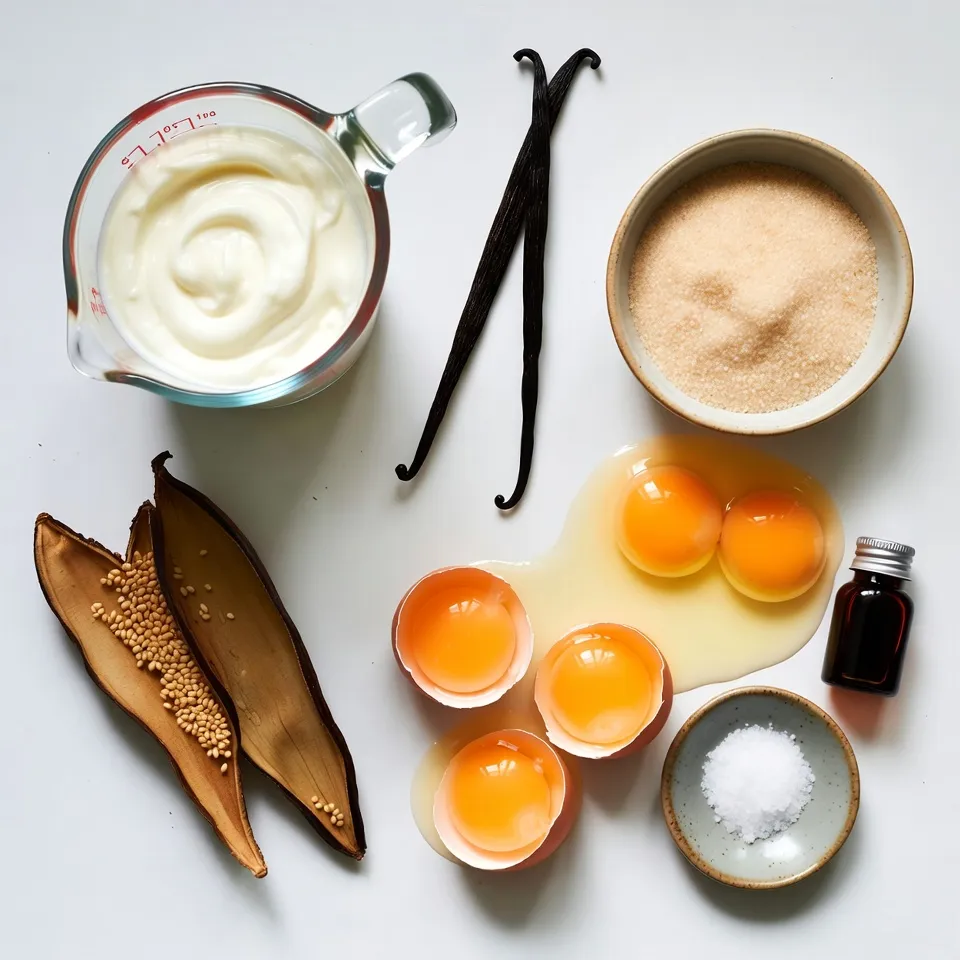
– 2 cups heavy cream
– 1 vanilla bean, split lengthwise and seeds scraped
– 1/2 cup granulated sugar (plus additional for topping)
– 4 large egg yolks
– 1 teaspoon pure vanilla extract
– A pinch of fine sea salt
Using the right ingredients makes a big difference. I recommend using high-quality heavy cream. This cream gives a rich and silky texture. Always choose a fresh vanilla bean for the best flavor. The aroma and taste of fresh vanilla are unmatched.
When you split the vanilla bean, scrape the seeds out carefully. These tiny black specks hold a lot of flavor. You can use pure vanilla extract, but fresh beans are better. They add depth to your dessert.
Make sure all your ingredients are at room temperature. This step helps them mix well. It also creates a smooth custard. Keep the granulated sugar handy for topping. You want a nice, even layer for that crunchy crust.
Using fine sea salt is key too. It enhances the sweet notes of your crème brûlée. Each ingredient plays a part in creating this delightful dessert.
Step-by-Step Instructions
Prepping the Ingredients
First, preheat your oven to 325°F (160°C). This helps the custard bake evenly. Next, take your vanilla bean and split it lengthwise. Use the back of a knife to scrape the seeds out. These seeds add rich flavor to your crème brûlée.
In a mixing bowl, whisk together the egg yolks, sugar, and a pinch of sea salt. Keep whisking until the mix turns pale and thick. This step is key for a smooth custard.
Combining Ingredients
Now, grab a medium saucepan and heat the heavy cream with the vanilla bean pod and seeds. Let it steam gently for 15 minutes. This step helps to extract the vanilla flavor well.
After steeping, slowly pour the warm cream into the egg mixture. Whisk while you pour. This is called tempering. It prevents the eggs from cooking too quickly. Make sure everything blends well for a silky custard.
Next, strain the mixture through a fine mesh sieve into a jug or bowl. This removes any lumps, ensuring a smooth custard.
Baking Process
Carefully pour the custard into six ramekins. Fill them about three-quarters full. This allows room for the custard to expand.
Place the filled ramekins in a deep baking dish. Add hot water to the dish, filling it halfway up the sides of the ramekins. This water bath helps the custard bake evenly.
Bake for 30-35 minutes. The edges should be firm, but the centers should still jiggle gently. This jiggle means they are perfectly set.
Once done, remove the baking dish from the oven. Carefully take the ramekins out of the water bath. Let them cool to room temperature for about an hour. Cover them with plastic wrap and chill in the fridge for at least 2 hours. For best results, chill overnight.
Tips & Tricks
Achieving the Perfect Custard Texture
Humidity plays a big role in baking. In high humidity, the sugar can absorb moisture. This can change the final texture of your custard. When making crème brûlée, aim for a dry day if possible.
Cracked surfaces can ruin the look of your dessert. To avoid this, bake your custards in a water bath. The steam from the water helps keep the heat even. When baking, check for a gentle jiggle in the center. This means it is done!
Caramelizing the Sugar Top
Using a kitchen torch is the best way to caramelize sugar. Hold the torch a few inches above the sugar. Move it in small circles to melt the sugar evenly. Watch closely to prevent burning.
If you don’t have a torch, you can use your oven’s broiler. Place the ramekins on a baking sheet. Broil for just 1-2 minutes, but watch closely. The sugar can burn very quickly, so stay nearby.
Make sure to let the sugar cool before serving. This will create a nice, crispy layer on top. Enjoy the blend of crunchy and creamy textures in every bite!
Pro Tips
- Use Fresh Ingredients: Always opt for fresh heavy cream and vanilla beans for the richest flavor in your crème brûlée. The quality of your ingredients can make a significant difference in the final taste.
- Tempering the Eggs: Pour the warm cream into the egg yolk mixture slowly while whisking continuously. This process prevents the eggs from cooking too quickly and ensures a smooth custard.
- Perfect Water Bath: Ensure the water bath reaches halfway up the sides of the ramekins. This technique helps maintain an even temperature during baking, preventing the custard from curdling.
- Caramelizing Sugar: When using a kitchen torch, move it in a circular motion for even melting of the sugar. If broiling, keep a close eye to avoid burning, as sugar can go from perfectly caramelized to burnt very quickly.
Variations
Flavor Variations
You can play with flavors in crème brûlée. Adding orange zest gives a fresh twist. Simply mix the zest in with the cream as it heats. It brings a bright note that pairs well with vanilla.
Espresso is another fun option. Use 1-2 teaspoons of espresso powder in the cream. This creates a rich, coffee-flavored dessert that coffee lovers will adore.
If you love chocolate, you can combine it with vanilla. Melt about 4 ounces of dark chocolate and mix it with the warm cream. This creates a luscious chocolate vanilla blend that is hard to resist.
Dietary Modifications
If you need dairy-free options, try coconut cream. Use 2 cups of full-fat coconut cream instead of heavy cream. This keeps the texture rich and creamy while adding a subtle coconut flavor.
For gluten-free needs, this recipe is already safe. All the ingredients are naturally gluten-free. Just ensure your sugar is labeled gluten-free, especially if processed.
These variations let you customize your crème brûlée. They can match any taste or dietary need, making this dessert even more delightful.
Storage Info
How to Store Crème Brûlée
To store leftover crème brûlée, cover each ramekin with plastic wrap. This keeps them fresh and prevents odors from other foods. You can also use an airtight container if you prefer. Store your crème brûlée in the refrigerator. It will stay good for about three days.
Reheating Tips
When you’re ready to enjoy your crème brûlée again, avoid the microwave. Microwaving can ruin the creamy texture. Instead, take it out of the fridge and let it sit at room temperature for 30 minutes. Then, you can reheat it gently in a low oven at 300°F (150°C) for about 10 minutes. This way, the custard stays smooth and delicious. If you need to, you can re-crisp the sugar topping using a kitchen torch or broiler after reheating.
FAQs
Common Questions about Vanilla Bean Crème Brûlée
What can I substitute for heavy cream?
You can use half-and-half or coconut cream. Both will give a rich taste. However, the texture may change slightly.
Can I make this recipe in advance?
Yes! You can prepare the custard a day ahead. Just chill it in the fridge. Add the sugar topping right before serving.
Troubleshooting Issues
Why did my crème brûlée turn out watery?
Watery crème brûlée may be due to undercooking. Ensure you bake it until the edges are firm. The center should have a slight jiggle.
How do I fix a grainy texture?
Grainy texture often comes from cooking the eggs too fast. Always temper the eggs slowly with warm cream. Straining the mixture also helps smooth it out.
This blog covers the key steps to making perfect vanilla bean crème brûlée. You learned the right ingredients, tips for smooth texture, and methods for caramelizing sugar. Remember, fresh ingredients make all the difference. With practice, you can impress anyone with this dessert. Don’t hesitate to explore flavor variations and dietary options. Keep experimenting for the best results. Enjoy your baking journe